
Table of Contents >> Show >> Hide
- 1) The 20-Second Basics: Take Your First Photo
- 2) The Two Controls That Matter Most: Focus + Exposure
- 3) Turn On the “Helpful Stuff”: Grid, HDR, and the Right Lens
- 4) Camera Modes Explained (Without the Confetti Cannon)
- 5) Composition That Instantly Improves Photos
- 6) Lighting: The Make-or-Break Ingredient
- 7) Action, Kids, Pets, and Other Fast-Moving Chaos
- 8) Zoom Without Regret
- 9) Editing and Organizing: Make Good Photos Look Great
- 10) Quick Fixes for Common Android Photo Problems
- Conclusion: The Easy Recipe for Better Android Photos
- Real-World Experiences: What It’s Like Actually Using These Tips (The “Ohhh” Moments)
Your Android phone is basically a tiny camera that lives in your pocket, never asks for a lens cap,
and politely auto-fixes your mistakes (most of the time). The only problem? It has about 97 buttons,
modes, and icons that look like they were designed by a committee of owls.
This guide makes Android photography simple. You’ll learn the quick “just take the shot” steps,
then level up with focus, exposure, lighting, and the camera modes that actually matter. No jargon
soup, no “just be artistic” nonsensejust clear moves that make your photos look sharper, brighter,
and more “wow, did you take that on your phone?!”
1) The 20-Second Basics: Take Your First Photo
- Open the Camera app (usually on your home screen or in the app drawer).
- Point the camera at your subject and let it autofocus for a beat.
-
Tap the shutter button (the big circle), or use a shortcut like
pressing the volume button if your phone supports it. - Preview it by tapping the tiny thumbnail (often in the corner).
That’s it. You’ve officially created digital evidence of your life (or at least your lunch).
Now let’s make those pictures better on purpose.
2) The Two Controls That Matter Most: Focus + Exposure
Most Android camera apps behave like this: you tap the screen, and the phone decides
what should be sharp (focus) and how bright it should be (exposure).
If you learn one “pro” move, make it this one.
Tap to focus (and tell the camera what you care about)
- Tap your subject (a face, your dog’s eyes, your coffee foam art).
- Wait for the focus box to lock in. If your subject is moving, tap again as needed.
Adjust exposure with the brightness slider
After you tap, many Android cameras show a little sun icon or
slider. Drag it:
- Down to reduce brightness (great for sunsets, bright windows, stage lighting).
- Up to brighten faces (use gentlytoo much looks washed out).
Quick rule: if the photo looks “meh,” fix exposure before you change modes.
Exposure is the difference between “wow” and “why does this look like a security camera?”
Use focus/exposure lock for steady results
Many phones let you tap and hold to lock focus and exposure (often shown as
AF/AE Lock). This is gold for:
- Taking multiple shots with consistent brightness
- Backlit portraits (bright background, darker face)
- Product photos where lighting changes slightly as you move
3) Turn On the “Helpful Stuff”: Grid, HDR, and the Right Lens
Enable grid lines (your secret weapon for composition)
Grid lines help you keep horizons straight and place your subject nicely in the frame.
Look in Camera Settings for “Grid lines” or “Composition grid.”
It’s like training wheels, except cool people use it too.
Use HDR when the scene has bright + dark areas
HDR (High Dynamic Range) helps when your photo has both highlights and shadowsthink:
a person in front of a bright sky, or an indoor shot with a sunny window.
- Good for: landscapes, city scenes, backlit portraits
- Not ideal for: fast action (HDR can struggle with movement)
Some phones do HDR automatically; others let you toggle it. If your sky is turning white and
your subject is turning into a silhouette, HDR is a smart first try.
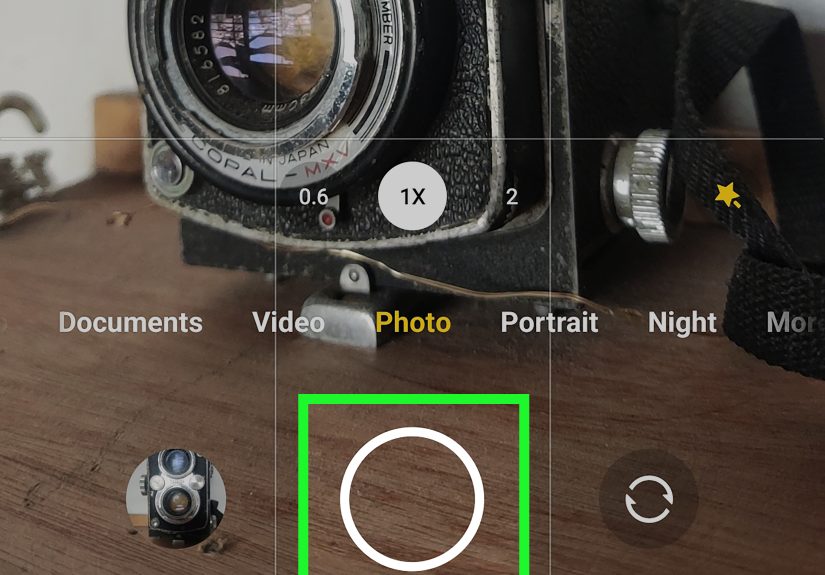
Pick the right camera (don’t “zoom” the hard way)
Many Android phones have multiple lenses: main (1x), ultrawide (0.5x), and telephoto (2x/3x/5x).
Here’s how to use them like a person who totally knows what they’re doing:
- Portraits: try 2x or 3x for more natural face shape
- Landscapes / tight rooms: use 0.5x (watch edge distortion)
- Everyday: 1x is usually the sharpest and cleanest
And yes: clean your lens. The #1 cause of “why is everything hazy?” is a pocket-smudged lens.
A quick shirt swipe can upgrade your photo quality more than a 45-minute YouTube deep dive.
4) Camera Modes Explained (Without the Confetti Cannon)
Different Android brands name modes differently, but most modern phones share the same core set.
These are the ones worth learning.
Photo / Auto (use this 70% of the time)
Auto mode is the default for a reason. It usually gives the best balance of detail, color,
and speed. If you’re not sure which mode to use, start herethen adjust focus/exposure.
Portrait mode (for people, pets, and “look at my sandwich”)
Portrait mode blurs the background (bokeh) to make your subject pop. Best practices:
- Keep space between subject and background (blur needs separation)
- Tap the eyes/face for focus
- Use 2x if availableportraits often look more flattering
Night mode (low light without the “grainy disaster”)
Night mode takes a longer exposure (sometimes multiple frames) and combines them. It can look
magicalif you help it out:
- Hold the phone very still until it finishes
- Brace against a wall/table or use a mini tripod
- Tap to focus before shooting (low light can confuse autofocus)
Pro / Manual mode (when you want control, not chaos)
Pro mode lets you adjust settings like ISO (brightness sensitivity), shutter speed, white balance,
and sometimes focus. Use it when:
- You want less noise (lower ISO) in dim light
- You want motion blur or sharper action (faster/slower shutter)
- You want consistent color under weird lighting (white balance)
If Pro mode feels intimidating, start with just one setting: lower ISO when possible,
and compensate by holding steadier or using more light.
Panorama (for wide scenes without ultrawide stretching)
Panorama stitches a wide view by having you slowly pan. Tips:
- Move smoothly and at a steady speed
- Keep the horizon level
- Don’t shoot fast-moving subjects in pano (they can turn into glitch art)
5) Composition That Instantly Improves Photos
Composition sounds fancy, but it’s really just “where you put stuff in the frame.” Here are
the easiest upgrades that work on basically any Android phone.
Use the rule of thirds (yes, it’s worth the hype)
With grid lines on, place your subject near an intersection point instead of dead center.
Your photos will feel more intentionallike you planned it, instead of panic-tapping the shutter.
Simplify the background
Before you shoot, scan behind your subject. Look for:
- Bright clutter that steals attention
- Poles/branches that look like they’re growing out of someone’s head
- Busy patterns that fight your subject
Small moves fix big problems: take one step left, lower your angle, or get closer.
Change your angle (your knees are a camera accessory)
Try one of these quick perspective swaps:
- Lower angle for dramatic buildings, pets, and kids
- Higher angle for food and flat lays
- Side light (turn your subject) for texture and depth
6) Lighting: The Make-or-Break Ingredient
The best camera is the one with the best light. Your Android phone can do a lot, but if you
shoot in harsh noon sun or a dim cave of a restaurant, it’s going to struggle.
Outdoors
- Golden hour (shortly after sunrise/before sunset): flattering, warm, forgiving
- Overcast days: soft light that’s amazing for portraits
- Harsh sun: find shade or turn on HDR to balance extremes
Indoors
- Shoot near a window (bright, soft, free)
- Avoid placing a bright window behind your subject unless you want silhouettes
- If light is low, use Night mode or steady the phone to reduce blur
7) Action, Kids, Pets, and Other Fast-Moving Chaos
Fast subjects create two classic problems: blur and missed moments. Here’s how to win.
Use burst mode (aka “spray and pray,” but smarter)
Many Android phones let you take bursts by pressing and holding the shutter or swiping it.
Bursts are perfect for:
- Kids running
- Pets doing something cute for exactly 0.4 seconds
- Group shots (someone always blinks)
Get more light, or let the camera work less
- Step into brighter areas so the camera can use a faster shutter speed
- Use the main lens (1x) for better low-light performance
- Stabilize your phone with two hands and elbows tucked in
8) Zoom Without Regret
Pinch-to-zoom is convenient, but it can also turn your photo into a watercolor painting of sadness.
Better options:
- Use the telephoto lens (2x/3x/5x) if your phone has one
- If you don’t, try a small zoom (around 1.2x–1.5x) to reduce wide-angle distortion
- When possible, move closer instead of zoomingdetail beats enlargement
9) Editing and Organizing: Make Good Photos Look Great
Shooting is step one. Editing is where “nice” becomes “share-worthy.” The good news:
you don’t need fancy software to improve your Android photos.
Start with the essentials: crop, straighten, and light
- Crop to remove distractions
- Straighten horizons (your brain notices crooked lines immediately)
- Adjust brightness, highlights, and shadows gently
Use built-in smart tools (without overdoing it)
In Google Photos (and many OEM gallery apps), you’ll often find tools like:
- Enhance for quick improvements
- Portrait blur adjustments (even after the shot on some devices)
- Object removal tools (for the random trash can photobombing your sunset)
- Unblur/sharpening tools for slightly soft shots
A gentle edit looks natural. A heavy edit looks like your photo is auditioning for a sci-fi movie poster.
Aim for “better,” not “brand new planet.”
Back up your photos (future-you will say thank you)
Great photos are only great if you still have them. Turn on cloud backup (like Google Photos) if it fits
your privacy and storage preferences, and consider cleaning up large videos or duplicates occasionally.
10) Quick Fixes for Common Android Photo Problems
“My photos are blurry.”
- Clean the lens (seriously)
- Tap to focus on the subject
- Hold steadyuse two hands, brace your arms, or lean on something
- Use Night mode in dim light instead of forcing a normal shot
“My photos are too dark / too bright.”
- Tap your subject and adjust the exposure slider
- Try HDR for high-contrast scenes
- Move your subject into better light (one step can change everything)
“Zoom looks terrible.”
- Switch to the telephoto lens if you have it
- Zoom less and crop later if needed
- Get closer when possible
“My photos look weirdly over-sharpened.”
- Try a different lens (main lens is often most natural)
- Turn off aggressive beauty filters or scene optimization if it looks unnatural
- Edit lightlyreduce sharpness/clarity if your editor allows
Conclusion: The Easy Recipe for Better Android Photos
If you remember nothing else, remember this: tap to focus, adjust exposure, use the right mode,
and prioritize good light. Add grid lines, keep your lens clean, avoid extreme zoom, and use
simple edits to polish your best shots.
Your Android phone already has the tools. The “upgrade” is you using them on purposewithout turning
your camera app into a spaceship cockpit. Now go take a photo you’re proud of. And yes, your lunch counts.
Real-World Experiences: What It’s Like Actually Using These Tips (The “Ohhh” Moments)
The first time most people try to “take better photos” on an Android phone, the surprise isn’t that the camera
is badit’s that the camera is honest. It faithfully records smudges, weird lighting, and the fact that
you took the photo while walking like you were dodging invisible bees. The quickest “experience upgrade” is
learning how much stability matters. The moment you start using two hands, tucking your elbows in, and pausing
for half a second before tapping the shutter, your hit rate jumps. It feels almost unfair, like you found a cheat code.
The next big “ohhh” moment is realizing that your phone isn’t reading your mind about what the photo is
about. You take a picture of a friend at a restaurant, and the camera decides the candle is the main character.
Then you tap your friend’s face, slide exposure slightly up, and suddenly the photo looks like it came from a much
fancier device. This is usually when people stop blaming the phone and start blaming the lighting. Which is progress.
Night mode is another classic experience: it feels magical the first time you see a dark scene turn bright and detailed.
But then you notice the “processing” pause and realize you can’t treat it like a normal quick snap. The best results come
when you accept that Night mode is a tiny collaboration: the phone does the math, and you do the “don’t move like a gremlin”
part. People who brace against a wall or rest the phone on a table suddenly get cleaner shots and less noise. The difference is
obvious enough that it becomes a habit.
Zoom is where expectations get adjusted fast. Many users start by pinch-zooming way in, then wonder why the photo looks like a
low-budget painting. The better experience comes when you use the telephoto button (2x/3x) if your phone has itor when you keep
zoom modest (around 1.2x–1.5x) and focus on framing. You’ll also notice that stepping a little closer often beats zooming, especially
indoors. Once you experience that crisp detail, your fingers become less zoom-happy.
Portrait mode creates its own learning curve. At first, people stand too close to a wall and wonder why the blur looks fake or messy.
Then they try adding distance behind the subject andboomthe background blur becomes smooth, and the subject pops naturally. It’s one of
those experiences where the phone teaches you basic photography without making you read a textbook. (It’s also when everyone becomes
“the designated photographer” at gatherings, whether they wanted that job or not.)
Finally, editing becomes less scary once you experience how small changes help. Cropping out distractions, straightening a horizon,
and gently lifting shadows can make a photo look finishedwithout making it look filtered. Many people discover that the best edits are
the ones nobody notices. After a few weeks of practicing, the overall experience shifts: you stop taking five random photos and hoping
one works, and start taking one or two intentional shots that are consistently better. That’s the real winnot perfection, but reliability.


