
Table of Contents >> Show >> Hide
- What an Electronic Training Collar Is (and Isn’t)
- When You Should Not Use an E-Collar
- Before You Begin: A Humane Setup Checklist
- Step 1: Decide the Real Goal (and Try the Least Intrusive Option First)
- Step 2: Choose the Right Collar (Features Matter)
- Step 3: Fit and Acclimate the Collar (No Surprises)
- Step 4: Teach the Behavior Without the Collar First
- Step 5: Start in the Easiest Environment Possible
- Step 6: If Using Stimulation, Find the Lowest “Working Level” (Not a “Gotcha” Level)
- Step 7: Pair the Collar With a Known Cue (Pressure On, Pressure Off, Reward On)
- Step 8: Increase Distractions in Tiny Increments
- Step 9: Keep Sessions Short and Watch Stress Signals
- Step 10: Fade the Collar and Keep the Rewards
- Common Mistakes (and How to Avoid Them)
- When to Get Professional Help
- Real-World Experiences: What People Learn the Hard Way (and How to Do Better)
- Experience #1: “I turned it up because he ignored me… and now he avoids me.”
- Experience #2: “My timing was off, and he started reacting to other dogs.”
- Experience #3: “I used tone/vibration like a ‘heads-up,’ and it helpedbecause my dog already knew the cue.”
- Experience #4: “I ditched the e-collar and got better results with a long line and better rewards.”
- Conclusion
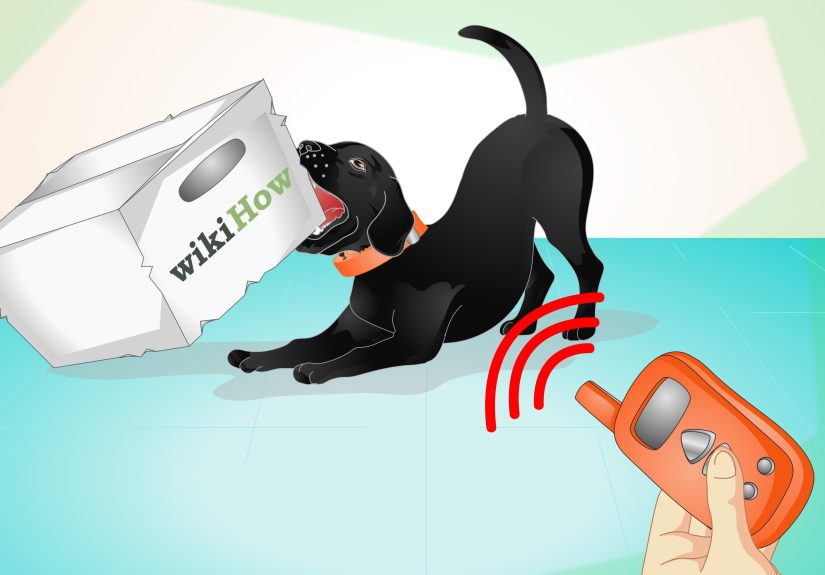
Electronic dog training collars (often called e-collars or remote training collars) are basically a “remote control”
for getting your dog’s attention at a distanceusually with a tone, vibration, and (on some models) electrical stimulation.
They’re also one of the most argued-about gadgets in the dog world. Some trainers use them, many veterinary and welfare organizations recommend avoiding them,
and plenty of dog owners feel stuck in the middle like a chew toy in a tug-of-war.
This guide is written with one goal: help you protect your dog’s welfare and your relationship.
That means we’ll treat an e-collar as a last-resort, carefully managed communication toolnot a shortcut, not a punishment button, and definitely not a way to “show who’s boss.”
If you can solve the problem with a long line, better rewards, and clearer training, do that first. Your dog will thank you with fewer side-eyes and more tail wags.
What an Electronic Training Collar Is (and Isn’t)
A typical electronic training collar includes a receiver worn on the dog’s neck and a handheld remote. Many collars offer:
tone (beep), vibration, and/or stimulation at adjustable levels.
Some collars are “automatic” (like certain bark collars) and activate without you pressing a button. For training and behavior work,
automatic corrections are especially risky because timing is everythingbad timing can teach the wrong lesson fast.
An e-collar is not a replacement for basic training. If your dog doesn’t understand “come,” “leave it,” or “heel” on a leash,
an e-collar won’t magically upload those skills like a software update. Think of it more like a microphone: it can amplify a cue your dog already knows,
but it can’t write the script for you.
When You Should Not Use an E-Collar
Skip the e-collar (and talk to a veterinarian or a credentialed behavior professional) if your dog shows
fearfulness, anxiety, reactivity, or aggression, or if you’re trying to treat a serious behavior issue
(like biting, resource guarding, panic, or phobias). Aversive methods can increase fear and can backfire into worse behavior.
Also avoid e-collars if you can’t confidently control timing and intensitybecause your dog shouldn’t pay the price for human “oops.”
Before You Begin: A Humane Setup Checklist
- A reward your dog would sell your secrets for: tiny soft treats, a squeaky toy, a ballwhatever really motivates your dog.
- A long line (15–30 feet) for safety while practicing recall.
- A quiet training area with minimal distractions.
- A properly fitted collar and fresh batteries/charge.
- A plan for what you want your dog to do (not just what you want them to stop doing).
Step 1: Decide the Real Goal (and Try the Least Intrusive Option First)
Start by writing one clear objective: “My dog will come when called even if a squirrel is hosting a parade.”
Then ask: can I reach that goal with management + positive reinforcement?
Many “e-collar problems” are actually “my dog practiced ignoring me” problemsfixed by better rewards, better timing,
and preventing rehearsal with a long line.
If you still feel an e-collar is necessary, commit to a humane framework: use the least intrusive, minimally aversive approach,
and prioritize tone/vibration features when possible. The collar should support learningnot intimidate your dog into silence.
Step 2: Choose the Right Collar (Features Matter)
Not all collars are built the same. Look for:
many adjustable levels, a reliable range, clear controls,
and tone/vibration options. Avoid models that jump in big intensity steps or feel confusing to operate.
If the remote has more buttons than your TV remote, that’s not a flexit’s a misclick waiting to happen.
Also consider comfort and fit. The receiver shouldn’t be so bulky that it bounces, rubs, or turns every training session into a neck-itch festival.
If your dog has medical issues (skin sensitivity, neck problems, tracheal concerns), talk to your vet before using any neck-worn training device.
Step 3: Fit and Acclimate the Collar (No Surprises)
Fit matters for both safety and clear communication. The collar should be snug enough that contact points (if present) stay consistent,
but not so tight that it pinches. A common guideline is “snug with room for a couple fingers,” and you should check the neck daily for redness or irritation.
Rotate collar position slightly and avoid leaving it on all day.
Acclimation is simple: let your dog wear the (inactive) collar for short periods while fun things happenmeals, play, a walk.
The goal is: collar on = “cool stuff,” not “uh-oh, the remote is coming.”
Step 4: Teach the Behavior Without the Collar First
Here’s the secret many people skip: train the cue first using rewards in a low-distraction setting.
For recall, practice “Come!” → dog turns toward you → reward immediately. Repeat until it’s automatic.
Then add distance: one step away, then two, then across the room, then across the yardalways paying your dog like they just won the lottery.
If your dog doesn’t understand the behavior on a leash, adding an e-collar just adds confusion.
Build the skill first. The collar (if used at all) comes later as a support toolnot the teacher.
Step 5: Start in the Easiest Environment Possible
Choose a quiet area: backyard, empty park corner, or a big living room. Use a long line for safety.
Keep sessions short (think 5–10 minutes) so your dog stays fresh and successful.
If your dog is distracted, don’t “turn up the collar.” Instead, make the lesson easier:
increase distance from distractions, raise reward value, or reduce session length.
Your training plan should look like a gentle ramp, not a cliff. Dogs learn best when they can predict how to succeed.
Your job is to make success the easiest option.
Step 6: If Using Stimulation, Find the Lowest “Working Level” (Not a “Gotcha” Level)
If your collar includes stimulation and you decide to use it, the humane standard is the lowest level your dog can perceive.
In many training systems, this is called a “working level”a mild sensation that acts like a tap on the shoulder, not a punishment.
Test in a calm environment and look for subtle signs your dog noticed something (ear twitch, head turn), not yelping, jumping, freezing, or panic.
If you see big reactions, stop. Big reactions mean you’re too high, your timing is off, or the dog is stressed.
A dog that’s scared isn’t “learning faster.” They’re just trying to escape the lesson.
Step 7: Pair the Collar With a Known Cue (Pressure On, Pressure Off, Reward On)
The collar should be linked to a cue your dog already understands. Example for recall:
say “Come,” and if your dog doesn’t respond, apply the mild cue (tone/vibration or lowest working level) briefly,
then release the moment the dog turns toward youfollowed by a reward when they arrive.
The lesson is: “Come makes the sensation stop, and coming to you pays.”
Timing is everything. If you apply the cue while your dog is already returning, you punish the correct choice.
If you apply it while your dog is staring at another dog, they may associate the sensation with that dog. That’s how accidents become behavior problems.
Step 8: Increase Distractions in Tiny Increments
Don’t go from “quiet backyard” to “Saturday farmer’s market.” Level up slowly:
backyard → driveway → quiet park → park with mild distractions → busier area (still on a long line).
Your dog should succeed often. If you’re failing more than you’re winning, the environment is too hard.
Use real-world practice: call your dog away from a sniff spot, reward, release them back to sniff.
This teaches that coming to you doesn’t end the funit’s just a quick pit stop for snacks and praise.
Step 9: Keep Sessions Short and Watch Stress Signals
Short sessions protect learning and your dog’s emotional state. End on a win.
Watch for signs of stress: tucked tail, avoidance, lip-licking, yawning when not tired, freezing, frantic scanning, or sudden shutdown.
If stress shows up, pause training, increase distance from distractions, switch to easier reps, or stop for the day.
Also protect your dog’s skin. Don’t leave a receiver collar on for long periods, and check the neck after each session.
A collar that irritates skin will make training miserableand “miserable training” is a great way to teach your dog to avoid you.
Step 10: Fade the Collar and Keep the Rewards
The end goal is reliability without the device. As your dog improves, reduce collar use:
use tone/vibration less, rely more on your voice and hand signals, and reward heavily for fast responses.
Randomize rewards over time (sometimes treats, sometimes play, always praise) so your dog stays motivated.
Keep practicing in different environments. Skills don’t “generalize” automaticallyyour dog may know recall at home but not at the beach.
Training is a lifestyle, not a one-time software installation.
Common Mistakes (and How to Avoid Them)
Using the collar to replace training
If your plan is “press button until dog behaves,” you’re not trainingyou’re gambling. Instead, teach the behavior with rewards first,
then use any collar cue (if used at all) as a backup signal.
Poor timing
Late cues confuse dogs. If you can’t apply and release with precision, you’re likely to create avoidance, anxiety, or new problem behaviors.
Video your sessions or work with a qualified trainer who can coach timing.
Trying to fix fear or aggression with discomfort
Fear-based behavior needs behavior modification, management, and professional guidancenot added pressure.
If your dog is reactive, consult a veterinary behavior professional or a credentialed trainer who uses reward-based methods.
When to Get Professional Help
If your dog has bitten, lunges intensely, panics, shuts down, or you feel unsafe handling them, get help.
Look for credentialed professionals who emphasize humane, evidence-based methods and can explain exactly what they do and why.
A good pro won’t promise a “guaranteed fix in one session.” Real behavior change takes timelike building muscle, not microwaving popcorn.
Real-World Experiences: What People Learn the Hard Way (and How to Do Better)
The internet is full of dramatic before-and-after stories: “One beep and my dog became a perfect angel!”
Real life is usually less cinematic and more “my dog found a goose feather and temporarily forgot my existence.”
Below are a few common, realistic experiences dog owners reportshared as composite examples so you can recognize patterns and avoid mistakes.
Experience #1: “I turned it up because he ignored me… and now he avoids me.”
This is one of the most common spirals. A dog ignores a recall outside, the owner increases intensity, and the dog learns something like:
“When I’m near squirrels, weird uncomfortable stuff happens.” Sometimes the dog starts hesitating, slinking back slowly, or refusing to come at all.
The fix usually isn’t more intensityit’s better training structure. Owners who recover from this often go back to basics:
long line on, distance from distractions increased, reward value upgraded (think chicken, not dry kibble), and recall practiced in easy settings
until the dog starts snapping their head around happily when called.
The big lesson: if your dog “ignores” you, they’re not being stubbornthey’re telling you the environment is too hard or the reward isn’t worth it.
Make the right choice easier and more profitable, and you’ll see better results with fewer side effects.
Experience #2: “My timing was off, and he started reacting to other dogs.”
Dogs are association machines. If a dog feels an unpleasant sensation while looking at another dog, they may connect the dots incorrectly:
“Other dogs make bad things happen.” That’s how you can accidentally create reactivity where there wasn’t any.
Owners who notice this early can often reverse course by stopping collar use, increasing distance from triggers,
and pairing the sight of other dogs with great treats (classic counterconditioning).
The big lesson: timing is not optional. If you can’t guarantee clean timing, don’t use a tool that can create emotional fallout.
Train with management and rewards, or get a professional coach who can keep both you and your dog on the safe path.
Experience #3: “I used tone/vibration like a ‘heads-up,’ and it helpedbecause my dog already knew the cue.”
Some owners report the most success when they treat the collar as a gentle attention-getter at distance,
especially for recall on hikes or in large spacesbut only after the dog has a strong reward-based foundation.
In these situations, the collar cue is introduced carefully: collar cue → dog orients to handler → reward,
repeated until the dog treats it like “check in with your human.”
The collar isn’t doing the training; it’s just prompting the dog to perform a skill they already love doing.
The big lesson: foundation first. When the dog understands the job and expects good outcomes, you’re far less likely to see stress,
confusion, or avoidance.
Experience #4: “I ditched the e-collar and got better results with a long line and better rewards.”
Plenty of owners eventually realize they weren’t missing a devicethey were missing a plan.
The long line prevents “practice runs” of ignoring you, and high-value rewards make coming back feel like a win.
Add consistent practice (tiny sessions, lots of success), and you build reliability without leaning on an aversive tool.
For many households, this approach strengthens trust and reduces conflictbecause training feels like a game, not a negotiation.
The big lesson: the simplest tools often work best. Management, reinforcement, and repetition solve a surprising number of problems,
and they come with a nice side effect: your dog still likes you.
Conclusion
If you choose to use an electronic dog training collar, do it with a welfare-first mindset:
teach the behavior with rewards first, keep intensity minimal, prioritize tone/vibration when possible,
protect your timing, and fade the device as quickly as you can. The best training plan is the one that helps your dog succeed
and keeps your relationship solidbecause a dog who trusts you learns faster, listens better, and doesn’t secretly plot to move out.


