
Table of Contents >> Show >> Hide
- What Is a Wet Set (and Why It Works)?
- What You’ll Need
- How to Wet Set Hair Rollers: 13 Steps
- Step 1: Pick the Right Rollers for Your Goal
- Step 2: Start with Clean Hair (or a Truly Fresh Refresh)
- Step 3: Condition for Slip, Then Rinse Thoroughly
- Step 4: Towel-Blot to “Damp,” Not Dripping
- Step 5: Detangle Like You Mean It
- Step 6: Apply Setting Product Section-by-Section
- Step 7: Choose Your Part and Plan Your Pattern
- Step 8: Create a Clean “Base” Section the Same Size as the Roller
- Step 9: Smooth the Ends (Use End Papers if You Have Them)
- Step 10: Roll with Gentle, Even Tension (No Scalp Torture)
- Step 11: Secure Each Roller So It Doesn’t Slide or Dent
- Step 12: Dry 100% (Yes, One Hundred) Before Removing
- Step 13: Cool Down, Takedown Slowly, Then Shape the Style
- Common Mistakes (and How to Fix Them)
- How to Make Your Roller Set Last Longer
- Real-World Roller-Set Experiences: What You’ll Learn After a Few Tries (About )
- Conclusion
Want bouncy curls, smooth ends, and that “I definitely woke up like this” volumewithout frying your hair like a sad piece of bacon?
A wet set with hair rollers is one of the most underrated, heat-minimizing ways to get a polished style that can last days.
The trick isn’t magic. It’s physics, patience, and (sorry) doing the small details right.
In this guide, you’ll learn how to wet set hair rollers in 13 clear steps, plus pro-level tips for different hair types,
drying faster, avoiding dents, and getting your curls to hold like they’ve got rent due.
What Is a Wet Set (and Why It Works)?
A wet set means shaping damp or wet hair around rollers and letting it dry fully in that shape. As hair dries, temporary bonds
reform and “lock in” the new patternso the set holds until moisture (humidity, sweat, water) tells your hair to go back to its natural vibe.
That’s why complete drying is the number-one rule of roller sets.
What You’ll Need
- Rollers for wet setting: magnetic rollers, foam rollers, perm rods, or smooth snap-on rollers (avoid Velcro on soaking-wet textured hair).
- Setting product: setting lotion, mousse, or a firm-hold foam wrap (choose based on your hair type and desired hold).
- Detangling tools: wide-tooth comb or detangling brush + a rat-tail comb for clean sections.
- Clips: duckbill clips or roller clips (metal/plastic) to secure rollers without slipping.
- Optional but amazing: end papers (great for smooth ends), hooded dryer or bonnet dryer, silk scarf/bonnet for finishing.
Quick Roller Cheat Sheet
- Jumbo rollers: smoother “blowout” look, soft bends, big volume.
- Medium rollers: classic curls, bounce, salon roller-set finish.
- Small rollers/perm rods: tighter curls, more definition, more shrinkage.
How to Wet Set Hair Rollers: 13 Steps
Step 1: Pick the Right Rollers for Your Goal
Decide what you want before you start rolling. Big, fluffy volume? Go bigger. Defined curls? Go smaller.
If you’re new, start with medium-to-large smooth rollerseasier takedown, fewer tangles, less drama.
Step 2: Start with Clean Hair (or a Truly Fresh Refresh)
A wet set works best when hair is clean and free from heavy buildup. If your hair feels coated or greasy, cleanse first.
If you’re refreshing (not fully washing), lightly mist and smooth hair evenlyrandom dry patches = random results.
Step 3: Condition for Slip, Then Rinse Thoroughly
A roller set is basically a detangling competition you want to win. Condition enough to soften and add slip, then rinse well
so you don’t leave hair too coated (which can slow drying and weaken hold). If your hair is dry or coily, deep conditioning helps.
Step 4: Towel-Blot to “Damp,” Not Dripping
Yes, it’s called a wet set, but dripping hair can turn your drying time into a full-length movie trilogy.
Gently blot with a microfiber towel or T-shirt until hair is evenly damp. You want hair wet enough to shape,
but not so soaked that your rollers slide like they’re on ice skates.
Step 5: Detangle Like You Mean It
Detangle in sections, starting at the ends and working up. If you skip this, your rollers will “detangle” for you laterrudely.
For textured hair, keep hair stretched and smooth as you detangle to reduce frizz and snagging.
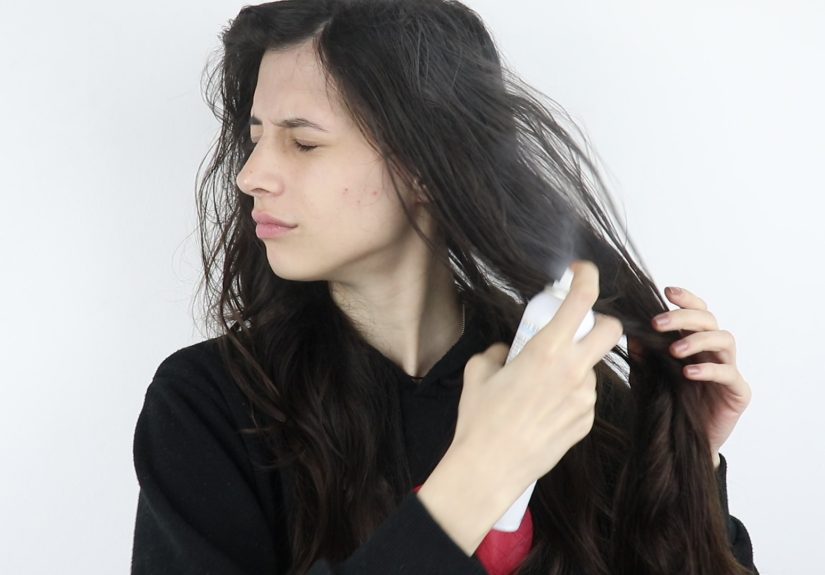
Step 6: Apply Setting Product Section-by-Section
Instead of dumping product everywhere and hoping for the best, apply it as you work.
Coat each section from roots to ends with setting lotion or mousse so it dries with consistent hold.
If your hair is fine, use lighter product. If your hair is thick/coily, you may need stronger hold and smaller sections.
Pro tip: Avoid heavy oils before the set. Oils can reduce hold and make drying slower. Save shine products for the takedown.
Step 7: Choose Your Part and Plan Your Pattern
Your set pattern affects how hair falls when you’re done. A simple classic pattern: crown first, then sides, then back.
Want face-framing volume? Roll the front sections away from your face. Want a vintage wave? Alternate roller directions by row.
Step 8: Create a Clean “Base” Section the Same Size as the Roller
The base (the section of hair going onto one roller) should match the roller’s width. Too wide and you get frizz and sagging.
Too thick and it won’t dry. A good beginner rule: sections about 1 inch for medium rollers, smaller if your hair is very dense.
Step 9: Smooth the Ends (Use End Papers if You Have Them)
Messy ends = messy curl. Comb the section smooth, then wrap the ends neatly around the roller.
End papers are optional, but they help keep ends tucked and sleekespecially on layered cuts or frizz-prone hair.
Step 10: Roll with Gentle, Even Tension (No Scalp Torture)
Place the roller at the ends and roll toward the scalp, keeping the section taut and smooth.
You want firm tensionbut not “I can feel my eyebrows lifting” tension.
If you feel pinching, redo it. A roller set should not hurt.
Step 11: Secure Each Roller So It Doesn’t Slide or Dent
Use clips that hold the roller in place without crushing the hair. If dents are your enemy, position clips carefully
and avoid overly tight elastics. Magnetic rollers usually need clips; foam rollers often have built-in closure.
Step 12: Dry 100% (Yes, One Hundred) Before Removing
You can air-dry, use a hooded dryer, or a bonnet dryer. The method matters less than the rule:
do not take rollers out until hair is completely dry. Even slightly damp hair will frizz or fall flat.
Check the thickest area (often the back or crown) before you start taking anything down.
Timing examples: Fine hair with a dryer might set in under an hour. Thick hair air-drying can take several hours or overnight.
Step 13: Cool Down, Takedown Slowly, Then Shape the Style
Let hair cool for a few minutes if you used a dryercooling helps the set “finish.”
Remove rollers gently by unwinding (not yanking). Then style:
- For defined curls: separate curls with fingertips.
- For a smooth blowout look: wrap hair, brush out carefully, or use a wide-tooth comb.
- For volume: lift roots with a pick or fingers and lightly mist with flexible-hold spray.
Common Mistakes (and How to Fix Them)
Your curls look frizzy
- Sections were too big or not smoothed enough.
- Hair wasn’t fully dry before takedown.
- Too much touching during takedownbe gentle and slow.
Your set fell flat fast
- Hold product was too light for your hair type.
- Hair was still damp inside the roll.
- Rollers were too large for the curl you wanted (big rollers = softer bend).
You got dents
- Clips were placed too tightly or directly on a high-tension area.
- Try repositioning clips, using smoother clips, or clipping the roller instead of clipping hair.
Tangles during takedown
- Use smooth wet-set rollers (not Velcro on very wet/textured hair).
- Unroll slowly in the reverse direction of how you rolled it.
- Make sure ends were tucked neatly during the set.
How to Make Your Roller Set Last Longer
- Sleep smart: wrap hair or use a silk/satin bonnet or pillowcase to reduce friction.
- Avoid moisture early: steam, heavy sweating, or misting can relax the set quickly.
- Refresh gently: re-roll a few face-framing pieces at night instead of redoing your whole head.
- Use light shine last: a tiny amount of serum or oil on the ends after takedown adds gloss without killing volume.
Real-World Roller-Set Experiences: What You’ll Learn After a Few Tries (About )
Let’s be honest: your first wet set might not look like a salon blowout. That’s normal. Most people’s “roller set origin story”
includes at least one of the following plot twists: rollers sliding down like they’re escaping, an unexpectedly crunchy section
from using too much setting product, or the moment you realize the back of your head is an entirely separate country with its own laws.
The biggest lesson people share after a few attempts is that small sections beat strong products.
It’s tempting to grab the firmest hold mousse on Earth and hope it bulldozes your hair into submission. But if sections are too large,
the inside stays damp longer, the outside dries first, and the result is frizz with confidence. Once people start working in
neat, roller-sized sectionsand smoothing every section like it’s a tiny silk ribbonthe style suddenly looks more “done,” even with
lighter product.
Another common experience: drying time is the real boss. A lot of first-timers remove rollers when the hair feels “mostly dry.”
Then the curls droop, frizz appears, and the set looks tired before it even leaves the house. After that happens once, people become loyal
to the 100% dry rule. Some even do a “hidden check” by unrolling one roller from the thickest area (usually back/crown) before committing
to the full takedown. It’s the hair equivalent of checking if the cake is baked before frosting it.
People also notice their results improve when they treat the roller set like a two-phase style:
installation (smooth, controlled, consistent tension) and takedown (slow, gentle, minimal touching).
The takedown phase is where many sets go wrongespecially if you’re excited and start fluffing immediately.
Experienced roller-setters tend to remove rollers carefully, let hair settle, then separate or brush in stages.
It sounds extra… because it is. But it’s the difference between “wow” hair and “why is it yelling at me?” hair.
One more real-life tip that comes up constantly: your roller size should match your lifestyle.
If you want hair that stays big and smooth through a busy week, larger rollers and a softer set are often easier to maintain.
If you want defined curls, smaller rollers can look amazingbut they may require more time, more rollers, and a more careful night routine.
People who stick with roller sets long-term usually pick a “go-to” roller size that fits their patience level, their schedule, and how much
they want to preserve the style overnight.
Bottom line: wet setting is a skill, not a lottery ticket. Once you nail sections, tension, and full drying,
a roller set becomes one of the most reliable ways to get heatless volume and curlsplus the satisfying feeling of knowing you did that.
Conclusion
A great wet set is less about fancy products and more about doing the basics consistently:
start with clean, detangled hair, work in roller-sized sections, smooth every strand, keep tension even,
and dry completely before takedown. Once you get the rhythm, wet setting becomes a repeatable, low-heat routine
that delivers smoothness, bounce, and serious “main character hair” energy.


