
Table of Contents >> Show >> Hide
- What Are Shrinky Dink Cake Toppers?
- Why Shrinky Dink Cake Toppers Are Perfect for Parties
- Supplies You Need
- Free Printable Ideas for Shrinky Dink Cake Toppers
- Step-by-Step: How to Make Shrinky Dink Cake Toppers
- Food Safety Tips for DIY Cake Toppers
- Design Tips for Super Cute Results
- Cute Shrinky Dink Cake Topper Ideas
- Troubleshooting Common Shrinky Dink Problems
- How to Style Shrinky Dink Toppers on a Cake
- How to Store Finished Cake Toppers
- Can You Reuse Shrinky Dink Cake Toppers?
- Experience Notes: What I Learned Making Shrinky Dink Cake Toppers
- Conclusion
Some cake toppers whisper, “Happy birthday.” Shrinky Dink cake toppers kick open the party door wearing glitter shoes and say, “Yes, I made this, and yes, it is adorable.” If you love DIY party decorations that look custom without requiring a craft-room degree, shrink plastic is about to become your tiny, magical best friend.
These super cute Shrinky Dink cake toppers are colorful, lightweight, budget-friendly, and easy to customize for birthdays, baby showers, classroom parties, graduation cakes, cupcakes, and “I survived Monday” desserts. The best part? You can use free printables as your guide, so you do not have to be an illustrator. Trace, color, cut, bake, attach, and admire your mini masterpiece like a proud craft goblin.
In this complete guide, you will learn how to make Shrinky Dink cake toppers from printable designs, which supplies work best, how to bake shrink plastic without panic, how to attach toppers safely to cakes, and how to avoid the common mistakes that turn cute rainbows into curly potato chips. Let’s shrink some joy.
What Are Shrinky Dink Cake Toppers?
Shrinky Dink cake toppers are small decorative pieces made from shrink plastic sheets. You draw, trace, or print a design onto the sheet, cut it out, and heat it in the oven. The plastic shrinks dramatically, becomes thicker, and turns into a firm little charm-like decoration. Attach it to a food-safe stick, skewer, or straw, and you have a custom cake topper that looks boutique-made but costs much less.
Shrink plastic crafts have been popular for decades because the process feels a little like kitchen science. The design curls, wiggles, shrinks, and then flattens into a sturdy miniature version of itself. It is equal parts craft project and tiny oven theater.
Why Shrinky Dink Cake Toppers Are Perfect for Parties
DIY cake toppers can get expensive fast, especially if you want personalized names, themed graphics, or matching cupcake decorations. Shrinky Dink toppers solve that problem beautifully. You can create a full party set from just a few sheets of shrink plastic, and the designs can match almost any theme.
They Are Easy to Customize
With free printables, you can make toppers shaped like stars, hearts, cherries, dinosaurs, rainbows, balloons, flowers, letters, numbers, mini cakes, party hats, or cartoon-style animals. You can also add names, ages, dates, or short phrases like “One Happy Dude,” “Sweet 16,” “Baby Girl,” or “Let’s Party.”
They Look Polished Without Being Complicated
After baking, shrink plastic becomes thicker and more vibrant. Colors often look richer after shrinking, which gives your toppers a clean, finished appearance. Even simple line art can look charming once it transforms into a glossy little decoration.
They Are Great for Cupcakes Too
Not every cake wants a giant topper. Sometimes the cupcakes want to be included in the outfit. Small Shrinky Dink cupcake toppers are perfect for dessert tables, party favors, lunchbox surprises, and themed treat trays.
Supplies You Need
Before you start, gather your materials. The project is simple, but having everything ready prevents the classic “where did I put the scissors?” craft spiral.
Basic Supplies
- Shrinky Dink sheets or printable shrink plastic sheets
- Free printable cake topper designs
- Inkjet printer, if using printable shrink film
- Permanent markers, colored pencils, acrylic paint pens, or alcohol-based markers
- Scissors or a craft knife
- Hole punch, if your design needs holes
- Parchment paper
- Baking sheet
- Oven or toaster oven
- Food-safe paper straws, bamboo skewers, lollipop sticks, or acrylic cake sticks
- Hot glue gun, strong craft glue, or food-safe tape for attaching sticks
- Clear sealant, optional
Choosing the Right Shrink Plastic
For printables, use shrink film labeled for inkjet printers. Do not run regular shrink plastic through a printer unless the packaging clearly says it is printable. Also, do not use laser printers with shrink film because laser printers use heat, and heat is exactly what makes shrink plastic shrink. That would be a very dramatic printer snack, and nobody wants that.
If you are tracing by hand, clear or frosted shrink plastic works well. Frosted sheets are especially friendly for colored pencils because the slightly rough surface holds pigment better. Clear sheets are great for permanent markers and bold outlines.
Free Printable Ideas for Shrinky Dink Cake Toppers
Free printables are the secret shortcut. You can create designs on your computer, download simple templates, or draw your own on paper and trace them under clear shrink film. The printable should be larger than the final topper because the plastic shrinks during baking.
Popular Printable Themes
- Birthday: candles, cakes, party hats, balloons, confetti, names, and numbers
- Baby shower: clouds, moons, teddy bears, baby bottles, bows, and tiny stars
- Spring party: flowers, butterflies, bees, strawberries, and rainbows
- Holiday: pumpkins, ghosts, snowflakes, gingerbread people, hearts, and fireworks
- Character-inspired: crowns, capes, magic wands, spaceships, dinosaurs, and mermaids
- Modern minimal: initials, monograms, simple line art, abstract shapes, and pastel icons
How Big Should the Printable Be?
Most shrink plastic becomes much smaller after baking, often around half or less of the original size depending on the brand, oven temperature, and baking time. Always check the package instructions and test one small piece before committing to your final design. For cake toppers, it is usually better to start bigger than you think. A design that looks enormous on the sheet may come out just right after shrinking.
Step-by-Step: How to Make Shrinky Dink Cake Toppers
Step 1: Choose or Print Your Design
Pick your free printable design and size it according to your cake. For a standard round birthday cake, one larger centerpiece topper plus a few small accent toppers usually looks balanced. For cupcakes, keep the original printable designs smaller so the finished toppers do not overwhelm the frosting.
If using printable shrink film, print on the correct side of the sheet according to the package directions. Many inkjet shrink films have a coated side that holds the ink. Let the ink dry fully before touching, cutting, or sealing.
Step 2: Color or Trace the Design
If you are using clear shrink plastic, place it over the printable and trace the design with a permanent marker. Fill in colors with colored pencils, paint pens, or markers. Remember that colors usually intensify after shrinking, so soft shades may become brighter and darker. That pale pink cupcake liner might become a hot pink diva after baking.
For a handmade look, use colored pencils on frosted shrink film. For bold party graphics, paint pens and permanent markers create strong lines and playful color.
Step 3: Cut Out the Shapes
Cut around each design carefully. Rounded edges are better than sharp points because sharp corners may become extra pointy after shrinking. Leave a small border if you want a sticker-like look, or cut close to the outline for a clean charm effect.
If you plan to hang any pieces or connect multiple shapes, punch holes before baking. Once the plastic shrinks, it becomes too thick and hard to punch neatly.
Step 4: Preheat the Oven
Preheat the oven according to the shrink film package instructions. Many shrink films bake between 300°F and 350°F, with 325°F being a common temperature. A toaster oven also works well, especially for small batches, as long as it heats evenly.
Step 5: Bake the Shrinky Dinks
Line a baking sheet with parchment paper. Place the designs on the sheet with enough space between each piece so they do not touch while curling. Put the tray in the oven and watch closely.
The plastic will curl, twist, and look completely wrong for a moment. Stay calm. This is normal. After a short time, the pieces usually flatten again. Once they have flattened and stopped shrinking, remove the tray from the oven. If needed, place another piece of parchment over the hot toppers and press gently with a flat object, such as a book or spatula, to help them cool flat.
Step 6: Seal the Designs
Sealing is optional but helpful if you used ink, markers, or colored pencils that may smudge. Use a clear acrylic sealer, brush-on glaze, or clear craft sealant. Let everything dry completely before attaching the toppers to sticks or placing them near food.
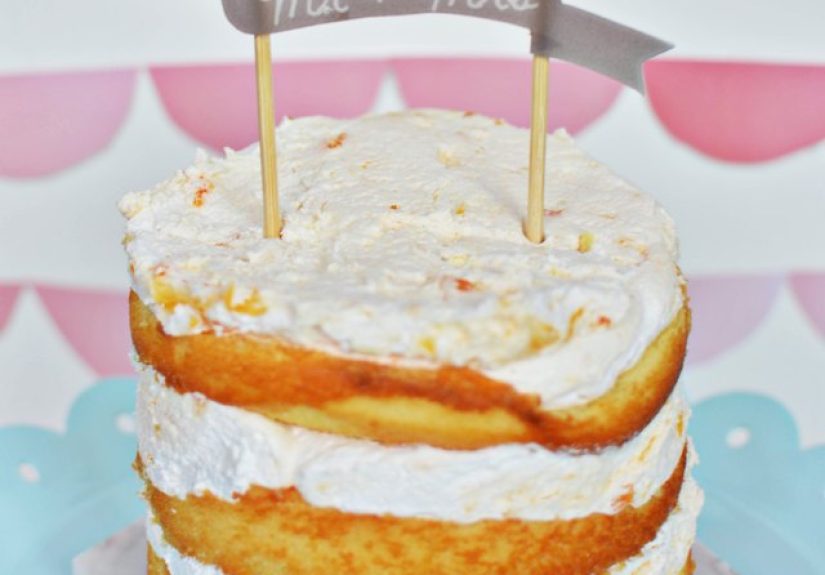
Step 7: Attach to Cake Sticks
Turn each topper over and glue a food-safe stick to the back. Bamboo skewers, lollipop sticks, and paper straws are popular options. For a cleaner look, choose a stick color that matches the cake or party theme.
Important: Shrink plastic is decorative, not edible. Do not push the plastic itself directly into the cake. Attach it to a food-safe stick and insert only the stick into the cake. Remove all toppers before serving.
Food Safety Tips for DIY Cake Toppers
Because these toppers sit on or near food, safety matters. Craft supplies are not the same as edible decorations. Even if a marker is labeled non-toxic, that does not mean it should touch frosting or be eaten. Non-toxic means it is not expected to cause harm under normal use as an art material; it does not magically become a snack.
Keep Craft Materials Away from Direct Food Contact
Use a food-safe barrier whenever possible. Attach the finished Shrinky Dink piece to a lollipop stick, paper straw, or skewer, then place the stick into the cake. If the topper rests near frosting, position it so the decorated plastic does not touch the edible surface.
Remove Before Serving
Treat Shrinky Dink cake toppers the way you would treat candles, plastic figurines, acrylic name toppers, or decorative picks. They are cute, photogenic, and absolutely not dessert. Remove them before slicing and serving the cake.
Use Adult Supervision
This project involves scissors, ovens, hot trays, glue guns, and small pieces. Kids can help color and trace, but adults should handle baking, hot plastic, cutting with craft knives, and gluing.
Design Tips for Super Cute Results
Use Bold Lines
Thin lines may disappear after shrinking, especially if the design is detailed. Use bold outlines and simple shapes for the best results. Cartoon-style graphics work beautifully because they stay readable after the plastic shrinks.
Make a Test Piece First
Every brand of shrink film behaves slightly differently. Before printing or coloring your whole set, make one test topper. Measure it before and after baking so you know the approximate shrink ratio. This tiny test saves big heartbreak.
Do Not Overcrowd the Baking Sheet
Shrink plastic curls as it heats. If pieces are too close together, they can bump into each other and stick. Give each topper some personal space. Craft boundaries are healthy.
Choose Colors That Match the Cake
For a clean party look, pull colors from the cake design. A strawberry cake might look adorable with pink, red, white, and leafy green toppers. A space-themed cake can use navy, silver, yellow, and purple. A pastel birthday cake practically begs for clouds, stars, and tiny smiling suns.
Add Dimension with Layers
You can glue smaller Shrinky Dink pieces onto larger pieces to create layered toppers. For example, attach a tiny balloon to a number topper, or add mini stars around a moon. Keep layers lightweight so the topper does not lean like it has had too much party punch.
Cute Shrinky Dink Cake Topper Ideas
Birthday Number Topper
Create a large number, such as 1, 5, 16, 21, or 50, then decorate it with confetti dots, tiny stars, or mini hearts. Attach it to two sticks for stability. This is one of the easiest ways to make a custom birthday cake topper that feels personal.
Name Cake Topper
Print or trace bubble letters spelling the guest of honor’s name. Keep the letters connected if you want one single topper, or make each letter separately and place them across the cake like a mini banner.
Mini Cupcake Toppers
Make tiny cherries, hearts, flowers, or party hats and attach each one to a short lollipop stick. These are perfect for cupcake trays because they add personality without requiring complicated frosting skills.
Baby Shower Cloud Toppers
Use clouds, moons, stars, and sleepy little faces for a soft baby shower cake. Pastel blue, blush pink, lavender, cream, and gold accents look sweet and modern.
Fruit-Themed Summer Toppers
Strawberries, lemons, oranges, watermelon slices, and cherries are excellent shrink plastic designs because their shapes are simple and their colors are bold. Add them to a white frosted cake for an instant picnic-party vibe.
Troubleshooting Common Shrinky Dink Problems
The Plastic Curled and Stuck to Itself
This can happen if the piece is large, thin, or oddly shaped. Let it cool slightly, gently separate it if possible, and return it to the oven for a little longer. Using parchment over the top while baking can help larger pieces shrink more evenly.
The Topper Came Out Warped
Warping may happen when the oven is too hot, the piece is too detailed, or the shape has long narrow sections. Try lowering the temperature slightly, baking a test piece, and pressing the topper flat while it is still warm.
The Colors Look Too Dark
Because the design shrinks, pigment becomes concentrated. Use lighter colors than you want in the final result. If your first rainbow comes out looking like it joined a rock band, lighten your next version.
The Ink Smeared
Make sure you are printing on inkjet-compatible shrink film and allow enough drying time. If the design still smears, seal it lightly before cutting or after baking, depending on the product instructions.
The Stick Will Not Stay Attached
Use enough glue and attach the stick to the flat back of the topper. For larger designs, use two sticks instead of one. Let the glue cure completely before placing the topper on a cake.
How to Style Shrinky Dink Toppers on a Cake
Styling matters. Even the cutest topper needs a little stage direction. For a tall cake, place the main topper at the back center and smaller accents around the front edge. For a sheet cake, arrange the toppers like a scene: clouds at the top, balloons on the sides, and a name or number in the middle.
For cupcakes, vary the topper designs so the tray feels playful but coordinated. For example, use three shapes in the same color palette: hearts, stars, and mini cakes. Repetition makes the display look intentional instead of chaotic. Cute chaos is still chaos.
If your cake already has lots of frosting details, keep the toppers simple. If your cake is plain, go bigger and brighter. Shrinky Dink toppers are especially charming on simple buttercream cakes because they add instant personality without requiring piping skills.
How to Store Finished Cake Toppers
Finished Shrinky Dink cake toppers can be made ahead of time. Store them in a small box or container with tissue paper between layers to prevent scratches. Keep them away from heat, moisture, and direct sunlight. If you sealed the pieces, make sure the sealant is completely dry before storage.
For party prep, make the toppers a few days before the event. Attach the sticks ahead of time and label the container so no one mistakes your handmade toppers for random tiny plastic confetti. It happens. Parties are busy.
Can You Reuse Shrinky Dink Cake Toppers?
Yes, in many cases you can reuse them, especially if they never touched frosting directly. Wipe the stick or replace it if needed, then store the plastic topper carefully. Name toppers and age toppers may be event-specific, but stars, hearts, flowers, fruits, animals, and seasonal shapes can absolutely party again.
Experience Notes: What I Learned Making Shrinky Dink Cake Toppers
The first thing you learn when making Shrinky Dink cake toppers is that shrink plastic has a flair for drama. One minute your carefully colored strawberry looks calm and innocent on the baking sheet. The next minute it curls into a tiny red taco and makes you question every craft decision you have ever made. Then, just when you start reaching for the oven mitt in panic, it relaxes and flattens like nothing happened. The lesson? Do not rescue too early. Shrink plastic is basically a theater kid.
My best results came from using simple designs with thick outlines. The tiny details I thought were “delicate and charming” mostly disappeared after shrinking. Bigger shapes, bolder lines, and lighter colors worked much better. A pastel rainbow looked soft on the sheet and beautifully vibrant after baking. A heavily colored rainbow, however, came out so intense it looked like it had been training for a neon sign competition.
Testing the shrink ratio was also a game changer. I made one small heart, measured it, baked it, and measured it again. That gave me a realistic idea of how large the printable designs needed to be. Without that test, my cupcake toppers would have become sprinkle-sized decorations. Cute, yes. Useful, not especially.
Another helpful trick was pressing the pieces flat right after removing them from the oven. I placed parchment paper over the hot pieces and gently pressed with a flat baking tray. This made the toppers look cleaner and more professional. You do have to move quickly, though, because the plastic cools fast. Think of it as a tiny craft workout.
For attaching sticks, I found that paper straws looked adorable for larger toppers, while lollipop sticks worked better for cupcakes. Bamboo skewers are sturdy, but they can look a little rustic unless you cover them with decorative paper, ribbon, or a straw. For heavier name toppers, two sticks are much better than one. A single stick may leave the topper leaning sadly to the side like it just heard bad news.
The most important experience-based tip is to keep the plastic away from direct cake contact. I treated the toppers as decorative pieces only and inserted the food-safe stick into the cake. That kept the project cute, practical, and safer for guests. I also told everyone to remove the toppers before serving, because no matter how adorable a tiny shrink plastic cherry is, it is not a garnish.
Overall, Shrinky Dink cake toppers are one of those crafts that feel much fancier than they are. They are affordable, customizable, kid-friendly with supervision, and surprisingly addictive. Once you make one batch, you start seeing topper ideas everywhere: birthday cakes, cupcakes, cookies, treat boxes, party favors, gift tags, and maybe even your houseplants if you are feeling festive. The process is simple, the results are delightful, and the “wait, you made those?” compliments are extremely satisfying.
Conclusion
Making super cute Shrinky Dink cake toppers with free printables is a fun, affordable way to personalize party desserts without spending a fortune on custom decorations. With the right shrink plastic, bold printable designs, careful baking, and food-safe placement, you can create toppers that look bright, polished, and totally charming. Whether you are decorating a birthday cake, baby shower dessert, cupcake tray, or themed celebration, these tiny handmade decorations bring big personality.
The key is to keep designs simple, test your shrink ratio, use lighter colors than expected, and remember that the toppers are decorative only. Once you get the hang of it, the possibilities are endless. Stars, names, numbers, fruits, animals, clouds, flowers, and mini party icons can all become custom cake decorations with just a little coloring, cutting, and oven magic. It is DIY party decor with maximum cuteness and minimum chaosunless you count watching the plastic curl, which is honestly part of the fun.
Note: Shrinky Dink cake toppers are for decoration only. Do not eat them, and do not allow the decorated plastic to touch the cake directly. Attach each topper to a food-safe stick and remove all toppers before serving.


