
Table of Contents >> Show >> Hide
- Why a Chalkboard Backsplash Works (and When It Doesn’t)
- The $10 Reality Check: What “$10” Actually Covers
- Pick Your Surface: Wall, Tile, or a Removable Panel
- Prep Like You Mean It (This Is Where the Magic Lives)
- Painting the Chalkboard Backsplash (The Fun Part)
- The “Don’t Skip This” Step: Seasoning Your Chalkboard Surface
- Design Ideas: Make It Look Intentional (Not Like You Lost a Bet)
- Chalk vs. Chalk Markers: What to Use (and Why It Matters)
- Cleaning and Maintenance in a Kitchen (Grease Happens)
- Durability: How Long Will a Chalkboard Backsplash Last?
- Common Mistakes (I Have Made These So You Don’t Have To)
- FAQ: Quick Answers Before You Grab a Roller
- My Real-Life “$10 Chalkboard Backsplash” Experience (The Extra You Asked For)
- Conclusion: A Tiny Project with Big “Why Didn’t I Do This Sooner?” Energy
I didn’t set out to become the kind of person who has “a writable backsplash.” I set out to stop staring at the same
boring strip of wall behind my counter like it owed me money. One impulsive trip down the paint aisle later, I walked
out with a small can of chalkboard paint and the confidence of a raccoon in a shiny-trash buffet.
The result? A kitchen chalkboard backsplash that cost about $10 in paint (and roughly 37 cents in dignity the
first time I tried to erase it too early). It’s part function, part fun, and part “Why does my grocery list look like a crime scene?”
If you’ve been craving a budget kitchen makeover or a low-commitment DIY backsplash idea, this is the project that punches
above its price tag.
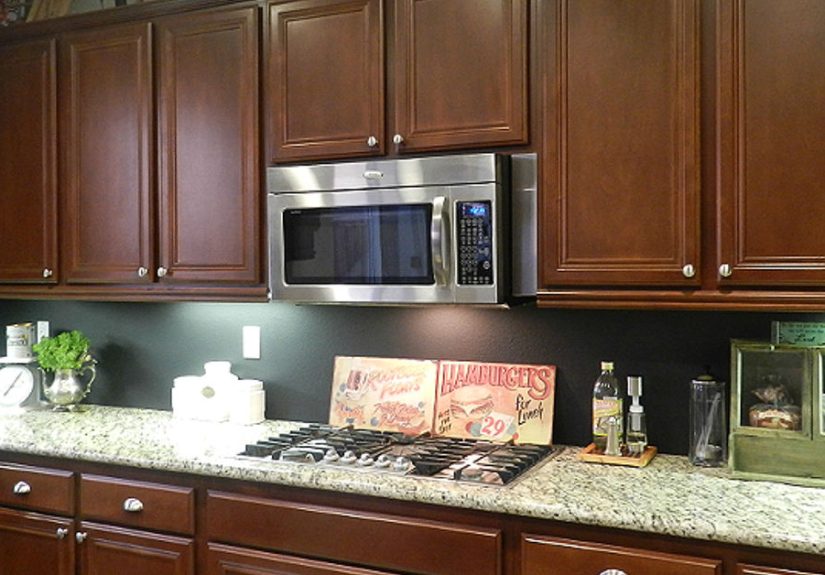
Why a Chalkboard Backsplash Works (and When It Doesn’t)
A chalkboard backsplash is basically a wall that pulls its weight. It can hold a meal plan, a running grocery list, reminders,
doodles, recipes, or the exact number of minutes you’ve been waiting for the pasta water to boil (spoiler: always longer than you think).
It also hides minor wall flaws better than glossy tileassuming you prep it properly and don’t paint over yesterday’s grease splatter.
Best places to use it
- Behind a coffee bar (menus, beans, brew ratios, your “do not talk to me” warning label).
- Behind a prep counter (shopping lists, recipe scribbles, measurement conversions).
- On a dedicated panel that sits on top of the counter (renters: this can be your golden ticket).
Places I’d think twice
- Directly behind a high-heat range unless you’ve got a heat shield or a non-painted protective surface.
- Right beside a heavy-splash sink zone where constant water exposure can wear the finish faster.
- Over slick tile without the right prep/primer (more on that in a minute).
Translation: chalkboard paint is awesome on the right surface, in the right spot, with the right expectations. It’s not a
substitute for commercial kitchen tile in a grease-and-steam war zone.
The $10 Reality Check: What “$10” Actually Covers
Let’s be honest. “My $10 kitchen chalkboard backsplash” usually means $10 for paint and you already own (or can borrow)
the basic supplies. That’s not cheatingthat’s adulthood. Here’s a realistic breakdown so your budget doesn’t get jump-scared at checkout.
| Item | Why it matters | Budget move |
|---|---|---|
| Chalkboard paint (small can/sample) | Creates the writable surface | Buy the smallest size; one can goes far on a backsplash strip |
| Foam roller + small angled brush | Foam helps keep the finish smoother | Reuse what you have; foam rollers are cheap |
| Cleaner/degreaser | Paint hates grease | Dish soap + warm water for light grime; stronger degreaser for heavy cooking zones |
| Painter’s tape + drop cloth | Clean lines, less regret | Use what’s in the garage; tape matters more than you think |
| Primer (sometimes) | Adhesion and durability on tricky surfaces | Only if needed: glossy, stained, or super-slick surfaces |
If you’re painting over standard painted drywall and it’s in decent shape, you may not need primer. If you’re painting over glossy
surfaces (tile, glass, laminate) or anything questionable, a bonding primer can save you from peeling heartbreak later.
Pick Your Surface: Wall, Tile, or a Removable Panel
Option A: Painted drywall (easiest, most common)
This is the sweet spot. Clean it well, smooth it, paint it, season it. Drywall behind a counter that isn’t constantly soaked is ideal.
Option B: Over existing tile (possible, but prep-heavy)
Tile is slick, glossy, and smug about it. If you want chalkboard paint directly on tile, expect extra steps: deep cleaning,
scuff-sanding (or a bonding primer designed for tough-to-paint surfaces), and patience. Bonding primers are formulated to grip dense,
glossy surfaces like tile and glass, which helps reduce peeling risk.
Option C: A thin panel (my favorite “smart cheap” approach)
If your backsplash area is complicated (tile, texture, weird gaps), screw this: paint a thin hardboard or plywood panel with chalkboard
paint, then mount it or brace it on the countertop. You can remove it later, repaint it easily, and you won’t be fighting grout lines.
This is also renter-friendly if you mount it with minimal wall damage.
Prep Like You Mean It (This Is Where the Magic Lives)
Chalkboard paint is basically an honesty test. If your wall is bumpy, greasy, dusty, or flaking, the paint will politely reveal
that to everyone who visits. Prep isn’t the boring partit’s the part that makes the “erase cleanly” dream real.
Step 1: Protect the zone
- Tape off the counter edge, cabinets, outlets, and any trim.
- Drop cloth down, because black paint shows up on socks like it’s trying to be a permanent roommate.
Step 2: Degrease thoroughly
Kitchens build a “seasoning” layer on walls tooexcept it’s not the fun cast-iron kind. Use warm water with dish soap for light
grime; for heavy cooking zones, use a cleaner that actually cuts grease. If you’re prepping tile or a backsplash area that has seen
serious cooking, a cleaner that tackles grease-and-grime buildup matters.
Step 3: Smooth the surface
Want crisp chalk lines and easy erasing? Smooth matters. Patch holes, sand ridges, and consider a skim coat if the wall is textured.
Multiple DIY guides emphasize that chalkboard paint highlights bumps, so the flatter the surface, the happier you’ll be with the finish.
Step 4: Prime if needed
Here’s a good rule: if you can describe your surface as “shiny,” “slick,” “stained,” or “mysteriously flaky,” prime it. Bonding primers
are made to cling to tough surfaces (think tile, glass, laminate, glossy finishes). If you’re blocking stains or dealing with stubborn
areas, specialized primers can help too.
Painting the Chalkboard Backsplash (The Fun Part)
This is where it starts looking like a real DIY backsplash. The goal is a smooth, even finish that won’t fight you every time you erase.
Most manufacturer and retailer guides recommend mixing thoroughly, using a foam roller for smoothness, and applying multiple light coats.
Step-by-step
- Stir the paint like you’re mad at it. Chalkboard paint can settle; mix thoroughly before and during use.
- Cut in first. Use an angled brush around edges, outlets, and corners.
- Roll with a dense foam roller. Light, even coats. Don’t over-roll as it starts to set.
- Apply 2 coats minimum. A third coat can help if the surface still looks uneven.
- Let it dryand then let it cure. Dry-to-touch isn’t the same as ready-to-write. Follow the product directions; some guides recommend waiting
a couple of days (or longer) before heavy use for best durability.
Pro tip: keep a small artist brush nearby for quick touch-ups around outlets and cabinet edges. Paint loves to creep into places it wasn’t invited.
The “Don’t Skip This” Step: Seasoning Your Chalkboard Surface
If you’ve ever written on a fresh chalkboard-painted wall and then struggled to erase it without leaving ghostly remnants of “EGGS” forever,
seasoning is your fix. Multiple how-to sources recommend rubbing the side of a piece of chalk over the entire surface, then wiping it off.
It fills micro-pores and improves erasability.
How to season it
- Wait until the paint is fully cured (check your paint’s instructions).
- Take plain white chalk and turn it sideways.
- Cover the whole backsplash with chalk, then wipe clean with a dry cloth or eraser.
Congratulations. Your wall is now officially ready to be used as a grocery list, a meal plan, and an emotional support doodle station.
Design Ideas: Make It Look Intentional (Not Like You Lost a Bet)
A chalkboard backsplash can be charmingly rustic, sleek and modern, or delightfully chaotic. The trick is giving it a “purpose” so it feels
like a design choicenot an accident with a paint can.
Ideas that work in real kitchens
- Weekly meal plan grid: Use painter’s tape and a chalk marker to lay out columns for days of the week.
- Coffee bar menu: “House Special: Survive Monday” is a classic.
- Recipe corner: Write the 3–4 steps you always forget (like “preheat oven” before you start panicking).
- Kids’ doodle zone: Contain the chaos to one area so your cabinets don’t become the canvas.
- Quote strip: Keep it simple: one line, big letters, easy to refresh.
Chalk vs. Chalk Markers: What to Use (and Why It Matters)
Regular chalk is classic, easy to erase, and low-commitment. Chalk markers look crisp and neon-bright, but they can stain some surfaces
or require more effort to clean. If you want to use markers, test them in a hidden corner firstespecially on painted chalkboard finishes.
The goal is “cute typography,” not “permanent evidence.”
Cleaning and Maintenance in a Kitchen (Grease Happens)
Kitchens are not gentle environments. Steam, splatter, fingerprints, and that one friend who gestures wildly with spaghetti sauce. The best
maintenance plan is: clean lightly, clean often, and avoid aggressive scrubbing that can dull the finish.
Everyday care
- Dry erase: Use a chalk eraser or microfiber cloth for daily cleanup.
- Damp wipe: For deeper cleaning, use a slightly damp cloththen dry it.
- Vinegar-water option: Many cleaning guides note vinegar and water can help lift chalk residue; test first and don’t soak the wall.
Stubborn residue and “ghosting”
Ghosting is when old writing faintly sticks around like a polite haunting. Re-seasoning occasionally can help. Also: softer chalk often erases
easier than rock-hard bargain chalk. If you use chalk markers, follow the marker instructions and test firstsome “erasable” markers are only erasable
on certain non-porous boards.
Avoid abrasive scrubbers and go easy with magic-eraser-style products; they can act like micro-sandpaper and change the finish. If you must use anything
stronger than a damp cloth, test in an inconspicuous corner first.
Durability: How Long Will a Chalkboard Backsplash Last?
With solid prep and a sane cleaning routine, a chalkboard backsplash can look great for years. The biggest enemies are:
grease buildup, constant water exposure, and impatience (writing on it before it’s cured).
If you’re in a heavy-cooking kitchen, you may need occasional touch-upsusually around the most-used prep areas.
When to repaint
- Erasing starts to leave shiny patches or uneven color.
- You see peeling at edges (often a prep/primer issue).
- The surface won’t “take” chalk evenly anymore.
The upside? Repainting is easy. Lightly sand, clean, touch up. It’s a forgiving DIY projectunless you ignore the grease.
Then it becomes a lesson.
Common Mistakes (I Have Made These So You Don’t Have To)
- Skipping degreasing: Paint does not bond to “mystery kitchen film.” Clean like you’re prepping for a health inspector.
- Not smoothing the wall: Texture = chalk dust trapped forever = harder cleaning.
- Thick coats: Thick paint can dry unevenly and show roller texture. Multiple thin coats look better.
- Writing too soon: Dry isn’t cured. Wait the full recommended time.
- Skipping seasoning: Hello, ghosted grocery lists of yesteryear.
FAQ: Quick Answers Before You Grab a Roller
Is chalkboard paint the same as chalk paint?
Nope. Chalkboard paint is formulated to create a writable, erasable surface. Chalk paint (the furniture finish) is a decorative paint with a matte,
chalky lookoften sealed with wax or topcoat. Don’t swap them unless you want to invent new problems.
Do I need to seal a chalkboard backsplash?
Usually, no. Sealing can reduce erasability and change how chalk behaves. In a kitchen, your best “protection” is proper curing, smart placement,
gentle cleaning, and occasional touch-ups. If you absolutely need more durability, consider a removable panel you can repaint easily.
Can I do this as a renter?
Yesgo with the painted panel method. Paint a thin board, season it, and mount it with minimal wall impact or let it rest on the countertop with a discreet brace.
You get the chalkboard backsplash vibe without donating your security deposit to your landlord’s vacation fund.
My Real-Life “$10 Chalkboard Backsplash” Experience (The Extra You Asked For)
Here’s what surprised me most: the backsplash didn’t just change how my kitchen lookedit changed how I used it. I thought I’d write a grocery list once,
take a picture, and forget the wall existed. Instead, it became the kitchen’s brain. If the fridge is the pantry’s bouncer, the chalkboard backsplash is the
DJ: always there, always setting the mood, occasionally playing something weird at 2 a.m.
Week one was pure excitement. I wrote a “meal plan” that looked like a motivational poster: salads, soups, “healthy bowls.” By week two, reality showed up in sweatpants.
The board now includes honest notes like “eggs,” “coffee,” and “WHY IS EVERYONE ALWAYS HUNGRY.” It turns out the best part of a chalkboard backsplash isn’t the aesthetic
it’s the way it catches thoughts you would otherwise lose between the pantry and your phone.
I also learnedquicklythat kitchens are grease factories. Even if you don’t fry bacon daily, that invisible cooking haze is real. The first time I tried to paint without
deep-cleaning one corner (because I was “almost done” and impatient), that area dried with a slightly different sheen. Not a disaster, but enough to make me mutter,
“I did this to myself,” like a person who has learned a life lesson from paint.
Erasing was its own mini-journey. On day one, I erased too aggressively and created a shiny patchlike my wall had a bald spot. Once I chilled out and used a microfiber cloth
with lighter pressure, it behaved. Seasoning helped a lot, and I re-seasoned after a deep clean when ghosting started to show. That’s the secret: the backsplash isn’t a one-and-done
renovation; it’s more like a pet. Low maintenance, yesbut it does need occasional attention or it will embarrass you in front of company.
The unexpected win: guests love it. People will walk into the kitchen and immediately start writing. Some leave helpful notes. Some draw questionable stick figures. One friend wrote
“Taco Tuesday?” so large it became the law. If you host, this backsplash turns into a social magnetlike a guestbook, but with more tortilla opinions. And if you have kids? It’s a
safer outlet for scribbles than your cabinets, your walls, or your soul.
Would I do it again? Absolutely. It’s cheap, it’s practical, and it makes the kitchen feel alive. Plus, when you get bored, you can repaint it or switch up the layout. The backsplash
is now my favorite “functional decor” move: part budget kitchen makeover, part DIY art space, and part daily reminder that yes, I still need to buy milk.
Conclusion: A Tiny Project with Big “Why Didn’t I Do This Sooner?” Energy
A kitchen chalkboard backsplash is one of those rare DIY backsplash ideas that’s inexpensive, beginner-friendly, and genuinely useful. If you clean well, smooth the surface,
apply thin coats, let it cure, and season it, you’ll get a finish that erases cleanly and looks intentional. And if you mess up? You repaint. That’s the beauty of a paint project:
the undo button is just… more paint.


