Table of Contents >> Show >> Hide
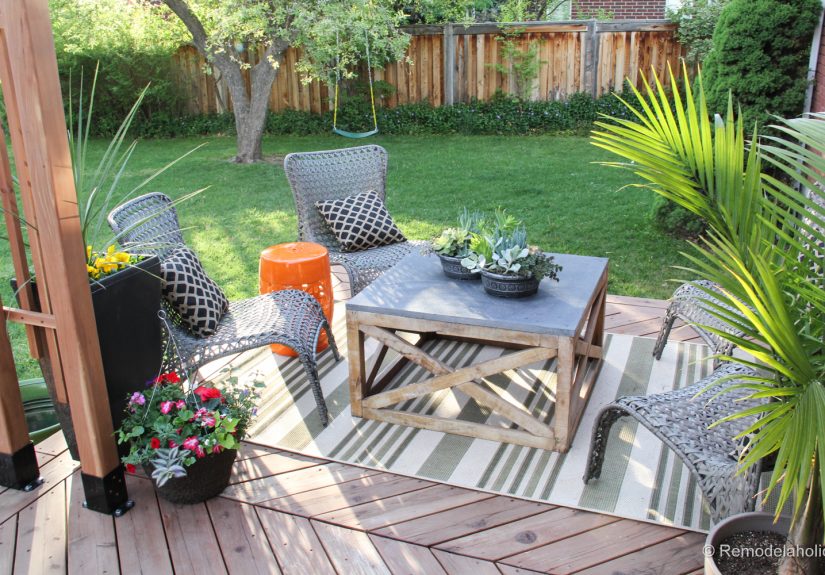
- Why Decks Get Gross (Even When You “Never Use It”)
- Before You Clean: The 20-Minute Prep That Saves Hours
- Choose Your Cleaning Method: Wood vs. Composite
- Our Go-To Step-by-Step Deck Clean Up (The “Not a Disaster” Edition)
- Pressure Washing: Helpful Tool or Deck Villain?
- Deck Cleaner Safety: The Two Rules That Prevent Bad Days
- What About Brighteners, Stain, and Sealant?
- Maintenance That Makes the Next Deck Clean Up Way Easier
- Common Deck Clean Up Mistakes (Ask Us How We Know)
- Conclusion: A Cleaner Deck = More “Outside Time” and Less “Ugh, Not Today”
- Our Deck Clean Up Experience (The 500-Word Real-Life Version)
Our deck is basically an outdoor living room… except it also moonlights as a pollen museum, a crumb sanctuary,
and (for one glorious week every spring) a moss-and-mildew exhibit. If you’ve ever stepped outside barefoot,
looked down, and thought, “Why does my deck feel like a nature documentary?”welcome. You’re among friends.
This post is a practical, real-life deck clean up guide: what to do first, what not to do (so you don’t
accidentally fuzz up your boards), and how to keep your deck looking good longerwhether you’ve got
pressure-treated wood, cedar, or composite decking.
Why Decks Get Gross (Even When You “Never Use It”)
Deck grime isn’t just “dirt.” It’s a combo platter: wind-blown dust, pollen, leaf tannins, sunscreen residue,
spilled drinks, grill grease, and a thin layer of outdoor biology (algae, mildew, mold spores) that loves
shade and moisture. Composite decks can still get a “biofilm” layer where mold feeds, and wood decks can
weather to that gray tone as UV and rain do their thing.
Quick deck health check
- Slippery spots: usually algae/mildewalso a fall risk.
- Black specks: often mildew staining.
- Gray wood: normal weathering; cleaning can brighten it up.
- Raised fibers / splinters: can happen after aggressive washing or aging.
- Loose fasteners / wobbly rails: cleaning day is the perfect day to fix them.
Before You Clean: The 20-Minute Prep That Saves Hours
The best deck clean up starts with boring prep. (Yes, it’s boring. No, you can’t skip it without consequences.)
Here’s what we do before any water hits the boards:
1) Clear and sweep like you mean it
Move furniture, planters, mats, and anything that hides debris. Then sweep thoroughlyespecially in the
gaps between boards, where leaves break down and create prime mildew real estate.
2) Protect plants, siding, and the “stuff you like”
Lightly rinse nearby plants with plain water first, and consider covering delicate landscaping if you’re using
any cleaner. Close windows/doors. If you’re cleaning near painted surfaces or metal rail hardware, keep
your method gentle and rinse well.
3) Pick the right day
Aim for a mild, dry dayideally not blazing-hot sun. Cleaners can dry too fast in heat, leaving uneven results.
And if it’s cold enough that water could linger, you’re not doing your deck any favors.
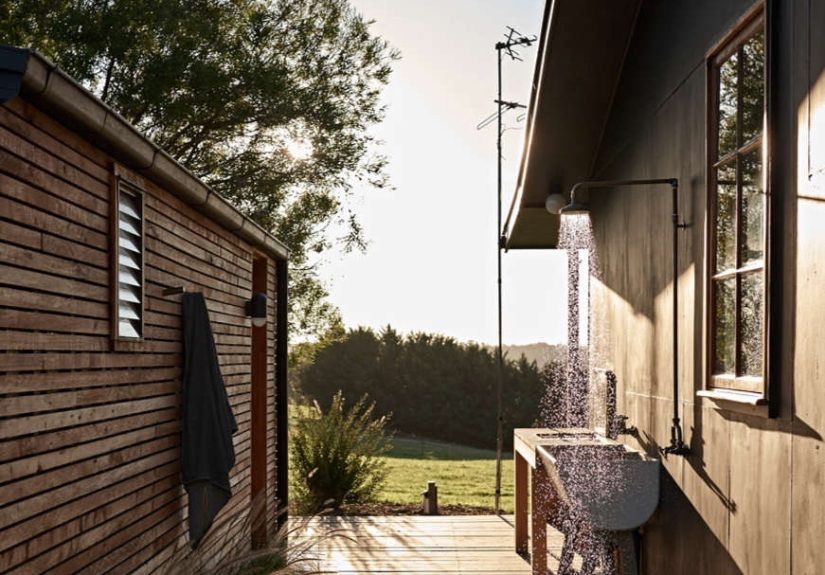
Choose Your Cleaning Method: Wood vs. Composite
If you have a composite deck
Composite is tough, but it’s not invincible. Most manufacturers emphasize simple maintenance:
hose + warm soapy water + a soft bristle brush for most messes. If mold/mildew shows up, it often feeds on
the layer of dirt/pollen sitting on the surfaceso removing that “food source” is the win.
- Use a soft to medium brush (no wire brush).
- Skip metal shovels for snow/ice (plastic is safer for the surface).
- Rinse thoroughly so soap and loosened grime don’t redeposit.
If you have a wood deck
Wood decks love gentle cleaning and hate being sandblasted by water pressure. A common pro approach is:
sweep → wash with a deck-appropriate cleaner (often oxygen-based) → scrub lightly → rinse →
let dry → then decide if it needs brightening, staining, or sealing.
Our Go-To Step-by-Step Deck Clean Up (The “Not a Disaster” Edition)
Step 1: Rinse first
Start with a basic hose rinse to knock off loose dirt and dampen the surface. This helps cleaning solution
spread more evenly and reduces streaking.
Step 2: Use a cleaner that matches the mess
For everyday grime, mild soap and water can be enough. For mildew/algae and weathered gray film,
many deck-care guides recommend oxygen-based cleaners (often containing sodium percarbonate)
as a less harsh option than chlorine bleach on wood surfaces.
If you use any productstore-bought or DIYfollow the label, wear gloves/eye protection, and test
a small hidden area first. Keep kids and pets away from wet surfaces until everything is rinsed and dry.
Step 3: Let it dwell (but don’t let it bake)
Most cleaners need a short “dwell time” to loosen grime (often around 10–15 minutes). The key is keeping
the surface dampif it starts drying, lightly mist with water so it doesn’t flash-dry and leave uneven spots.
Step 4: Scrub with the grain
Use a deck brush (or a stiff nylon brush) and scrub along the direction of the boards. Think “firm handshake,”
not “exorcism.” Scrubbing is where the magic happensespecially in textured grain and corners where algae loves
to throw parties.
Step 5: Rinse thoroughly
Rinse from the house outward so dirty runoff doesn’t recoat areas you already cleaned. Be patient: leftover
cleaner can leave residue, cause spotting, or interfere with any future stain/sealer.
Pressure Washing: Helpful Tool or Deck Villain?
Pressure washing is the most misunderstood deck clean up movelike giving your deck a haircut with a leaf blower.
It can work, but only if you use the right settings, keep the nozzle moving, and avoid “digging” into one spot.
Too much pressure can splinter wood, raise fibers (“fuzzing”), and make the surface harder to refinish later.
If you pressure wash, do it like a grown-up (carefully)
- Start low: use the lowest effective pressure and test a small area.
- Use a wide fan tip: narrow tips are more likely to damage decking.
- Keep distance consistent: don’t hover too close.
- Move with the grain: steady, overlapping passesno “graffiti writing” with the wand.
- Don’t chase perfection: stubborn stains usually need cleaner + scrubbing, not more PSI.
Also: if you’re a teen reading this and thinking, “I’ll just grab the pressure washer,” please don’t do it
solo. Ask an adult to help. Pressure washers can hurt people and wreck wood fast.
Deck Cleaner Safety: The Two Rules That Prevent Bad Days
Rule #1: Never mix cleaning chemicals
This is non-negotiable. Mixing products can create toxic gasesespecially anything involving bleach and
ammonia or acids. Use one product at a time, rinse well, and let the surface clear before trying something else.
Rule #2: Rinse, rinse, rinse
Deck cleaners are meant to be removed. Rinse the surface, rinse nearby plants, and rinse tools. Your future self
will thank you when the deck doesn’t develop mystery streaks and your landscaping doesn’t look personally offended.
What About Brighteners, Stain, and Sealant?
Cleaning is step one. If your wood deck looks clean but still a little dull or uneven, a wood brightener can help
restore tone and balance out the look after cleaning (especially if the deck was very weathered).
Then ask the big question: Does it need protection? If water no longer beads on the surface and the deck
soaks it up immediately, it may be time to re-seal or re-stain. The exact timing depends on your climate, sun exposure,
and what product was used last timebut a clean, dry surface is always the correct starting point.
Simple “Do we stain?” checklist
- Is the deck clean and fully dry (often 24–48 hours after washing, depending on weather)?
- Are there peeling areas that need scraping/sanding first?
- Are you okay with the current color, or do you want to change it?
- Do you want a transparent look (shows grain) or a solid look (hides more imperfections)?
Maintenance That Makes the Next Deck Clean Up Way Easier
The secret to a deck that stays nice isn’t one heroic cleaning dayit’s small habits:
- Sweep weekly in peak season (especially under plants and near the grill).
- Rinse pollen when it builds uppollen is basically mold snack food.
- Clean spills quickly (wine and grease don’t “age well” outdoors).
- Trim nearby shrubs to improve airflow and reduce damp shade zones.
- Use furniture pads so you don’t grind grit into the surface.
Common Deck Clean Up Mistakes (Ask Us How We Know)
Mistake 1: “Let’s just blast it with high pressure.”
That’s how you end up with raised grain and a deck that feels like 80-grit sandpaper. Start gentle.
Mistake 2: Using harsh bleach like it’s holy water
Chlorine bleach can discolor wood, harm plants, and doesn’t always solve the underlying problem long-term.
If you use any bleach product, follow instructions carefully and never combine it with other cleaners.
Mistake 3: Skipping the “test patch”
Deck boards can react differently depending on age, stain type, and sun exposure. A 5-minute test saves a
weekend of regret.
Conclusion: A Cleaner Deck = More “Outside Time” and Less “Ugh, Not Today”
A deck clean up doesn’t need to be dramatic. Sweep, choose the right cleaner, scrub with the grain, rinse well,
and use pressure washing only if you can do it gently. The payoff is huge: safer footing, better-looking boards,
and an outdoor space you actually want to use (instead of avoiding like it owes you money).
Our Deck Clean Up Experience (The 500-Word Real-Life Version)
Our deck clean up started the way all “quick weekend projects” start: with optimism, coffee, and the belief
that we would be eating lunch on a sparkling deck by noon. By 9:17 a.m., the deck furniture was stacked like a
yard-sale Tetris situation, and we discovered at least three missing socks that had apparently been living under a
bench since last summer. (Outdoor socks are a different species. They do not obey the rules of laundry.)
The first sweep was oddly satisfyinglike vacuuming a carpet and watching the lines appearexcept the “lines”
were made of pollen and tiny seed pods that had wedged themselves into every crack. We used a narrow brush to
pull gunk from between boards and immediately realized this step is the difference between “looks okay from ten feet
away” and “wow, this is actually clean.” Also, we learned that sweeping first makes everything else easier. Who knew
the boring step would be the hero?
Next came the rinse. This is where we had our first humbling moment: the deck didn’t just look dustywater revealed
the full patchwork of grime, including a few slippery green spots that screamed “algae” in the most unhelpful way.
We slowed down and treated those areas carefully because (1) slipping on your own deck is embarrassing, and (2) we
wanted the deck to be safer for everyone, especially if friends or family are walking around with drinks, plates, or kids
doing the chaotic sprinting thing.
We opted for a gentle approach: cleaner, dwell time, scrub, rinse. The scrubbing part felt like a workout you can brag
about without ever stepping into a gym. We worked in small sections, partly to keep the surface from drying out and
partly because watching the boards change from “sad gray” to “hello, wood grain!” was weirdly motivating. We also
learned to scrub with the grainnot because we’re fancy, but because the deck looked smoother and more even when
we did.
The biggest lesson? Don’t rush the rinse. The first pass looked good, but once the surface dried we noticed a couple
of dull areas where leftover residue had clung on. A second rinse fixed it. Another lesson: protect the plants. We
lightly rinsed the greenery before and after, and everything stayed happy. The final surprise was how much the deck
“brightened” just from cleaninglike it had been wearing a dusty sweater all season and finally took it off.
By late afternoon, the deck was drying, the furniture was still in the yard, and we were exhaustedbut it was the good
kind of tired. The deck looked cleaner, felt safer, and smelled like… well, outdoors, but in a “fresh” way instead of a
“swamp adjacent” way. And the best part? The next day, we actually sat out there with breakfast and thought,
“Okay, yes. This was worth it.” Which is the highest compliment a weekend project can receive.