Table of Contents >> Show >> Hide
- Why solar lights are the easiest “wow” upgrade for your yard
- What you can get for about $19 on Amazon
- A quick solar-light primer (so listings make sense)
- The smart shopper checklist for $19 solar lights
- Brightness: choose lumens based on the job
- Color temperature: warm usually wins outdoors
- Weather resistance: look for IP ratings and sturdy materials
- Battery details: replaceable is a big plus
- Lighting modes: the best budget “feature” is smarter timing
- Mounting and placement: stakes, screws, or separate panels
- How many lights do you need? A simple layout formula
- Installation that’s faster than microwaving a potato (almost)
- What to expect from $19 lights (realistic, not rude)
- When it’s worth paying more (and when $19 is perfect)
- 500+ words of experience: what it’s actually like living with budget solar lights
- Conclusion
Outdoor lighting is one of those rare home upgrades that can make your place look nicer, feel safer, and stop you from tripping over that one sneaky step… all in the same evening. And if you’ve been putting it off because you don’t want to deal with wiring, drilling, or calling a professional who “can totally come Tuesday” (six Tuesdays from now), solar lights are your best friend.
Here’s the fun part: Amazon often has outdoor solar lights starting around $19. Sometimes it’s a multi-pack of pathway stakes, sometimes it’s deck/step lights, and sometimes it’s a set of spotlights that make your hydrangeas look like they’re starring in their own prestige TV drama. Prices fluctuate, deals come and go, but the low entry point is very realand it’s why solar lighting has basically become the “throw pillow” of outdoor spaces: quick, affordable, and surprisingly transformative.
Why solar lights are the easiest “wow” upgrade for your yard
Solar outdoor lights are popular for one big reason: they remove the hardest part of outdoor lightingpower. No trenching, no extension cords snaking across the lawn, no mysterious outdoor outlet you forgot existed. During the day, the panel charges an internal battery; at night, the light uses that stored energy to run LEDs.
That means you can add glow where you actually need it: walkways, steps, fence lines, garden beds, patios, and any place where guests might wander like moths, but with snacks. Solar lights can also help you be more intentional: lighting for safety (paths, stairs), lighting for security (motion-activated floods), and lighting for vibes (string lights, lanterns, warm accents).
What you can get for about $19 on Amazon
“Outdoor solar lights” covers a lot of ground (sometimes literally). Around the $19 mark, you’ll most commonly see deals in a few categories:
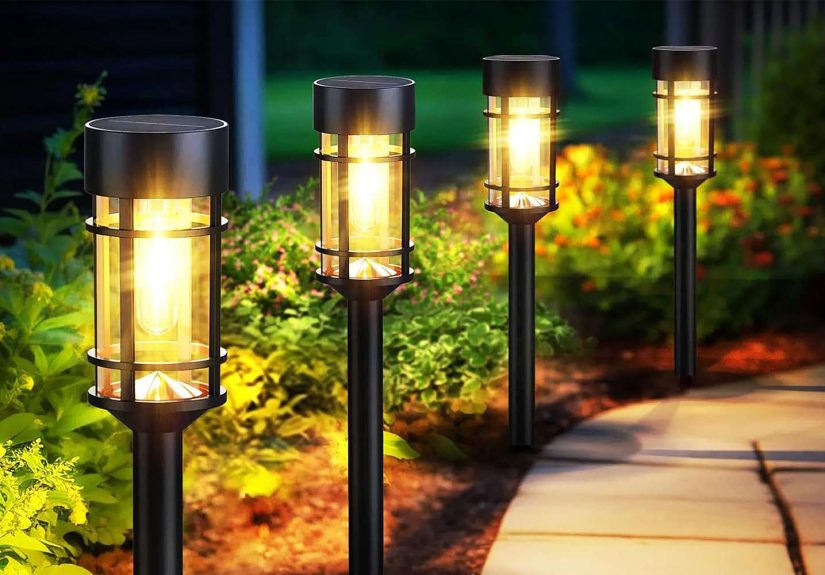
1) Solar pathway lights (the classic stake-in-the-ground set)
These are the workhorses: line a sidewalk, guide guests to the front door, or outline a garden edge. Many budget sets focus on soft accent lighting rather than “turn night into day” brightnesswhich is actually perfect for pathways when you don’t want the yard to look like a stadium parking lot.
2) Solar deck and step lights
If you have stairs, a deck, or a darker side yard, step lights punch above their price. They’re often small but useful: a subtle glow that reduces falls, makes edges visible, and upgrades the look of railings and risers.
3) Compact solar spotlights
Budget spotlights can highlight a tree trunk, a planter, or a house number. The key is to treat them like accent lights unless the listing clearly supports higher output.
4) Solar string lights (patio personality in a box)
String lights are the fastest way to turn “backyard” into “hangout.” Solar versions can be slightly less intense than plug-in sets, but they win on convenienceespecially for renters or patios far from outlets.
Translation: $19 can absolutely buy you meaningful outdoor lighting. You just want to match the style to your goal: guidance, safety, security, or ambiance.
A quick solar-light primer (so listings make sense)
Most solar lights share the same basic anatomy:
- Solar panel: converts sunlight into electricity (more direct sun = better charging).
- Rechargeable battery: stores energy for nighttime use.
- LEDs: efficient, long-lasting light source.
- Controller + sensor: handles dusk-to-dawn activation, motion detection, and modes.
The performance you get at night is mostly determined by three things: how much sunlight the panel actually receives, the battery capacity, and the efficiency of the LEDs and electronics. This is why two “similar” sets can behave wildly differently if one is placed under a leafy tree and the other gets full afternoon sun.
The smart shopper checklist for $19 solar lights
If you want budget lights that feel like a smart buy (instead of a “why is my yard blinking sadly?” moment), focus on these specs and details.
Brightness: choose lumens based on the job
Lumens measure visible light output. A common mistake is buying the brightest option for everything. For many spaces, you don’t need itand too much brightness can create glare or wash out landscaping.
- Pathway markers / edging: often best with a gentle glow.
- Steps and trip hazards: brighter than path markers, aimed downward or shielded.
- Security lighting: look for motion-activated lights with clearly stated higher brightness and a wide beam.
Pro tip: If a listing doesn’t clearly state lumens, look for real-world review photos taken at night (and don’t trust the ones that look like they were shot at noon).
Color temperature: warm usually wins outdoors
Most people prefer warm white outdoors (think cozy porch glow) rather than icy blue-white, especially for gardens and patios. Warmer tones also tend to feel less harsh and more welcoming. Cool white can make sense for visibility, but on a patio it can start to feel like you’re hosting a barbecue in a dentist’s office.
Weather resistance: look for IP ratings and sturdy materials
Outdoor gear should be built for rain, dust, sprinklers, and the occasional surprise thunderstorm that arrives like it has a personal grudge. Many listings mention IP ratings (Ingress Protection). In plain English: higher ratings generally mean better resistance to dust and water.
Also check the materials. Plastic can be totally fine if it’s thick and well-sealed, but thin plastic housings and flimsy stakes can fail fasterespecially in extreme heat, freezing temperatures, or wet soil.
Battery details: replaceable is a big plus
The battery is the heart of a solar light. Over time, rechargeable batteries can lose capacity. If a budget light lets you replace the battery (rather than forcing you to replace the entire unit), that’s a major long-term value win.
If you live in a colder climate, know that batteries can deliver less usable energy in low temperatures, which may reduce runtime. In winter, you may want lights with more efficient modes (dim-to-bright, motion-based activation) instead of constant high output.
Lighting modes: the best budget “feature” is smarter timing
You’ll often see modes like:
- Dusk-to-dawn: turns on automatically when it gets dark.
- Dim-to-bright: stays low, then boosts when motion is detected.
- Motion-only: best for security and battery savings.
- Multiple brightness settings: lets you trade brightness for runtime.
If you’re buying near the $19 range, mode control is often more important than chasing “max brightness.” Smart timing makes modest hardware feel premium.
Mounting and placement: stakes, screws, or separate panels
Budget solar lights often come as all-in-one units: panel on top, light underneath, stake in the ground. That’s super convenient, but it means the panel must sit where the light sits. If the spot you want is shaded (under shrubs, on a north-facing wall, under a porch roof), consider lights with separate solar panels connected by a cord. That design can dramatically improve reliability in tricky locations.
How many lights do you need? A simple layout formula
When people say solar lights “didn’t work,” sometimes they mean: “I bought two lights for a 40-foot walkway and expected an airport runway.” Here’s a practical way to plan:
For pathways
- Spacing: about 6–8 feet apart for a gentle guide-light effect.
- Example: a 32-foot path might use 4–6 lights (depending on curves and steps).
- Corners and transitions: add an extra light where the path turns or where surfaces change (gravel to steps, patio to lawn).
For steps and edges
- Prioritize top and bottom of stairs first.
- Place lights where they define the edge without shining into eyes.
For landscaping
- Use spotlights for one focal point per “zone” (tree, sculpture, feature plant).
- Layer with softer path lights for depth.
The goal isn’t to flood everything with light. It’s to create useful visibility and a pleasant nighttime look.
Installation that’s faster than microwaving a potato (almost)
Most solar lights install in minutes, but placement makes or breaks performance. Use these best practices:
Put the panel in real sunnot “technically outdoors” shade
A sunny spot means several hours of direct light, not “it’s bright over there.” If your yard is shaded, look for separate panels or choose lights designed for lower-light charging.
Angle matters more than you think
Solar panels perform best when they’re positioned to capture sunlight effectively. Even small changestilting toward the sun or moving away from shadecan improve nightly runtime.
Clean the panel occasionally
Dust, pollen, and grime reduce charging. A quick wipe with a soft cloth every few weeks (or after heavy pollen season) can keep performance steady.
Stabilize stakes in soft soil
If your ground is very soft, push the stake in carefully and consider packing soil around the base so the light stays upright. A leaning panel is a charging panel with dreams, not results.
What to expect from $19 lights (realistic, not rude)
Budget solar lights can be fantasticespecially for pathways and ambiance. But managing expectations helps you buy smarter:
- They may look brightest for the first few hours and then taper off.
- Cloudy days can reduce runtime because charging is lower.
- Ultra-cheap sets may use thinner plastic or less robust seals.
- “Waterproof” is not a magic spelllook for clear weather ratings and real-world reviews.
That said, many review sites and testers consistently find that well-chosen solar lights can be durable, attractive, and genuinely usefulespecially when you pick the right style for the right job and install them where they can charge properly.
When it’s worth paying more (and when $19 is perfect)
Think of the $19 tier as your “foundation layer.” It’s ideal for:
- marking a path
- adding ambiance to a patio
- highlighting small garden areas
- lighting steps and edges gently
Spending more can make sense when you need:
- serious brightness for security
- long runtime in winter or shaded yards
- smarter controls (app control, better motion detection, dimming schedules)
- premium materials (metal housings, better seals, replaceable components)
If you’re unsure, start with a small set around $19, test placement for a week, and then expand. Outdoor lighting works best when you build it in layerslike landscaping, but with fewer blisters.
500+ words of experience: what it’s actually like living with budget solar lights
People usually buy solar lights for one reason (“I need to see the steps!”), then discover the side benefits they didn’t expect (“Wait… my yard looks cute at night?”). Based on common homeowner patterns, here’s what the experience tends to look like once those $19-ish Amazon solar lights show up and you start placing them around your outdoor space.
The “why didn’t I do this sooner?” week
The first few nights can feel oddly satisfying. You’ll step outside and notice the walkway is visible without flipping on harsh porch lights. If you’ve got path lights, the yard looks more “finished,” like someone planned itrather than accidentally creating a lawn around a house. Many people also realize they don’t need the lights to be blinding; they just need them to show the edges. A gentle row of markers makes the difference between “stumbling and guessing” and “walking like a person who pays taxes.”
The “oh… placement matters” adjustment
Then comes the tiny reality check: one or two lights might be dimmer than expected. This is usually when you discover the panel is spending its day under a bush, near a fence shadow, or angled like it’s politely avoiding sunlight. The fix is often simplemove it two feet, rotate it slightly, or relocate that one “problem light” to a sunnier section of the yard. It’s surprisingly common for people to shuffle lights around like chess pieces for a few days until the layout clicks.
The “vibes upgrade” moment
Once the path is handled, many people get greedy (in the best way) and add a second lighting type. A small set of solar string lights on the patio can turn a basic outdoor table into a hangout zone. A couple spotlights aimed at a tree or planter adds depth so your yard doesn’t look flat at night. It’s like adding background music to a scene: you don’t realize what’s missing until you hear it, and then you can’t go back.
The seasonal reality: summer confidence, winter strategy
In long, bright summer days, solar lights tend to feel effortless. They charge easily, run longer, and you stop thinking about them. In winter (or rainy stretches), the experience becomes more “set expectations and choose the right mode.” People often switch lights to a lower brightness setting, rely more on motion-activated units for security, or accept that decorative lights may not stay bright for as many hours. It’s not failureit’s physics. The best long-term users treat winter as “efficient mode season,” the same way you treat your phone battery differently on a travel day.
The durability lessons you learn without meaning to
Budget solar lights can lastespecially if they’re well-sealed and positioned thoughtfullybut the real-world experience teaches you what matters. If stakes are thin, you learn to avoid forcing them into rocky soil. If panels get dusty, you learn a quick wipe makes a noticeable difference. If water collects in a low spot after a storm, you learn to place lights slightly higher or choose units with stronger weather protection for that area.
Overall, the lived experience of $19 solar lights is less about perfection and more about smart, flexible improvement. You’re not installing a museum-grade lighting systemyou’re giving your outdoor space a practical glow-up, one sunny spot at a time. And honestly, for the price of a couple pizzas, that’s a pretty good deal.
Conclusion
Outdoor solar lights starting around $19 on Amazon can be a legit upgradeespecially if you pick the right type for your goal and install them where they can actually charge. Use path lights for guidance, step lights for safety, spotlights for focal points, and string lights for instant atmosphere. Focus on lumens (when available), weather resistance, battery replaceability, and smart modes. Start small, test placement, then expand. Your future selfwalking outside at night without doing the “cautious shuffle”will be grateful.