Table of Contents >> Show >> Hide
- What Makes the Raspberry Pi Zero W Antenna So Interesting?
- The Trapezoid That Does the Talking
- Why Not Use a Regular Chip Antenna?
- How PCB Antennas Work in Small Devices
- What Antenna Analysis Reveals
- The Clever Part: Performance Without Extra Hardware
- Why the Antenna Shape Matters
- Lessons for Makers and Hardware Designers
- Should You Modify the Raspberry Pi Zero W Antenna?
- Why This Design Still Matters
- Real-World Experience: What the Pi Zero W Antenna Teaches in Projects
- Conclusion
The Raspberry Pi Zero W looks like the kind of board that should not be able to do much wireless magic. It is tiny, thin, inexpensive, and packed so tightly that every square millimeter feels like it already has a job. Yet along the bottom edge, between the mini HDMI and micro USB area, Raspberry Pi slipped in one of the board’s smartest engineering tricks: a compact PCB antenna that handles 2.4 GHz Wi-Fi and Bluetooth without needing a bulky external antenna, a ceramic chip antenna, or a dangling dongle doing its best impression of a tiny tail.
The title “Raspberry Pi W Antenna Analysis Reveals Clever Design” is not just tech-flavored clickbait. The antenna really is clever. It shows how thoughtful RF engineering can turn a small copper-free shape in a circuit board into a practical wireless radiator. For makers, hardware designers, IoT builders, and curious Raspberry Pi fans, the design is a great lesson: good engineering is not always about adding more parts. Sometimes it is about removing copper in exactly the right place.
What Makes the Raspberry Pi Zero W Antenna So Interesting?
The Raspberry Pi Zero W added wireless LAN and Bluetooth to the original Pi Zero form factor, giving makers a board that could join networks, talk to Bluetooth peripherals, and run headless IoT projects without sacrificing its famously small footprint. Official specifications list 802.11 b/g/n wireless LAN, Bluetooth, Bluetooth Low Energy, a 1 GHz single-core CPU, 512 MB RAM, mini HDMI, micro USB On-The-Go, and the familiar 40-pin GPIO footprint. That feature list sounds ordinary today, but fitting it into a board roughly the size of a stick of gum was not exactly a casual afternoon stroll through PCB-land.
The antenna is the star because it solves several problems at once. It saves board space, avoids a separate antenna component, keeps the bill of materials low, and preserves the clean shape that makes the Pi Zero W so useful in embedded projects. Instead of placing a traditional surface-mount chip antenna on the board, Raspberry Pi used a printed antenna structure integrated into the PCB itself. That means the board material, copper layers, ground plane, nearby connectors, and empty keepout area all become part of the wireless story.
The Trapezoid That Does the Talking
Look closely at a Raspberry Pi Zero W and you will see a small trapezoidal feature near the bottom edge. It does not scream “antenna” to beginners. It looks more like a tiny geometric doodle left behind by a PCB designer with a fondness for odd shapes. But that trapezoid is a resonant cavity antenna formed by carefully removing copper from the PCB layers.
In plain English, the antenna is not a separate metal stick. It is a shaped region of the circuit board designed to resonate at wireless frequencies. At 2.4 GHz, where Wi-Fi, Bluetooth, BLE, Zigbee, and many IoT devices operate, antennas are extremely sensitive to dimensions, nearby metal, board thickness, plastic cases, human hands, and even the way cables are routed around the board. The Pi Zero W antenna design works because it treats the entire board environment as part of the design challenge instead of pretending the antenna lives alone in a perfect little RF kingdom.
Why Not Use a Regular Chip Antenna?
Chip antennas are common in compact wireless products. They are small, easy to place, and available from many component manufacturers. But they are not magic beans. A chip antenna still needs a proper ground plane, matching network, keepout area, and careful tuning. Put it in the wrong location or crowd it with metal connectors, and performance can sink faster than a Wi-Fi signal behind three concrete walls.
The Raspberry Pi 3 used a surface-mount antenna component, but the Zero W presented a different challenge. The smaller board had less real estate, stricter cost pressure, and less room for layout gymnastics. A PCB antenna allowed Raspberry Pi to reduce component count while maintaining practical wireless performance. That decision fits the philosophy of the Pi Zero family: remove anything unnecessary, keep what matters, and make the result affordable enough that people will actually build projects with it instead of keeping it in a drawer labeled “too precious to solder.”
How PCB Antennas Work in Small Devices
A PCB antenna uses copper traces, slots, clearances, and the surrounding ground plane to radiate electromagnetic energy. The antenna’s geometry determines how it resonates, while the board layout shapes how efficiently energy leaves the board as radio waves. The ground plane is not just electrical background scenery. It is part of the antenna system.
This is why RF layout guides often talk about antenna keepout zones, controlled impedance traces, via placement, ground continuity, and matching components. A tiny 2.4 GHz antenna may look simple, but it behaves like a picky musical instrument. Change the case, move a connector, add a metal screw nearby, or run a noisy digital trace under the antenna, and the tuning can shift. In the Raspberry Pi Zero W, the antenna’s position near the edge of the board helps it radiate more effectively, because antennas generally dislike being buried in the middle of a copper jungle.
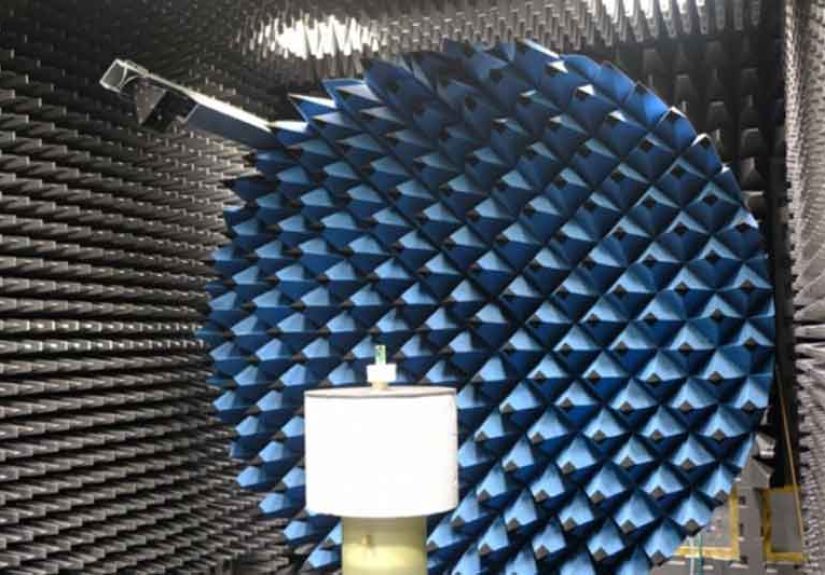
What Antenna Analysis Reveals
Independent antenna analysis of the Pi Zero W design has shown that the little trapezoidal structure performs surprisingly well for its size. Measurements of efficiency and radiation pattern suggest that while the antenna cannot defeat physics, it makes excellent use of the available space. At Wi-Fi frequencies, reported losses around a few decibels are respectable for a board this small. In practical terms, that means the antenna is not some decorative copper trick. It is a working RF solution that balances cost, size, and performance.
That balance matters. A full-size external Wi-Fi antenna can usually outperform a tiny onboard antenna, especially for range. But Raspberry Pi Zero W was never meant to be a long-range wireless base station wearing a tiny hat. It was designed for compact computing, portable electronics, home automation, cameras, robots, sensors, and educational projects. For those uses, the onboard antenna is a smart compromise: good enough to connect reliably in normal environments, small enough to disappear into the board, and inexpensive enough to keep the product accessible.
The Clever Part: Performance Without Extra Hardware
The elegance of the Raspberry Pi Zero W antenna design is that it turns a constraint into an advantage. The board needed wireless connectivity, but there was not much room. Adding a chip antenna would cost money and require layout space. Adding an external antenna connector would complicate manufacturing, certification, and user safety. Leaving wireless out would defeat the whole point of the “W.”
So the antenna became part of the PCB. That move reduces the number of parts, simplifies assembly, and keeps the board mechanically clean. It also makes the design more reproducible at scale, assuming the PCB stackup and layout are tightly controlled. In mass-produced hardware, fewer components often means fewer failure points and a cleaner supply chain. The best engineering decisions sometimes look boring on a spreadsheet and brilliant under a microscope.
Why the Antenna Shape Matters
The trapezoidal shape is not random. Antenna geometry controls resonance, impedance, bandwidth, and radiation behavior. The Pi Zero W antenna has to operate around the 2.4 GHz band while living near connectors, traces, and board edges. A simple straight trace would not automatically solve those challenges. The antenna shape, ground cutout, feed path, and board structure work together to produce a usable match to the wireless radio.
Think of it like designing a tiny acoustic chamber, except instead of sound waves bouncing through air, electromagnetic fields are forming around copper, fiberglass, and empty space. The dimensions are small, but the tolerances are serious. At 2.4 GHz, a quarter wavelength in free space is roughly 31 mm, and the effective wavelength changes when fields interact with PCB material. That is why compact antennas use creative shapes: meanders, inverted-F structures, slots, cavities, and other designs that fold useful electrical length into limited physical space.
Lessons for Makers and Hardware Designers
The Raspberry Pi Zero W antenna is a useful reminder that RF design is not just “draw a squiggle and hope.” If you are designing your own IoT board, copying an antenna shape without copying the board conditions can lead to disappointing results. The ground plane size, board thickness, dielectric material, plastic enclosure, battery placement, nearby metal, and cable routing all affect performance.
For makers using the Pi Zero W, the lesson is more practical: do not cover the antenna area with metal tape, place it directly against a metal plate, trap it inside a conductive enclosure, or bury it behind a nest of cables and then blame the Wi-Fi like it personally betrayed you. If your project needs better range, pay attention to board orientation, case materials, router placement, and interference from USB devices, motors, batteries, and power supplies.
Good Practices for Better Pi Zero W Wireless Performance
Keep the antenna end of the board away from metal surfaces whenever possible. Plastic, wood, acrylic, and 3D-printed cases are generally friendlier to 2.4 GHz signals than aluminum boxes. If you mount the Pi Zero W inside an enclosure, give the antenna region some breathing room. If your project includes motors, relays, LED strips, or switching regulators, route noisy power wiring away from the antenna area and use proper grounding and filtering.
Also remember that Wi-Fi performance is a system-level issue. A weak router, crowded 2.4 GHz channel, thick walls, poor power supply, or noisy USB peripheral can create problems that have nothing to do with the antenna itself. Before modifying hardware, test simple changes: move the device, rotate it, try another channel, check signal strength, update software, and compare performance in a different room. In RF work, “move it three inches to the left” is sometimes a legitimate engineering procedure, which is both funny and deeply humbling.
Should You Modify the Raspberry Pi Zero W Antenna?
Some hardware hackers have experimented with external antenna modifications by adding tiny coax connectors or rerouting the RF path. These modifications can be educational, but they are not beginner-friendly and may affect regulatory compliance. Once you alter the antenna system, you are no longer using the board exactly as certified. You can also damage the board, detune the RF path, or make performance worse despite the larger antenna.
For most users, the best answer is simple: leave the antenna alone. If your project truly needs longer range or a directional link, consider using a different Raspberry Pi model, a USB Wi-Fi adapter with an approved external antenna, Ethernet where available, or a purpose-built wireless module. The Pi Zero W antenna is clever because it solves the everyday problem elegantly, not because it replaces every antenna under the sun.
Why This Design Still Matters
The Raspberry Pi Zero W is not the newest board in the Raspberry Pi lineup, but its antenna remains a great case study. It teaches that low-cost hardware can still contain sophisticated design choices. It also shows why small devices are not automatically simple devices. The smaller the board, the more every decision matters.
Modern IoT products face the same pressure: smaller enclosures, lower cost, better battery life, cleaner assembly, and reliable wireless connectivity. The Pi Zero W antenna demonstrates a valuable design principle: the best solution is often the one that uses the existing structure more intelligently. Instead of adding a part, the designers made the PCB itself do more work. That is the kind of engineering that deserves a tiny round of applause, preferably not too close to the antenna.
Real-World Experience: What the Pi Zero W Antenna Teaches in Projects
Working with Raspberry Pi Zero W boards in real projects quickly teaches you that antenna performance is not just a specification on a product page. It is something you experience when a camera stream freezes, a sensor node drops offline, or a robot suddenly decides the router has become a mythological creature. The onboard antenna is capable, but like any compact 2.4 GHz antenna, it rewards thoughtful placement.
In a simple home automation project, for example, a Pi Zero W mounted inside a plastic enclosure usually connects without drama. Put that same board behind a metal appliance, inside a cabinet full of wires, or near a noisy power supply, and the signal may weaken. The funny part is that nothing about the software changed. The code did not become lazy. The antenna simply lost a friendlier RF environment.
One practical experience is using the Pi Zero W as a headless network device. During setup, it may sit openly on a desk and connect perfectly. After installation, it gets tucked into a case, zip-tied behind a monitor, powered from a questionable adapter, and surrounded by HDMI, USB, and power cables. Suddenly SSH feels sluggish. The lesson is obvious after the fact: the antenna location deserves planning just like the camera angle, cable strain relief, and power budget.
For camera projects, orientation can make a noticeable difference. A Pi Zero W used with a camera module in a small enclosure may perform better when the antenna edge faces outward rather than toward a wall, battery pack, or metal bracket. Even a small rearrangement can improve stability. This is why prototype testing should happen in the final enclosure, not only on a clean workbench where every board behaves like it just came back from a spa retreat.
Another useful experience involves 3D-printed cases. PLA and PETG cases are generally friendly compared with metal, but case geometry still matters. Thick walls, tight cable bends, and nearby fasteners can influence performance. Leaving a small air gap around the antenna end of the board is a simple design habit that can prevent future troubleshooting. When designing a case, mark the antenna area and avoid placing screws, metal inserts, magnets, or dense wiring there.
Power quality also matters more than many beginners expect. A weak or noisy power supply can make wireless issues look mysterious. The Pi Zero W may boot and run, yet still behave poorly under load if voltage drops or electrical noise increases. When debugging connectivity, use a reliable power source before blaming the antenna. In maker projects, the villain is often not the glamorous RF physics; sometimes it is the bargain-bin cable with the electrical personality of wet spaghetti.
The biggest lesson from hands-on use is that the Pi Zero W antenna is a well-designed compromise. It is not a miracle device, and it does not need to be. It gives a tiny computer practical wireless capability without extra hardware. When users respect its limits, keep the antenna area clear, use sensible enclosures, and test placement early, the design performs impressively well. That is the true charm of the Raspberry Pi Zero W: it makes advanced engineering feel ordinary enough that beginners can build with it, while still giving experienced designers something to admire.
Conclusion
The Raspberry Pi W antenna analysis reveals a design that is small, smart, and surprisingly effective. By using a PCB-based resonant cavity antenna, Raspberry Pi avoided extra antenna hardware while keeping the Zero W compact, affordable, and project-friendly. The trapezoidal antenna may look simple, but it represents a careful balance of RF performance, cost control, manufacturability, and real-world usability.
For makers, the takeaway is clear: treat the antenna area with respect. Keep it away from metal, avoid unnecessary modifications, test it inside the final enclosure, and remember that wireless performance depends on the whole environment. For designers, the Pi Zero W is a mini masterclass in doing more with less. It proves that clever engineering does not always arrive as a flashy new component. Sometimes it is etched quietly into the board, waiting for someone curious enough to notice.
Note: This original article synthesizes publicly available Raspberry Pi documentation, antenna engineering references, and real-world maker experience. It does not include source links in the body so it can be published cleanly on the web.