
Table of Contents >> Show >> Hide
- What “RW” usually signals (and why people search it)
- Why a wooden toilet seat and cover is still a great idea
- Fit first: how to make sure your RW wooden toilet seat and cover actually matches your toilet
- Hinges and hardware: where “premium” actually lives
- Materials breakdown: solid hardwood vs. molded wood vs. plastic
- Installation: a DIY upgrade you can do in under 30 minutes
- Cleaning and care: keep the wood beautiful (and the bathroom not terrifying)
- Buying checklist: how to choose an RW wooden toilet seat and cover you’ll actually love
- Real-life experiences: 500+ words of what it’s like to live with an RW wooden toilet seat and cover
- Conclusion
There are two kinds of bathroom upgrades: the “we’ll do it someday” kind, and the kind you actually finish
before your coffee gets cold. Swapping in an RW wooden toilet seat and cover belongs to the
second categoryfast, surprisingly satisfying, and oddly powerful. (Seriously: you can repaint a vanity and
still lose the room to a flimsy, wobbly seat. Bathrooms are petty like that.)
In this guide, we’ll break down what “RW” typically signals in product listings, why wood is still a smart
choice in a world full of plastic, how to measure so you don’t buy “almost right,” and how to keep a wooden
finish looking fresh without turning your lid into a science fair experiment.
What “RW” usually signals (and why people search it)
Depending on where you’re shopping, “RW” can show up as a shorthand label for a specific style of
wooden seatoften a more design-forward, “real wood” look with upgraded hardware. In design catalogs, an
RW-style seat is commonly described as solid hardwood (not thin veneer), paired with
soft-close metal hinges and a finish that reads intentionalthink ebonized/black wood, warm oak,
or walnut tones rather than bright builder-grade white.
The key takeaway for U.S. buyers is this: regardless of the exact listing you’re looking at, “RW wooden toilet
seat and cover” usually implies a wood seat + lid with a premium vibeheavier feel, warmer touch, and
sturdier construction than the lowest-cost options.
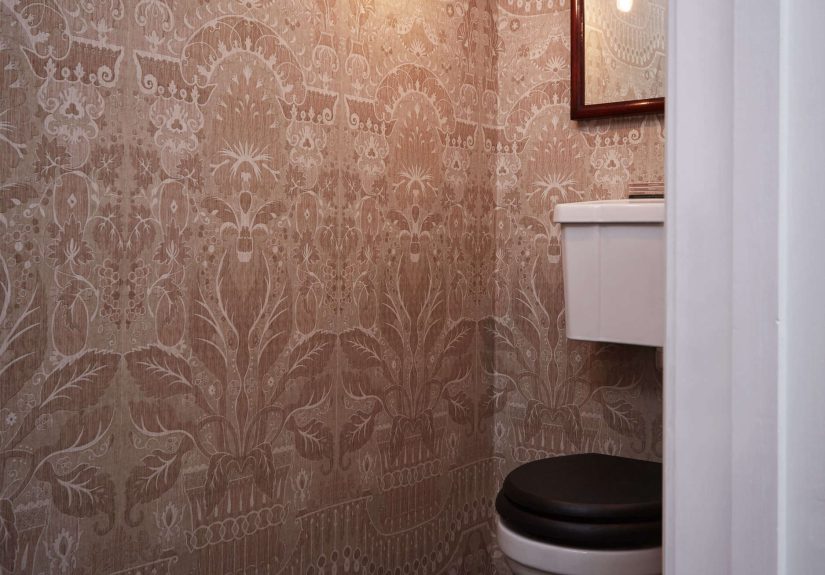
Why a wooden toilet seat and cover is still a great idea
1) It feels warmer (literally) and more solid
Wood (and molded wood) tends to feel warmer than plastic, especially in cooler seasons. It also has a
satisfying weightlike the difference between a “toy” remote and a “nice” remote. The lid closes with authority
instead of a plastic clatter that echoes through the house at 2 a.m.
2) It looks like décor, not just plumbing
A wooden seat can visually connect the toilet to surrounding materialswood vanities, shelves, picture frames,
or even black hardware. If your bathroom has any style at all (farmhouse, modern, traditional, moody, coastal),
wood can help the toilet stop looking like an isolated white appliance that wandered in by accident.
3) There are trade-offs (because bathrooms are humid)
Wood and moisture have a complicated relationship. Most quality wooden seats are sealed to resist water, but
constant soaking, harsh cleaners, and standing moisture around hinges can wear finishes faster over time. The
good news: the care is simplemostly about using the right cleaner and drying when needed.
Fit first: how to make sure your RW wooden toilet seat and cover actually matches your toilet
Toilet seats are not mysterious, but they are picky. Before you fall in love with a finish (hello, ebonized
black), do two minutes of measuring so you don’t end up returning a box the size of a small canoe.
Step 1: Identify the bowl shape (round vs. elongated)
In most North American bathrooms, you’re choosing between two shapes:
round or elongated. The fastest way to confirm is measuring from the
center between the mounting bolt holes to the front rim of the bowl.
- Round bowls are typically around 16.5 inches long.
- Elongated bowls are typically around 18–18.5 inches long.
If your measurement lands clearly in one camp, buy that shape. If it’s close, follow the toilet manufacturer’s
specs (or bring a tape measure and accept that adulthood is 40% measuring things).
Step 2: Confirm bolt spacing
Next, measure the distance between the two mounting holes at the back of the toilet. The most common spacing in
the U.S. is 5.5 inches. Many seats are designed around that standard, and many “adjustable”
hinge systems give a little wiggle roombut it’s best to confirm.
Step 3: Check hinge adjustability and bumper placement
“Fits most toilets” often means the hinges can slide or adjust to align the seat properly on the bowl. That’s
especially helpful if your bowl is slightly nonstandard or the holes sit in an odd spot. Also look for:
- Sturdy bumpers underneath the ring (they prevent shifting and protect the finish).
- Hardware that stays tight (quality seats won’t constantly loosen).
- A cover (lid) that aligns and doesn’t overhang or feel off-center.
Hinges and hardware: where “premium” actually lives
With a wooden seat, the wood is the headlinebut the hinges are the whole plot. Great hardware can make a seat
feel quiet, stable, and “expensive.” Cheap hardware can turn it into a daily annoyance.
Soft-close hinges (quiet-close, slow-close)
Soft-close hinges lower the lid gently instead of slamming, which helps reduce noise and can protect little
fingers from getting pinched. If you’ve ever heard a toilet seat slam in the middle of the night, you already
know this is not a luxuryit’s diplomacy.
Quick-release / lift-off hinges (for cleaning)
A quick-release hinge lets you remove the seat for deep cleaning around the hinge areawhere grime tries to set
up a long-term lease. Some systems lift straight off; others use buttons or latch mechanisms. If easy cleaning is
high on your list, quick-release is one of the best “why didn’t I do this sooner” features.
Finish matching (chrome, brushed nickel, matte black)
Many RW-style wooden seats are offered with metal hinge finishes to match common bathroom hardware. If your
faucets and towel bars are brushed nickel, matching hinges can make the whole bathroom feel coordinatedeven if
you still have a mystery drawer full of expired bandages.
Materials breakdown: solid hardwood vs. molded wood vs. plastic
Solid hardwood (the “RW vibe”)
Solid hardwood seats are typically the most design-forward. They can be stained, ebonized, or finished in
different tones, and they often feel the most substantial. Look for a smooth, sealed finish (so moisture doesn’t
soak in) and quality hinges that can handle the extra weight.
Molded wood (often wood flour + resin)
Molded wood seats are common in U.S. big-box retailers. They give a wood-like weight and feel, typically at a
lower price point than solid hardwood. They’re often coated with a durable finish and can be a sweet spot for
buyers who want “wood feel” without “boutique price.”
Plastic (low-maintenance champ)
Plastic is lightweight, stain-resistant, and easy to clean. It can be great for kids’ bathrooms, rentals, or
anyone who wants “functional first.” But if your goal is warmth, style, and a more furniture-like feel, wood is
usually the better match.
Installation: a DIY upgrade you can do in under 30 minutes
Replacing a toilet seat is one of the most beginner-friendly home tasks out there. The only real danger is
dropping a wing nut and briefly questioning every life choice that led you to this moment.
Tools you may need
- Flathead screwdriver (or Phillips, depending on your hardware)
- Adjustable wrench or pliers (sometimes)
- Rubber gloves and a cleaning cloth (recommendedlet’s keep it civilized)
Step-by-step
-
Clean the area first. Wipe down the toilet around the hinge area so you’re not working in
“mystery moisture.” - Pop open the hinge caps (if your current seat has them) to access the bolts.
-
Unscrew the bolts from the top while holding the nuts underneath (some toilets have
top-tightening systems that don’t require you to hold the nut). -
Lift off the old seat and clean the porcelain area underneath. This is the one time you’ll
see what’s been hiding theretake advantage. - Position your new RW wooden toilet seat and cover so the bolts align with the mounting holes.
-
Install the new hardware (top-mount or bottom-mount depending on your kit). Tighten until the
seat feels stablesnug, not “I’m trying to crack porcelain.” - Adjust alignment so the seat is centered and the lid closes evenly.
-
Test the close. Soft-close hinges should lower gently. Quick-release seats should remove and
reinstall smoothly.
Pro tip: After a day or two of normal use, re-check tightness. Some hardware settles slightly once it’s been
used.
Cleaning and care: keep the wood beautiful (and the bathroom not terrifying)
A wooden seat doesn’t need babyingbut it does appreciate a smarter cleaning routine than “blast it with harsh
chemicals and hope for the best.”
Everyday cleaning
- Use a soft cloth dampened with mild soap and water.
- Wipe the top and underside of the ring and lid (yes, undersidegerms don’t respect your schedule).
- Dry it with a clean towel, especially around seams and hinge areas.
Disinfecting without wrecking the finish
Many wooden seats are sealed with durable finishes, but harsh chemicals can still dull or damage surfaces over
time. As a general rule:
- Avoid abrasive powders and scratchy pads.
- Be cautious with strong disinfectantsespecially if you don’t know the exact finish.
- Never mix cleaners (for example, vinegar with bleach or ammonia). That can create dangerous fumes.
If someone in the house is sick and you want a stronger routine, choose a cleaner that’s compatible with sealed
wood finishes, use it as directed, and don’t let liquids sit on the wood. When in doubt, follow the seat
manufacturer’s care instructions.
Moisture management (the secret to long life)
Wood lasts longer when it isn’t constantly wet. A few habits go a long way:
- Run the bathroom fan during and after showers.
- Wipe condensation off the lid if your bathroom stays humid.
- Keep hinge areas cleanbuildup holds moisture against the finish.
Common issues and quick fixes
-
Seat shifting: Tighten mounting bolts and check bumpers underneath. If your hinges are
adjustable, re-center the seat before re-tightening. -
Soft-close not closing slowly anymore: Some hinges wear over time. Check if the hinge
mechanism can be tightened or replaced. -
Dull finish: Switch to gentler cleaning methods and avoid abrasive tools. If the finish is
truly worn, consider replacing the seat (bathrooms are harsh workplaces).
Buying checklist: how to choose an RW wooden toilet seat and cover you’ll actually love
Here’s a no-drama checklist for shopping:
- Correct shape: round or elongated (measure first).
- Bolt spacing compatibility: typically 5.5 inches in the U.S.
- Sealed finish: look for coated/finished wood that resists moisture.
- Soft-close hinges: quiet, gentle closing.
- Quick-release option: easier deep cleaning around hinges.
- Metal hinge finish: match your bathroom hardware (chrome, brushed nickel, matte black).
- Stable bumpers + quality hardware: less wobble, less re-tightening.
- Style choice: oak, walnut, ebonized black, paintedpick what fits your space.
If you’re aiming for a more elevated look, prioritize hinges and finish quality over gimmicks. A seat that
aligns perfectly, closes quietly, and cleans easily will feel like a bigger upgrade than a dozen features you
never use.
Real-life experiences: 500+ words of what it’s like to live with an RW wooden toilet seat and cover
The first “experience” most people have with a wooden toilet seat is the soundor rather, the lack of
one. In a typical household, the old seat announces itself like a cymbal crash: lid up, lid down, everybody in
the house now knows exactly what you’re doing. After switching to a soft-close RW wooden toilet seat and cover,
the bathroom gets noticeably quieter. It’s a small change, but it’s the kind of small change that makes your
home feel calmerlike swapping a squeaky door hinge for one that glides.
Then there’s the “wait…this feels nicer” moment. Wood has a different temperature and texture than plastic. In
cooler months, it doesn’t deliver that instant cold shock, and it feels sturdier when you sit downless flex,
less wobble, more confidence. People often describe it as the bathroom equivalent of upgrading from a basic
folding chair to an actual dining chair. You don’t realize how much the old one annoyed you until it’s gone.
Style-wise, a wooden seat can change the whole vibe of the room faster than you’d expect. Picture a small
powder room with a black-framed mirror, brass faucet, and a little wooden shelf for hand soap and a candle.
A white plastic seat can look slightly out of place in that setuplike you dressed up and forgot to change your
shoes. An ebonized or warm-oak RW wooden toilet seat and cover makes the toilet look intentional, like it
belongs in the design instead of merely occupying the space. Guests might not say, “Wow, gorgeous toilet seat,”
but they do tend to say, “This bathroom is cute,” which is basically the same thing (just more socially normal).
Cleaning is where real life sets the rules. In week one, many homeowners go a little too hardusing whatever
cleaner is closest and scrubbing like they’re trying to erase history. Then they notice the finish looks a bit
dull or they see faint streaking. The lesson comes quickly: gentle soap, a soft cloth, and quick drying works
better for sealed wood than harsh chemicals and aggressive scrubbing. After a couple of cleanings, the routine
becomes automaticwipe, rinse cloth, wipe again, dry. It’s no more time than cleaning a plastic seat, it’s just
less “industrial.”
The hinge area becomes the unexpected hero. If your RW wooden toilet seat and cover has a quick-release
function, you may find yourself removing it the first time out of curiositythen continuing to do it because it
makes cleaning around the bolts so much easier. That hinge zone is where dust, hair, and cleaner residue like to
gather. Being able to lift the seat off and wipe everything down in one pass is one of those quality-of-life
upgrades that feels overpowered for how simple it is.
Over a few months, people also notice practical perks: fewer late-night “seat slam” incidents, less loosening
if the hardware is good, and a general feeling that the bathroom is more put-togethereven if nothing else has
changed. It’s also a surprisingly nice “reset” after a mini remodel. If you’ve just painted, swapped hardware,
or upgraded towels, a wood seat can be the finishing touch that makes the whole space feel cohesive.
The most honest long-term experience, though, is that wood rewards reasonable care. If the bathroom is extremely
humid and the seat is constantly left wet, it will show wear sooner. But with basic ventilation and a gentle
cleaning routine, a well-finished wooden seat stays handsome for a long time. In other words: it won’t ask you
to become a bathroom butler. It just wants you to stop attacking it with a bleach volcano.
Conclusion
An RW wooden toilet seat and cover is one of those upgrades that looks minor on paper and feels
major in daily life. Measure for the right shape, prioritize quality hinges (soft-close and quick-release if you
can), and keep the finish happy with gentle cleaning and sensible moisture control. Do that, and you’ll get a
warmer, quieter, more stylish bathroomwithout tearing out a single tile.


