
Table of Contents >> Show >> Hide
- What the “Myles Henry Liquor Bar” Look Really Is
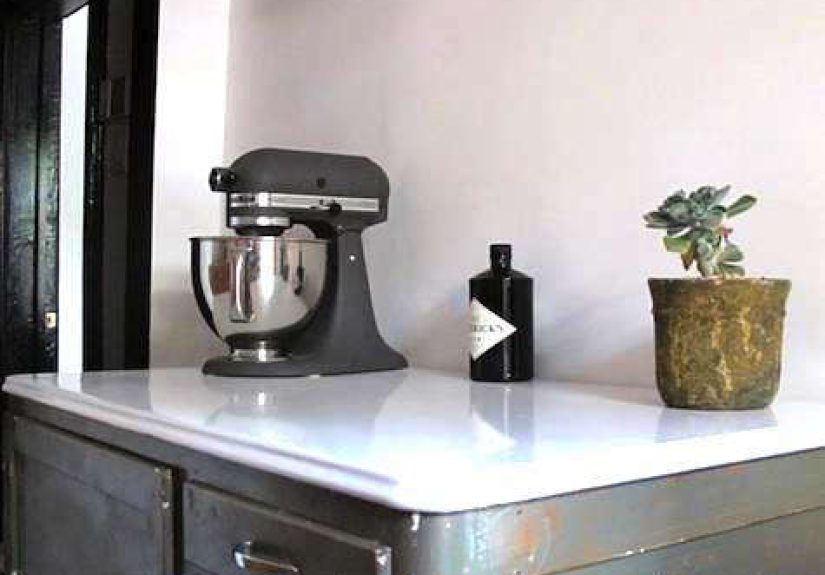
- The Design DNA: Clean/Minimal + Industrial/Rustic
- The Anchor Piece: One Vintage Cabinet That Does Triple Duty
- Build the Bar in 6 Layers (So It Looks Designed, Not Dumped)
- The Toolkit: What to Buy Once and Use Forever
- Glassware: The Highball Is the MVP
- Lighting and Mood: “After Hours” Without Turning Your Kitchen Into a Cave
- The Signature Drink: The “Myles Henry Cocktail” Template
- Styling Rules That Make It Look Curated (Not Cluttered)
- Common Mistakes (and How to Fix Them Fast)
- Quick “Steal This Look” Checklist
- 500 More Words: The Experience of Living With a “Myles Henry” Liquor Bar
- Conclusion
Some people have a home bar. Myles Henry had a liquor barwhich sounds like a nightclub, but was actually a smart little cocktail station carved out of a Brooklyn galley kitchen. The genius is the restraint: it’s not a “theme.” It’s not a “tiki corner.” It’s not a shrine to novelty skull shot glasses you got on spring break and regret every time you dust.
Instead, it’s the design equivalent of a perfectly made drink: clean lines, a little grit, zero chaos, and just enough personality to make guests say, “Wait… can you show me how you set this up?” (Translation: you’ve officially become the cool friend with the functional apartment.)
In this guide, we’ll break down the Myles Henry Liquor Bar lookwhat it is, why it works, and how to recreate it without needing a spare room, a trust fund, or a bartender named Luca who hand-carves your ice. We’ll also walk through tools, layout, styling rules, and the signature cocktail template that makes the whole setup feel like it has a point beyond “owning objects.”
What the “Myles Henry Liquor Bar” Look Really Is
The original concept is a compact cocktail setup annexed from a corner of a small kitchenbuilt around one hard-working vintage cabinet and stocked with a minimal, industrial-leaning toolkit: shaker, glassware, and a short list of ingredients that actually get used. It’s “urban cocktail station” energy: tight footprint, high function, and styled like a design vignette instead of a frat-house supply closet.
The vibe is best described as clean/minimal meets industrial/rustic. Think: stainless steel + glass + weathered wood. Practical, but pretty. If your bar cart has ever looked like it lost a fight with a recycling bin, this is your redemption arc.
The Design DNA: Clean/Minimal + Industrial/Rustic
1) The palette stays calm
Neutral materials do the heavy lifting: metal tools, clear glass, and a wood cabinet with some age. You don’t need loud color when the texture mix is doing the talking. This keeps the setup feeling intentional rather than decorative clutter.
2) The “industrial” is the hardware, not the whole mood
Industrial style gets misunderstood as “everything must look like a factory.” Here, it’s simpler: polished or brushed steel, utilitarian forms, no unnecessary ornament. Your shaker and jigger can be the industrial notes; your cabinet brings the rustic warmth so it doesn’t feel sterile.
3) The rustic element has a job
A vintage cabinet isn’t just cuteit’s storage, counter space, and display all in one. That’s the real flex: the rustic piece earns its place by being the anchor, not an accessory.
The Anchor Piece: One Vintage Cabinet That Does Triple Duty
The hallmark of this look is a vintage bread-making cabinet repurposed as countertop and storage. That one sentence contains basically the whole strategy: pick one character piece, then keep everything else disciplined and useful.
What to look for if you’re thrifting:
- Depth: shallow enough for a tight kitchen, deep enough to hold bottles and tools without playing Jenga.
- A real working surface: wood or butcher-block vibe that can handle citrus, condensation, and the occasional “oops.”
- Closed storage + open storage: doors/drawers for visual calm, plus a shelf or top area for the “pretty” items.
- Patina, not fragility: worn is good; wobbly is not. If it sways when you breathe, keep walking.
No vintage cabinet in your area? You can still hit the same effect with a slim kitchen cart, a narrow console table, or wall-mounted shelving. The non-negotiable is vertical organization: tools and bottles should have a home, not a pile.
Build the Bar in 6 Layers (So It Looks Designed, Not Dumped)
Layer 1: The zone
Pick a single corner and commit. Small spaces thrive on boundaries. A bar “zone” can be as simple as a cabinet top plus a tray that signals, “This is where the good decisions happen.”
Layer 2: The surface
You need a stable place to build drinkslime juice, muddling, measuring, the whole routine. If you can’t comfortably set down a cutting board and a glass at the same time, you’ll resent the setup and it will become an expensive plant stand.
Layer 3: The tools (minimal, not miserable)
The minimum viable home bar is not huge. A reliable shaker, a strainer, and a bar spoon can carry you far. Add a jigger for consistency, and suddenly your drinks taste like you meant them to. (Because you did.)
Layer 4: The glassware (one workhorse first)
Start with a solid highball glass. It’s the utility player: perfect for tall, fizzy drinks and easy builds. Add a second style later (coupe or rocks glass), but earn it with usage.
Layer 5: The bottles and mixers (curate like a tiny menu)
The Myles Henry setup feels modern because it doesn’t scream “I own every spirit known to mankind.” It reads like a short cocktail list: a favorite gin, a quality ginger beer, fresh citrus, and a couple of accents.
Layer 6: The garnish station (small, fresh, visible)
A little cutting board, a paring knife, and a bowl for limes. That’s it. Garnish is where your bar becomes hospitality instead of “look at my stuff.”
The Toolkit: What to Buy Once and Use Forever
Great bar tools are like great jeans: they should fit your hands, survive real life, and look better as they become “yours.” Here’s what matters most.
Shaker: Boston vs. cobbler (and why both are fine)
Boston-style shakers (two tins) are a favorite for durability and speed; cobbler shakers (three-piece with a built-in strainer) are friendlier for beginners. Choose the one you’ll actually use. If you dread sealing a Boston shaker, you’ll stop making drinks and start ordering delivery cocktails like it’s a coping mechanism.
Jigger: consistency is the whole point
Measuring is not “fussy.” It’s how you avoid making a drink that tastes like lime-scented regret. A small measuring cup-style jigger is especially easy for weeknights when you want “nice,” not “ceremonial.”
Strainer: the unsung hero
A Hawthorne strainer plus an optional fine-mesh strainer gives you clean pours and keeps mint bits from freeloading in your teeth all night.
Muddler, bar spoon, and a sharp little knife
If your signature drink uses mint and ginger, you’ll want a muddler. Add a bar spoon for stirring and layering, and a paring knife or small utility knife for citrus and ginger prep. Bonus: your kitchen will quietly improve.
Glassware: The Highball Is the MVP
The original look highlights a classic highball glassclean, tall, and unfussy. Highballs suit drinks built with ice and topped with soda or ginger beer, which is exactly the kind of cocktail you’ll make when you want something refreshing without turning your kitchen into a chemistry lab.
Minimal glass plan that still feels “host-ready”:
- Highballs (start here)
- Rocks glasses (second purchase; your “brown spirit” friend will thank you)
- One “nice” option (a coupe or Nick & Nora) if you actually serve up-style drinks
Lighting and Mood: “After Hours” Without Turning Your Kitchen Into a Cave
The best home bars feel a little theatrical. You don’t need a spotlight; you need low, warm light that makes steel gleam and glass sparkle. A small lamp, a cordless accent light, or even candlelight can give your bar zone that “swanky corner” vibeespecially when the rest of the kitchen lighting is bright and practical.
Pro move: keep the light source near the bottles and tools. It draws the eye and makes the setup feel intentional, like it was designedbecause it was.
The Signature Drink: The “Myles Henry Cocktail” Template
The drink at the center of the original setup is basically a fresh, minty, gingery gin highball: bright lime, muddled mint, a kick of ginger, gin, ice, and ginger beer on top. It’s in the same family as a Gin-Gin Mulerefreshing, aromatic, and dangerously easy to drink.
The template (for one drink)
- Fresh lime juice
- Mint leaves (about a small handful)
- Fresh ginger (a couple small pieces)
- Gin
- Ice
- Ginger beer to top
- Lime wedge to garnish
How to make it taste “bar good,” not “I tried”
- Muddle gently: press mint to release aroma, don’t pulverize it into bitterness.
- Use plenty of ice: tall drinks want cold, not watery. More ice melts slower.
- Taste your ginger beer: sweetness varies wildly. Adjust lime (or add a tiny bit of simple syrup) to balance.
- Choose a gin you like neat: if you don’t enjoy the base spirit, you’re just decorating a problem.
Easy variations that keep the same “Myles” energy
- Less sweet: add more lime, choose a drier ginger beer, or cut with a splash of soda water.
- More spicy: grate a little ginger instead of using chunks, or add a thin ginger slice as garnish.
- No-alcohol version: muddle mint + ginger + lime, top with ginger beer and a little soda. Still looks and feels like a “real” drink.
Styling Rules That Make It Look Curated (Not Cluttered)
A liquor bar in a small kitchen has one enemy: visual noise. Here are the styling moves that keep it polished.
Rule 1: Use a tray to contain the chaos
A tray is basically punctuation. It says, “Everything inside this boundary is intentional.” Without a tray, bottles and tools look like they wandered in and never left.
Rule 2: Ingredients can be decorif they’re fresh and few
Limes in a small bowl. Mint in a glass of water. Ginger in a tiny dish. That’s not “props.” That’s an edible color palette.
Rule 3: Balance height and negative space
A tall bottle next to a shorter one, plus a low glass and a horizontal tool (like a bar spoon) creates a calm composition. Leave breathing room. Your bar should look like it can exhale.
Rule 4: Display only the “daily drivers”
If you use it weekly, it can live out. If you use it twice a year, it goes in a drawer. This is how minimalism stays livable instead of performative.
Common Mistakes (and How to Fix Them Fast)
- Mistake: Too many bottles. Fix: Pick one base spirit, one “supporting” spirit, and two mixers. Rotate seasonally.
- Mistake: Tools everywhere. Fix: One crock or small container for bar spoon + muddler; everything else stored.
- Mistake: Sticky surfaces. Fix: Keep a small towel or bar rag at the station; wipe after every round.
- Mistake: The bar blocks your kitchen workflow. Fix: Move it to a corner or use a narrow cart; the bar must not create daily friction.
Quick “Steal This Look” Checklist
- A compact cabinet/cart with a real work surface
- Tray to visually “frame” the bar zone
- Shaker + strainer + jigger + bar spoon
- Highball glasses (start with 4–6)
- Small cutting board + paring knife
- One great gin, ginger beer, fresh limes, mint, ginger
- A small warm light source for evening vibe
500 More Words: The Experience of Living With a “Myles Henry” Liquor Bar
The underrated magic of a tiny liquor bar isn’t the gearit’s the rhythm it creates. In a small apartment (or any home where the kitchen is also the dining room, the office, and occasionally the emotional support animal), a dedicated cocktail corner becomes a miniature ritual space. You’re not “making a drink.” You’re clocking out.
Picture a Thursday night when your brain feels like it has seventeen tabs open, and at least three of them are playing audio. You rinse a highball glass and drop in ice that clinks like a tiny applause track. You cut a limenot because you’re fancy, but because the scent alone makes the room feel cleaner. Mint leaves hit the board and immediately smell like “we’re doing better now.” You muddle gently, and the oils wake up. It’s a small thing, but the moment has texture. A beginning, a middle, andimportantlyan end.
Then there’s the social effect. People gravitate toward a well-styled bar setup the way they gravitate toward a kitchen island: it’s a gathering point with a job. Friends show up and instantly understand where to stand, what to admire, and what to ask about. Someone will always pick up the shaker like it’s a prop in a movie and say, “Okay, bartender,” and you’ll pretend to roll your eyes while secretly enjoying your new title. (You have been promoted. There was no meeting. Congratulations.)
A Myles-style liquor bar also changes what you buy. Instead of hoarding random bottles that felt like a good idea in the store, you start thinking in “house drinks.” You keep one gin you love, one mixer that’s always reliable, and fresh ingredients that pull double-duty in the kitchen. Your setup starts to feel like a tiny menu, which is exactly why it stays tidy: it has boundaries. And boundaries, in design and in life, are oddly soothing.
There’s also the aesthetic payoff, which is real. Stainless tools catch the light. Glassware looks crisp. The worn wood cabinet keeps it grounded so it doesn’t feel like a showroom. In the evening, a warm lamp turns the corner into its own little scenesomething you notice when you walk by, even when you’re not using it. It’s functional decor, the kind that makes your space feel cared for.
And finally, the best part: this look makes “hosting” feel doable. Not a production. Not a performance. Just a couple of people, a bright drink, a clean corner, and a night that feels slightly more intentional than it did an hour ago. The liquor bar isn’t there to impress anyone. It’s there to make the everyday feel a little more like a moment worth keeping.
Conclusion
Stealing the Myles Henry Liquor Bar look isn’t about copying a shopping listit’s about copying a philosophy: small footprint, strong anchor piece, minimal tools, and ingredients that actually get used. Keep it clean, keep it a little industrial, add one rustic note for warmth, and let the setup feel like a deliberate corner of your home rather than a storage problem you’ve styled with hope.
Start with the cabinet (or cart), add the core tools, commit to one signature highball, and build from there. If you do it right, your kitchen gains a bar, your bar gains a vibe, and your vibe gains… suspiciously confident garnish skills.


