
Table of Contents >> Show >> Hide
- Why Kid-Made Ornaments Are the Ultimate Holiday Cheat Code
- Idea #1: Salt Dough Handprint “Time Capsule” Ornaments
- Idea #2: Shrink Plastic “Mini Masterpiece” Ornaments
- Make Them Look Extra Nice (Without Spending Extra Money)
- Cheap Gift Ideas Using These Ornaments
- How to Store Kid-Made Ornaments So They Last
- Conclusion
- Extra: of Real-Life Crafting Experience (AKA Lessons Learned the Sticky Way)
- SEO Tags
If you’ve ever watched a child create “art,” you know it’s a magical mix of genius, chaos, and one mysterious smudge that may or may not be jelly.
The good news: kid art is basically made for ornaments. It’s colorful, personal, and (best of all) it distracts children long enough for you to drink a warm beverage while it’s still warm.
This guide gives you two easy, cheap DIY kid art ornament ideas that look adorable on a tree, feel meaningful in a memory box,
and make relatives say things like, “I’m not crying, you’re crying,” even if they definitely are.
Why Kid-Made Ornaments Are the Ultimate Holiday Cheat Code
Store-bought ornaments are pretty, surebut kid-made ornaments are story. They capture tiny hands, wiggly handwriting, and that one year your
child insisted Santa wears purple boots. Plus, they’re budget-friendly holiday crafts: most supplies are pantry staples or inexpensive craft basics.
Quick promise before we begin
- Easy: Minimal steps, kid-friendly, no advanced crafting skills required.
- Cheap: Mostly items you already have, or just a few dollars from a dollar store or craft aisle.
- Actually keepsake-worthy: These won’t look like “a project” unless you want them to.
Idea #1: Salt Dough Handprint “Time Capsule” Ornaments
This one is a classic for a reason: salt dough handprint ornaments are easy, inexpensive, and ridiculously sentimental. It’s also the only time
it’s acceptable to say, “Put your hand in the dough and don’t move,” like you’re casting someone in a tiny, delicious statue.
Why this ornament works
- Costs pennies (flour + salt + water).
- Works for toddlers through big kids (and babies with help).
- Can be customized endlessly: names, dates, paint, glitter, stamps, fingerprints, you name it.
Supplies
- All-purpose flour
- Table salt
- Warm water
- Mixing bowl + spoon
- Rolling pin (or a smooth bottle)
- Straw (for making the hanging hole)
- Parchment paper + baking sheet
- Ribbon or twine
- Optional decorating: acrylic paint, paint pens, glitter, markers, stamps
- Optional sealing: Mod Podge or clear spray sealer (adult-only step)
Salt dough ratio that’s hard to mess up
A reliable starting point is 2 parts flour : 1 part salt, then add water slowly until the dough feels like play doughsoft, not sticky.
If it’s crumbly, add water one tablespoon at a time. If it’s sticky, add a pinch of flour and keep going.
Step-by-step instructions
- Mix the dough. Combine flour and salt. Add warm water gradually and stir until it forms a shaggy dough.
- Knead like you mean it. Knead for about 5–10 minutes until smooth. This is the secret to fewer cracks later.
- Roll it out. Roll to about 1/4 to 1/2 inch thick. Thicker dough takes longer to dry and can puff.
- Make the handprint. Press the child’s hand firmly into the dough. If you’re working with a baby, press gently but evenly and be prepared for multiple takes (baby hands are adorable but not cooperative).
- Trim into a shape. Use a cookie cutter or cut around the print with a butter knife. Circles, ovals, and mitten shapes are forgiving.
- Poke a hanging hole. Use a straw near the top. Make it slightly larger than you thinkyou’ll thank yourself later.
-
Dry it. You have two paths:
- Air-dry: 2–7 days depending on thickness and humidity. Flip once a day.
- Oven-dry (adult-only): “Low and slow” at roughly 200–250°F until completely hard. Flip halfway through for even drying.
- Cool completely. Don’t paint warm dough. Warm dough is basically a sponge that’s begging to smudge.
- Decorate. Paint, add names and dates, or turn the handprint into a character (Santa beard, reindeer antlers, angel wingsgo wild).
- Seal (optional but recommended). Once paint is dry, seal both sides to help it last year after year.
Design ideas that feel “custom,” not “crafty”
- Minimalist keepsake: White paint + black paint pen for name/date. Super classy.
- “Yearly series” set: One ornament per year, same shape, different colors. Instant timeline on your tree.
- Fingerprint snowman: Use fingerprints to make a tiny snowman family around the edge.
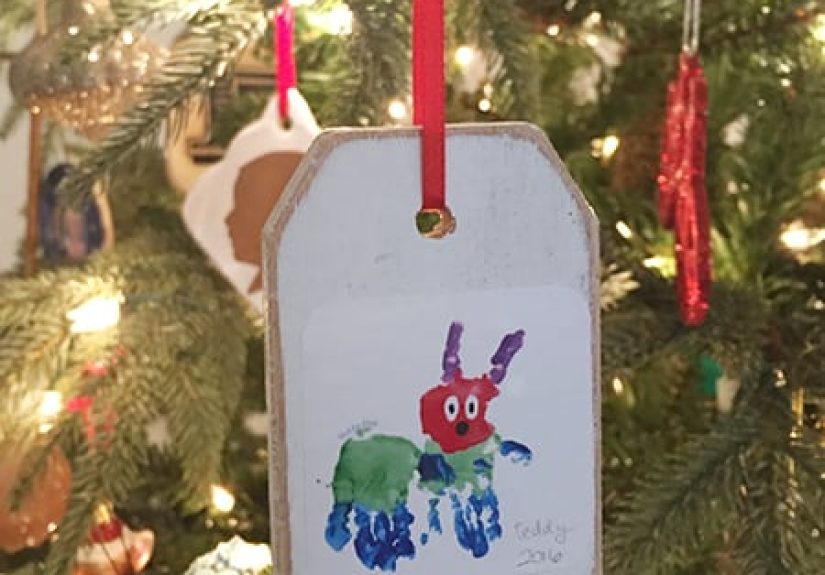
- Handprint reindeer: Paint the palm brown and add a red nose dot. It’s corny in the best way.
- Photo frame style: Cut a small center window once dry (older kids), tape a tiny photo behind it.
Troubleshooting (because salt dough has opinions)
- It puffed up: Roll thinner, air-dry a day first, and bake lower/longer next time.
- It cracked: Knead longer and dry slower. Tiny cracks can be filled with a dab of white glue and painted over.
- It browned: Oven too hot. Lower the temperature and give it time.
- It’s still soft inside: Keep drying. “Looks dry” isn’t the same as “is dry.”
Idea #2: Shrink Plastic “Mini Masterpiece” Ornaments
If you want kid art ornaments that feel like magic, this is the one. Shrink plastic takes a child’s drawing and transforms it into a sturdy,
glossy mini charm that’s perfect for the tree. You’ll watch it curl up in the oven like it’s doing a dramatic interpretive dance… and then it flattens
into a tiny masterpiece.
Two ways to do it (choose your adventure)
- Craft-store shrink plastic: Easiest, consistent results, small cost.
- Recycled #6 plastic (polystyrene): Often free (hello, takeout clamshell), but requires extra care and adult supervision.
Supplies
- Shrink plastic sheets or clean, flat #6 plastic (look for recycle code “6” or “PS”)
- Permanent markers (and/or colored pencils depending on your plastic type)
- Scissors
- Hole punch
- Parchment paper or aluminum foil
- Baking sheet
- Oven mitts (adult)
- Optional: sandpaper (lightly scuffing can help some plastics hold color better)
- Ribbon, ornament hooks, or twine
Step-by-step instructions
- Prep the plastic. If using recycled plastic, wash it well, remove labels, and cut out a flat section.
- Make the art BIG. Drawings should be at least 2–3x larger than you want the final ornament, because it will shrink dramatically.
- Color and let it dry. Permanent marker dries fast, but give it a minute so it doesn’t smudge during cutting.
- Cut it out. Rounded corners help prevent sharp points. (Trees and toddlers can both be surprisingly unforgiving.)
- Punch a hole. Punch near the top and make it larger than usualholes shrink too.
- Bake (adult-only). Place pieces on a lined baking sheet. Bake around 325–350°F and watch closely. It curls, shrinks, then flattensusually within a couple minutes.
- Flatten if needed. If it finishes slightly curved, press it flat with a heavy book carefully while it’s still warm.
- String it up. Add ribbon or hooks and hang your tiny gallery on the tree.
Mini masterpiece themes kids love
- Name ornaments: Big bubble letters + doodles around the edges.
- Pet portraits: Even if it looks like a potato with legs, it’s your potato with legs.
- “This year’s obsession” set: Dinosaurs, space, sharks, unicornscapture the phase.
- Family icon ornaments: Each person draws a symbol that represents them (book, soccer ball, music note).
- Holiday doodle mash-up: Snowman wearing sunglasses, Santa on a skateboard, etc. Encourage maximum silliness.
Safety & sanity tips (read this part, future-you will be grateful)
- Adult supervision is non-negotiable. Hot oven, hot tray, hot plastic.
- Use only the correct plastic. If recycling, verify it’s marked #6/PS. Other plastics may not behave safely when heated.
- Ventilate. Open a window and keep the bake time short and watched.
- Protect your baking sheet. Use foil or parchment so marker doesn’t transfer.
- Watch the whole time. This is not a “set it and scroll your phone” craft. It’s a “blink and it’s done” craft.
Make Them Look Extra Nice (Without Spending Extra Money)
Do the “name + date” ritual
Write the child’s name and the year on the back of every ornament. Someday, you’ll be holding it thinking, “Aw, remember when their handwriting looked like
a tiny tipsy spider?” And you’ll be glad you dated it.
Choose one “signature” finish
If you want your tree to look cohesive (and not like a craft store exploded), pick one unifying element:
a ribbon color, a metallic paint pen, or a simple white-and-gold palette. The art stays kid-like, but the overall vibe becomes “intentional.”
Cheap Gift Ideas Using These Ornaments
- Grandparent bundle: One handprint salt dough ornament + one shrink plastic drawing from the same child.
- Teacher thank-you: Shrink plastic ornament with the class year and a tiny doodle message.
- Family set: Each family member makes one shrink plastic ornament. Hang them together like a mini exhibit.
- Gift topper upgrade: Tie a shrink plastic mini masterpiece onto a wrapped gift instead of a bow.
How to Store Kid-Made Ornaments So They Last
Salt dough storage
- Make sure ornaments are fully dry before boxing (moisture is the enemy).
- Store flat in a sturdy container with tissue paper between pieces.
- Keep them away from humidity (avoid basements if yours gets damp).
Shrink plastic storage
- These are fairly durable, but avoid heavy items pressing on them for months.
- Hang ribbon separately if you used delicate knots that might crease.
Conclusion
The best ornaments aren’t the ones that match your living room aesthetic perfectly. They’re the ones that make you pause mid-decorating and smile because
you remember the moment they were made: flour on the counter, marker on someone’s cheek, and a child proudly announcing, “I made ART.”
With salt dough handprint ornaments and shrink plastic mini masterpieces, you get two easy, cheap, and genuinely meaningful ways to
turn kid creativity into holiday keepsakes. And if your tree ends up slightly lopsided because your child insisted their ornament needs “the best branch,”
congratulationsyou’re doing it right.
Extra: of Real-Life Crafting Experience (AKA Lessons Learned the Sticky Way)
Here’s what nobody tells you about making kid art ornaments: the craft is only half the project. The other half is crowd management.
If you’re crafting with more than one child, you’re not running an art sessionyou’re running a tiny, joyful, lightly chaotic studio where the artists
are also the paint spill risks.
First, salt dough is wonderfully forgiving… until it isn’t. The moment you think, “This is going so smoothly,” someone will press their hand in, pull it out,
and then immediately press it in again “just to see what happens.” (Spoiler: what happens is modern art, and modern art is hard to identify as a handprint.)
The best trick is to treat it like taking a photo: explain the plan, do a “practice press” on the table, and then say, “Okayhands in, hands out, freeze!”
If you can make it a game, kids cooperate more. If you can’t, you’ll still get something charmingyou’ll just call it “abstract.”
Second, the drying step is where patience goes to cry quietly. If you bake too hot, you get browning. If you bake too fast, you can get puffing.
If you don’t dry long enough, the ornament feels solid… until you paint it and the moisture inside decides to join the party.
My best real-world approach: roll a little thinner than you think, air-dry if you can, and bake low and slow. Also: write the kid’s name on a sticky note
and place it next to their ornament while it dries. Otherwise you’ll forget whose is whose and you’ll end up guessing based on “vibe.”
Shrink plastic, meanwhile, is the craft equivalent of a magic show. Kids love the oven-window moment when the plastic curls up like a tiny creature
and then flattens out. The key is to prep everything before the baking starts: hole punched, ribbon ready, baking sheet lined, and an adult assigned as
“Oven Boss.” If you skip the hole punch and try to drill one later, you’ll discover shrink plastic is strong in the way a LEGO is strong: it will win.
Finally, the best “experience upgrade” is to create a tiny tradition. Put on holiday music. Let kids sign the back with the year. Snap a quick photo of the
child holding the finished ornament. Next year, pull out the box and compare. Kids grow fast, and these ornaments make that visible in the sweetest way.
Yes, there will be mess. Yes, someone will ask for glitter. And yes, you’ll probably find one ornament in March behind the couch. But when you hang them up
again, you’ll be glad you made the time.


