
Table of Contents >> Show >> Hide
- What Is Pavlova, Exactly?
- Pavlova vs. Meringue: Aren’t They the Same Thing?
- A Quick Origin Story (With a Side of Friendly Chaos)
- The Anatomy of a Great Pavlova
- How to Make Pavlova: Step-by-Step (No Pastry Degree Required)
- Classic Pavlova Ingredient List
- Step 1: Prep like a pro (aka: clean everything)
- Step 2: Start whipping egg whites
- Step 3: Add sugar slowlyyes, slowly
- Step 4: Add cornstarch and vanilla gently
- Step 5: Shape the pavlova
- Step 6: Bake low and slow
- Step 7: Cool it slowly (this is where the magic happens)
- Step 8: Whip cream and top just before serving
- Common Pavlova Problems (and How to Fix Them Without Panic)
- Topping Ideas That Make Pavlova Feel Like a Party
- Make-Ahead and Storage: How to Keep It Crisp
- So… Is Pavlova Hard?
- of Pavlova “Experience”: Scenes Every Baker Recognizes
Pavlova is the dessert equivalent of showing up to a potluck in sunglasses and a great outfit: it looks dramatic,
it takes compliments well, and it somehow feels both fancy and effortless at the same time. If you’ve ever stared
at a bakery window display thinking, “Sure, that’s gorgeous, but it probably requires a pastry degree and a
tiny blowtorch,” pavlova is here to gently roast you (at a low oven temperature, of course).
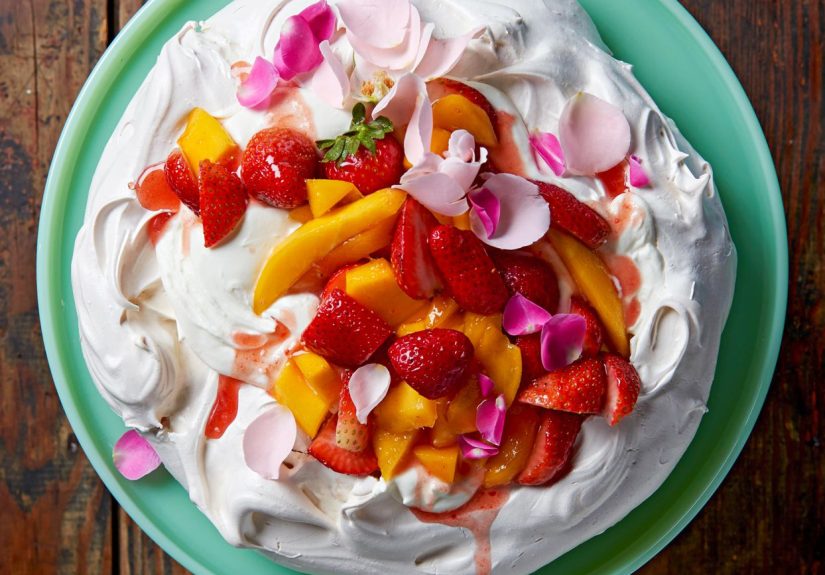
At its core, pavlova is a baked meringue shellcrisp on the outside, soft and marshmallowy in the centertopped
with whipped cream and fruit. The contrast is the whole point: crackly sweet shell, cloudlike middle, cool cream,
and bright fruit. One bite and you get crunchy, creamy, and juicy in a single forkful. It’s basically texture therapy.
What Is Pavlova, Exactly?
Pavlova is a meringue-based dessert made by whipping egg whites with sugar until glossy and voluminous, then baking
it low and slow. Once cooled, it’s topped with whipped cream and fruit (berries, kiwi, passion fruitwhatever looks
like it belongs on a magazine cover). Many recipes also include a little cornstarch and an acid (like vinegar or cream
of tartar) to help create that signature soft center.
Bonus: because the base is made from egg whites and sugar, pavlova is naturally gluten-freeno flour required. That
doesn’t make it “health food,” but it does make it “gluten-free food that doesn’t taste like compromise.”
Pavlova vs. Meringue: Aren’t They the Same Thing?
They’re cousins, not twins. A classic meringue is typically crisp all the way through (think meringue cookies).
Pavlova’s meringue, on the other hand, is designed to set on the outside while staying chewy-marshmallowy inside.
That interior texture is encouraged by ingredients like cornstarch and a little vinegar, plus gentle baking and slow cooling.
If you’ve ever had a pavlova that was crunchy from edge to center, congratulationsyou made a very nice giant meringue.
If you’ve had one that collapses into a sweet, sticky crater… you made a pavlova that had a rough day. We’ll prevent that.
A Quick Origin Story (With a Side of Friendly Chaos)
Pavlova is named for the Russian ballerina Anna Pavlova, and the dessert is widely associated with Australia and New Zealand.
The “who invented it” debate is famously spiritedlike sports rivalry, but with more whipped cream. Anna Pavlova toured the region
in the 1920s, and one popular story is that a chef created the dessert in her honor. The exact origin is disputed, but the legend
stuck, and the dessert became a celebratory staple.
Translation: you don’t need to settle the debate to enjoy the dessert. Your fork is Switzerland.
The Anatomy of a Great Pavlova
1) Egg whites
Egg whites are the structure, the lift, the whole architectural plan. For maximum volume, bring them to room temperature
before whipping. Cold egg whites can whip up, but room temp whites typically expand more easily.
2) Sugar
Sugar isn’t just sweetnessit stabilizes the foam and helps the meringue hold its shape while baking and cooling.
The key is dissolving it properly: add sugar gradually and whip until the mixture is glossy and no longer gritty.
Many bakers prefer superfine (caster) sugar because it dissolves faster; if you can’t find it, you can pulse regular
granulated sugar briefly in a food processor to reduce crystal size.
3) Acid (cream of tartar, vinegar, or lemon juice)
Acid helps stabilize the egg white foam so it holds air better and resists collapsing. Cream of tartar is common, but
vinegar or lemon juice works too. And noyour pavlova will not taste like salad dressing. It’s a tiny amount, and it’s there
for chemistry, not vibes.
4) Cornstarch
Cornstarch helps manage moisture and contributes to that soft, marshmallow-like interior. It’s also a quiet hero in the
fight against “weeping” (when sugary moisture beads up on the surface and makes everything sticky).
5) Vanilla (or another flavor)
Vanilla is the classic, but pavlova is very open to being “tricked out.” You can add cocoa, espresso powder, citrus zest,
or warm spicesjust keep liquids minimal so the meringue doesn’t deflate.
How to Make Pavlova: Step-by-Step (No Pastry Degree Required)
Below is a reliable, classic approach that works for one large pavlova (about 8–10 servings) or several mini pavlovas.
Think of it as the “little black dress” of pavlova recipes: adaptable, flattering, and always appropriate.
Classic Pavlova Ingredient List
- 4 large egg whites, room temperature
- 1 cup superfine (caster) sugar (or pulse granulated sugar briefly to make it finer)
- 1/2 teaspoon cream of tartar OR 1 teaspoon white vinegar (or lemon juice)
- 1 tablespoon cornstarch
- 1 teaspoon vanilla extract
- For topping: 1 cup heavy cream + 1–2 tablespoons sugar + vanilla, plus 2–4 cups fruit
Step 1: Prep like a pro (aka: clean everything)
Grease is the sworn enemy of whipped egg whites. Make sure your bowl and whisk are very clean and dry.
Line a baking sheet with parchment and draw a circle (about 8–9 inches) as a guide, then flip the parchment so the ink/pencil
is underneath. This keeps your pavlova roughly roundbecause “rustic” is charming, but “accidentally amoeba-shaped” is a choice.
Step 2: Start whipping egg whites
Beat the egg whites on medium speed until they look foamy and begin to form soft peaks. Add your acid (cream of tartar or vinegar)
early in the process to help stabilize the foam.
Step 3: Add sugar slowlyyes, slowly
With the mixer running, add sugar gradually (a spoonful at a time or in small increments). This helps it dissolve properly,
which improves texture and reduces the chance of “sugar sweat” later. Keep whipping until the mixture is thick, glossy,
and forms stiff peaks.
Quick test: rub a tiny bit between your fingers. If you feel gritty sugar crystals, keep whipping.
(This is the only time you should be encouraged to touch dessert batter with your fingers in public.)
Step 4: Add cornstarch and vanilla gently
Sift the cornstarch to avoid lumps, then fold it in gently with vanilla. You’re trying to keep as much air in the mixture as possible.
Think: “folding like you’re tucking in a sleepy toddler,” not “stirring like you’re angry at a traffic jam.”
Step 5: Shape the pavlova
Spoon the meringue onto the parchment within your circle. Build the edges slightly higher than the center, creating a shallow “nest”
for cream and fruit. Swirls and swoops are encouragedthey make pavlova look fancy even if you’re wearing sweatpants.
Step 6: Bake low and slow
Bake at a low temperature (commonly around 225°F to 275°F, depending on your recipe and oven) until the outside is dry
and crisp and the pavlova is very pale. Typical bake times range from 1 hour to 2 hours.
And here’s the hard part: don’t open the oven door. Temperature swings are how cracks happen.
Your pavlova doesn’t want surprises.
Step 7: Cool it slowly (this is where the magic happens)
Turn off the oven and let the pavlova cool inside. Many recipes recommend leaving it in the oven for at least 30–60 minutes,
and some go longer. This slow cooling reduces dramatic cracking and helps the inside set into that chewy, marshmallow-like texture.
Small cracks are normal; big dramatic fissures are still edible and often fixable with whipped cream.
Step 8: Whip cream and top just before serving
Whip cold heavy cream with a little sugar and vanilla until it holds soft to medium peaks. Spread over the cooled pavlova and top
with fruit. Assemble close to serving time so the meringue stays crispmeringue + moisture is a ticking clock.
Common Pavlova Problems (and How to Fix Them Without Panic)
“My pavlova cracked!”
Cracks happen, even to experienced bakers. Rapid temperature changes are a major culprit, which is why low heat and slow cooling help.
Also: don’t overbake at high temps, and don’t slam the oven door like you’re in a sitcom argument scene.
If you get cracks anyway, cover them with whipped cream. Pavlova is basically designed with spackle in mind.
“It wept and got sticky.”
Weeping can happen when sugar doesn’t fully dissolve or when humidity is high. Add sugar gradually, whip until not gritty, and consider
using superfine sugar. Cornstarch also helps absorb excess moisture. Store the baked shell in an airtight container in a cool, dry place.
If it’s humid, the shell can soften over timestill tasty, just less crisp.
“It collapsed.”
Under-whipping egg whites, adding sugar too fast, fat contamination (yolk/grease), or aggressive folding can reduce structure.
Make sure your bowl is spotless, your whites are yolk-free, and your peaks are truly stiff before you shape and bake.
Also, avoid opening the oven door mid-bake.
“The inside is too gooey.”
A soft interior is the goal, but if it’s wet and syrupy, it may need more time drying in the turned-off oven.
Ovens vary, so it’s okay to extend the “cooling/drying” phase. Pavlova is patient; it expects you to be, too.
Topping Ideas That Make Pavlova Feel Like a Party
Classic Berry Cloud
Whipped cream + strawberries + blueberries + raspberries. Simple, bright, and extremely photogenic.
Tropical Vacation (No PTO Required)
Whipped cream + kiwi + mango + passion fruit. The tartness balances the sweetness beautifully, and passion fruit seeds add that
“chef-y” look with zero effort.
Citrus-Curd Glow-Up
Spread a thin layer of lemon curd (store-bought is totally fine) under the whipped cream, then top with berries.
The tang cuts through the sugar and makes the whole thing taste more “dessert-table sophisticated.”
Chocolate Lovers’ Edition
Add cocoa to the meringue or drizzle melted chocolate over the whipped cream, then top with cherries or strawberries.
It’s pavlova wearing a leather jacket.
Winter Party Mode
Top with whipped cream, pomegranate arils, and citrus segments. It’s bright, festive, and makes you look like you planned ahead
(even if you didn’t).
Make-Ahead and Storage: How to Keep It Crisp
The baked pavlova shell is best made ahead. Once completely cool, store it at room temperature in an airtight container for a couple
of days in a dry environment. Humidity is the enemymoist air can soften the shell. Assemble with whipped cream and fruit shortly
before serving, because the cream will slowly hydrate the meringue and soften its crunch.
If you’re hosting, this is a gift: you can bake the shell the day before, whip the cream and prep fruit the day of, then assemble
five minutes before serving like some kind of dessert magician.
So… Is Pavlova Hard?
Pavlova isn’t hard, but it is specific. It wants clean tools, gradual sugar, low heat, and a slow cool-down. Give it those things
and it will reward you with a dessert that looks like it came from a high-end bakerywithout requiring you to learn French pastry terms.
And if it cracks? Congratulations. You’ve made a realistic pavlova. Now cover it with whipped cream and accept applause.
of Pavlova “Experience”: Scenes Every Baker Recognizes
Scene 1: The Bowl Inspection. You’re about to whip egg whites, and suddenly you become a forensic investigator.
You hold your mixing bowl up to the light like it’s a priceless diamond. Is that a smear? A fingerprint? A single molecule of
grease left behind by last night’s pasta? You wipe it anywayonce with soap, once with a clean towel, and once more because you
remember that pavlova is essentially a drama queen with a PhD in chemistry.
Scene 2: The Sugar Patience Test. Adding sugar “gradually” feels like a suggestion until you’ve watched a meringue
go grainy. So you slow down. You add a spoonful, wait, add another, wait, and begin wondering if this is what meditation is supposed
to feel like. The reward is that moment when the meringue turns glossylike satinand you realize you’ve created something that looks
suspiciously like edible clouds.
Scene 3: The Oven Door Temptation. Pavlova bakes low and slow, which means there’s a long stretch of time where
nothing seems to happen. This is the part where your curiosity tries to sabotage you. You want to peek. You want to check. You want
to “just make sure it’s okay.” But you remember the rule: opening the oven is like yelling “plot twist!” in the middle of a quiet scene.
So you don’t. You walk away. You busy yourself with fruit prep like an adult. You feel extremely proud of this personal growth.
Scene 4: The Cooling Phase Anxiety. The oven turns off, the pavlova stays inside, and now you’re waiting again.
This is where you practice the fine art of doing nothing. You might even convince yourself that you hear it crack. You don’t panic,
because you’ve accepted a universal truth: pavlova cracks are not a failure; they’re a design feature that improves cream retention.
You’re not “covering mistakes,” you’re “creating valleys for whipped cream.” Very different.
Scene 5: The Assembly Glow-Up. The shell is cool, the cream is whipped, and the fruit is glossy and bright.
You spread the whipped cream like you’re frosting a very delicate, very sweet pillow. Then you scatter fruit over the top and
suddenlyboomyour kitchen looks like it belongs in a lifestyle photoshoot. This is when someone walks in and says, “You made that?”
and you try to act casual, as if you didn’t spend ten minutes staring at a mixing bowl like a detective earlier.
And then comes the best part: the first slice. It won’t be neat. It will be gloriously messy. The shell will crack, the cream will
swoosh, the fruit will tumble, and everyone will be delighted. Pavlova is not the dessert of perfect edges; it’s the dessert of
perfect bites. It tastes like you planned, even if you were winging it with confidence and a very clean whisk.


