Table of Contents >> Show >> Hide
- Before You Start: The “Keep Your Deposit” Rules
- 16 Renter-Friendly DIY Design Upgrades
- 1) Peel-and-stick wallpaper (accent wall or “micro moment”)
- 2) Removable decals, washi tape, or “fake tile” stickers
- 3) Upgrade curtains without drilling (tension rods, no-drill brackets, or adhesive hooks)
- 4) Add privacy and style with removable window film
- 5) Swap your lighting “vibe” with plug-in pendants or sconces
- 6) Smart bulbs and layered lamps (the easiest glow-up)
- 7) Under-cabinet lighting that sticks on
- 8) Peel-and-stick backsplash (tile, panels, or faux subway)
- 9) Countertop makeover with removable vinyl or contact paper (carefully)
- 10) Switch plate covers: tiny change, surprisingly fancy
- 11) Change cabinet knobs and pulls (and keep the originals)
- 12) Create “architectural” trim with removable molding or picture ledges
- 13) Temporary flooring tricks: area rugs + rug pads + carpet tiles
- 14) Peel-and-stick floor tiles or vinyl decals for small areas
- 15) A “no-holes” gallery wall (Command strips, leaning frames, or picture ledges)
- 16) Mirrors that bounce light and make rooms look bigger
- Common Mistakes to Avoid (So You Don’t Cry During Move-Out)
- What Renters Learn After Doing These Upgrades (Real-Life Experience, Minus the Drama)
- Conclusion
Renting has a special talent for making your home feel like it belongs to… everyone but you. The walls are “landlord beige,” the lighting is “interrogation room,” and the kitchen backsplash looks like it survived three roommates and a spaghetti incident.
The good news: you can do a lot without drilling holes, painting yourself into a corner (literally), or donating your security deposit to your landlord’s next vacation.
Below are 16 renter-friendly DIY design upgrades that are reversible, practical, and actually make your space feel intentional. You’ll see ideas for temporary wall treatments, no-drill window upgrades, rental kitchen updates, lighting glow-ups, and easy tricks that pack up nicely when you move.
Before You Start: The “Keep Your Deposit” Rules
1) Read your lease like it’s a group chat screenshot
Some rentals allow small nail holes but hate paint. Others don’t mind paint but forbid “adhesives.” Know what you’re working with, and when in doubt, ask for permission in writingespecially for anything involving plumbing or permanent hardware.
2) Test everything in a hidden spot
“Removable” depends on wall texture, paint quality, humidity, and how long it stays up. Do a small test patch behind a door or inside a closet firstyour future self will thank you while packing.
3) Save originals in a labeled box
Knobs, switch plates, showerheads, even that oddly flimsy toilet paper holderstore originals in a zip bag with a label. Moving out becomes a simple swap, not a scavenger hunt.
4) Think layers, not forever
Renters win with layered design: lighting + textiles + removable surfaces + smart storage. One big “wow” change is fun, but multiple small upgrades often look more polished.
16 Renter-Friendly DIY Design Upgrades
1) Peel-and-stick wallpaper (accent wall or “micro moment”)
Peel-and-stick wallpaper is the MVP of temporary wall treatments. Use it behind your bed, in a hallway, or inside a nook to define a “zone” in a small apartment. Keep patterns scaled to your room size (tiny prints can look busy; huge murals can overwhelm a shoebox).
Pro tip: start in the least visible corner and use a smoothing tool to avoid bubbles.
2) Removable decals, washi tape, or “fake tile” stickers
If wallpaper feels like a commitment, go lighter with removable wall decals or washi tape patterns (think stripes, a headboard outline, or a geometric border). For kitchens and baths, tile decals can disguise dated patterns without the bulk of thicker materials. This is renter-friendly decor that’s perfect for short stays or dorm-style timelines.
3) Upgrade curtains without drilling (tension rods, no-drill brackets, or adhesive hooks)
Curtains are instant architecture. Use tension rods for recessed windows, no-drill brackets that mount to window trim, or adhesive hooks for lightweight rods. Hang panels higher and wider than the window to make ceilings feel taller and windows feel larger. (It’s basically visual sorcery, but legal.)
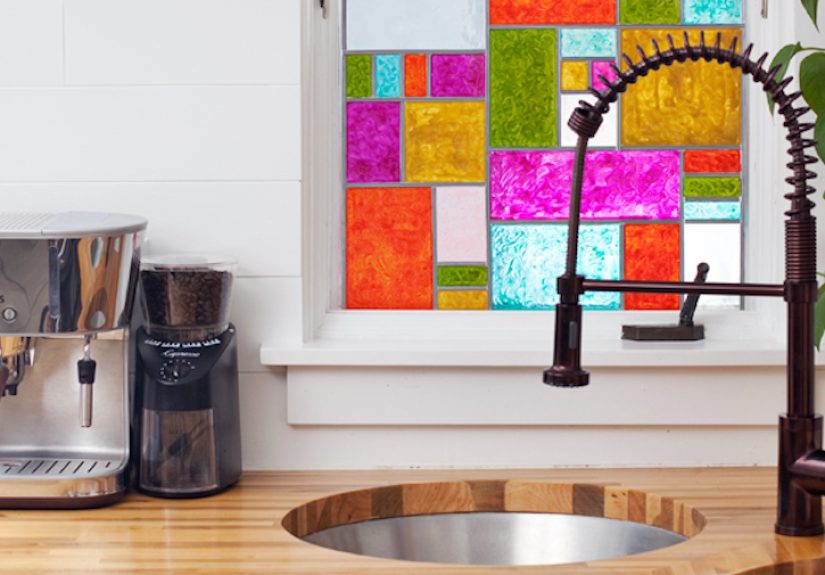
4) Add privacy and style with removable window film
Frosted or reeded window film gives you privacy while still letting in lightideal for bathrooms or street-facing windows. It’s also a sneaky way to make builder-grade glass feel custom. Choose a film that uses static cling if you’re worried about residue, and cut carefully with a sharp utility blade for clean edges.
5) Swap your lighting “vibe” with plug-in pendants or sconces
Overhead lighting in rentals can be… emotionally challenging. Plug-in pendants, plug-in sconces, and corded fixtures can change the whole mood without touching wiring. Use adhesive hooks rated for the weight, keep cords tidy with cord covers, and stick to LED bulbs (cooler, safer, and cheaper to run).
6) Smart bulbs and layered lamps (the easiest glow-up)
If you do one thing, do this: add floor lamps, table lamps, and a warm smart bulb. Layered lighting makes any rental feel intentionallike a home, not a waiting room. Smart bulbs let you fine-tune brightness and color temperature, which is especially helpful if your apartment gets weirdly dark at 4 p.m. for no reason.
7) Under-cabinet lighting that sticks on
Stick-on LED light bars (rechargeable or plug-in) are a renter-friendly kitchen upgrade that adds function and makes countertops look cleaner. Place them under upper cabinets, inside a pantry, or above a desk. Go for diffused covers so it looks “installed,” not “temporary flashlight situation.”
8) Peel-and-stick backsplash (tile, panels, or faux subway)
A removable backsplash is a high-impact rental kitchen update. Peel-and-stick tiles can mimic subway tile or stone and instantly modernize a space. Prep matters: clean the wall thoroughly and avoid installing over greasy residue. In steamy zones, choose products rated for kitchens and keep an eye on cornershumidity is where “temporary” gets dramatic.
9) Countertop makeover with removable vinyl or contact paper (carefully)
A temporary countertop wrap can hide dated laminate, but it’s all about patience. Align seams slowly, use a squeegee, and wrap edges cleanly so water doesn’t creep underneath. Avoid high-heat zones and be realistic: this is a “looks better, costs less” solutionnot a “now I own marble” solution.
10) Switch plate covers: tiny change, surprisingly fancy
Yellowed switch plates can age a room fast. Swapping them for crisp white, matte black, or brushed metal takes minutes and makes walls look cleaner. It’s also one of the most budget-friendly DIY design upgradeslike a haircut for your apartment, but for $12.
11) Change cabinet knobs and pulls (and keep the originals)
New knobs and pulls are a classic renter-friendly upgrade because they’re reversible and instantly elevate builder-grade cabinets. Pick a finish that matches your lighting (black, brass, or nickel are usually safe bets). Store old hardware in a labeled bag, and you’ll be able to revert everything in under an hour when you move.
12) Create “architectural” trim with removable molding or picture ledges
Want character without construction? Try lightweight trim pieces (like faux crown molding or wall trim accents) attached with removable strips, or install picture ledges that rely on minimal, easily patched anchors if allowed. Even one line of trim can make a room feel more finishedlike your rental suddenly got a personality.
13) Temporary flooring tricks: area rugs + rug pads + carpet tiles
Ugly floors are common, but you don’t have to stare at them. Layer a large area rug with a quality rug pad for comfort and slip resistance. For tricky spots (entryways, home office corners), carpet tiles can create a clean “zone” and reduce echo. Choose durable fibers if your place doubles as a snack station.
14) Peel-and-stick floor tiles or vinyl decals for small areas
For bathrooms, laundry corners, or a sad little entry, peel-and-stick floor tiles or vinyl floor decals can fake the look of patterned tile without a renovation. Stick to small zones so removal is manageable, and avoid putting them where standing water is constant. This is best for “I need a quick win” spaces.
15) A “no-holes” gallery wall (Command strips, leaning frames, or picture ledges)
A gallery wall is renter-friendly when you use removable hanging strips, lightweight frames, or simply lean art on shelves, console tables, or mantels. Mix sizes for a collected look and keep spacing consistent. Bonus: if you’re indecisive, leaning art lets you rearrange daily like it’s a mood board.
16) Mirrors that bounce light and make rooms look bigger
Mirrors are the cheat code for small spaces. Use a tall leaning mirror in a bedroom or a big wall mirror near your entry to brighten and expand the room visually. If you hang one, follow weight ratings carefully and use the right removable hanging system. This upgrade is especially helpful in rentals with limited natural light.
Common Mistakes to Avoid (So You Don’t Cry During Move-Out)
- Skipping surface prep: Dust and grease are the enemies of peel-and-stick everything.
- Ignoring weight limits: Adhesive hooks have ratings for a reason. Heavy mirrors and lamps need serious support.
- Using “permanent” adhesives: If it requires scraping, it’s not renter-friendly.
- Overdoing patterns: One bold pattern + calm solids usually looks more expensive than pattern everywhere.
- Not planning removal: If you can’t imagine taking it down, rethink it before you put it up.
What Renters Learn After Doing These Upgrades (Real-Life Experience, Minus the Drama)
Renters tend to discover something funny: the hardest part isn’t the DIYit’s the decision. The first time you hold a roll of peel-and-stick wallpaper, you’ll have a tiny internal debate that sounds like,
“Am I the kind of person who commits to a giant botanical print?” That moment is normal. It’s also why “micro moments” (like a nook, a closet, or the wall behind a bookshelf) are such a smart start.
You get the impact without feeling like you married the pattern.
Another common experience: the “one upgrade that changes everything” is almost always lighting. Renters often try a big visual change firstlike a removable backsplashthen realize the room still feels off because the overhead bulb is bright enough to signal aircraft.
Once you add two lamps and a warm bulb, suddenly your couch looks better, your art looks more intentional, and your space reads “cozy home” instead of “temporary unit.”
It’s not magic; it’s just that good lighting flatters everything, including your bargain side table.
People also learn the truth about adhesive products: they’re great, but they’re not all the same. Some renters swear by removable strips and hooks for frames and lightweight décor, while others discover that textured walls (or cheap paint jobs) can make removal trickier.
The renters who stay happiest are the ones who test first and treat adhesives like a first date: start small, see how it behaves, then decide if you want to introduce it to your entire living room.
In kitchens, renters often report the biggest “before and after” comes from three small moves: new hardware, better lighting, and a clean backsplash moment.
A full countertop wrap can look amazing, but it’s the project where patience matters mostmeasuring, lining up edges, smoothing bubbles, and avoiding messy seams near the sink.
Many renters find it’s easier to start with the least risky area (like covering a small section of counter or a bathroom vanity) before tackling a long kitchen run.
Storage upgrades create a different kind of satisfactionless “ooh” and more “finally.” Over-the-door organizers, tension rod solutions, baskets, and a simple entry drop zone reduce daily friction.
It’s the difference between losing your keys twice a week and feeling like a functioning adult with a system.
And because these solutions are portable, they move with you, which is the renter’s version of “building equity.”
Then there’s the moving-out moment: renters who saved original hardware and kept a small “reversal kit” (spackle if permitted, a magic eraser, extra paint for tiny touch-ups if allowed, and the original knobs/switch plates) usually have a calmer exit.
The best part is realizing your upgrades weren’t just temporary decorationthey were practice. You learned what you actually like, what your habits demand (hello, easy-clean surfaces), and what’s worth doing again in your next place.
That knowledge is the real upgrade.
Finally, the most relatable renter experience: you’ll do one small change “just to test it,” and suddenly you’re standing in the aisle choosing curtain panels like it’s a life-altering decision.
That’s the joy of renter-friendly DIY design upgradesthey let you experiment without permanent consequences.
Your apartment becomes a low-stakes design lab, and honestly, that’s kind of the dream.
Conclusion
You don’t need a renovation budget to make your rental feel like yours. With renter-friendly DIY upgradeslike peel-and-stick wallpaper, a removable backsplash, no-drill curtain solutions, layered lighting, and temporary flooring tricksyou can add personality, comfort, and function without the move-out panic.
Start with one high-impact change (lighting or curtains), then build layers. Your security deposit can stay intact, and your home can still have style.