
Table of Contents >> Show >> Hide
- Quick Porch-Pro Tips (So Your Masterpiece Doesn’t Collapse by Tuesday)
- 20 Jack-O-Lantern Ideas That’ll Make You Wish You Had a Bigger Porch
- 1) The “Layered Smile” (easy, classic, looks expensive)
- 2) Constellation Pumpkin (no stencil, high impact)
- 3) Haunted House Windows
- 4) Cat Silhouette (the porch’s unofficial security guard)
- 5) The “Peekaboo Ghost”
- 6) Spiderweb Corner (simple geometry, big drama)
- 7) “Swarm Escape” (aka: the mice are moving in)
- 8) The Tooth Fairy Pumpkin (for maximum grin)
- 9) Stacked Pumpkin Totem (because one face is never enough)
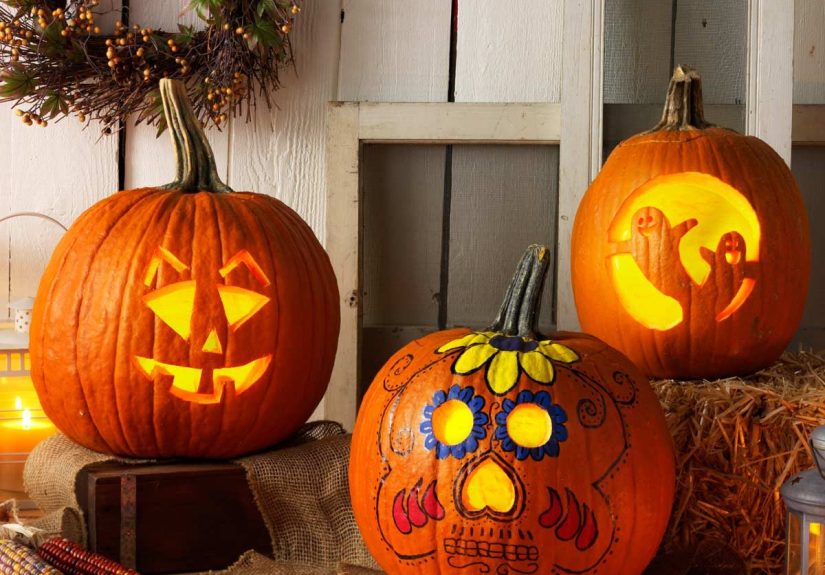
- 10) Sugar Skull-Inspired Pattern (intricate without being impossible)
- 11) The “Forest Eyes” Pumpkin
- 12) Moon + Bats Cutout
- 13) Message Pumpkin (“BOO,” “EEK,” or a tiny roast of your friends)
- 14) Floral No-Carve Pumpkin (pretty, porch-safe, lasts longer)
- 15) “Stitched Mouth” Pumpkin
- 16) The Lantern Cutouts (holes with purpose)
- 17) The “Pumpkin Diorama” (tiny scene, huge wow)
- 18) Pop-Art Dots (no-carve, ridiculously photogenic)
- 19) “Creepy Crawl” Vine Carve
- 20) The Porch “Pumpkin Family” (a whole cast of characters)
- Porch Styling Tricks That Make Everything Look More Intentional
- Extra: Real-Life Pumpkin Carving Experiences and Lessons (So You Don’t Learn Them the Hard Way)
- Conclusion
Every October, porches across America turn into tiny theaters: flickering faces, goofy grins, spooky silhouettes, and that one
pumpkin that looks suspiciously like it’s judging your life choices. The best part? You don’t need professional-level carving
skills to build a front-porch lineup that makes neighbors slow down and say, “Okay… who did that?”
This guide is built for real humans with real schedulesmeaning some ideas are “I did this while watching a movie,” and others
are “I suddenly understand why artists charge money.” Mix and match, scale up or down, and remember: the goal is delight, not
perfection. (Though perfection is welcome if it arrives with snacks.)
Quick Porch-Pro Tips (So Your Masterpiece Doesn’t Collapse by Tuesday)
Pick a pumpkin like you’re hiring it for a job
- For carving: Choose a firm pumpkin with a flat bottom and no soft spots.
- For stacking: Look for squat “Cinderella” shapes or wide pumpkins that won’t wobble.
- For tiny details: Smaller “pie pumpkins” can carve cleanly and look extra charming in groups.
Tools that actually help
- A basic pumpkin carving kit (small saws + pokers) for cleaner lines than a big kitchen knife.
- A metal spoon or ice-cream scoop to scrape the inside thinner where you want glow.
- Toothpicks for quick “pumpkin first aid” when a piece snaps off.
Light smarter (and safer)
Battery-operated LED tea lights or small LED strings give you steady glow without heat. If you use a real candle, keep the pumpkin
on a stable surface, away from anything flammable, and never leave it unattended.
Make it last longer
- Carve closer to when you’ll display it (a day or two before is ideal for crisp edges).
- Scrape the inside smooth and remove stringy pulpless moisture means less mold.
- Seal cut edges with a thin layer of petroleum jelly to slow drying.
- Keep it cool and shaded; bring it inside overnight if your porch gets warm.
20 Jack-O-Lantern Ideas That’ll Make You Wish You Had a Bigger Porch
1) The “Layered Smile” (easy, classic, looks expensive)
Carve a big friendly face, then add a second layer of detail by shaving (not cutting through) the pumpkin skin around the eyes and mouth.
The glow goes from “cute” to “gallery lighting” instantly.
2) Constellation Pumpkin (no stencil, high impact)
Use a drill or poke tool to make star clusters across the pumpkintiny holes, some bigger than others. Put an LED string inside,
and suddenly your porch has a mini night sky.
3) Haunted House Windows
Carve a simple house outline, then cut out a few crooked windows and a door. Add “shaved” areas around the windows so they glow softly.
Bonus points for a little chimney silhouette.
4) Cat Silhouette (the porch’s unofficial security guard)
Paint the pumpkin black (optional), carve a sleek cat shape, and add whiskers with thin carving lines. Keep the face minimal so it reads
from the sidewalkmysterious, not messy.
5) The “Peekaboo Ghost”
Carve an arched “sheet” shape ghost as if it’s peeking around the pumpkin’s curve. Shave the ghost’s body so it glows, and cut through
only the eyes and mouth. Cute-spooky perfection.
6) Spiderweb Corner (simple geometry, big drama)
Carve a web that starts in one corner and fans outward. Keep lines thick and clean. Add one dangling spider cutout (or a plastic spider)
so it looks intentionally terrifying.
7) “Swarm Escape” (aka: the mice are moving in)
Carve a few round “holes,” then place small plastic mice as if they’re crawling in and out. It’s more theater than carving,
and it’s hilarious in a mildly unsettling way.
8) The Tooth Fairy Pumpkin (for maximum grin)
Carve a wide mouth and make the teeth by leaving pumpkin “bars” instead of cutting everything out. Add a couple crooked teeth.
The result looks cartoonish and oddly charismatic.
9) Stacked Pumpkin Totem (because one face is never enough)
Stack three pumpkins: top is surprised, middle is smug, bottom is grumpy. Use skewers/dowels for stability.
Light only the middle pumpkin for a “spotlight” effect.
10) Sugar Skull-Inspired Pattern (intricate without being impossible)
Use repeated shapesteardrops, dots, and petalsaround eyes and cheeks. Symmetry is your friend. The trick is consistency:
even simple dots look fancy when they’re evenly spaced.
11) The “Forest Eyes” Pumpkin
Carve two almond-shaped eyes and shave the surrounding area so the glow is soft. Place the pumpkin low among porch plants or
decorative corn stalkslike something is watching from the leaves.
12) Moon + Bats Cutout
Carve a crescent moon and a few flying bat silhouettes. Keep shapes bold so they don’t snap. If you want extra glow,
shave a light halo around the moon.
13) Message Pumpkin (“BOO,” “EEK,” or a tiny roast of your friends)
Carve chunky letters that glow clearly at night. Keep the word short, and use a stencil if you want crisp edges.
Pair it with a goofy face pumpkin so it feels playful, not like porch homework.
14) Floral No-Carve Pumpkin (pretty, porch-safe, lasts longer)
Skip the knife: attach dried or faux flowers in a crescent pattern across the pumpkin. Add fairy lights around the base
for sparkle. This is “fall chic” with minimal mess.
15) “Stitched Mouth” Pumpkin
Carve a simple face, then add a stitched mouth using small slits and short horizontal lines. It reads spooky but not gory,
like a classic Halloween cartoon character.
16) The Lantern Cutouts (holes with purpose)
Carve geometric shapestriangles, diamonds, circleslike stained glass. The pattern becomes the design, and it looks especially
good with brighter LEDs inside.
17) The “Pumpkin Diorama” (tiny scene, huge wow)
Cut a large opening like a stage window. Inside, place a mini haunted scene: a little fence, tiny trees, or paper silhouettes.
Backlight with an LED so the silhouettes pop.
18) Pop-Art Dots (no-carve, ridiculously photogenic)
Paint the pumpkin a bright base color, then add bold polka dots or comic-style shapes. Add a small “face” decal or simple carved
eyes for a hybrid look that stands out in daylight and at night.
19) “Creepy Crawl” Vine Carve
Instead of a face, carve curling vines and leaves wrapping around the pumpkin. It feels more “enchanted garden” than “jump scare,”
and it pairs beautifully with real gourds and mums.
20) The Porch “Pumpkin Family” (a whole cast of characters)
Make five mini pumpkins with different expressions: happy, shocked, sleepy, skeptical, and “I regret everything.” Group them
on steps like they’re posing for a family photo. It’s silly, memorable, and surprisingly charming.
Porch Styling Tricks That Make Everything Look More Intentional
- Vary height: Use crates, upside-down planters, or stacked hay bales to create levels.
- Cluster in odd numbers: Groups of 3, 5, or 7 look natural and “designed” without trying too hard.
- Mix textures: Add corn stalks, mums, faux cobwebs (lightly!), or dried leaves to frame the pumpkins.
- Create one “hero” pumpkin: Put your most detailed design front and center, then surround it with simpler ones.
Extra: Real-Life Pumpkin Carving Experiences and Lessons (So You Don’t Learn Them the Hard Way)
If you’ve ever hosted a pumpkin-carving night, you already know the first universal truth: the “quick 20-minute project” has a way of
turning into a two-hour event where someone is googling “how to fix pumpkin collapse” while another person is aggressively roasting seeds
like they’re training for a snack Olympics. That’s not failurethat’s tradition.
One of the most common experiences is realizing that carving is basically lighting design. In daylight, a pumpkin can look
finemaybe even greatthen nighttime hits and the face becomes a faint whisper. That’s why people who carve a few every year often develop a
ritual: scrape the inside thinner behind the areas you want to glow, test the LED, then adjust before the final cut. It feels extra in the moment.
It feels genius later.
Another classic porch moment: the “Oops, the triangle fell out” incident. It happens to beginners and confident overachievers alike. The fix is
surprisingly simple and very human: toothpicks. Break one in half, anchor the fallen piece from behind, and you’re back in business. Plenty of
households have at least one pumpkin each year that’s held together by toothpicks and optimismand honestly, that pumpkin has character.
People also learn quickly that pumpkin personality beats pumpkin perfection. The most complimented porch displays usually aren’t
the most intricate; they’re the ones that tell a little story. A “pumpkin family” on the steps, a goofy message pumpkin next to a dramatic spiderweb,
or a stack of three faces that look like they’re reacting to trick-or-treatersthose get remembered. When kids stop to point, laugh, or pose for a photo,
you’ve already won Halloween.
Then there’s the great debate: candles versus LEDs. A lot of people start with candles because it’s classic, but after one windy night (or one
porch that suddenly smells like “campfire but make it pumpkin”), many switch to LEDs for reliability. The experience is less “romantic flicker,”
more “my jack-o-lantern still looks alive at 9 p.m.” If you’re doing multiple pumpkins, remote-controlled LEDs can feel like a cheat code:
one click and your whole porch wakes up.
Finally, there’s the emotional arc of timing. Carve too early and you risk a mushy pumpkin before the big night. Carve too late and you’re
sprinting through details while someone’s ringing the doorbell. The experienced approach is usually a compromise: do the no-carve or painted pieces
early, then carve the true jack-o-lanterns one to two days before your main display night. It keeps the edges crisp, the glow bright, and your stress
level at “festive” instead of “I’m moving to a pumpkin-free planet.”
The best takeaway from all these real-world porch adventures is simple: pumpkins are temporary, but the vibe is forever. Pick a few designs you
genuinely enjoy making, give yourself permission to keep some ideas easy, and let your porch be the place that feels welcoming, funny, and just spooky
enough to make October feel like October.
Conclusion
A bigger porch is nice, surebut a smarter mix of designs is what really creates the “wow” factor. Pair one detailed showstopper with a few simple
glow-forward pumpkins, add height and clustering, and your front steps can look like a Halloween magazine spread (minus the pressure and plus snacks).
Whether you carve, paint, or build tiny scenes inside, the best jack-o-lantern idea is the one you’ll actually enjoy making.


