
Table of Contents >> Show >> Hide
- Before You Start: How to Prepare Wine Glasses for Decorating
- 1. Decorate Wine Glasses with Glass Paint
- 2. Decorate Wine Glasses with Permanent Vinyl Decals
- 3. Decorate Wine Glasses with Glitter and Decoupage
- 4. Decorate Wine Glasses with Charms, Ribbon, and Removable Accents
- Choosing the Right Method for Your Project
- Common Mistakes to Avoid When Decorating Wine Glasses
- 500-Word Experience Section: What Actually Works When Decorating Wine Glasses
- Conclusion
Plain wine glasses are perfectly fine, the same way plain toast is technically breakfast. But add a little color, sparkle, personality, or a tiny charm dangling from the stem, and suddenly your glassware looks like it RSVP’d to the party on purpose. Whether you are decorating glasses for a wedding, birthday dinner, holiday table, bridal shower, craft night, or a cozy family celebration with sparkling cider, learning a few easy wine glass decoration ideas can turn ordinary glassware into custom table decor.
The best part? You do not need to be a professional artist, own a craft room the size of a garage, or speak fluent “Pinterest.” With the right materials and a little patience, you can create personalized wine glasses that look polished, last longer, and make guests say, “Wait, you made these?” This guide covers four reliable ways to decorate wine glasses: glass paint, vinyl decals, glitter accents, and removable charms or ribbon details.
Before grabbing a brush, sticker, or glitter jar, remember one golden rule: keep decorations away from the rim and any area that touches drinks. Most paints, adhesives, glitter finishes, and vinyl products are meant for decorative surfaces only. Leave at least half an inch to one inch of blank glass near the drinking edge. Your design will still look fabulous, and your glass will remain practical.
Before You Start: How to Prepare Wine Glasses for Decorating
Great wine glass crafts start before the decorating begins. Dust, fingerprints, oils, and mystery kitchen smudges can stop paint, vinyl, or glue from sticking properly. Wash the glasses with mild dish soap and warm water, rinse thoroughly, and dry with a lint-free towel. For extra adhesion, wipe the outside surface with rubbing alcohol and let it dry completely.
Work on a flat, protected surface. A towel or silicone mat can stop glasses from rolling around like tiny transparent escape artists. If you are painting, keep cotton swabs nearby for quick fixes. If you are using vinyl, use painter’s tape to mark placement. If glitter is involved, accept that one sparkle may appear on your cheek three days from now. That is simply the glitter tax.
1. Decorate Wine Glasses with Glass Paint
Glass paint is one of the most popular ways to decorate wine glasses because it offers the most artistic freedom. You can paint flowers, dots, stripes, fruit slices, snowflakes, tiny stars, initials, abstract swirls, or full seasonal themes. If you can draw it on paper, you can probably simplify it enough to paint on glass.
Best Design Ideas for Painted Wine Glasses
For beginners, dots are your best friend. Use the back end of a paintbrush, a cotton swab, or a dotting tool to create confetti patterns, flower centers, or bubbly designs near the base of the bowl. Ombre dots are especially pretty: start with dense dots near the bottom, then space them out as you move upward.
Floral designs are another classic choice. Paint small leaves around the base, then add simple five-petal flowers. You do not need botanical accuracy. Nobody at the table is going to inspect your daisy and say, “Actually, that petal structure is suspicious.” Keep it loose, cheerful, and balanced.
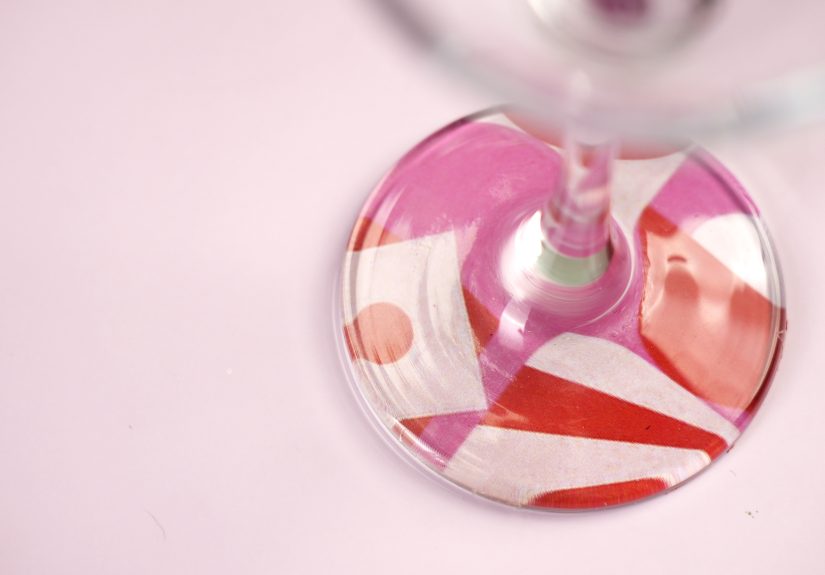
For modern glassware, try geometric patterns. Use painter’s tape to create clean triangles, stripes, or color-blocked sections. Metallic glass paint can make inexpensive glasses look elegant, especially when used sparingly on the stem or lower bowl.
How to Paint Wine Glasses
Start with clean, dry glass. Sketch your design on paper first, then place the paper inside the glass as a guide if the bowl is clear enough. Apply glass paint with a soft brush, sponge, or paint marker. Thin layers usually look smoother than one thick coat. Let each layer dry before adding another.
Many glass paints require curing. Some air-cure over several days, while others can be baked according to the product instructions. Always follow the paint manufacturer’s directions because temperature, curing time, and dishwasher safety vary by brand. Even when a product says it is top-rack dishwasher safe after curing, hand washing is usually gentler and helps preserve the design longer.
Painted Wine Glass Tips
Keep your brush strokes light and avoid overworking the paint. Glass is slick, so pushing the brush around too much can create streaks. If you make a mistake while the paint is wet, wipe it off with a damp cotton swab. If the paint has dried, check the product label for removal advice before scraping.
Painted wine glasses work beautifully for weddings, holiday brunches, birthday tables, teacher gifts, and handmade party favors. They also make lovely decorative glasses for mocktails, sparkling water, juice, or dessert displays. The design is the star; the beverage is just along for the ride.
2. Decorate Wine Glasses with Permanent Vinyl Decals
Vinyl decals are perfect when you want clean lettering, names, monograms, dates, silhouettes, or small icons without hand-painting every detail. This method is especially useful for custom wedding glasses, bridesmaid gifts, party place cards, and themed event glassware.
Why Vinyl Works So Well on Wine Glasses
Permanent adhesive vinyl can cling well to smooth glass when applied correctly. It gives you crisp lines that are hard to achieve with a brush, especially if your hands shake when concentrating. Vinyl also comes in many finishes, including matte, glossy, metallic, holographic, frosted, and glitter-look options.
The secret is choosing simple designs. Wine glasses are curved, and curved surfaces do not always cooperate with large flat decals. Small names, initials, hearts, stars, leaves, short phrases, or narrow decorative bands usually apply more smoothly than giant complicated designs.
How to Apply Vinyl to Wine Glasses
Clean the glass thoroughly and let it dry. Cut or buy your vinyl decal, remove the extra vinyl around the design, and place transfer tape over the top. Burnish the transfer tape firmly so the design lifts cleanly. Position the decal on the glass, then press from the center outward to reduce bubbles and wrinkles.
For curved glasses, make tiny relief cuts around the transfer tape, not through the design itself. This helps the tape bend around the curve. Once the decal is stuck, peel the transfer tape back slowly at a low angle. Press the vinyl down again with your fingers or a soft cloth.
Vinyl Wine Glass Design Ideas
Try a classic monogram near the lower bowl, a small name along the side, or a date on the base for a keepsake. For parties, make each guest’s glass slightly different with vinyl initials. It solves the “Which glass was mine?” problem without requiring detective-level memory.
Vinyl is also excellent for themed sets. Think snowflakes for winter, lemons for summer, pumpkins for fall, stars for New Year’s Eve, or tiny flowers for spring celebrations. For a minimalist look, use white or metallic vinyl. For a playful look, combine two colors, but keep the layout clean so the glass does not look like it lost a fight with a sticker drawer.
How to Care for Vinyl-Decorated Wine Glasses
Hand wash vinyl-decorated glasses gently with mild soap. Avoid soaking them, scrubbing directly over the decal, or putting them in the microwave. Heat and harsh washing can weaken adhesive over time. Let the glass air dry or pat it carefully with a soft towel.
3. Decorate Wine Glasses with Glitter and Decoupage
Glitter wine glasses are bold, festive, and unapologetically cheerful. They are popular for birthdays, weddings, bachelorette-style themes, holiday parties, and gift sets. The trick is making the glitter look intentional rather than like a craft drawer sneezed.
Where to Put Glitter on Wine Glasses
The safest and cleanest placement is usually the stem, base, or lower outside bowl. Avoid the rim and the inside of the glass. A glittered base creates sparkle without interfering with drinking. A glitter-dipped stem looks elegant and is easier to handle than a fully covered bowl.
For an upscale look, try an ombre glitter design. Apply more glitter near the base and gradually fade it upward. Gold, silver, rose gold, champagne, pearl, and iridescent glitter are timeless choices. Bright colors work well for birthdays, school events, themed parties, and playful table settings.
How to Make Glitter Wine Glasses
Tape off the section you want to decorate. Apply a dishwasher-safe decoupage medium or glass-safe adhesive to the outside of the glass. Sprinkle fine glitter over the wet adhesive, tap off the excess, and let it dry. Add another thin sealing layer over the glitter once the first layer is fully dry.
Fine glitter usually gives a smoother finish than chunky glitter. Chunky glitter can look fun, but it may create a rough texture that is harder to seal. If you want a professional finish, build several thin layers instead of one thick, gloopy layer. Gloopy is not a design style. It is a cry for help.
Decoupage Ideas Beyond Glitter
Decoupage is not limited to sparkle. You can use small pieces of tissue paper, patterned napkins, pressed-look paper flowers, or translucent paper shapes. Apply them to the outside of the glass with a suitable decoupage medium, then seal according to product instructions.
Tissue paper mosaics are especially pretty on stemless glasses. Cut or tear small shapes and layer them near the bottom of the glass. When light passes through, the colors glow like stained glass. This method works well for decorative glasses, party centerpieces, or candle holders made from wine glasses.
Care Tips for Glitter and Decoupage Glasses
Even when using washable products, hand washing is the gentlest option. Do not soak glittered glasses. Do not scrub the decorated area. Let them cure fully before use, because rushing the process can make the finish cloudy, tacky, or fragile. Patience is boring, yes, but so is watching glitter peel off in the sink.
4. Decorate Wine Glasses with Charms, Ribbon, and Removable Accents
Removable decorations are the easiest, safest, and most flexible way to decorate wine glasses. They are ideal when you want themed glassware for one event but do not want to permanently change the glasses. This method is also excellent for renters, busy hosts, and anyone who likes commitment-free crafting.
Wine Glass Charms
Wine glass charms wrap around the stem and help guests identify their glasses. You can make them with small hoops, beads, letter charms, tassels, tiny ornaments, or themed pendants. Use different colors or initials so each glass has its own marker.
Charms are perfect for weddings, dinner parties, baby showers, graduation celebrations, holiday gatherings, and family events. They add personality without touching the drinking surface. They are also reusable, which makes them practical if you host often.
Ribbon and Twine Decorations
Ribbon can instantly change the mood of a wine glass. Satin ribbon feels formal, gingham feels picnic-ready, velvet feels holiday-rich, and jute twine gives rustic farmhouse energy. Tie a small bow around the stem or just below the bowl. Keep it snug enough to stay in place but loose enough to remove easily.
For weddings, use ribbon in the event colors. For birthdays, match the ribbon to the party palette. For fall tables, combine twine with tiny faux leaves. For winter, add a small bell or snowflake charm. The glass gets dressed up without needing paint, glue, or a dramatic cleanup scene.
Temporary Stickers and Washi Tape
Temporary stickers and washi tape can work for short-term decorating, especially for photo props or party tables. Use them on the lower bowl, stem, or base. Because they are not usually designed for washing, remove them after the event and clean any residue from the glass.
Washi tape is great for color bands, quick stripes, or place-card labels. Write guest names on small tape flags and attach them to stems. It is fast, affordable, and easy to change when someone brings an unexpected plus-one and your seating chart begins sweating.
Choosing the Right Method for Your Project
If you want a handmade artistic look, choose glass paint. If you want clean names, dates, or monograms, choose permanent vinyl. If you want party sparkle, choose glitter and decoupage. If you want something quick, reusable, and low-risk, choose charms or ribbon.
Think about how the glasses will be used. For keepsakes, painted or vinyl designs feel personal and lasting. For one-night events, removable decorations are easier. For gifts, combine methods: a painted base with a small charm, or a vinyl monogram with a ribbon bow around the stem.
Common Mistakes to Avoid When Decorating Wine Glasses
Decorating Too Close to the Rim
This is the big one. Keep paint, vinyl, glitter, glue, and sealers away from the drinking edge. It looks cleaner and keeps the glass more comfortable to use.
Skipping Surface Prep
Glass may look clean while secretly wearing a tiny jacket of oil and dust. Always wash, dry, and wipe the surface before decorating. Better prep means better adhesion.
Using the Wrong Materials
Regular acrylic paint may not last on glass unless it is made for glass surfaces or properly sealed. Craft glue may cloud, peel, or soften when washed. Always choose materials labeled for glass, ceramics, or washable decorative use.
Washing Too Soon
Many decorated glasses need curing time. If the label says wait several days, wait several days. Your future self will appreciate not having to repair a design that slid off like a bad mood.
500-Word Experience Section: What Actually Works When Decorating Wine Glasses
After trying different wine glass decorating methods, the biggest lesson is that simple designs usually look the most expensive. The first instinct is to add everything: glitter, initials, dots, flowers, ribbon, maybe a tiny crown if the craft drawer is feeling dramatic. But glass already has elegance because it reflects light. A small design placed well often looks better than a glass covered from top to bottom.
Painting is the most relaxing method once you stop expecting perfection. The curved surface feels awkward at first, especially on stemless glasses. Turning the glass slowly while keeping your brush steady helps. Dots and leaves are forgiving because they do not need to be identical. In fact, tiny differences make the design look handmade in a good way, not “I painted this during a power outage” way.
Vinyl is the method that looks the neatest fastest, but it has one sneaky challenge: curves. A design that looks perfect on a flat cutting mat can wrinkle when placed on a rounded glass. Smaller decals solve most of the problem. Names, initials, and short words apply better than large quotes. Transfer tape is helpful, but peeling it slowly is everything. Rushing vinyl application is like pulling a tablecloth trick without practicing; something will probably go sideways.
Glitter delivers the biggest transformation, especially on the base or stem. The key is sealing it well and letting it cure. Fine glitter gives a smoother, more grown-up finish, while chunky glitter feels more playful. For a set of glasses, using the same glitter color on each glass creates unity even if the shapes or decorations vary slightly. This is helpful when decorating thrift-store glasses that are similar but not identical.
Removable charms are the most practical for real-life hosting. They do not require curing, drying, baking, sealing, or whispering motivational speeches to a paintbrush. They also help guests keep track of their glasses. For family gatherings or parties, charms with different colors are easier than names because people can remember “I’m the blue bead” faster than reading tiny lettering every time.
Another useful experience: make one test glass before decorating the whole set. This saves time, materials, and emotional stability. A design may look great in your head but feel too busy on actual glass. Testing also shows how paint dries, how vinyl curves, and whether the glitter color matches your table decor.
Finally, decorated wine glasses make excellent gifts when they are personalized but still usable. A monogram, small floral pattern, glittered base, or charm set feels thoughtful without being overly specific. The best designs fit the person’s style: elegant metallics for someone classic, bright dots for someone cheerful, rustic twine for someone farmhouse-loving, and removable charms for someone who changes decor every season like their home is running a tiny theater production.
Conclusion
Decorating wine glasses is one of those crafts that gives a big visual payoff without requiring advanced skills. Glass paint lets you create custom artwork, vinyl decals give you crisp personalization, glitter and decoupage add celebration-ready sparkle, and removable charms or ribbons offer flexible style with almost no stress. The right method depends on your event, your patience level, and how permanent you want the design to be.
For the best results, prepare the glass carefully, use materials made for glass surfaces, keep decorations away from the rim, and follow curing or care instructions. Whether you are making wedding favors, holiday table decor, handmade gifts, or just giving plain glassware a glow-up, these four wine glass decorating ideas can help you create pieces that feel personal, polished, and fun.
Note: This article synthesizes practical guidance from established U.S. craft publishers, art-supply retailers, and glass-paint product makers. Always follow the specific safety, curing, washing, and usage instructions printed on your chosen materials.


