
Table of Contents >> Show >> Hide
- What Makes a Bathroom “After” Feel Like a Total Upgrade?
- Step 1: Capture the “Before” Like a Detective (Not Like a Gremlin)
- Step 2: Choose Your Remodel Level (Refresh, Replace, or Rip-It-Down)
- Step 3: Layout Decisions That Change Everything (Even If You Don’t Move Plumbing)
- Step 4: Pick Three Anchors for Your “After” Look
- Lighting: The Fastest “Before” to “After” Upgrade You Can Feel
- Ventilation and Moisture Control: The Unsexy Secret Behind Every Great “After”
- Small Bathroom Before and After: Tricks That Actually Work
- Five Bathroom Before-and-After Examples You Can Borrow
- Example 1: Builder-Grade Guest Bath → Clean, Modern, Easy to Clean
- Example 2: Dark Small Bath → Airy “Feels Bigger” Makeover
- Example 3: “The Tile Is Fine… Except It’s Gross” → Restoration Refresh
- Example 4: Outdated Primary Bath → Spa-Inspired Upgrade (Without Going Full Hotel Lobby)
- Example 5: Family Bath → Durable, Kid-Proof, Still Stylish
- Common Mistakes That Make the “After” Feel Like a Lateral Move
- Budget Bathroom Remodel Strategy: Smart Splurges and Smart Saves
- Aftercare: Keep Your “After” Looking Like an “After”
- Experiences From Bathroom Before-and-After Projects (The Part People Learn the Hard Way)
- Wrap-Up: Your Best Bathroom Before-and-After Starts With a Plan
There are two kinds of bathrooms: the ones that help you start the day like a functional adult, and the ones that make you consider living outdoors. A great bathroom before and after transformation isn’t just about new tile and trendy fixturesit’s about turning a high-moisture, high-traffic, high-complaint zone into a space that works better, cleans easier, and looks like it’s not stuck in a time capsule.
This guide breaks down what actually changes between “before” and “after,” how to plan your remodel without chaos energy, and which upgrades create the biggest visual and functional glow-upwhether you’re doing a full bathroom remodel or a strategic refresh. Along the way, you’ll get real-world examples (the kind you can steal) and a 500-word “experience section” at the endbecause the best lessons usually show up right after you’ve already bought the wrong light fixture.
What Makes a Bathroom “After” Feel Like a Total Upgrade?
Scroll any before-and-after gallery and you’ll notice a pattern: the most dramatic transformations aren’t necessarily the most expensive ones. The “after” looks better because it solves the things the “before” was doing badly:
- Light: The “before” has a single overhead glare bulb. The “after” has layered lighting that doesn’t make you look like a haunted doll.
- Moisture control: The “before” grows mildew like it’s a hobby. The “after” ventilates properly and uses water-smart materials.
- Storage: The “before” stores everything on the counter. The “after” hides clutter so the room feels calm (and wipeable).
- Scale and proportion: The “before” has a bulky vanity in a tiny bath. The “after” fits the room and frees up floor space.
- Finishes with a plan: The “before” is a random mix of chrome, beige, and regret. The “after” sticks to a cohesive palette.
Step 1: Capture the “Before” Like a Detective (Not Like a Gremlin)
Before you touch a single tile, do a quick bathroom audit. The easiest way is to make a “Before File” on your phone: wide photos from each corner, close-ups of problem areas, and a short notes list. You’re not being dramaticthis helps you plan, budget, and later appreciate the glow-up.
Your “Before” Checklist
- Measurements: overall room dimensions, vanity width, shower/tub footprint, door swing, and where the toilet sits.
- Function pain points: not enough counter space, awkward layout, towel storage, mirror visibility, poor lighting.
- Moisture clues: peeling paint, soft drywall, stained caulk, musty smells, recurring mold/mildew.
- Daily friction: “Where do I put the hair dryer?” and “Why is the outlet located in a different zip code?”
This is also the moment to decide your non-negotiables. Maybe it’s a larger shower. Maybe it’s two sinks. Maybe it’s simply a bathroom that doesn’t feel like it’s judging you at 6 a.m. Write it down now, because design decisions get weird when you’re tired.
Step 2: Choose Your Remodel Level (Refresh, Replace, or Rip-It-Down)
Most bathroom renovations fall into three categories. The trick is picking the level that matches your goals, timeline, and budget. Your “after” can look stunning without moving plumbingsometimes the best move is not moving anything except the vibe.
1) Cosmetic Refresh (High impact, lower disruption)
- Paint (moisture-resistant), new mirror, updated lighting, new hardware, upgraded faucet, re-caulk/re-grout, styling.
- Best for: rentals, tight budgets, “I need this to look better by next weekend” energy.
2) Fixture & Finish Replacement (The classic remodel)
- New vanity, countertop, toilet, flooring, tile, and a shower/tub updateusually within the same layout.
- Best for: dated bathrooms, functional upgrades, resale-friendly improvements.
3) Full Gut Remodel (Big changes, big decisions)
- Layout changes, plumbing moves, electrical upgrades, new ventilation, waterproofing systems, everything new.
- Best for: major damage, terrible layout, accessibility needs, or “we’re here anyway, let’s do it right.”
A helpful mindset: define the “after” you want first, then choose the smallest remodel level that gets you there. That’s how you avoid paying full-gut prices for what was basically a lighting problem.
Step 3: Layout Decisions That Change Everything (Even If You Don’t Move Plumbing)
Layout is the skeleton of your before-and-after story. If your bathroom feels cramped, it’s often because clearances are tight, door swings collide, or fixtures are oversized for the space.
A common pro tip from before-and-after remodels: keep the plumbing footprint if it works. Moving supply and drain lines can raise cost and complexity fast. But you can still improve flow by right-sizing the vanity, changing the door type (pocket or out-swing where appropriate), and using storage that goes vertical.
Comfort Clearances to Aim For
- Breathing room in front of fixtures: you want enough clear space so the bathroom doesn’t feel like an obstacle course.
- Toilet + vanity spacing: avoid squeezing them together so tightly that your elbows file a complaint.
- Shower entry clearance: give yourself space to step in/out safelywet floors are not a personality trait.
If you’re planning a long-term home, consider age-friendly choices now: slip-resistant flooring, brighter lighting, blocking in walls for future grab bars, and a shower that’s easy to step into. These can blend in beautifully when planned early.
Step 4: Pick Three Anchors for Your “After” Look
The easiest way to create a cohesive “after” is to commit to three anchor elements and build around them. Most bathrooms look “random” because every decision was made in isolation at 11:47 p.m.
Anchor #1: Shower/Tub Zone
The wet zone is where the “after” earns its reputation. Great before-and-after transformations typically upgrade: tile layout, niches/shelving, hardware finish, and (most importantly) the waterproofing strategy behind the scenes. Tile and grout aren’t inherently waterproof; the system underneath matters.
- Best visual upgrades: frameless glass, large-format tile, a curbless/low-curb entry (when feasible), and a clean-lined niche.
- Best functional upgrades: pressure-balanced or thermostatic valves, easy-clean surfaces, and smart shower storage.
Anchor #2: Vanity + Storage Strategy
Vanities are the “face” of the bathroom, but storage is the “brain.” In before-and-after remodels, swapping a bulky cabinet for a better-fitting vanity often makes the room feel bigger instantly.
- Small bathroom makeover move: a floating vanity or a furniture-style vanity with legs can visually open up the floor.
- Clutter control: deep drawers, integrated organizers, and a medicine cabinet that actually holds things (imagine!).
Anchor #3: Flooring and Wall Color
Flooring is a huge part of the “after” because it’s uninterrupted surface area. In smaller bathrooms, a calmer floor pattern can make the room feel larger. If you love bold design, consider putting the drama on a single wall (or wallpaper) instead of the floor plus shower plus vanity plus ceiling. Your bathroom does not need to be a themed restaurant.
Lighting: The Fastest “Before” to “After” Upgrade You Can Feel
Lighting is where many bathrooms go wrongespecially older ones with a single overhead fixture that casts shadows like a campfire ghost story. Better lighting improves daily life and makes your finishes look more expensive than they were.
Layered Bathroom Lighting (Simple, Not Fussy)
- Task lighting: sconces at the sides of the mirror (or a great vanity light) for grooming.
- Ambient lighting: recessed lights or a ceiling fixture for overall brightness.
- Optional mood lighting: dimmers, a shower-rated recessed light, or subtle LED under-vanity glow.
Bonus: good lighting makes “after photos” actually look like your bathroomnot like a blurry witness sketch.
Ventilation and Moisture Control: The Unsexy Secret Behind Every Great “After”
Bathrooms are moisture machines. Without proper ventilation, even the prettiest remodel can become a peeling, moldy disappointment. The best before-and-after projects treat moisture control like a must-have, not a “maybe later.”
What a Solid Ventilation Plan Looks Like
- Use the fan: run it during showers and long enough after to clear humidity.
- Right-size it: airflow needs depend on bathroom size and conditions; choose quality equipment and good installation.
- Seal and finish smart: mold-resistant products where appropriate, and clean caulk lines that keep water where it belongs.
Moisture control is also why “cheap” shortcuts in the shower area are the most expensive mistakes later. Spend the money (or time) on the system behind the tile, not just the pretty tile itself.
Small Bathroom Before and After: Tricks That Actually Work
If you’re planning a small bathroom makeover, you’re not alonesmall baths show up constantly in before-and-after galleries because the transformation feels dramatic with just a few smart changes.
High-Impact Small Bath Moves
- Go bigger on tile: large-format tile can reduce visual “busyness” from grout lines.
- Choose a clearer shower boundary: glass (or a simpler curtain setup) keeps the room feeling open.
- Use mirrors strategically: a larger mirror (or mirrored cabinet) bounces light and adds function.
- Get storage off the counter: recessed shelves, a tall cabinet, over-toilet storage, or better vanity drawers.
- Pick a tight palette: two or three main tones often looks more “designed” than five competing finishes.
Five Bathroom Before-and-After Examples You Can Borrow
These are common “before” problems and the upgrades that usually create a satisfying “after.” Use them as a menumix and match to fit your space.
Example 1: Builder-Grade Guest Bath → Clean, Modern, Easy to Clean
- Before: beige tile, bulky vanity, mirror with a harsh strip light, zero personality.
- After: a sleeker vanity, framed mirror, updated lighting, matte black or brushed metal hardware, and a fresh wall color that doesn’t scream “rental tan.”
- Why it works: lighting + hardware + cohesive palette can make a basic bathroom look intentional.
Example 2: Dark Small Bath → Airy “Feels Bigger” Makeover
- Before: poor lighting, heavy colors, cluttered counters, shower curtain swallowing the room.
- After: brighter wall color, layered lighting, a better mirror, vertical storage, and a lighter shower boundary.
- Why it works: you didn’t add square footageyou removed visual obstacles.
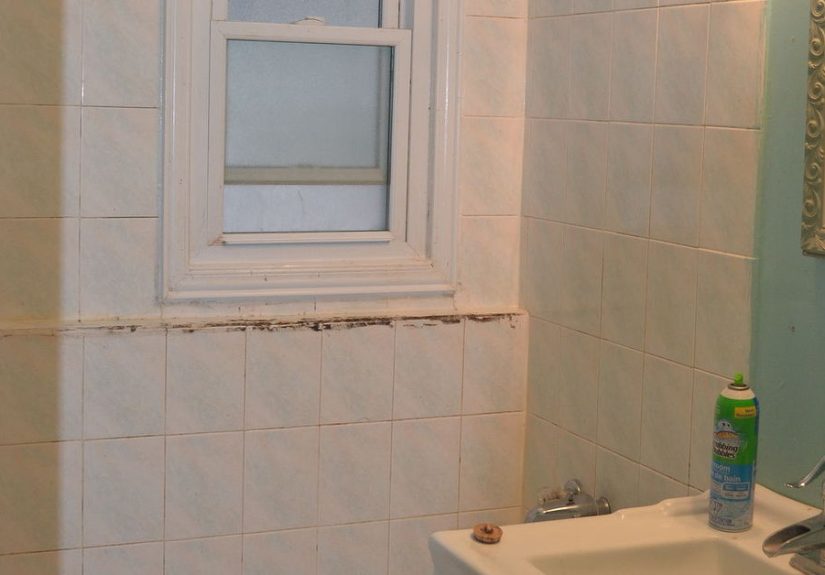
Example 3: “The Tile Is Fine… Except It’s Gross” → Restoration Refresh
- Before: decent tile, but stained grout, failing caulk, and a general “why does it feel damp?” mood.
- After: deep clean, refreshed grout where appropriate, new silicone caulk in wet zones, and better ventilation habits.
- Why it works: sometimes the “after” is maintenance done correctly, not a full demo.
Example 4: Outdated Primary Bath → Spa-Inspired Upgrade (Without Going Full Hotel Lobby)
- Before: oversized tub you never use, cramped shower, dated lighting, not enough storage.
- After: larger shower, niche storage, calming finishes, dimmers, and a vanity that holds real life (not just decorative soap).
- Why it works: you designed around daily routines, not “what looks cool for 10 seconds online.”
Example 5: Family Bath → Durable, Kid-Proof, Still Stylish
- Before: slippery floors, scuffed paint, open shelving chaos.
- After: slip-resistant flooring, durable wall finish, closed storage, and lighting that actually helps during morning traffic.
- Why it works: the “after” survives real humans.
Common Mistakes That Make the “After” Feel Like a Lateral Move
If you want a before-and-after transformation that feels worth it, avoid these classics:
- Skipping the plan: buying finishes before measuring (the decorating equivalent of gambling).
- One-light syndrome: installing a nice mirror… and leaving the same harsh ceiling light to ruin everything.
- Ignoring moisture: choosing pretty materials without considering ventilation, waterproofing, and cleanable surfaces.
- Too many finishes: mixing five metal tones and three tile styles until the bathroom looks confused.
- Storage afterthought: designing a “minimalist” bath with nowhere to put toothpaste, towels, or reality.
- Wrong scale: a giant vanity in a tiny bath, or tiny tile patterns that visually “shrink” the room.
Also: always follow local building codes and use licensed pros when requiredespecially for plumbing and electrical. A gorgeous “after” should not come with a side of “mysterious buzzing sound.”
Budget Bathroom Remodel Strategy: Smart Splurges and Smart Saves
A budget bathroom remodel doesn’t mean “cheap.” It means you spend money where it prevents future problems and save where the upgrade is mostly cosmetic.
Splurge Where It Protects the Bathroom
- Waterproofing and shower systems: the behind-the-scenes work that keeps the remodel from failing.
- Quality ventilation: fewer moisture issues and better daily comfort.
- Professional tile work (when needed): tile is beautifuluntil it’s lumpy, cracked, or leaking.
Save Where Swaps Create Big Visual Wins
- Keep the layout: if it’s functional, don’t pay to move plumbing just for fun.
- Paint and hardware: small changes with outsized “after” energy.
- Mirror + lighting combo: often looks like a mini-renovation by itself.
- Refresh instead of replace: when surfaces are structurally fine, maintenance can be the makeover.
Aftercare: Keep Your “After” Looking Like an “After”
The best before-and-after bathrooms stay that way because the owners treat maintenance like part of the design. It’s not glamorous, but neither is scraping mystery gunk off grout lines on a Saturday.
- Run ventilation during and after showers; reduce lingering humidity.
- Use a small squeegee on shower walls if you want to cut down on water spots and buildup.
- Keep caulk lines clean and repair failing caulk earlywater will always pick the weakest spot.
- Use gentle cleaners appropriate for your finishes; harsh chemicals can damage grout and coatings.
Experiences From Bathroom Before-and-After Projects (The Part People Learn the Hard Way)
If you read enough bathroom before-and-after stories, you start to notice the same “experience lessons” popping upusually right after the dust settles. Here are the most common ones homeowners share, wrapped in the friendly warning label they deserve.
1) “I thought the tile would be the hardest part… and then I met lighting.”
People often obsess over tile (understandableit’s gorgeous and comes in approximately one million options), but the day-to-day experience of a bathroom is heavily shaped by lighting. Many “before” bathrooms have a single overhead light that makes everything feel flat and shadowy. In the “after,” once layered lighting is in place, the whole room looks cleaner, brighter, and more expensiveeven if you didn’t change every finish.
The lesson: plan lighting early, and don’t treat it like a last-minute accessory. Also, if you’ve ever looked in the mirror and thought, “Wow, I look… tired,” there’s a decent chance your bathroom light is committing a crime.
2) “Storage isn’t boringclutter is.”
A lot of bathrooms look messy not because people are messy, but because the room has nowhere to hide normal life. Hair tools, skincare, extra toilet paper, cleaning spraythese things exist. In after photos, counters look calm because the storage plan is smarter: deeper drawers, a functional medicine cabinet, hooks where you actually need them, and shelves that aren’t just decorative.
The lesson: if you want a spa vibe, you don’t start with eucalyptus. You start with a drawer that can hold your toothbrush charger and your dignity.
3) “Moving plumbing sounded simple… until it wasn’t.”
Many remodelers go in thinking, “Let’s just shift the toilet a little,” or “How hard could it be to move the shower?” The reality is that plumbing moves can snowballopening floors, adjusting drains, dealing with venting and structural constraints, and coordinating inspections where applicable. That’s why so many impressive before-and-after projects keep the same basic layout and still look completely different afterward.
The lesson: if the layout works, keep it. Put your budget into the upgrades you can see and feel every daylike a better shower, better lighting, and better storage.
4) “Moisture control is the quiet hero of the ‘after.’”
Homeowners who’ve dealt with peeling paint, recurring mildew, and musty smells often say the same thing: they wish they had prioritized ventilation sooner. A beautiful bathroom that traps humidity ages fast. The best “after” bathrooms stay beautiful because they’re dry enough to behave. That means good ventilation, sensible materials in wet areas, and regular maintenance of caulk and grout lines.
The lesson: the prettiest tile in the world won’t save you from a bathroom that can’t exhale.
5) “I regret the trendy thing… but I never regret the comfortable thing.”
Trendy choices can be funbold wallpaper, statement tile, dramatic paintbut the most loved “after” bathrooms usually balance personality with longevity. Homeowners rarely regret a comfortable shower, a vanity height that feels good, a mirror that’s the right size, or lighting that makes mornings easier. Regrets more often show up around choices that looked cool online but are annoying in real life: high-maintenance finishes, overly busy patterns, and materials that show every water spot.
The lesson: choose one “wow” moment, then let everything else support it. Your bathroom doesn’t need to audition for a reality show. It needs to help you function.
Wrap-Up: Your Best Bathroom Before-and-After Starts With a Plan
A successful bathroom before-and-after transformation is part design, part engineering, and part honest self-reflection about how you actually live. Start with the “before” audit, pick your remodel level, anchor the design with a few key choices, and invest in moisture control and lighting. Do that, and your “after” won’t just photograph wellit’ll feel better every single day.


