
Table of Contents >> Show >> Hide
- What Are Neapolitan Cookies, Exactly?
- The “Best” Neapolitan Cookie: What We’re Aiming For
- Key Ingredient Choices (Small Decisions, Big Cookie Energy)
- Best Neapolitan Cookies Recipe
- How To Make Neapolitan Cookies (Step-by-Step)
- Pro Tips for Bakery-Pretty Neapolitan Cookies
- Troubleshooting
- Variations (Because Cookies Should Be Allowed to Have Hobbies)
- Make-Ahead and Storage
- FAQ
- Experience Notes: What Usually Happens in Real Kitchens (And How to Win Anyway)
- Conclusion
Neapolitan cookies are the dessert version of “why choose?”chocolate, vanilla, and strawberry living
together in peaceful, delicious harmony. Think Neapolitan ice cream, but with more butter and fewer
melty regrets.
This guide gives you a best-in-class Neapolitan cookies recipe (with a foolproof loaf-pan
shaping trick), plus the baking science behind crisp edges, soft centers, clean slices, and bold strawberry
flavor that tastes like fruitnot pink perfume.
What Are Neapolitan Cookies, Exactly?
“Neapolitan cookies” can mean a few different things in American kitchens:
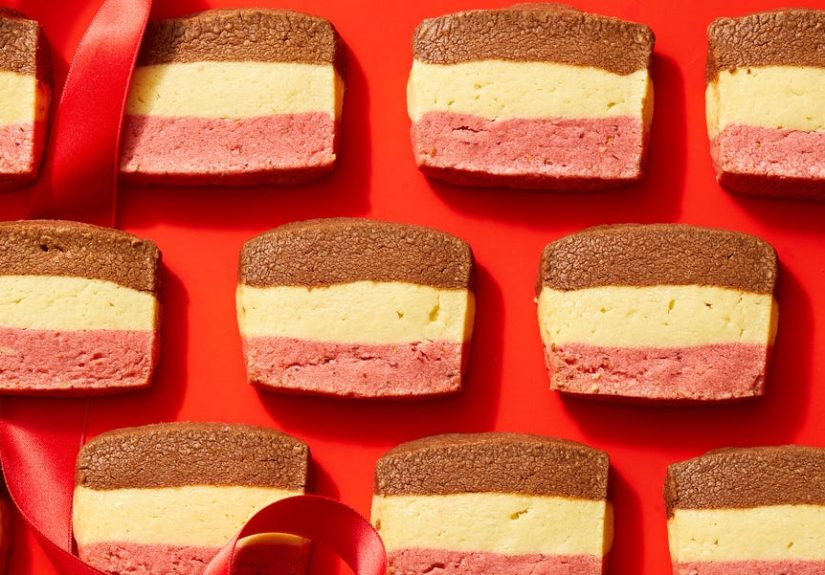
- Tri-flavor slice-and-bake cookies (vanilla, chocolate, strawberry) baked together in one cookie.
- Shortbread-style Neapolitan cookies, more crisp and buttery, often layered or swirled.
- Bakery-style almondy holiday versions (sometimes with jam and chocolate coatings).
This recipe focuses on the most crowd-pleasing, most repeatable style: one base dough, divided into
three flavors, pressed into a loaf, chilled, sliced, and baked. It’s neat, reliable, and looks like you
own a tiny cookie boutique (without requiring boutique-level patience).
The “Best” Neapolitan Cookie: What We’re Aiming For
- Strong flavors: real cocoa, real vanilla, and real strawberry flavor (not just food coloring).
- Clean layers: distinct stripes that don’t smear into a beige identity crisis.
- Great texture: tender butter-cookie bite with lightly crisp edges.
- Make-ahead friendly: dough can chill overnight and even freeze beautifully.
Key Ingredient Choices (Small Decisions, Big Cookie Energy)
Freeze-dried strawberry powder
Fresh strawberries add water, and water is the sworn enemy of tidy cookie dough. Freeze-dried strawberries
deliver concentrated berry flavor without turning the dough into a sticky puddle. You can buy freeze-dried
strawberries (snack aisle), then blitz into a powder.
Cocoa powder
Use unsweetened cocoa powder for the chocolate portion. If you want a deeper chocolate note, add a
tiny pinch of espresso powder (optional), but don’t turn your cookie into a mocha résumé.
Chilling
Chilling firms the butter, helps the flour hydrate, and reduces spreadaka the difference between a
gorgeous striped cookie and a cookie tie-dye experiment.
Best Neapolitan Cookies Recipe
Yield: about 24–30 cookies (depending on thickness)
Prep: 25 minutes
Chill: 2–3 hours (or overnight)
Bake: 10–12 minutes per batch
Oven: 350°F
Ingredients (Base Dough)
- 1 cup (226 g) unsalted butter, softened (cool-room-temp, not greasy)
- 1 cup (200 g) granulated sugar
- 1 large egg
- 2 teaspoons vanilla extract (yes, twothis is the vanilla team’s moment)
- 2 1/2 cups (315 g) all-purpose flour
- 1 1/2 teaspoons baking powder
- 1/2 teaspoon fine salt
- Optional: 1/4 teaspoon almond extract (adds bakery-style warmth)
Flavor Add-Ins (Divide the Dough into 3 Parts)
- Chocolate portion: 3 tablespoons (18–20 g) unsweetened cocoa powder
- Strawberry portion: 1/3 cup (about 12–15 g) freeze-dried strawberry powder
- Vanilla portion: no add-in needed (it’s the control group, but delicious)
- Optional for color: a drop or two of pink/red gel food coloring for strawberry
- Optional for “pop”: 1/2 teaspoon strawberry extract (use sparingly)
Equipment
- Stand mixer or hand mixer
- Food processor or blender (for freeze-dried strawberries)
- 9×5-inch loaf pan
- Parchment paper
- Sharp knife
- Baking sheets + parchment or silicone mat
How To Make Neapolitan Cookies (Step-by-Step)
Step 1: Make strawberry powder
Add freeze-dried strawberries to a blender or food processor and pulse until you get a fine powder.
If it clumps, it’s just excited. Break it up with a spoon and keep going.
Step 2: Mix dry ingredients
In a medium bowl, whisk flour, baking powder, and salt. Set aside.
Step 3: Cream butter + sugar
Beat butter and sugar on medium speed until light and fluffy, about 2–3 minutes. You’re adding air
for a tender cookie, not training for an arm-wrestling tournamentdon’t overdo it.
Step 4: Add egg + vanilla
Beat in the egg until combined, then mix in vanilla (and almond extract if using).
Step 5: Add dry ingredients
Add the flour mixture and mix on low until the dough just comes together. Stop the mixer as soon as
you don’t see dry flour. Overmixing toughens cookies, and nobody wants a cookie that bites back.
Step 6: Divide and flavor the dough
Divide dough into three equal portions (a kitchen scale helps, but “close enough” works).
- Chocolate: Knead in cocoa powder until evenly colored.
- Strawberry: Knead in strawberry powder (and a tiny bit of gel color if desired).
- Vanilla: Leave as-is.
If the chocolate or strawberry dough feels a bit drier, that’s normalpowders absorb moisture. If it
becomes crumbly, knead with 1 teaspoon milk at a time until it holds together (usually 1–2 teaspoons is plenty).
Step 7: The loaf-pan layering trick (clean stripes, minimal chaos)
- Line a 9×5-inch loaf pan with parchment, leaving overhang on the long sides.
- Press the chocolate dough into an even layer in the bottom.
- Press the vanilla dough on top (use parchment or lightly floured fingers to prevent sticking).
- Press the strawberry dough on top and smooth the surface.
- Cover and chill 2–3 hours, or overnight for the cleanest slices.
Step 8: Slice and bake
- Preheat oven to 350°F. Line baking sheets with parchment.
- Lift the dough slab out using parchment overhang.
- Slice into cookies about 1/4-inch thick for classic crisp-tender cookies, or 3/8-inch for softer centers.
- Place cookies 2 inches apart on the baking sheet.
- Bake 10–12 minutes, until edges are just set and the tops look dry (don’t wait for deep browning).
- Cool 5 minutes on the sheet, then transfer to a rack.
Pro Tips for Bakery-Pretty Neapolitan Cookies
Tip 1: Keep your dough cool
Warm dough spreads. Cool dough keeps its shape. If your kitchen runs hot, chill sliced cookies on the
baking sheet for 10 minutes before baking.
Tip 2: Don’t bake on a hot baking sheet
If you reuse the same baking sheet for multiple batches, let it cool completely. Hot pans melt the butter
before the cookie sets, and stripes start drifting like they’re late for a meeting.
Tip 3: Slice with confidence
Use a sharp knife and wipe it clean occasionally. If the top layer cracks a bit, press it gently back
togethercookies are forgiving, unlike group projects.
Troubleshooting
My cookies spread too much
- Dough wasn’t chilled long enough (go overnight next time).
- Butter was too warm/soft to start.
- Flour was under-measured (spoon and level, or weigh it).
- Baking sheet was warm.
My strawberry flavor is weak
- Use more freeze-dried strawberry powder (add 1–2 tablespoons more).
- Make sure it’s finely powderedbig flakes give texture but less flavor impact.
- Add a tiny amount of strawberry extract (optional, but easy to overdo).
My layers smear when slicing
- Chill longer. The dough should feel firm like cold cheese (not like soft frosting).
- Use a sharp knife and avoid sawing back and forth aggressively.
Variations (Because Cookies Should Be Allowed to Have Hobbies)
Chocolate-dipped Neapolitan cookies
Dip half of each cooled cookie in melted semisweet or dark chocolate. Let set on parchment.
This is the fastest way to make your cookies look “giftable” without buying ribbon.
Shortbread-style (crisper)
Prefer a snappy, buttery bite? Reduce the egg to just the yolk (or omit egg and add a touch more butter),
and chill thoroughly. Shortbread styles love low spread and clean edges.
Almond-bakery twist
Add 1/4 teaspoon almond extract to the base dough, or swap a few tablespoons of flour for finely
ground almonds for a subtle Italian-bakery vibe.
Jam-sandwich moment
Spread a thin layer of strawberry jam between two cookies. Now you have Neapolitan cookie sandwiches,
and suddenly “one cookie” is a very flexible concept.
Make-Ahead and Storage
- Refrigerate dough: wrapped tightly, up to 3 days (bake when you’re ready).
- Freeze dough: freeze the layered slab well-wrapped up to 2 months. Thaw overnight in the fridge before slicing.
- Store baked cookies: airtight container at room temperature for 5–7 days.
- Freeze baked cookies: up to 2 months; thaw at room temp.
FAQ
Do I have to use food coloring?
Nope. Freeze-dried strawberry powder gives a natural pink hue. Color helps the stripe pop, but it’s optional.
Can I make these gluten-free?
You can try a 1:1 gluten-free baking flour blend designed for cookies. Expect a slightly different texture
and be extra generous with chilling.
What thickness is best?
For a classic butter-cookie bite, slice 1/4-inch thick. For softer centers, go 3/8-inch and bake just until set.
Experience Notes: What Usually Happens in Real Kitchens (And How to Win Anyway)
Neapolitan cookies look like they require a pastry diploma, a marble slab, and a dramatic scarf. In reality,
the biggest “skill” is learning what the dough should feel like at each stageand not rushing the chill.
In many home kitchens, the first batch is where bakers discover the truth: cookie dough has opinions.
The most common moment of panic happens right after dividing the dough. The chocolate portion can feel
slightly firmer, and the strawberry portion can swing either way: powder makes it drier, but humidity can
make it tacky. The fix is simple: knead gently and adjust in tiny steps. If a portion feels crumbly, add milk
by teaspoons. If it feels sticky, dust in a teaspoon of flour and chill for 10 minutes. The goal isn’t perfection;
it’s a dough that presses smoothly without sticking to your fingers like it’s trying to hitch a ride.
Another real-world lesson: pressing layers into the loaf pan is oddly therapeutic until it isn’t. If the dough
sticks while you’re smoothing the vanilla layer over chocolate, use parchment as your “hand.” Lay a small
sheet of parchment on top and press/smooth through it. Your fingers stay clean, your layers stay even, and
you avoid accidentally inventing “Neapolitan marble cookies” (which taste fine, but aren’t the look you came for).
Chilling is where patience pays rent. Many bakers chill “until it’s not warm anymore,” slice, bake, and then
wonder why the stripes spread like they’re trying to socialize. For consistently sharp layers, a longer chill
works betterovernight is ideal if you want picture-perfect slices. There’s also a confidence boost that comes
from slicing a firm slab: the knife glides, the edges stay neat, and you feel like the cookie whisperer you were
born to be.
Baking day brings its own quirks. Ovens run hot, pans vary, and cookies can go from “set” to “overdone” fast.
The secret is watching for cues: the tops should look dry and the edges should be just barely turning golden.
If you wait for the strawberry stripe to brown, the chocolate stripe will be plotting revenge. Pull them when
they look slightly underbaked; they’ll finish setting on the tray as they cool.
Finally, there’s the joy factorbecause these cookies aren’t just pretty, they’re fun. They show up well on
cookie platters, brighten up holiday tins, and make ordinary afternoons feel like a mini celebration. Many
bakers find the flavor balance improves the next day as the strawberry and cocoa mellow into the butter base.
Translation: if you “test” a cookie today and it tastes even better tomorrow, that’s not a flaw. That’s a feature.
A delicious, three-stripe, totally reasonable excuse to bake ahead.
Conclusion
If you want one cookie that does the most (in a good way), Neapolitan cookies are it. With one base dough,
smart flavor add-ins, and a loaf-pan method that practically guarantees clean layers, you can bake a batch that
tastes classic, looks impressive, and doesn’t require a second mortgage in sprinkles.


