Table of Contents >> Show >> Hide
- What “Chalk Paint” Means Outdoors (and Why That Matters)
- Should You Chalk Paint a Patio Ceiling and Exterior Wall?
- Pick the Right Product: Three Smart Options
- Know Your Surface: Patio Ceiling and Back-of-House Checklist
- Tools and Materials (So You Don’t “Make It Work” With a Dinner Fork)
- Step-by-Step: Chalk Painting a Backyard Patio Ceiling
- 1) Protect the area like you’re filming a crime scene
- 2) Clean thoroughly (this is where paint jobs go to live or die)
- 3) Scrape loose paint and feather the edges
- 4) Repair and caulk gaps (especially at seams)
- 5) Prime only where it’s needed (but don’t skip it when it is)
- 6) Paint the ceiling: cut in, then roll
- 7) If using decorative chalk paint: seal it (and pick the right sealer)
- Step-by-Step: Chalk Painting the Back of the House
- Sealing and Protection: The Outdoor Durability Playbook
- Design Ideas That Make It Look Intentional (Not Like You Ran Out of Regular Paint)
- Common Mistakes (and How to Avoid Them)
- Maintenance: How to Keep It Looking Good Without Repainting Every Spring
- FAQ
- Wrap-Up: A Chalky Finish That’s Cute and Built to Last
- Experiences and Lessons Learned From Real-World Chalky Outdoor Projects (Extra Section)
- The overhead painting surprise: “Why do my arms hate me?”
- The drip reality: “I thought I covered everything… I did not.”
- The “chalky look” learning curve: matte shows application habits
- The mildew plot twist: it comes back if you don’t solve the cause
- The sealer debate: “Do I really need it?”
- The best surprise: the space feels “finished”
If your backyard patio ceiling and the back of your house are looking a little… “seasoned” (as in: sun-faded, mildew-speckled, and vaguely judgmental),
chalk painting can be a surprisingly charming way to freshen things up. Done right, it creates a soft, velvety, modern-matte finish that hides a lot of minor
sinskind of like good lighting, but for siding and soffits.
Done wrong? You’ll get peeling paint confetti in your patio seating area and a finish that chalks up faster than a middle school gym scoreboard.
So this guide is all about doing it the smart way: what “chalk paint” really means outdoors, what surfaces can handle it, how to prep properly,
and how to protect the finish so it lasts.
What “Chalk Paint” Means Outdoors (and Why That Matters)
First, quick reality check: “chalk paint” is often used as a catch-all phrase for any paint that dries matte and slightly powdery. Some products are true
decorative chalk paint (popular for furniture makeovers). Others are “chalk-style” paints formulated more like acrylic latex (sometimes with exterior options).
Outdoors, that distinction matters a lot.
Here’s the outdoor-friendly rule of thumb
- If it’s a true decorative chalk paint: plan on sealing it for weather, UV, and cleaningespecially on wood and high-exposure areas.
- If it’s an exterior-rated chalk-style paint (or exterior acrylic latex): it’s designed to be its own protective system, and clear-coating is often optional (and sometimes not recommended by manufacturers).
Your patio ceiling (often soffit material, beadboard, plywood, or fiber cement) and the back of the house (siding, trim, masonry) are big surfaces exposed
to moisture swings, heat, and UV. That means we’re not just chasing “cute matte vibes.” We’re building a finish system that can live outside without throwing a tantrum.
Should You Chalk Paint a Patio Ceiling and Exterior Wall?
You canbut it’s not always the best solution for every surface. Think of chalk painting outdoors like wearing white sneakers to a barbecue:
totally doable, looks great, but you need a plan for the mess.
Why people love the look
- Matte camouflage: Hides small dings, uneven patches, and old texture better than glossy finishes.
- Designer mood: Soft, modern “European cottage” energy without committing to a full remodel.
- Great for vertical surfaces: Walls, soffits, trim, brick accentsespecially when you want a muted, heritage look.
What can go wrong
- Chalking and fading: Matte finishes can show UV wear soonerespecially on darker colors.
- Moisture issues: If you paint over dirt, mildew, or damp surfaces, the finish may bubble or peel.
- Wrong topcoat choice: Some sealers yellow, cloud, or get sticky in heat if you pick the wrong chemistry.
Pick the Right Product: Three Smart Options
Option 1: Exterior “chalk-style” paint (best for large areas)
If you’re painting the back of your house or a broad patio ceiling, an exterior-rated chalk-style paint (or a high-quality exterior acrylic latex in a flat/matte)
is usually the most durable and least fussy choice. You still get the matte look, but the coating is engineered for outdoor expansion, UV exposure, and rain.
Option 2: Decorative chalk paint + exterior-grade sealer (best for controlled “feature” areas)
If you’re set on true decorative chalk paintmaybe you’re matching furniture, planters, or a specific signature colorplan to seal it with a tough, outdoor-appropriate
varnish/lacquer. This is especially important on wood, trim, and any surface you’ll wash.
Option 3: Mineral paint / limewash for masonry (best for brick or stucco accents)
For brick, stone, or stucco sections on the back of the house, mineral-based finishes can look gorgeous and age naturally. They’re not “chalk paint” exactly,
but they deliver that soft, breathable, matte look many homeowners are after.
Know Your Surface: Patio Ceiling and Back-of-House Checklist
Before you buy paint, take five minutes to identify what you’re painting. This tells you how to prep, whether to prime, and what topcoat (if any) makes sense.
Common patio ceiling materials
- Painted wood beadboard or plywood: Usually straightforwardclean, scrape, spot-prime, paint.
- Fiber cement soffit panels: Very paint-friendly when clean and sound.
- Vinyl or aluminum soffit: Needs careful cleaning and possibly an adhesion primer; avoid thick buildup in vented areas.
Common back-of-house surfaces
- Wood siding/trim: Prime any bare wood; seal knots/tannin-prone areas if needed.
- Fiber cement siding: Paint adheres well when properly cleaned and dry.
- Brick/stucco: Requires masonry-appropriate prep; ensure you’re not trapping moisture in already-damp walls.
- Metal (flashing, doors, railings): Remove rust, use a metal-appropriate primer, and topcoat for UV.
Tools and Materials (So You Don’t “Make It Work” With a Dinner Fork)
- Exterior cleaner (or mild detergent) and a scrub brush
- Mildew remover (or an approved bleach/water mix, used safely)
- Scraper, sanding sponge (fine grit), and dust mask
- Exterior patch/filler for wood + caulk rated for exterior gaps
- Primer: stain-blocking for wood bleed-through; adhesion primer for slick surfaces
- Paint: exterior chalk-style or decorative chalk paint (if sealing)
- Brushes: angled sash brush + a smaller trim brush
- Roller + extension pole (your shoulders will send thank-you notes)
- Drop cloths, painter’s tape, plastic sheeting
- Ladder or platform + basic safety gear (gloves, eye protection)
- Topcoat/sealer (if needed): water-based exterior-rated lacquer/polyacrylic, or a product specifically labeled for outdoor use
Step-by-Step: Chalk Painting a Backyard Patio Ceiling
1) Protect the area like you’re filming a crime scene
Cover the patio floor, furniture, grills, and anything you don’t want “matte misted.” Tape off light fixtures, fan hardware (turn power off),
and adjacent walls. Overhead drips are inevitableplan for them like they’re a scheduled guest.
2) Clean thoroughly (this is where paint jobs go to live or die)
Patio ceilings attract dust, pollen, spiderwebs, and sometimes mildewespecially near the house wall line. Wash the surface with an appropriate exterior cleaner
and rinse well. If mildew is present, treat it fully and allow the surface to dry completely before painting.
3) Scrape loose paint and feather the edges
If you have peeling or flaking paint, scrape until you reach solid edges. Then lightly sand to feather transitions. You’re not sanding for funyou’re sanding so
the new finish doesn’t telegraph every ridge like a topographic map.
4) Repair and caulk gaps (especially at seams)
Fill small holes or cracks with an exterior-rated patching compound. Caulk seams where panels meet trim, but don’t caulk vent holes or weep paths.
If your soffit is vented, keep paint out of the ventsclogging airflow is a sneaky way to create attic moisture problems.
5) Prime only where it’s needed (but don’t skip it when it is)
- Bare wood: Prime it. Always.
- Stains/tannin bleed (common on wood): Use a stain-blocking primer.
- Glossy or slick materials (metal/vinyl): Use an adhesion primer if required.
6) Paint the ceiling: cut in, then roll
Cut in edges with an angled brush, then roll the field with a roller on an extension pole. Work in manageable sections and maintain a wet edge to avoid lap marks.
Two thin coats beat one heavy coat every timeespecially overhead, where gravity is always ready to humble you.
7) If using decorative chalk paint: seal it (and pick the right sealer)
For outdoor use, wax is generally a poor choice because heat and sun can soften it. Instead, use a durable, water-based exterior-rated lacquer/polyacrylic
that dries clear and has UV resistance when available. Apply thin coats and avoid overworkingover-brushing can cause cloudiness and texture issues.
Step-by-Step: Chalk Painting the Back of the House
1) Time it with the weather (and the sun)
Avoid painting in direct blazing sun, during heavy humidity, or when rain is expected too soon. Exterior coatings need a stable window to dry and start curing.
If possible, work in the shade and follow the “top down” approach so you control drips and keep a clean finish.
2) Clean, then clean again (especially near soil and sprinklers)
The back of a house tends to collect grime near the base, around hose bibs, and where sprinklers hit. Scrub those zones well. Paint won’t bond to dirt, and it
definitely won’t bond to mildew that’s planning a comeback tour.
3) Address failing paint and damaged material
If paint is peeling, scrape and sand to sound edges. If wood is rotted or soft, repair or replace before painting. Paint is not a structural engineer.
It cannot “seal in” rot with positive thoughts.
4) Prime strategically
On large exteriors, you typically prime bare or repaired sections and any stain-prone wood. Masonry may require a primer designed for that substrate.
The goal is even absorption and strong adhesionnot “more steps for the sake of steps.”
5) Apply paint in sections for a consistent look
For siding, paint one board/row at a time where practical. For brick, work the paint into mortar lines with a masonry brush and keep your coat consistent.
Chalky/matte finishes look best when coverage is evenpatchy matte is just… patchy.
Sealing and Protection: The Outdoor Durability Playbook
When you should seal
- You used a decorative chalk paint on exterior wood, trim, or high-wear areas.
- Your surface will be washed often (near grills, kids’ play areas, muddy dog highways).
- You chose a darker color that’s more prone to fading and visible scuffs.
When you might not need a clear coat
If you used an exterior-grade paint system (like exterior acrylic latex or an exterior-rated chalk-style paint), those products are typically designed to protect themselves
without an extra clear coat. Adding a random topcoat can sometimes cause adhesion or sheen issues unless the manufacturer explicitly allows it.
Topcoat tips that prevent heartbreak
- Stay water-based for clarity: Water-based topcoats are less likely to yellow than many oil-based finishes.
- Thin coats win: Heavy clear coats can look milky, streaky, or unevenespecially in matte sheens.
- Respect cure time: “Dry to the touch” is not “fully cured.” Avoid hard washing or hanging décor too soon.
Design Ideas That Make It Look Intentional (Not Like You Ran Out of Regular Paint)
1) Classic porch ceiling color, chalk-matte edition
A soft blue-green on a patio ceiling can feel airy and brighterespecially if your back-of-house siding is a deeper neutral. Keep trim a clean soft white for contrast.
2) Two-tone: ceiling lighter, wall slightly deeper
Paint the patio ceiling one to two shades lighter than the back wall. This visually “lifts” the ceiling and makes the outdoor room feel bigger.
3) Chalky finish on brick accents
A chalk-matte finish can look incredible on brickespecially if you’re aiming for a softened, European courtyard vibe. Use a masonry-friendly approach and don’t
trap moisture in already-problematic walls.
Common Mistakes (and How to Avoid Them)
- Skipping cleaning: Dirt and pollen create a weak bond layer. Paint peels. You get mad. The cycle continues.
- Painting over active mildew: It comes back through the new paint like it pays rent.
- Applying thick coats: Thick coats sag overhead and cure slower, increasing the risk of marks and failure.
- Using wax outdoors: Heat + wax can equal stickiness, dust attraction, and uneven wear.
- Blocking vents: Painted-shut soffit vents can contribute to moisture issues. Keep vents clear.
- Ignoring cure time: You can ruin a finish by washing it or bumping it before it hardens.
Maintenance: How to Keep It Looking Good Without Repainting Every Spring
A chalky-matte exterior can last beautifully when you treat it like a finish, not a force field.
Once fully cured:
- Rinse gently with a hose when pollen builds up; avoid aggressive pressure washing on delicate finishes.
- Spot-clean with mild soap and a soft brush for grime.
- Inspect annually for hairline cracks, open seams, or peeling spotstouch up early before water gets behind the film.
- Keep sprinklers from constantly soaking the lower wall area if possible.
FAQ
Can I chalk paint exterior siding?
Yes, but your best bet for long-term performance is an exterior-grade paint system with a matte/flat sheen. If you use decorative chalk paint,
plan to seal it appropriately and accept that maintenance touch-ups may be more frequent than with standard exterior paint.
Do I need to sand first?
Not always. Many chalk paints adhere well to properly cleaned, deglossed surfaces. But if your surface is glossy, dirty, or flaking, sanding (at least lightly)
helps create a stable base. The goal is adhesionnot perfection.
What about older homesdo I need to worry about lead paint?
If your home was built before 1978, assume old layers may contain lead until tested. Use appropriate safety practices and consider professional guidance
if you’re disturbing old paint extensively.
Wrap-Up: A Chalky Finish That’s Cute and Built to Last
Chalk painting a backyard patio ceiling and the back of the house can look stunningsoft, clean, and intentionally “designer.”
The success comes down to three things: prep like you mean it, choose a product that matches the surface and exposure, and protect the finish correctly.
Do that, and you’ll get a patio that feels refreshed, brighter, and way more invitingwithout the “why is it peeling?” drama.
Experiences and Lessons Learned From Real-World Chalky Outdoor Projects (Extra Section)
Homeowners who tackle chalk painting outdoors tend to have the same emotional arc: excitement, mild panic, then triumphusually in that order.
If you’re about to paint your patio ceiling or the back of your house, here are the most common “ohhh, that’s how it goes” experiences people report,
plus what they wish they’d done from the start.
The overhead painting surprise: “Why do my arms hate me?”
Painting a patio ceiling is a special kind of workoutone that sneaks up on you because you’re holding a roller above your head like you’re trying to high-five the sky.
Most DIYers start strong and then realize the real MVP is the extension pole. When you use an extension pole and keep your roller properly loaded (not dripping),
you move faster, get more even coverage, and you don’t end up with a neck cramp that makes you walk like a confused robot for two days.
The drip reality: “I thought I covered everything… I did not.”
The first time paint drips onto the patio floor, it’s annoying. The 37th time, it’s a lifestyle. People often say the best decision they made was using
larger drop cloths than they thought they neededand taping plastic to the wall where the ceiling meets the house. Overhead projects create micro-splatter
that travels farther than your confidence. If you’re painting around a ceiling fan, even more so. The “I’ll just be careful” plan is adorable, but plastic sheeting
is more reliable than optimism.
The “chalky look” learning curve: matte shows application habits
Matte finishes hide dents but they can reveal uneven coverageespecially if you stop mid-panel and restart later. DIYers often learn that consistency is everything:
keep a wet edge, finish each section cleanly, and don’t stretch paint too far. On the back of the house, painting one side in the morning shade and the other side
in afternoon sun can lead to subtle differences in how the paint levels and dries. People who love their finished results usually worked in similar conditions
and didn’t rush coat two before coat one was ready.
The mildew plot twist: it comes back if you don’t solve the cause
One of the most common experiences is painting over a “clean-looking” surface only to spot mildew freckles returning a few months later. That’s usually not the paint’s fault.
It’s a moisture and shade issue. Folks who got lasting results treated mildew properly, rinsed thoroughly, let everything dry completely,
and then looked for the sourcesprinklers hitting the wall, a gutter that dumps water, landscaping that traps humidity, or a spot that never sees sun.
Fixing those things feels less fun than picking paint colors, but it’s the difference between “wow” and “why.”
The sealer debate: “Do I really need it?”
Many people try to skip sealing because the finish looks perfect right after painting. Then real life happens: wind-blown dust sticks, fingerprints show,
and cleaning becomes tricky. When decorative chalk paint is used outdoors, the folks happiest long-term tend to be the ones who sealed with an outdoor-appropriate,
water-based topcoat in thin coats. They also tend to say the same thing: the topcoat slightly deepened the color and made it easier to wipe down without scuffing.
Meanwhile, the people who regret skipping sealing usually mention they couldn’t gently wash the wall without leaving marks.
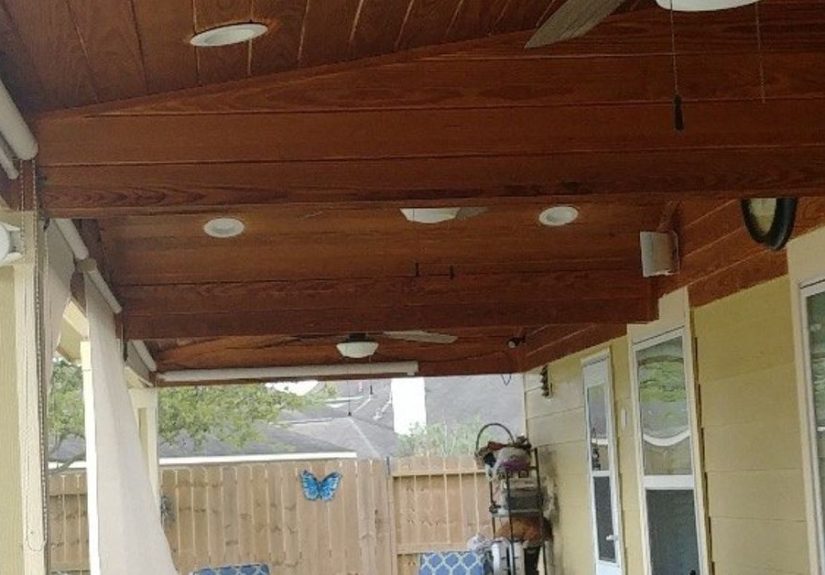
The best surprise: the space feels “finished”
The most consistent positive experience is how much a painted patio ceiling changes the vibe. Even if you don’t touch the furniture, a clean, soft ceiling color
makes the whole patio feel brighter and more intentionallike an outdoor room, not just “the back of the house.” Painting the back wall (or even just the trim and door)
often has the same effect. People describe it as the moment their backyard stopped feeling like a storage zone and started feeling like a place to actually hang out.
Bottom line: the “experience” of chalk painting outdoors is mostly about managing prep, protection, and patience. When you plan for thoseespecially drying time
and the right topcoat choiceyou get the pretty, velvety finish you wanted… without signing up for constant repainting.