
Table of Contents >> Show >> Hide
- Build a Smart Starter Kit (Not a Gadget Museum)
- Knife + Cutting Board: The Power Couple
- Temperature Tools: Your Best Insurance Policy
- Pans & Pots: Pick the Right Surface for the Job
- Measuring & Mixing Tools That Quietly Fix Your Food
- Wood, Plastic, and “Please Don’t Put That in the Dishwasher”
- A Simple Care Calendar (So Tools Last Longer Than a Season)
- Common Tool Troubles (Fast Fixes)
- Final Thoughts: Make the Tools Work for You
- Experience: What Cooking Tools Taught Me (and What They’ll Teach You)
There are two kinds of home cooks: the “I can make anything with one pan and pure confidence” type,
and the “Why do I own three spatulas and still can’t flip an egg?” type. Good news: both can level up
fastbecause better cooking isn’t about collecting gadgets like they’re Pokémon. It’s about using a
small set of tools correctly, caring for them like they pay rent, and knowing which ones actually move
the needle on flavor, texture, and safety.
This guide breaks down essential cooking tools (the ones you’ll reach for every day), plus practical
how-tos and tips that make them work harder: knife skills that protect your fingers, thermometer habits
that protect your stomach, cast iron care that protects your pride, and measuring tricks that protect
your cookies from becoming “rustic” in the bad way.
Quick reality check: The “best” tool is the one you’ll actually use, clean, and store without
starting a household debate.
Build a Smart Starter Kit (Not a Gadget Museum)
A well-equipped kitchen isn’t stuffedit’s balanced. Aim for a tight lineup that covers five jobs:
cutting, measuring, heat, mixing, and cleanup.
Once those are solid, “nice-to-haves” can come later (when you can identify them in the drawer without using sonar).
The core lineup most cooks actually need
- Knife trio: chef’s knife, paring knife, serrated knife
- Cutting board: one for produce, one for raw proteins (or a strict clean-in-between routine)
- Instant-read thermometer: the single easiest upgrade to safer, better meat
- Two pans: a skillet (cast iron or stainless) + a nonstick (for eggs/fish if you like)
- Sheet pan + rack: roasting, toasting, crisping, cooling
- Measuring set: dry cups, liquid cup, spoons… plus a kitchen scale for baking
- Mixing basics: whisk, silicone spatula, tongs, wooden spoon
- Cleanup helpers: bench scraper, dish brush, towels, storage containers
Knife + Cutting Board: The Power Couple
If you learn one “tool system” well, make it this one. A sharp knife and a stable board turn prep from a chore
into something weirdly satisfyinglike bubble wrap, but edible. They also reduce accidents. Counterintuitive but true:
a dull knife is more likely to slip, because you push harder and lose control.
How to choose knives without overthinking it
Start with a chef’s knife that feels comfortable in your hand. Comfort beats hype. You want a grip that feels secure,
a blade that doesn’t feel unwieldy, and a weight you can control. Add:
- Paring knife: small jobs like peeling, trimming, hulling strawberries
- Serrated knife: bread, tomatoes, anything with a tough outside and soft inside
The “claw grip” that saves fingertips
The most important knife skill isn’t a fancy diceit’s protecting your non-knife hand. Use a “claw” grip:
curl fingertips under and let your knuckles guide the side of the blade. Your knuckles become the “bumper,”
your fingertips stay tucked, and your future self stays grateful.
Pair that with a stable cutting board. If your board slides, everything gets sketchy. Fix it with a damp paper towel
or a thin damp kitchen towel under the board. No more countertop ice skating.
Honing vs. sharpening (they’re not the same thing)
Think of honing as straightening a bent paperclip, and sharpening as shaving off metal
to create a fresh edge. Honing rods (steel or ceramic) realign the edge and can make a knife feel sharper quickly.
Sharpening (whetstone or a quality sharpener) actually reshapes the edge and is needed when honing stops helping.
- Hone often: a few controlled swipes before cooking sessions can keep performance steady.
- Sharpen sometimes: when tomatoes laugh at your knife, it’s time.
If you’re new to sharpening stones, start slow. The goal isn’t speed; it’s consistency. A calm, repeatable motion beats
aggressive grinding every day of the week.
Cutting board rules that keep food safer
Boards are innocent-looking, but they’re where cross-contamination likes to throw a party. The simplest rule:
keep raw proteins and ready-to-eat foods separate.
- Best practice: one board for raw meat/poultry/seafood, another for produce and bread.
- If you only have one: prep produce first, move it away, then wash the board well before raw protein.
- Replace boards: when deeply grooved or crackedthose cuts can trap gunk.
To sanitize boards, many food safety guides recommend a dilute bleach solution (made with unscented liquid chlorine bleach)
and thorough rinsing after. Always follow label directions, and never mix cleaning chemicals. When in doubt, soap + hot water +
drying completely is your everyday baseline.
Temperature Tools: Your Best Insurance Policy
A thermometer is the kitchen tool that quietly upgrades everything: it prevents undercooking (unsafe) and overcooking (sad).
It also ends the “Is this done?” debate without anyone having to perform chicken surgery.
How to use an instant-read thermometer like you mean it
- Measure the thickest part of the food, away from bone and the pan surface.
- For burgers or patties: probe from the side into the center.
- For thin foods: angle the probe so the tip reaches the center.
- Take more than one reading if the shape is uneven.
Calibrate it (yes, really)
Thermometers can drift. The easiest accuracy check is an ice-water bath: pack a glass with ice, add water, stir, and insert
the probe into the icy slurry (not touching the sides). It should read about 32°F. Some models can be adjusted;
others can’tso it’s good to know what “normal” looks like for your tool.
Safe internal temperatures you should memorize
Exact guidance varies by food, but the big takeaways most home cooks lean on are:
- Poultry: 165°F
- Ground meats: 160°F
- Whole cuts of beef/pork/lamb: 145°F (often with a rest time)
- Fish: 145°F (or until opaque and flakes easily)
- Leftovers/casseroles: 165°F
Use these as anchors, then follow trusted food safety guidance for specifics (especially for dishes like stuffed poultry,
reheating, or batch cooking).
Pans & Pots: Pick the Right Surface for the Job
The best pan isn’t the one that looks dramatic on social media. It’s the one that matches what you cook.
Here’s a practical way to think about cookware: nonstick for delicate foods,
stainless for strong browning and sauces, and cast iron when you want heat retention
and a pan that could survive a minor apocalypse.
Cast iron: how to season it without fear
“Seasoning” is just oil baked onto the pan in thin layers until it forms a hard, protective coating. The trick is
thin. Thick oil gets stickylike a pan that’s noticed you’ve been talking behind its back.
- Clean and dry the pan thoroughly (water is the enemy of storage).
- Rub a very thin layer of neutral, high-heat oil over all surfaces.
- Bake in a hot oven (commonly 450–500°F) for about 30–60 minutes with good ventilation.
- Let it cool, then repeat if needed.
Everyday care is simple: wash promptly, dry completely, and store in a dry spot. Modern guidance generally agrees that
a small amount of mild dish soap won’t “ruin” a well-seasoned panwhat ruins it is soaking, dishwashers, and storing it damp.
Stainless steel: the preheat trick that prevents sticking
Stainless can be a joy when it’s used correctly. Preheat the pan, then add oil, then add food. You’re trying to build
a quick “release” effect as proteins sear. If food sticks at first, don’t panicgive it time. Often it releases naturally
once a crust forms.
Nonstick: keep it gentle, keep it useful
Nonstick is great for eggs and fragile fish, but treat it like a friend with boundaries: avoid metal utensils, avoid
very high heat, and replace it when the coating is damaged. Use silicone, wood, or nylon tools and keep it out of the
“let’s see what happens on maximum flame” experiments.
Measuring & Mixing Tools That Quietly Fix Your Food
Measuring tools don’t get the glamorous credit, but they’re the reason your pancakes aren’t accidentally “artisan.”
Consistent measurements create consistent resultsespecially in baking, where ratios matter more than vibes.
Kitchen scale: the easiest way to bake better
If you bake even a little, a digital kitchen scale is worth it. Measuring by weight is typically more accurate than
measuring by volume because cups depend on how ingredients settle and how you scoop. Weight also makes portioning easier:
evenly sized muffins, evenly sized cookies, evenly sized cake layerslike your baked goods went to finishing school.
Practical example: Making chocolate chip cookies? Weighing your flour and portioning your dough into equal
weights helps them bake at the same pace. That means fewer “some are pale, some are crunchy” batches.
Dry vs. liquid measuring cups: yes, it matters
- Dry cups: meant to be filled and leveled.
- Liquid cups: meant to be read at eye level on a flat surface.
For dry ingredients, avoid packing unless the recipe says so. For liquids, don’t hold the cup in the air like a trophy
set it down and read the line at eye level.
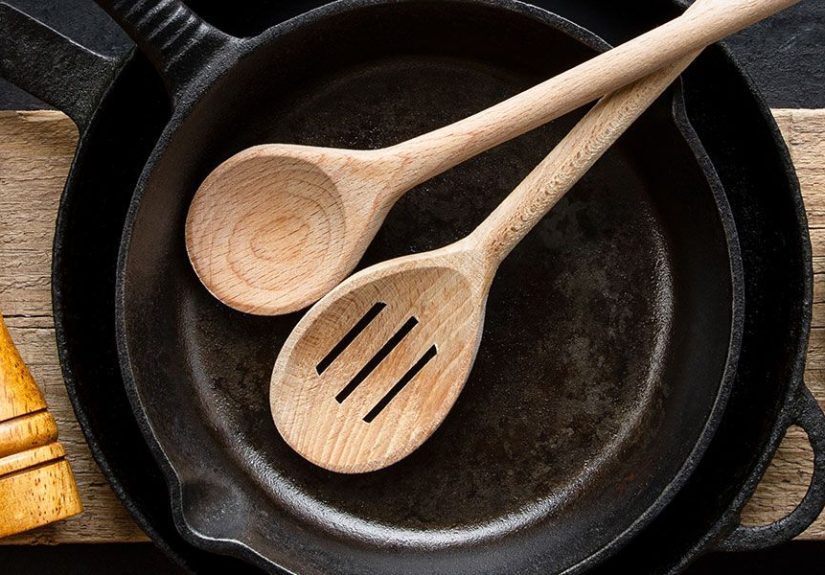
Mixing MVPs: spatulas, tongs, and whisks
- Silicone spatula: scrapes bowls clean, folds batter gently, saves sauce you paid for with effort.
- Tongs: flips, tosses, grabs, and does the job of your fingers… but safer and less dramatic.
- Whisk: for emulsions, vinaigrettes, pancakes, and making gravy feel less like a science fair.
Add a microplane or grater and you unlock quick flavor upgrades: citrus zest, garlic, ginger, hard cheesessmall effort, big payoff.
Wood, Plastic, and “Please Don’t Put That in the Dishwasher”
Tool care is where good cooks quietly separate themselves from the “why does everything smell like last week’s onions?” crowd.
The biggest culprits: letting things soak forever, storing tools damp, and tossing wood into the dishwasher.
Wooden cutting boards: how to keep them happy
- Wash by hand with soap and warm water; dry thoroughly.
- Wash both sides so the board dries evenly and is less likely to warp.
- Oil regularly with food-grade mineral oil to reduce drying and cracking.
- Deodorize naturally with salt + lemon for stubborn smells (then rinse and dry well).
If a board is deeply cracked, warped, or developing permanent funky odors, replace it. “Sentimental” is not a food safety strategy.
A Simple Care Calendar (So Tools Last Longer Than a Season)
After each cook
- Wash and dry knives promptly (no sink “mystery bath”).
- Clean boards and let them air-dry upright if possible.
- Dry cast iron completely; apply a whisper-thin oil film if it looks thirsty.
- Wipe down counters and replace towels often.
Weekly
- Hone knives and check for dullness.
- Inspect boards for deep grooves and sanitize if they’ve seen raw proteins.
- Clean and reorganize your most-used drawer (your spatulas deserve a stable home).
Monthly (or when you notice problems)
- Oil wooden boards and utensils.
- Run an ice-bath check on your thermometer.
- Re-season cast iron if it looks dull, sticky, or starts rusting.
Common Tool Troubles (Fast Fixes)
“My cast iron is sticky.”
Sticky usually means too much oil during seasoning. Scrub gently, heat it to dry, then apply a much thinner layer of oil and bake again.
Thin coats build better seasoning than “oil blankets.”
“My knife is sharp-ish, but still struggles.”
Try honing first. If that doesn’t help, it likely needs sharpening. Also check your cutting board: glass, stone, and very hard surfaces
dull knives quickly. Use wood or plastic.
“My cookies never turn out the same.”
Use a scale for flour and sugar, and portion dough by weight. Also check your oven with an oven thermometer if you suspect temperature swings.
Consistency is a system, not a wish.
“My cutting board smells weird.”
Clean it promptly after use, try salt + lemon scrubbing, and make sure it dries fully (standing it on edge helps airflow). If odors persist
and the board is cracked or deeply grooved, it may be time for a replacement.
Final Thoughts: Make the Tools Work for You
The goal isn’t to own everything. The goal is to own a few tools that do their jobs brilliantlyand to learn the small habits that make them
perform: stable boards, protected fingertips, calibrated thermometers, thin-layer cast iron seasoning, and accurate measuring. Once those habits
stick, you’ll cook faster, safer, and with better results… which is the nicest possible way to prove your kitchen drawer isn’t just storage.
Experience: What Cooking Tools Taught Me (and What They’ll Teach You)
The first time someone hands you a “real” chef’s knife, it feels like driving a car with a sensitive gas pedal. Suddenly every movement matters,
and you realize you’ve been doing that thing where you press down harder because the blade isn’t cuttingwhen the real problem is that the blade
is begging to be sharpened. That was my early lesson: tools don’t reward force; they reward technique. When you stop wrestling the knife and start
guiding it, prep becomes calmer, cleaner, and a whole lot safer.
Then there’s the cutting board revelation. I used to think “a board is a board” until I tried slicing tomatoes on a board that slid like it was
auditioning for an ice show. One damp towel under the board changed everything. Suddenly my knife work improvednot because I became a culinary
wizard, but because the foundation stopped moving. That’s a theme you’ll see again and again: tiny upgrades in stability create giant upgrades
in confidence.
Thermometers taught me humility. I was once firmly on Team “Poke It and Guess,” which is a fun game until it isn’t. When you start using an
instant-read thermometer, you realize how many times you’ve overcooked chicken “just to be sure,” accidentally turning dinner into a chew toy.
The thermometer doesn’t just keep you safe; it gives you permission to stop cooking out of fear. It turns “maybe” into “done,” which is the most
relaxing two-word reminder in the kitchen.
Cast iron taught me patienceand the value of thin layers. Early on, I treated seasoning like applying sunscreen: more must be better, right?
Wrong. Too much oil made the pan sticky, like it had feelings about being ignored. The fix wasn’t complicated. It was restraint: wipe off the oil
like you made a mistake, because you kind of did. Bake it, cool it, repeat. Cast iron rewards steady effort, not dramatic gestures. Also, it’s
surprisingly forgiving if you dry it well and don’t store it damp.
The kitchen scale taught me that baking is secretly a science experiment that wants clean data. Measuring flour by cups can vary wildly depending
on how it’s scooped and packed. The scale turns “close enough” into “exact,” which is why suddenly your muffins bake evenly and your cakes rise
like they’re proud of themselves. And yes, it’s faster: you can add ingredients to one bowl without washing extra cups, which is basically a
quality-of-life upgrade disguised as math.
Finally, tool care taught me something unglamorous but real: the best cooks aren’t just good at cookingthey’re good at resetting the kitchen.
Washing knives right away, drying boards thoroughly, oiling wood occasionally, and keeping towels fresh aren’t heroic acts. They’re small routines
that make tomorrow’s cooking easier. When your tools are clean, sharp, and ready, you cook more oftenand you enjoy it more. And that’s the
actual secret: not owning more tools, but making the ones you have feel like teammates instead of chores.


