
Table of Contents >> Show >> Hide
- Why a Dollar Tree Pumpkin Makeover Is So Popular
- What You’ll Need for an Easy Dollar Tree Pumpkin Makeover
- The Easiest Dollar Tree Pumpkin Makeover (Beginner Method)
- Easy Decoupage Dollar Tree Pumpkin Makeover (Looks Fancy, Costs Little)
- 4 Stylish Dollar Tree Pumpkin Makeover Ideas to Try
- How to Make It Look Expensive (Even If It Cost $3)
- Common Mistakes to Avoid in a Dollar Tree Pumpkin Makeover
- Where to Use Your DIY Dollar Tree Pumpkin Decor
- Budget Breakdown for an Easy Dollar Tree Pumpkin Makeover
- Real-World Crafting Experiences: What This Project Feels Like (and Why People Keep Doing It)
- Conclusion
If your Dollar Tree pumpkin is giving “bright orange toy from aisle seven” and you want “cozy boutique fall decor,” welcome. You are exactly where you need to be. The good news? You do not need a giant craft budget, an art degree, or a hot glue gun that sounds like a dragon when it warms up. This easy Dollar Tree pumpkin makeover is beginner-friendly, affordable, and surprisingly fun.
The best part of a Dollar Tree pumpkin makeover is that the pumpkin is already doing the heavy lifting. It’s pumpkin-shaped (very helpful), lightweight, and easy to customize. With a few simple suppliespaint, glue, ribbon, napkins, or metallic waxyou can turn a basic faux pumpkin into stylish DIY pumpkin decor that looks way more expensive than it is.
In this guide, I’ll walk you through an easy makeover method, plus a few high-impact variations (farmhouse, glam, vintage, and modern). I’ll also share real-world tips so your pumpkin looks intentional instead of “my glue and I had a disagreement.”
Why a Dollar Tree Pumpkin Makeover Is So Popular
There’s a reason this craft keeps showing up every fall: it checks every box. It’s cheap, quick, customizable, and reusable. If you’re trying to create budget fall decor without buying a whole new seasonal collection, a faux pumpkin makeover is one of the easiest wins.
- Budget-friendly: You can make one pumpkin for a few dollars or a whole set for less than many store-bought centerpieces.
- No-carve, no mess: No pumpkin guts. No slippery countertops. No mysterious smell three days later.
- Reusable: Faux pumpkins can come back every year with a new look.
- Custom style: Neutral farmhouse? Moody glam? Cottagecore? Maximalist “more is more”? All possible.
This project also fits beautifully into the broader trend of no-carve pumpkin ideas, which are safer for family crafting and easier to display for longer stretches of the season.
What You’ll Need for an Easy Dollar Tree Pumpkin Makeover
Basic Supplies (Choose What Fits Your Style)
- Dollar Tree foam or carvable faux pumpkin
- Acrylic craft paint (white, cream, taupe, black, green, etc.)
- Paintbrushes or sponge brushes
- Sandpaper or sanding sponge (optional, for texture/distressing)
- Mod Podge or decoupage glue (optional, for napkin/paper finishes)
- Decorative paper napkins, tissue paper, wrapping paper, or fabric scraps
- Hot glue gun and glue sticks
- Twine, jute, ribbon, lace, velvet ribbon, or faux stems/leaves
- Metallic wax finish (like Rub ’n Buff) or metallic craft paint (optional)
- Matte sealer spray or brush-on sealer (optional)
Optional Tools for Extra Flair
- Painter’s tape (for stripes, blocked designs, clean edges)
- Stencils (letters, leaves, florals, geometric patterns)
- Wood beads, buttons, pearls, or rhinestones
- Battery-operated LED tea light (for lit designs)
- Craft knife (adults only, if modifying a faux pumpkin)
Safety note: If you cut into a foam pumpkin, use an LED tea light onlynever a real candle. Faux foam pumpkins and open flames are not a cozy combo.
The Easiest Dollar Tree Pumpkin Makeover (Beginner Method)
If you want a makeover that works even if your crafting confidence is currently at “I once glued my fingers together,” start here. This method creates a soft, neutral pumpkin that fits almost any fall decor style.
Step 1: Prep the Pumpkin
Wipe the pumpkin clean with a dry cloth. If it has a glossy or plasticky finish, lightly scuff it with a sanding sponge. You don’t need to sand it like a deckjust rough it up enough so the paint grips better.
Step 2: Paint the Base Coat
Choose a base color that matches your decor. Cream, white, sage, greige, matte black, and muted terracotta all look elevated. Apply thin coats instead of one thick coat. Thick paint likes to pool in grooves and leave “oops” marks.
Let it dry fully between coats. Two coats is usually enough, but bright orange pumpkins may need a third if you’re going light.
Step 3: Upgrade the Stem
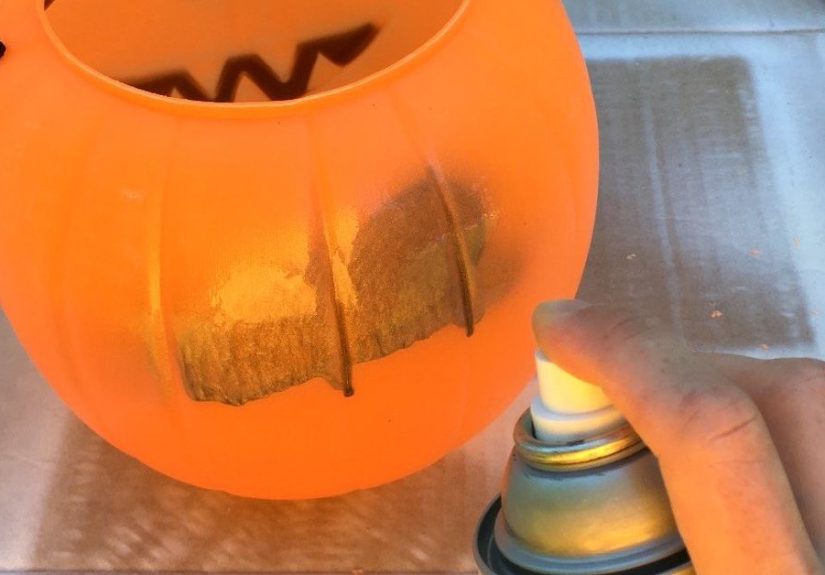
This tiny detail makes a huge difference. Paint the stem brown, black, gold, or bronzeor lightly rub on a metallic wax for a vintage finish. You can also wrap the stem in twine or velvet ribbon for texture.
Want the “designer pumpkin” look? Add a little metallic wax just to the raised ridges and stem. It catches the light and instantly looks less dollar store, more curated shelf styling.
Step 4: Add Texture or Detail
Now choose your vibe:
- Farmhouse: Dry brush a little taupe or gray over white paint.
- Glam: Add gold accents, pearls, or a metallic stem.
- Rustic: Wrap twine around the stem and add a burlap bow.
- Modern: Use painter’s tape for color-block stripes or simple line art.
Step 5: Seal (Optional but Smart)
If your pumpkin will sit on a porch, be handled a lot, or survive enthusiastic children and curious pets, use a matte sealer. Indoors, you can often skip itbut sealing helps paint and embellishments last for next year.
Easy Decoupage Dollar Tree Pumpkin Makeover (Looks Fancy, Costs Little)
If you want something eye-catching without hand-painting florals like a Renaissance artist, try decoupage. This is one of the best easy Dollar Tree pumpkin makeover options because paper napkins do all the visual work for you.
How to Do It
- Paint the pumpkin a light base color (white or cream works best).
- Cut your napkin or tissue paper shapes before separating layers.
- Separate the top printed layer of the napkin (important!).
- Apply decoupage medium to the pumpkin surfacenot directly soaking the napkin.
- Gently place the napkin and smooth from center outward with a soft brush or plastic wrap over your fingers.
- Add a thin top coat once dry.
Pro tip: If you’re using napkins, work in small pieces. One giant piece looks ambitious until it wrinkles like a fitted sheet on laundry day.
Floral napkins are popular, but don’t stop there. Toile prints, vintage script, plaid, and botanical patterns can all create beautiful fall pumpkin crafts that match your room.
4 Stylish Dollar Tree Pumpkin Makeover Ideas to Try
1) Neutral Farmhouse Pumpkin
Paint the pumpkin matte white, then lightly dry-brush beige or gray into the grooves. Wrap jute around the stem and add a small tied bow. This style looks great on mantels, tiered trays, and entry tables.
2) Faux Concrete Pumpkin
Mix gray and white paint for a stone look. Dab with a sponge for variation. For extra texture, some crafters use a gritty additive or a textured spray finish (used outdoors and with ventilation). The result is a modern, high-end pumpkin that looks amazing with black candlesticks and wood tones.
3) Gilded Glam Pumpkin
Start with a black, cream, or soft blush base. Add gold or bronze on the stem and ridges, or apply metallic wax sparingly and buff for shine. Pair with taper candles and mirrored trays for a dramatic centerpiece.
4) Fabric or Ribbon-Wrapped Pumpkin
Use strips of fabric, velvet ribbon, or decorative trim to create vertical panels or simple bands. This is ideal if painting is not your favorite thing and you want texture-heavy decor that feels cozy and custom.
How to Make It Look Expensive (Even If It Cost $3)
Here’s where the magic happens. The difference between a cute craft and a “Where did you buy that?” piece is usually in the finishing choices.
- Choose a limited palette: Stick to 2–3 colors. Too many colors can make the pumpkin look busy.
- Use matte finishes: Matte paint often looks more upscale than shiny paint for home decor.
- Add contrast: Light pumpkin + dark stem, or dark pumpkin + metallic highlights.
- Repeat the style: Make 3 pumpkins in coordinating colors for a cohesive display.
- Mix textures: Paint + twine + metallic wax = layered, designer-looking decor.
- Style in groups: Pumpkins always look better with companybooks, candles, leaves, trays, lanterns, and small vases all help.
Common Mistakes to Avoid in a Dollar Tree Pumpkin Makeover
Using Thick Paint Coats
Thick coats can streak, crack, or fill in the pumpkin grooves. Thin coats look smoother and dry faster.
Skipping Dry Time
Yes, we all want instant results. But touching wet paint “just to check” is how fingerprints become a design element.
Overdecorating
A pumpkin does not need lace, beads, glitter, ribbon, feathers, and a tiny hat all at once (unless that is your style, in which case, glitter on). Start simple and add one detail at a time.
Using Real Flames in Faux Pumpkins
Always use battery-operated LED lights if you want a glow. Pretty and safe is a great combo.
Where to Use Your DIY Dollar Tree Pumpkin Decor
One makeover pumpkin is nice. A styled set is where things get dramatic (in the good way).
- Entryway table: Pair with a small mirror, candle, and fall stems.
- Mantel: Mix heights using pumpkins, candlesticks, and framed art.
- Front porch: Combine faux and real pumpkins for a fuller, budget-friendly display.
- Dining table: Use as a centerpiece with eucalyptus, pinecones, or mini gourds.
- Tiered tray: Mini pumpkins with wood beads and tiny signs create instant fall charm.
- Bookshelf styling: Tuck one into a stack of books with a vase and small lamp.
If you make multiple pumpkins, vary the sizes but keep the color palette consistent. That’s the trick that makes the whole display feel intentional instead of random.
Budget Breakdown for an Easy Dollar Tree Pumpkin Makeover
You can absolutely make this project with supplies you already own, but here’s a realistic starter budget:
- Dollar Tree faux pumpkin: $1.25–$3.00 (depending on item/season/store)
- Craft paint (1–2 bottles): $2–$6 total
- Twine/ribbon/embellishment: $1–$5
- Mod Podge (if needed): $3–$8
- Napkins/paper scraps: often already at home, or $1–$3
Estimated cost per finished pumpkin: about $3 to $10 depending on how fancy you get. (No judgment if your “simple pumpkin” somehow ends up with metallic leaf and velvet ribbon. We’ve all been there.)
Real-World Crafting Experiences: What This Project Feels Like (and Why People Keep Doing It)
One of the reasons the Easy Dollar Tree Pumpkin Makeover trend keeps returning every fall is the experience itself. It’s not just about the finished pumpkinit’s about the process. This is the kind of project people start because they want “one quick thing” for the season, and then suddenly they’re three pumpkins deep, comparing ribbon widths, and calling it a relaxing afternoon. Honestly? Fair.
A common experience is walking into Dollar Tree for batteries, spotting a bin of faux pumpkins, and immediately developing a personality for each one. The small round one becomes “mantel pumpkin.” The slightly weird-shaped one becomes “paint experiment pumpkin.” The tall one somehow becomes “centerpiece pumpkin,” even if you don’t currently have a centerpiece plan. This craft is very good at creating plans you didn’t know you had.
Another real-life win is how forgiving the project is. If you paint a pumpkin white and hate it, you can paint over it. If your decoupage wrinkles, you can smooth it, trim it, or call it texture. If your bow looks like it lost a fight, remove it and try twine instead. Compared with more complicated DIY projects, this one lets beginners recover quickly without wasting expensive materials.
People also love how easy it is to match a pumpkin to a room. If your home is neutral, you can do cream and taupe pumpkins with jute stems. If your style is colorful, you can use florals, gingham, or even playful patterns. If your decor leans modern, a matte black pumpkin with a gold stem can look surprisingly chic. The project feels personal in a way store-bought decor often doesn’t.
For families, this makeover works because it can be scaled. Kids can paint base coats or glue on simple embellishments (with supervision), while adults handle detailed steps like trimming napkins or using hot glue. It becomes less of a “craft session” and more of a seasonal ritualmusic on, snacks nearby, paint water mysteriously turning brown, everyone pretending they’re only making one more.
And then there’s the decorating payoff. A finished Dollar Tree pumpkin makeover can look genuinely impressive in photos and in person, especially when grouped with candles, leaves, or books. Many crafters say the project gives them that satisfying “I made this” feeling without requiring a full weekend, power tools, or a trip to five stores. It’s affordable, low-pressure, and high reward.
Maybe the best part is reuse. You can pack the pumpkins away and pull them out next year, or repaint them for a completely different look. A farmhouse pumpkin this year can become a glam metallic pumpkin next year. That flexibility makes the project feel less disposable and more creative over time. In short: this little fall DIY sticks around because it’s cute, practical, and weirdly addictivein the best possible pumpkin-themed way.
Conclusion
An easy Dollar Tree pumpkin makeover is one of the simplest ways to create custom fall decor on a budget. Whether you go with paint, decoupage, fabric, twine, or metallic accents, the key is choosing a clear style, working in thin layers, and adding a few thoughtful details. Start with one pumpkin, test a look you love, and build a small collection over time. Your fall decor will look more polished, more personal, and much more “you.”


