Table of Contents >> Show >> Hide
- Why Witches Broom Candy Bags Are Such a Clever Halloween Craft
- Supplies You Will Need
- How to Make Whimsical Witches Broom Candy Bags
- Creative Ways to Make Your Broom Candy Bags More Whimsical
- The Best Candy and Fillers for Broom Treat Bags
- Common Mistakes to Avoid
- How to Batch-Make Witches Broom Candy Bags for Parties
- Halloween Candy Safety and Allergy-Friendly Tips
- Experiences People Often Have When Making Witches Broom Candy Bags
- Final Thoughts
Some Halloween crafts are adorable. Some are practical. And some are both, which is how you end up with whimsical witches broom candy bags—the tiny broom-shaped treat holders that look like they flew straight out of a candy-coated spell book. They are festive, inexpensive, surprisingly easy to make, and just dramatic enough to make people say, “Wait, you made those?” That is the sweet spot of seasonal crafting.
If you want a Halloween project that feels creative without requiring an engineering degree, these broom candy bags are a winner. They work beautifully for classroom parties, family movie nights, neighborhood boo baskets, trick-or-treat handouts, office snack tables, and party favors. Better yet, you can make them with materials many people already have at home: brown paper lunch bags, scissors, wrapped candy, twine, and a small stick or branch. In other words, this is not one of those “easy” crafts that secretly expects you to own a glue gun, a laser cutter, and the patience of a saint.
The classic version uses two lunch bags to create a layered broom head. One bag becomes the shaggy outer bristles, while the second holds the candy securely inside. Tie everything around a small branch, fluff the fringe, and suddenly you have a Halloween favor that looks thoughtful, charming, and just the right amount of witchy. From there, you can lean rustic, glamorous, kid-friendly, vintage, spooky-cute, or all-out enchanted forest. The design is flexible, which is craft-speak for “you can probably fix your mistakes with ribbon.”
Why Witches Broom Candy Bags Are Such a Clever Halloween Craft
Witches broom candy bags work because they solve three Halloween problems at once. First, they package treats in a way that feels special. Second, they double as party decor. Third, they are fast enough to batch-make without losing your mind somewhere around broom number seven. That combination is rare. Plenty of Halloween crafts are cute but fragile. Plenty of treat bags are easy but forgettable. These little brooms manage to be memorable and manageable.
They also have wonderful texture. The fringed paper looks like real bristles, the twine gives them a rustic handmade finish, and the stick handle adds a natural element that makes the whole project feel more whimsical than mass-produced. Even a simple brown paper version has personality. Dress it up with striped ribbon, metallic tags, glitter stars, or a tiny “Broom Parking Only” label, and suddenly your candy favor has main-character energy.
Another reason this project is popular is that it adapts to different ages and skill levels. Adults can create polished party favors, while older kids can help with stuffing, tying, and decorating. If younger children are joining in, they can personalize tags or choose the candy mix while an adult handles the scissors and assembly. The result feels homemade in the best way, not “homemade” in the “why is the broom sideways and covered in accidental glue fingerprints?” way.
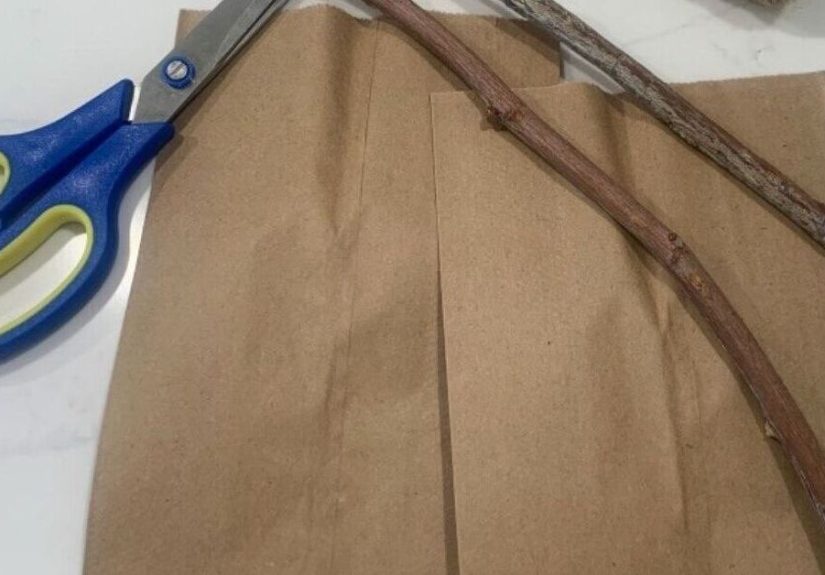
Supplies You Will Need
- Brown paper lunch bags, two per broom
- Wrapped candy or other commercially wrapped treats
- Scissors
- Black twine, jute twine, baker’s twine, ribbon, or raffia
- Small wooden sticks, twigs, clean branches, pencils, or paper straws
- Optional extras: burlap, tissue paper, tags, Halloween stickers, stamps, markers, hole punch, printable toppers, and mini bells or charms
If you want the most classic look, use brown lunch bags and real twigs. If you want a cleaner, more polished finish, use paper straws or smooth craft sticks. If you want mini party favors, pencils wrapped with burlap or fringed paper can create a smaller broomstick effect that is especially cute for place settings or classroom giveaways.
How to Make Whimsical Witches Broom Candy Bags
1. Create the outer broom layer
Take the first brown paper lunch bag and cut it into thin vertical strips starting from the open edge and stopping just above the bottom section. Do not cut all the way through. This bag becomes the shaggy outside of the broom, so think “messy but magical,” not “paper confetti disaster.” Narrow strips create a fuller broom head, while slightly wider strips give the broom a chunkier rustic style.
2. Prepare the inner candy bag
Take the second lunch bag and cut short narrow slits into the top inch or two. This bag will hold the candy, so only fringe the upper section. The lower part stays intact to keep your treats from making a dramatic escape across the kitchen floor.
3. Nest the bags together
Open both bags and place the second bag inside the shredded outer bag. This double-bag trick is what makes the project work so well. The inner bag handles the practical job of containing candy, while the outer bag handles the performance art of looking like a broom. Halloween has always respected a good costume.
4. Fill with wrapped treats
Add wrapped candy to the inner bag. Mini chocolate bars, wrapped caramels, fruit chews, lollipops, and small snack packs all work well. Avoid overfilling. A broom that is too stuffed starts looking less like enchanted transportation and more like it swallowed a vending machine. You want enough weight for structure, but not so much that the bag bulges awkwardly.
5. Insert the handle
Slide a small branch, stick, pencil, or paper straw about an inch into the center of the bag opening. If you are using natural twigs, wipe them clean and make sure they are dry and splinter-free. Handles should feel secure, not hazardous. The goal is festive, not “tiny woodland spear.”
6. Tie the broom in place
Gather the top edges of both bags around the handle and tie them tightly with twine about 1 to 2 inches from the top. Knot it firmly so the candy stays in place. Then fluff the fringed outer strips downward to form the broom bristles. At this stage, the project goes from “brown paper situation” to “oh wow, that is actually adorable.”
7. Trim and style the bristles
If needed, trim the fringed paper to even out the broom head. You can leave it wild and rustic or shape it neatly. Both work. A tidier trim looks polished for party favors, while a rougher fringe gives more personality. Think of it as the difference between a witch who alphabetizes her potion shelf and one who absolutely does not.
Creative Ways to Make Your Broom Candy Bags More Whimsical
Add layered textures
Brown paper is a great base, but it gets even more charming when you mix in texture. Wrap a little burlap around the top of the broom head, tie on a velvet ribbon, or tuck in a strip of orange, purple, or black tissue paper for extra color. If you want a softer look, use raffia to create a mini broom effect around a pencil or straw.
Use tags and toppers
A small tag instantly makes the favor feel finished. Try phrases like “A Little Hocus Pocus,” “Broom Service,” “Witching You a Happy Halloween,” or “Take a Treat and Fly Away.” Printable bag toppers, folded labels, and punched tags are especially helpful if you are making a large batch and want everything to look cohesive.
Stamp or doodle the bags
Plain paper bags are charming, but decorated paper bags are charming with ambition. Add stars, moons, black cats, tiny hats, candy corn, or swirls with markers or stamps. You do not need to create museum-worthy art. Even simple dots and stripes add movement and make the broom heads look custom.
Choose a color story
Classic Halloween colors are always a hit, but you are not limited to orange and black. Try black and gold for a glam party, lavender and silver for a moonlit fantasy look, or kraft paper with cream ribbon for a cozy farmhouse Halloween aesthetic. A consistent palette makes a big batch look intentional and elevated.
The Best Candy and Fillers for Broom Treat Bags
The ideal filler is small, wrapped, and easy to portion. Mini candy bars, wrapped taffy, chocolate kisses, gummies in sealed packets, pretzel packs, and sticker sheets all work nicely. If you are making party favors rather than trick-or-treat handouts, you can also mix in tiny extras like erasers, temporary tattoos, bookmarks, or glow sticks.
Try to match the contents to the audience. For younger kids, soft chews and stickers may be a safer, simpler choice. For classroom favors, individually wrapped items are your best friend. For a more grown-up Halloween dinner or office treat table, gourmet wrapped chocolates or caramel candies can make the brooms feel extra special. The packaging matters almost as much as the contents, because these favors are part snack and part showpiece.
Common Mistakes to Avoid
Cutting the outer bag too far
If you cut through the bottom of the outer bag, the broom loses structure. Stop just above the base so the fringe stays attached and forms a solid broom head.
Overstuffing the inner bag
Too much candy makes the broom hard to tie and causes odd lumps. Aim for a full but flexible bag. Your broom should look charmingly plump, not medically concerning.
Using flimsy handles
A handle that bends easily can make the whole project feel droopy. Choose sticks, sturdy paper straws, pencils, or branches with enough strength to support the finished bag.
Skipping the finishing touches
The difference between “cute” and “wow” is often one final detail: a tag, a ribbon, a trim, a stamp, or a coordinated color palette. The broom itself is simple. The personality comes from how you style it.
How to Batch-Make Witches Broom Candy Bags for Parties
If you need a dozen or more, do not make each one from start to finish before beginning the next. That is the fastest path to crafting fatigue and mild Halloween resentment. Instead, create an assembly line. Cut all the outer bags first. Fringe the inner bags next. Then nest them, fill them, insert handles, tie them, and decorate them in batches.
This approach saves time and keeps the final set looking consistent. It also makes the project more social. One person can cut, another can stuff candy, another can tie twine, and another can add labels. That is especially useful if you are preparing favors for a classroom, party, or trunk-or-treat event. Store finished brooms upright in a box or basket until party time so the bristles stay neat.
Halloween Candy Safety and Allergy-Friendly Tips
Whimsical is wonderful, but safe is smarter. Stick to commercially wrapped treats, especially if the candy bags are being handed out to children outside your immediate household. Wrapped treats are easier to inspect, easier to portion, and easier for families to check for allergens. If you are making favors for a group, keep ingredient labels from bulk candy bags nearby or include a small note if you are using a mixed assortment.
Food allergies matter, and it is thoughtful to plan for them. Consider making a few non-food brooms filled with stickers, pencils, mini bubbles, or erasers so guests have another option. If your audience includes very young children, avoid choking hazards such as gum, hard candies, peanuts, or tiny loose trinkets. In short, you want guests to leave with a cute treat, not a mystery ingredient list and a parental side-eye.
Experiences People Often Have When Making Witches Broom Candy Bags
One of the funniest things about making witches broom candy bags is how quickly a “small, easy Halloween craft” turns into a full seasonal event. Many people begin with the humble goal of making six. Then they realize the first one is cute. The second one is cuter. By the fourth, they are naming color palettes and debating whether tiny gold stars are “too much” or “just enough spooky glamour.” This is how October projects multiply. No one plans to become emotionally invested in paper lunch bags, and yet here we are.
A common experience is discovering that the materials matter more than expected. The first attempt may use a weak stick, a bag cut into clumsy strips, or a ribbon that refuses to cooperate. Then the second attempt comes out dramatically better because the cuts are narrower, the bag is not overfilled, and the twine is pulled tightly enough to shape the broom. These are the kinds of tiny lessons that turn a simple craft into a satisfying one. It is not difficult, but it does reward rhythm. Once your hands understand the sequence, the project becomes almost relaxing.
Another familiar moment happens during decorating. At first, many crafters assume the broom shape will do all the work. But once they add one small tag, a stamped moon, or a strip of patterned ribbon, they realize finishing touches are where the magic lives. Suddenly, the brooms feel less like snack packaging and more like tiny party props. They become part of the table, part of the costume theme, part of the whole Halloween mood. That transformation is often the most satisfying part of the process.
People also tend to notice how versatile the finished brooms are. A batch made for a classroom can be simplified and playful. A batch for a dinner party can be elegant and moody. A batch for neighbors can include candy and a cheerful note. The same core method keeps working, which is why the craft feels so useful year after year. It is not a one-time novelty. It is more like a reusable Halloween idea with different costumes of its own.
Then there is the social part. These broom candy bags are the kind of craft that invites commentary from everyone within a fifteen-foot radius. Someone always says they look too cute to open. Someone else immediately opens one anyway because candy is a powerful motivator. Kids often want to help choose the treats. Adults start suggesting themes. Before long, the table is covered in paper fringe, ribbon scraps, and wrappers, and somehow that mess feels festive rather than annoying. It feels like holiday evidence.
Perhaps the best experience connected to this project is the reaction when people receive one. A standard candy handout is nice, but a broom-shaped candy bag feels personal. It suggests thought, humor, and a little extra effort. It says, “Yes, I could have dumped fun-size chocolate into a bowl, but where is the drama in that?” That tiny burst of delight is what makes the project worth repeating. Not because it is perfect, and not because every broom looks identical, but because handmade Halloween favors create a kind of cheerful chaos that store-bought packaging rarely matches.
Final Thoughts
If you want a Halloween craft that is charming, practical, and surprisingly easy to personalize, whimsical witches broom candy bags are hard to beat. They look creative, hold treats neatly, and can be adapted for parties, classroom favors, trick-or-treat handouts, or festive table settings. Best of all, they rely on simple materials and a straightforward method, which means you spend less time wrestling with complicated instructions and more time making something genuinely fun.
So gather your lunch bags, choose your candy, trim your fringe, and tie those broom handles tight. Whether your style is rustic, cute, glam, or just slightly unhinged in the most Halloween-appropriate way, this project gives you plenty of room to make it your own. And when someone asks where you bought those adorable little broom favors, you can smile mysteriously and say, “Oh, these? Just a little light magic.”