Table of Contents >> Show >> Hide
- What You Need to Develop Black and White Film
- Know Your Film Before You Start
- Understand the Four Main Chemical Steps
- Step-by-Step: How to Develop Black and White Film
- A Quick Beginner Processing Reference
- Common Mistakes and How to Avoid Them
- Should You Use a Monobath?
- Tips for Better Results Every Time
- Why So Many Photographers Still Love This Process
- Experiences Related to “How to Develop Black and White Film”
- Conclusion
Note: This guide covers traditional black-and-white film processed in standard black-and-white chemistry, not chromogenic C-41 black-and-white film.
There is a special kind of magic in developing black-and-white film at home. You load a roll of mystery into a tank, pour in a few chemicals, swirl like a tiny darkroom wizard, and a little while later you’re holding negatives that actually exist in the real world. Not on a memory card. Not in the cloud. Not trapped in your phone next to 4,000 screenshots you swear you’ll organize one day.
The good news is that learning how to develop black and white film is far less intimidating than it sounds. You do not need a full basement darkroom, a dramatic red light, or the patience of a saint. What you do need is the right gear, the correct chemistry, careful timing, and a willingness to accept that your first reel load may feel like wrestling a spaghetti noodle in the dark.
This guide walks you through the full process step by step, from choosing supplies to drying your negatives without turning them into dust magnets. Whether you’re developing 35mm film for the first time or finally trying 120 after years of saying “someday,” this article will help you get clean, usable negatives with less guesswork and more confidence.
What You Need to Develop Black and White Film
Before you start, gather everything in one place. Film developing gets dramatically less stressful when you are not halfway through the process asking, “Where did the scissors go?”
Essential equipment
- Developing tank with reel
- Changing bag or a completely dark room for loading film
- Scissors
- Bottle opener or church key for 35mm cartridges
- Graduated measuring containers
- Storage bottles for mixed chemistry
- Thermometer
- Timer
- Clips for hanging film to dry
Essential chemistry
- Developer
- Stop bath
- Fixer
- Wetting agent
- Water for mixing and washing
If you are brand new, stick with a standard beginner-friendly setup instead of trying to impress yourself with seven experimental chemicals and a spreadsheet. A simple tank, a reliable thermometer, and clearly labeled bottles will take you much farther than darkroom bravado.
Know Your Film Before You Start
Not all “black-and-white” film is processed the same way. Traditional black-and-white film uses black-and-white chemistry. Chromogenic black-and-white film, often labeled for C-41 processing, is developed like color negative film and is usually better handled by a lab unless you specifically run a C-41 workflow.
In other words, read the box before you do anything heroic. If the film says C-41, do not toss it into standard black-and-white developer and hope for a miracle. Hope is lovely, but chemistry is not sentimental.
It also helps to know your film speed. ISO 400 black-and-white film is often the easiest place for beginners to start because it is flexible in many lighting conditions and forgiving enough to keep first-timers from spiraling into exposure regret.
Understand the Four Main Chemical Steps
1. Developer
The developer turns the latent image on the film into a visible negative. This is the step where timing and temperature matter most. Most black-and-white film development charts are standardized around 68°F (20°C), and your exact time depends on the film stock, developer, dilution, and agitation method.
2. Stop bath
Stop bath halts development so the negatives do not keep building density after the developer is poured out. It is quick, simple, and one of those steps that feels tiny until you skip it and later wonder why things look off.
3. Fixer
Fixer removes unexposed silver salts and makes the image permanent. Until the film is fixed, it is still vulnerable to light. After fixing, you can finally open the tank and look at your negatives without feeling like you’re defusing a bomb.
4. Wetting agent
This final rinse helps water sheet off the film more evenly and reduces drying marks. It is not the flashiest part of the process, but it can save you from annoying spots that make your negatives look like they were dried in a light drizzle.
Step-by-Step: How to Develop Black and White Film
Step 1: Set up your workspace
Choose a clean, organized area with easy access to water. Keep the dry side and wet side mentally separate. Your changing bag, reels, tank, scissors, and unopened film belong in the loading zone. Your chemistry, measuring tools, timer, and storage bottles belong in the wet zone.
Dust is the enemy here. A dusty room can turn a perfect roll into a cleanup project later. Many home developers use a bathroom for drying because it can be relatively still and easier to keep clean.
Step 2: Mix your chemistry
Mix your developer, stop bath, and fixer according to the manufacturer’s instructions. Use the correct dilution, and label every bottle clearly. This is not the time for mysterious containers with “probably fixer?” energy.
Bring the developer to the proper processing temperature, usually 68°F (20°C). Stop bath, fixer, and wash water do not have to be treated like royalty, but they should stay reasonably close to the developer temperature to avoid unnecessary stress on the emulsion.
Step 3: Load the film onto the reel in total darkness
This is the only part that truly requires darkness. Use a changing bag or a completely dark room. For 35mm film, open the cartridge, pull the film out, trim the leader, and feed the film onto the reel. For 120 film, remove the backing paper and load the film carefully onto the reel.
Once the film is fully on the reel, place the reel in the tank and seal it. From that point on, the tank protects the film from light, and you can turn the lights back on and breathe like a normal person again.
Step 4: Develop the film
Pour the developer into the tank and start the timer immediately. Your exact time will depend on your film and chemistry. This is why development charts matter so much. One film in one developer might need around 6 or 7 minutes, while another might need 10, 12, or longer.
A classic beginner agitation pattern is to invert the tank several times during the first 10 seconds, then repeat that brief agitation at the start of each additional minute. Gentle, consistent agitation helps the chemistry work evenly. Too little agitation can cause uneven development; too much can increase contrast and grain more than you intended.
Tap the tank lightly after agitation to knock loose any bubbles clinging to the film. Tiny bubbles can leave tiny undeveloped spots, which is a very rude thing for physics to do.
Step 5: Stop development
At the end of the development time, pour the developer out and immediately add stop bath. Agitate briefly. This step usually takes only about 10 seconds in a standard workflow.
Step 6: Fix the film
Pour in the fixer and agitate as directed. A common starting point is a few minutes of fixing, though the exact time depends on the fixer and dilution. Once the film is fixed, you can open the tank. This is the moment every beginner remembers: that first look at real negatives hanging on the reel like proof that maybe, just maybe, you do know what you’re doing.
Step 7: Wash the film
Wash the film thoroughly to remove residual chemistry. Many home developers use running water for around 5 to 10 minutes. Another popular low-water method is the inversion wash sequence: fill the tank, invert 5 times, drain; refill, invert 10 times, drain; refill, invert 20 times, drain.
After washing, use a final rinse with wetting agent to reduce drying marks.
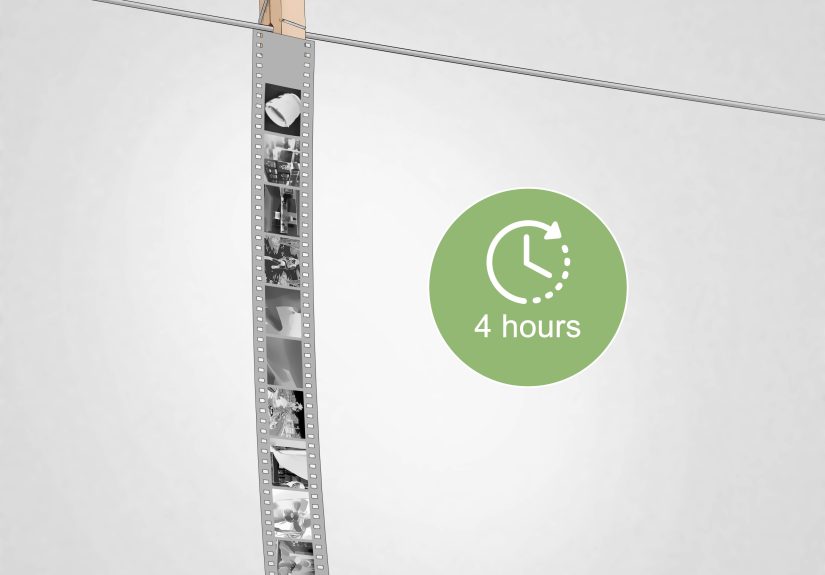
Step 8: Dry the film
Hang the film in a still, dust-free place using clips. Add a clip or small weight at the bottom so the film dries straighter. Leave it alone until fully dry. Not “mostly dry.” Not “I’m impatient dry.” Fully dry.
Once dry, cut the negatives into strips and store them in archival sleeves. Handle them by the edges whenever possible.
A Quick Beginner Processing Reference
Use this as a simple orientation guide, not as a substitute for your film and chemical data sheet:
- Developer: exact time varies by film, developer, and dilution
- Developer temperature: usually 68°F / 20°C
- Stop bath: about 10 seconds
- Fixer: commonly a few minutes, depending on product instructions
- Wash: about 5 to 10 minutes, or use the inversion wash method
- Final rinse: wetting agent helps reduce drying marks
Common Mistakes and How to Avoid Them
Thin negatives
If your negatives look very faint, the cause is often underexposure, underdevelopment, or both. Check your camera meter, your ISO setting, and your development time. Film is forgiving, but it does appreciate being treated like you read the label.
Negatives that are too dense
If the negatives are very dark and hard to scan or print, you may have overexposed the film, overdeveloped it, or agitated too aggressively. Minor density problems can still be workable, but consistent technique is what keeps your results repeatable.
Water spots
Use a wetting agent in the final rinse and let the film dry in a clean space. Hard water can leave mineral marks, which are not artistic unless you are extremely committed to explaining them that way.
Scratches and fingerprints
Handle negatives by the edges. Do not rush the drying stage. Do not drag dirty fingers across the emulsion unless your creative vision is “avoidable damage.”
Dust everywhere
Dust usually appears during drying and handling. Clean your workspace, keep the drying area still, and store negatives in sleeves as soon as they are fully dry.
Should You Use a Monobath?
If you want the simplest possible entry point, a monobath combines developer and fixer into one solution. It can be a practical shortcut for beginners, travel setups, or people who would like home processing to involve fewer bottles and less chemistry math.
That said, a traditional developer-stop-fix workflow usually gives you more control and a better understanding of the process. Monobath is convenient; standard processing is more flexible. Neither option makes you more authentic. The negatives do not care about darkroom ego.
Tips for Better Results Every Time
- Use the manufacturer’s development chart for your exact film and developer combination.
- Keep your timing and agitation consistent from roll to roll.
- Write down what you did, especially if you like the results.
- Do not use safelights while processing film; film loading must happen in total darkness.
- Wear gloves when handling chemistry, keep food and drinks out of the workspace, and clean spills immediately.
- If you change your agitation style, tank type, dilution, or temperature, expect your results to change too.
Why So Many Photographers Still Love This Process
Developing black-and-white film is part craft, part routine, part minor act of rebellion against convenience culture. It slows photography down in a good way. You learn to expose more carefully, meter more thoughtfully, and appreciate the physical reality of an image.
It also teaches discipline. You stop guessing. You start paying attention. And eventually you reach the point where loading a reel in the dark no longer feels like performing surgery inside a pillowcase.
Once you get the hang of it, home film development becomes less about technical fear and more about creative control. You are not just taking the picture; you are shaping the result from exposure to final negative.
Experiences Related to “How to Develop Black and White Film”
The first time most people develop black-and-white film at home, the experience is a weird blend of science class, meditation, and low-stakes panic. You start out feeling prepared. You lay out the tank, the reel, the thermometer, the scissors, the bottles, and the timer like you’re starring in your own darkroom cooking show. Then the lights go out, the film goes into the changing bag, and suddenly you forget how hands work.
That reel-loading moment is almost a rite of passage. Beginners often expect it to be elegant. It is usually not elegant. It is more like politely negotiating with a strip of film that has its own opinions. Sometimes the reel accepts it smoothly, and you feel like a genius. Sometimes the film catches, bends, or refuses to advance, and you begin questioning every life choice that led to this point. Then, almost magically, you get it loaded. That tiny victory feels enormous.
Another common experience is discovering just how much film development depends on rhythm. Once the tank is sealed and the lights come back on, the mood changes. You pour in the developer, start the timer, and settle into a pattern: invert, tap, wait, repeat. It becomes oddly calming. For a few minutes, the world gets very small in the best possible way. There is only temperature, timing, and trust.
Then comes the suspense. You pour out the developer, add stop bath, add fixer, and wait for the moment when you can finally open the tank. That first look is unforgettable. Even if the negatives are not perfect, they are yours. They came from light you captured, choices you made, and a process you handled with your own two slightly anxious hands. It feels less like pressing a button and more like making something.
People who stick with black-and-white film development often talk about the sensory details too: the sound of the tank lid snapping shut, the faint chemical smell of the workspace, the clink of bottles on the counter, the visual satisfaction of negatives hanging to dry in a shower or laundry room. It is not glamorous in the usual modern sense. But it is deeply satisfying.
There is also a learning curve that becomes part of the fun. One roll teaches you to agitate more gently. Another teaches you that dust really is as annoying as everyone says. Another teaches you not to cut negatives before they are truly dry, unless you enjoy fingerprints and regret. Over time, the mistakes become stories, and the stories become experience.
That may be the best part of learning how to develop black and white film: it turns photography into a fuller experience. You are no longer just making images. You are participating in the entire journey, from exposure to negative. And once you see your own frames appear on developed film for the first time, it becomes very hard not to want that feeling again.
Conclusion
Learning how to develop black and white film is one of the most rewarding skills in analog photography. It is affordable, practical, and surprisingly beginner-friendly once you understand the workflow. Start with a simple tank setup, follow the proper development chart for your film and chemistry, keep your temperature close to 68°F, stay organized, and treat dust like the villain it is.
Your first roll does not need to be perfect. It just needs to get done. From there, every roll teaches you something new. And before long, developing your own film stops feeling intimidating and starts feeling like the most natural part of making photographs.