Table of Contents >> Show >> Hide
- Before You Begin: Can You Install a Ceiling Fan in a Mobile Home?
- Tools and Materials You May Need
- Step 1: Choose the Right Ceiling Fan for a Mobile Home
- Step 2: Turn Off the Power
- Step 3: Remove the Existing Light Fixture
- Step 4: Check Whether the Electrical Box Is Fan-Rated
- Step 5: Install a Fan-Rated Brace and Box
- Step 6: Attach the Ceiling Fan Mounting Bracket
- Step 7: Assemble the Fan Body
- Step 8: Hang the Fan Motor
- Step 9: Wire the Ceiling Fan
- Step 10: Secure the Canopy and Fan Housing
- Step 11: Attach the Blades
- Step 12: Install the Light Kit, Bulbs, and Shade
- Step 13: Restore Power and Test the Fan
- How to Fix Ceiling Fan Wobble
- Safety Rules for Mobile Home Ceiling Fan Installation
- Best Ceiling Fan Direction for Comfort
- Common Mistakes to Avoid
- Cost to Install a Ceiling Fan in a Mobile Home
- Experience Notes: What Real Mobile Home Ceiling Fan Projects Teach You
- Conclusion
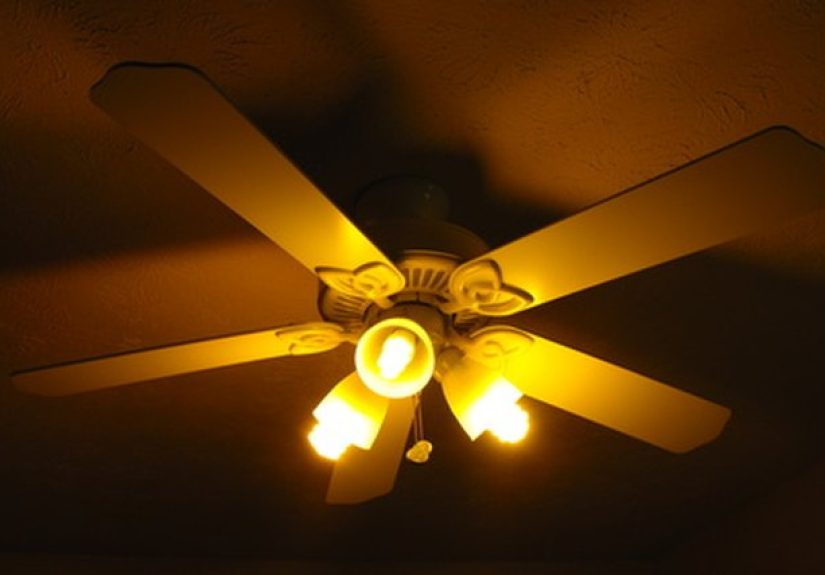
Installing a ceiling fan in a mobile home can make a room feel cooler, brighter, and more comfortable without turning your living room into an arctic research station. A good fan helps move air through compact spaces, supports your heating and cooling system, and gives a room a more finished look. But before you grab a screwdriver and start confidently staring at the ceiling, there is one important truth to know: a ceiling fan is not just a heavier light fixture with blades.
In a mobile home or manufactured home, ceiling construction can be different from a site-built house. Ceiling panels may be thinner, attic access may be limited, roof trusses may be shallower, and the existing electrical box may only be designed to hold a lightweight light fixture. That means the most important part of the project is not the fan itself. It is the support above it. A ceiling fan vibrates, spins, starts, stops, and hangs overhead every single day. It needs a fan-rated electrical box and solid structural support.
This guide explains how to install a ceiling fan in a mobile home safely, what tools you need, how to check the existing ceiling box, and when to call a licensed electrician. The goal is simple: a quiet, secure, wobble-free ceiling fan that cools the room, looks great, and does not make you suspiciously stare upward every time it reaches high speed.
Before You Begin: Can You Install a Ceiling Fan in a Mobile Home?
Yes, you can install a ceiling fan in many mobile homes, but only if the ceiling location has the right electrical wiring and proper structural support. The existing ceiling box must be rated for ceiling fan use, or it must be replaced with a fan-rated box and brace system. A standard light fixture box is usually not enough because it is designed to support a stationary light, not a moving fan motor and spinning blades.
Mobile homes often have lower ceilings, so choosing the right fan style matters. A low-profile ceiling fan, also called a flush-mount or hugger fan, is often the best option for rooms with limited clearance. If the ceiling is higher or slightly vaulted, a short downrod may work, but the blades still need safe clearance from the floor, walls, cabinet doors, bunks, and anything else that should not become part of the fan’s daily workout routine.
Tools and Materials You May Need
- Ceiling fan rated for the room size
- Fan-rated electrical box or retrofit fan brace kit
- Voltage tester
- Phillips and flathead screwdrivers
- Wire strippers
- Pliers
- Adjustable wrench
- Drill and bits, if needed
- Wire connectors approved for the wire size
- Step ladder
- Safety glasses
- Dust mask, especially in older ceiling cavities
- Ceiling medallion or trim ring, optional
Read the fan manual before starting. Different brands use different mounting brackets, canopies, remote receivers, blade arms, light kits, and wiring layouts. A ceiling fan manual is not exactly beach reading, but it is much cheaper than guessing.
Step 1: Choose the Right Ceiling Fan for a Mobile Home
The best ceiling fan for a mobile home is usually lightweight, low-profile, quiet, and sized correctly for the room. Bigger is not always better. A huge fan in a small bedroom can feel less like gentle airflow and more like a weather event.
Fan Size by Room
For small bedrooms, offices, and laundry rooms, a fan between 36 and 44 inches often works well. For average living rooms or primary bedrooms, a 44- to 52-inch fan is common. Larger open spaces may need a bigger fan or more than one fan, but always check the manufacturer’s room-size recommendations.
Low-Profile Fans Are Often Best
Many mobile homes have ceilings around 7 to 8 feet high. For low ceilings, choose a flush-mount fan that keeps the blades close to the ceiling while still allowing good airflow. Avoid long downrods unless your ceiling height allows proper clearance.
Consider a Remote-Control Fan
A remote-control ceiling fan can be useful when the existing wall switch only controls one power feed. Some fans use a receiver tucked into the canopy, allowing separate control of the fan and light without running a new switch leg. This can make installation easier, especially in mobile homes where fishing new wiring through shallow ceiling cavities can be challenging.
Step 2: Turn Off the Power
Go to the breaker panel and turn off power to the room. Do not rely only on the wall switch. A switch can be wired in more than one way, and electricity has a rude sense of humor.
After turning off the breaker, use a non-contact voltage tester at the existing ceiling fixture. Test the wires before touching them. If the tester indicates power is still present, stop and identify the correct breaker. If you are unsure, call a licensed electrician.
Step 3: Remove the Existing Light Fixture
Take down the existing light fixture carefully. Remove the shade or globe, unscrew the fixture base, and gently lower it to expose the wiring. Take a photo of the wire connections before disconnecting anything. That photo can save you from the classic DIY moment known as “I swear I knew where this wire went five minutes ago.”
Disconnect the wires by removing the wire connectors. You will typically see black or red hot wires, white neutral wires, and a bare copper or green ground wire. In older homes, wire colors or grounding methods may vary. If the wiring looks damaged, brittle, aluminum, scorched, or confusing, pause the project and get professional help.
Step 4: Check Whether the Electrical Box Is Fan-Rated
This is the most important step when installing a ceiling fan in a mobile home. Look inside or around the ceiling electrical box for markings. A fan-rated box is usually labeled with wording such as “acceptable for fan support” or “ceiling fan rated.” It may also list a maximum fan weight.
If the box is plastic, shallow, loose, attached only to ceiling paneling, or not clearly marked for fan support, do not use it for the fan. Many light boxes in mobile homes are designed only for lightweight fixtures. A fan needs a listed fan-rated box attached to framing or an approved brace.
What If the Existing Box Is Not Fan-Rated?
Replace it with a fan-rated retrofit brace and box kit. These kits are designed to install through the existing ceiling opening and expand between ceiling joists or trusses. In some mobile homes, spacing and framing can differ from standard construction, so measure carefully and choose a brace compatible with your ceiling structure.
If the ceiling cavity is too shallow, the framing is hard to locate, or the existing opening is awkwardly positioned, call an electrician or qualified installer. Cutting into mobile home ceilings without understanding the structure can lead to damaged panels, weakened support, or a hole that grows emotionally and physically larger than planned.
Step 5: Install a Fan-Rated Brace and Box
If you need to replace the box, remove the old electrical box without damaging the wires. Insert the fan brace through the ceiling opening and position it between structural members. Expand the brace according to the manufacturer’s instructions until it bites securely into the framing. Attach the fan-rated box to the brace and pull the electrical wires into the box using the correct connector or clamp.
The box should sit flush with the finished ceiling surface or as directed by the box manufacturer. It should not wiggle, twist, or feel loose. If it moves when you pull on it, it is not ready for a fan.
Mobile Home Tip
Some manufactured homes have factory-installed ceiling fan boxes in specific rooms. If your home came with a ceiling fan prep location, use that location if possible. It may already have additional support above the ceiling. If you are unsure, check the home’s documentation, contact the manufacturer, or have a professional inspect it.
Step 6: Attach the Ceiling Fan Mounting Bracket
Use the mounting bracket that came with the fan. Do not mix brackets from another fan unless the manufacturer specifically allows it. Attach the bracket to the fan-rated box using the machine screws provided with the box or fan. Tighten the screws firmly, but do not strip them.
The bracket should sit flat and secure against the box. Give it a gentle tug. If the bracket shifts, clicks, or makes you nervous, fix the support before moving forward. Ceiling fans are one area where “probably fine” is not a building strategy.
Step 7: Assemble the Fan Body
Follow the fan manual to assemble the motor housing, downrod, canopy, or flush-mount hardware. For low-profile fans, the motor housing may attach directly to the mounting bracket. For downrod fans, feed the wires through the downrod, secure the downrod to the motor, and tighten all set screws and pins as instructed.
Do not attach the blades too early unless the manual tells you to. Installing blades before hanging the motor can make the fan harder to handle and increase the chance of bending blade arms. Bent blade arms are a common cause of wobble.
Step 8: Hang the Fan Motor
Most ceiling fans have a temporary hook, hanger ball, or bracket slot that holds the motor while you connect the wires. Make sure the fan is properly seated in the bracket before letting go. Keep one hand on the fan until you are certain it is supported.
If your fan feels too heavy or awkward, ask another person to help. Ceiling fan installation is not the time to prove your upper-body strength while standing on a ladder and holding a motor above your head.
Step 9: Wire the Ceiling Fan
Typical ceiling fan wiring includes a black wire for the fan motor, a blue wire for the light kit, a white neutral wire, and a green or bare ground wire. The ceiling box usually has a black or red hot wire, a white neutral wire, and a bare or green ground wire.
For a basic single-switch setup, the fan’s black and blue wires often connect to the ceiling hot wire, the fan’s white wire connects to the ceiling neutral, and the ground wires connect together and to the grounding screw or bracket. However, wiring varies by fan model, switch setup, remote receiver, and home wiring. Always follow the fan manual and local electrical code.
Using a Remote Receiver
If the fan includes a remote receiver, the receiver usually connects between the house wiring and the fan wiring. Match the input wires from the ceiling to the receiver, then connect the receiver output wires to the fan wires. Tuck the receiver into the canopy only as directed. Do not force it into a space where wires are crushed or pinched.
When to Call an Electrician
Call a licensed electrician if there is no ground wire, the wiring is aluminum, the circuit is overloaded, the ceiling box has multiple unknown cables, the breaker trips, or you want separate wall controls for the fan and light but only have a single switch leg. Electrical shortcuts are rarely short for long.
Step 10: Secure the Canopy and Fan Housing
After wiring, gently fold the wires into the electrical box. Keep wire connectors pointed upward if possible and avoid pinching wires between the canopy and bracket. Secure the canopy or motor housing with the screws provided.
Check that all screws are tight and the canopy does not rub against moving parts. A rubbing canopy can cause scraping noises that will make you question every decision you made that afternoon.
Step 11: Attach the Blades
Attach each blade to its blade arm, then attach the blade arms to the motor. Use the screws supplied by the manufacturer and tighten them evenly. Do not overtighten to the point of cracking blade material or stripping screws.
For best balance, install all blades exactly the same way. Make sure the decorative side faces the correct direction and that no blade arm is bent. Even a small difference can cause wobble at higher speeds.
Step 12: Install the Light Kit, Bulbs, and Shade
If your ceiling fan includes a light kit, connect it according to the manual. Many modern fans use plug-style connectors between the light kit and motor housing. Install the recommended bulbs, making sure they do not exceed the maximum wattage listed on the fixture.
Attach the glass shade, diffuser, or globe securely. If your fan uses LED modules instead of bulbs, avoid touching the LED board unless instructed. LED components can be sensitive, and replacement parts may be model-specific.
Step 13: Restore Power and Test the Fan
Turn the breaker back on. Test the wall switch, pull chains, remote, fan speeds, and light. Let the fan run on low, medium, and high. Watch for wobble, clicking, grinding, or unusual vibration.
A slight movement at high speed can be normal, but heavy wobble is not. Turn the fan off and let the blades stop completely before making adjustments.
How to Fix Ceiling Fan Wobble
If the fan wobbles, first check that all mounting screws, blade screws, and bracket screws are tight. Confirm that the fan-rated box is secure. Measure the distance from each blade tip to the ceiling. If one blade sits higher or lower than the others, a blade arm may be slightly bent or misaligned.
Most fans include a balancing kit with small weights. Follow the instructions to test each blade and add weight where needed. A balanced fan runs quieter, lasts longer, and is much less likely to make guests casually ask, “Is that supposed to move like that?”
Safety Rules for Mobile Home Ceiling Fan Installation
- Never hang a ceiling fan from a box that is not fan-rated.
- Never rely on ceiling paneling alone for support.
- Always turn off power at the breaker and test wires before touching them.
- Use the fan manufacturer’s bracket and hardware.
- Choose a fan that fits the room and ceiling height.
- Do not modify roof trusses or structural members without professional guidance.
- Call an electrician if wiring is unclear, damaged, or not grounded.
Best Ceiling Fan Direction for Comfort
Once the fan is installed, use it correctly. In warm weather, set the fan to rotate counterclockwise so it pushes air downward and creates a cooling breeze. In cooler weather, reverse the fan to clockwise on low speed to help circulate warm air that collects near the ceiling. The fan does not actually lower the room temperature, but it can make people feel cooler and help reduce reliance on air conditioning when used wisely.
Turn the fan off when no one is in the room. Ceiling fans cool people, not empty furniture. Your sofa may appreciate the breeze, but it is unlikely to pay the power bill.
Common Mistakes to Avoid
Using the Old Light Box
The biggest mistake is installing the fan on the old light fixture box without checking whether it is fan-rated. A light box may hold a small fixture for years but fail under the movement and weight of a fan.
Buying a Fan That Is Too Tall
A downrod fan on a low mobile home ceiling can create clearance problems. Measure before buying and consider a flush-mount model.
Skipping the Manual
Ceiling fans look similar, but small installation details vary. The manual tells you the correct bracket, wiring method, blade order, remote setup, and weight limits.
Ignoring Wobble
A wobbling fan is not just annoying. It can loosen screws and wear parts over time. Balance it early.
Cost to Install a Ceiling Fan in a Mobile Home
The cost depends on whether the ceiling is already fan-ready. If you are replacing an existing fan with a similar model, the job may only require the cost of the fan and basic supplies. If you need a new fan-rated box, brace, switch wiring, or electrical repairs, the cost increases.
DIY installation can be affordable if the wiring and support are already correct. Professional installation usually costs more, but it may be worth it in a mobile home where ceiling access is limited or the existing box is questionable. Paying for safe support once is better than paying later to repair a damaged ceiling, damaged fan, or damaged confidence.
Experience Notes: What Real Mobile Home Ceiling Fan Projects Teach You
After working through the details of ceiling fan installation in mobile homes, one lesson becomes obvious: the ceiling box tells the truth. The fan may be beautiful, the blades may be stylish, and the remote may look fancy enough to operate a small spaceship, but none of that matters if the box above the ceiling is not built for fan support. In many mobile homes, especially older ones, the existing light fixture box may be attached to thin ceiling material or a lightweight bracket. It may feel secure when holding a small dome light, but a ceiling fan adds movement, vibration, and leverage. That is where trouble starts.
A practical experience-based approach is to treat every mobile home ceiling fan project as an inspection first and an installation second. Before buying the fan, remove the old fixture and check the box. Look for a clear fan-rated label. Tug gently on the box. Find out whether it is attached to framing, a brace, or just the ceiling panel. This early check can save a frustrating return trip to the store. Nothing ruins a Saturday project faster than discovering halfway through that you need a brace kit, a different fan, and possibly a calmer attitude.
Another useful lesson is that low-profile fans are usually your friend. In mobile homes, ceiling height can be limited, and a standard downrod fan may hang too low for comfort. A flush-mount fan keeps more headroom while still improving airflow. This is especially helpful in bedrooms, narrow living rooms, and kitchens where cabinet doors, bunk beds, or tall people may enter the danger zone. Always measure the ceiling height and check blade clearance before installation. Guessing is not measuring; it is just measuring with optimism.
Remote-control fans can also make life easier. Many mobile homes have a single wall switch controlling the ceiling fixture. If you want separate fan and light control without opening walls or fishing new cable, a fan with a remote receiver can be a smart solution. The receiver must still be wired correctly and fit safely inside the canopy, but it can avoid extra switch work in many situations.
Finally, take wobble seriously. A fan that shakes on day one rarely fixes itself. Usually, it needs tightened screws, properly seated blades, or balancing weights. Run the fan at every speed before calling the project finished. Listen for clicking, scraping, or humming. A properly installed ceiling fan in a mobile home should feel boring in the best possible way: quiet, steady, and dependable. When the fan simply works, moves air, and does not draw attention to itself, that is the victory lap.
Conclusion
Learning how to install a ceiling fan in a mobile home is mostly about respecting the structure above the ceiling. The wiring matters, the fan style matters, and the blade size matters, but the fan-rated box and solid support matter most. Start by turning off power, removing the old fixture, inspecting the electrical box, and installing a proper fan-rated brace if needed. Choose a low-profile fan when ceiling height is limited, follow the manufacturer’s instructions, wire carefully, and test the fan at every speed.
If anything looks unsafe, unclear, loose, or outdated, bring in a licensed electrician. A ceiling fan should make your mobile home more comfortable, not more dramatic. With the right support, the right fan, and a patient step-by-step approach, you can enjoy better airflow, improved comfort, and a room that feels cooler without giving your air conditioner a nervous breakdown.