
Table of Contents >> Show >> Hide
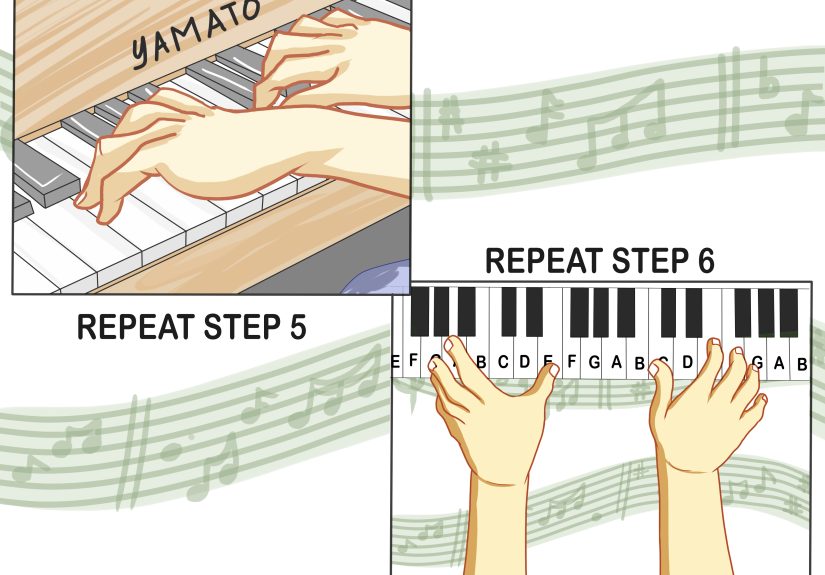
- Start by Learning the Keyboard Pattern
- How to Learn Piano Notes Faster
- Proper Finger Placement on Piano
- How Sharps and Flats Affect Finger Placement
- Thumb Crossing and Hand Shifts
- A Simple Practice Plan for Beginners
- Common Mistakes to Avoid
- Conclusion
- Real Beginner Experiences: What Learning This Actually Feels Like
Learning piano can feel a little like being introduced to a very elegant, very judgmental staircase. There are white keys, black keys, strange little symbols, and sheet music that seems to assume you were born knowing what an accidental is. The good news is that piano notes and proper finger placement are absolutely learnable. In fact, once you understand how the keyboard is organized, how sharps and flats work, and why your fingers should stop freelancing and start cooperating, the piano becomes far less mysterious and a lot more fun.
If you are a beginner, this guide will help you connect the dots between piano notes, finger numbers, hand position, and the black keys that everybody pretends not to fear. We will cover how to find notes quickly, how to recognize sharps and flats, how to place your fingers correctly, and how to practice in a way that builds confidence instead of chaos. By the end, you should be able to look at a keyboard and think, “I know what’s going on here,” which is a lovely upgrade from “Why are there so many C’s?”
Start by Learning the Keyboard Pattern
The piano is not random. It only looks random the way a city map looks random before you know what the symbols mean. The keyboard repeats the same pattern over and over: a group of two black keys, then a group of three black keys, then back to two black keys again.
The easiest way to find your note names is to use those black-key groups as landmarks. The white key directly to the left of any group of two black keys is C. Once you find C, the rest of the musical alphabet goes forward in order: C, D, E, F, G, A, B, and then back to C again. That repeating pattern runs across the entire keyboard.
This matters because note recognition becomes much faster when you stop trying to memorize all 88 keys individually. Instead, you learn the keyboard as a repeating pattern. Find C first. Then identify the nearby notes. It is less “memorize a giant machine” and more “recognize a friendly pattern.”
Natural Notes, Sharps, and Flats
The white keys are usually called the natural notes: A, B, C, D, E, F, and G. The black keys are named using sharps or flats, depending on the musical context.
A sharp means a note is one half step higher. On the keyboard, that means you move one key to the right. A flat means a note is one half step lower, so you move one key to the left.
For example:
- The black key between C and D can be called C# or Db.
- The black key between F and G can be called F# or Gb.
Same key, different name. This is where beginners often squint suspiciously at the piano. That is normal. The note name depends on the key signature and musical spelling, not on the physical key changing its identity overnight.
Also important: there is no black key between B and C, and there is no black key between E and F. Those pairs are already a half step apart. That is one of the most useful facts on the keyboard, and one of the easiest to forget the second you need it.
How to Learn Piano Notes Faster
If you want to learn piano notes efficiently, do not rely on guesswork and panic. Use a system. There are three practical layers to learning notes: keyboard geography, staff reading, and repetition with purpose.
1. Learn Landmark Notes First
Start with a few anchor notes instead of trying to master everything in one heroic afternoon. Good landmark notes include:
- Middle C: the famous peacemaker between the treble and bass clefs
- Treble G: identified by the treble clef curl
- Bass F: identified by the two dots around the bass clef
Once you know those, you can read nearby notes by moving up or down step by step. This is much easier than treating every note as a brand-new stranger.
2. Read by Direction and Pattern
When notes move upward on the staff, they move to the right on the keyboard. When notes move downward on the staff, they move to the left. If a melody climbs line-space-line-space, it is moving stepwise. If it jumps, it is moving by intervals.
Good readers do not decode every single note from scratch. They notice patterns. Repeated notes, short scales, chord shapes, and five-finger positions all make reading easier. Think of it like reading words instead of spelling every letter out loud like a nervous game show contestant.
3. Practice Note Identification Daily
Spend five minutes a day naming notes on the keyboard and on the staff. Quick daily practice works better than a giant cram session once a week. Point to a key and name it. Point to a note on the page and find it on the keyboard. Say note names aloud. Yes, it feels a little dorky. Yes, it works.
Proper Finger Placement on Piano
Now let’s talk about the part your hands have been waiting for: finger placement. Piano fingering is not a random set of rules invented to annoy beginners. It is designed to make your playing smoother, more accurate, and less physically awkward.
Know the Finger Numbers
Each finger has a number:
- Thumb = 1
- Index finger = 2
- Middle finger = 3
- Ring finger = 4
- Pinky = 5
These numbers are the same in both hands. So if sheet music says “1,” it means your thumb. If it says “5,” it means your pinky. Nice and logical. We love that for us.
Use the Five-Finger Position
The most common beginner setup is the five-finger position. In a basic C position for the right hand, your thumb goes on middle C and the rest of your fingers rest naturally on D, E, F, and G. For the left hand, your pinky often starts on the C below middle C, with the other fingers covering D, E, F, and G upward.
This setup teaches several important things at once:
- how each finger maps to a note
- how to keep your hand stable
- how to read short melodies without constantly shifting position
Many beginner songs are built around five-finger positions because they help develop note reading and control without forcing the hand to travel all over the keyboard like it left something in another room.
Shape Your Hand Correctly
Proper hand shape matters. Your fingers should be gently curved, not flat and collapsed. Imagine you are holding a small ball, or a very expensive egg you do not want to crush. Your knuckles should stay lifted, your wrist should be level and relaxed, and your shoulders should not creep up toward your ears like startled cats.
Good piano posture also helps. Sit high enough so your forearms are roughly level with the keyboard. Sit far enough from the piano that your elbows are slightly in front of your body, not pinned awkwardly at your sides.
If your hands look tense, feel stiff, or sound uneven, pause and reset. A relaxed hand is not lazy; it is efficient.
Do Not Ignore Suggested Fingering
When beginner sheet music includes finger numbers, pay attention to them. Those numbers are often there to help your hand move logically through the music. Ignoring them can make simple music feel harder than it actually is.
A common beginner mistake is using only the “strong” fingers, especially 1, 2, and 3. That may feel easier at first, but it creates clumsy habits. Use all five fingers when the passage allows it. Your fourth and fifth fingers may complain at first. They will survive. They simply need training.
How Sharps and Flats Affect Finger Placement
Now we bring the black keys into the story, because eventually every pianist must stop pretending C major is the whole universe.
When sharps and flats appear, finger placement changes slightly because black keys sit higher and farther back than white keys. That means your hand needs to adjust without becoming stiff.
Keep the Hand Balanced
In many beginner passages, your longer fingers, especially 2, 3, and 4, are comfortable on black keys. Your thumb and pinky often feel most stable on white keys. That is one reason fingering patterns are arranged the way they are. They help your hand fit the topography of the keyboard.
This is not a rigid law. Sometimes the thumb does play a black key. But in general, efficient fingering tries to avoid awkward stretching and unnecessary twisting.
Learn Common Examples
Here are a few simple examples:
- C major: no sharps or flats, all white keys
- G major: one sharp, F#
- F major: one flat, Bb
- D major: two sharps, F# and C#
Practicing these keys early is smart because they introduce black keys gradually. Your fingers learn that black keys are not enemy territory. They are just part of the neighborhood.
Understand Key Signatures
The key signature at the beginning of a piece tells you which notes will regularly be sharp or flat. If the music is in G major, every F is F# unless marked otherwise. If the music is in F major, every B is Bb unless canceled.
This matters for both note reading and fingering. If you know the key signature before you start, your hand can prepare. You are no longer surprised by a black key appearing like a plot twist in chapter two.
Thumb Crossing and Hand Shifts
At some point, five notes are not enough. Music moves beyond one little hand position, and that is where thumb crossing enters the picture.
In scales, the thumb often passes under the hand, or the fingers pass over the thumb, so you can continue ascending or descending smoothly. For example, in a one-octave C major scale with the right hand, you usually play:
1-2-3, then thumb under to 1, then 2-3-4-5
This movement should feel smooth, not jerky. Do not lift your whole arm like you are changing lanes on a freeway. Keep the wrist relaxed and let the thumb move naturally under the hand.
Practicing scales slowly is one of the best ways to improve this. Scales are not just music-school vegetables. They are technique builders. They train note recognition, key signatures, finger coordination, and hand motion all at once.
A Simple Practice Plan for Beginners
If you want real progress, use a short and repeatable routine:
Step 1: Keyboard Map Review
Spend two minutes finding all the C’s, then all the G’s, then all the F’s. Use the black-key groups as guides.
Step 2: Note Reading
Practice five to ten notes on the staff and locate them on the keyboard. Focus on accuracy before speed.
Step 3: Five-Finger Patterns
Play C-D-E-F-G with the right hand, then left hand. Then try G major and F major so you get used to F# and Bb.
Step 4: Mini Scales
Practice one-octave scales in C, G, and F. Say the note names out loud as you play.
Step 5: A Short Piece
Use beginner sheet music with finger numbers. Before playing, identify the starting note, hand position, and any sharps or flats.
This routine can take fifteen to twenty minutes and is far more effective than wandering aimlessly around the keyboard hoping inspiration will do all the work.
Common Mistakes to Avoid
- Looking only at your hands: glance when needed, but learn to trust the keyboard layout.
- Ignoring the key signature: this leads to wrong notes and unnecessary confusion.
- Using random fingering every time: consistency builds muscle memory.
- Flattening the fingers: this weakens control and tone.
- Playing too fast too soon: speed built on confusion is just stylish panic.
Conclusion
Learning piano notes and proper finger placement with sharps and flats is really about building a set of connected skills. First, you learn the keyboard pattern. Then you learn how note names relate to the staff. Then you train your fingers to sit in sensible positions, move efficiently, and adapt when black keys enter the conversation. The more those skills connect, the more natural piano playing feels.
Start simple. Use landmark notes. Practice five-finger patterns. Respect finger numbers. Learn a few easy key signatures early. Most of all, stay patient. Every solid pianist was once a beginner staring at a keyboard and wondering why B and C had no black key between them. The difference is that they kept going, one note and one finger at a time.
Real Beginner Experiences: What Learning This Actually Feels Like
One of the most comforting things about learning piano is realizing that nearly everyone has the same strange beginner experiences. At first, the keyboard can feel huge. You may know that the notes repeat, but it still seems like there are way too many of them. You find middle C, feel proud for about six seconds, and then immediately lose track of it again. This is normal. Beginners often think they are “bad at piano” when they are really just in the completely ordinary stage of building spatial familiarity.
Another common experience is that the right hand feels like the star student while the left hand acts like it showed up without doing the reading. Many beginners can play a simple melody with the right hand and then suddenly feel clumsy and uncertain when the left hand joins in. The left hand is not broken. It is just less practiced. With steady repetition, it becomes more dependable, and eventually both hands learn how to work together without sounding like two strangers arguing in public.
Sharps and flats also tend to create a dramatic emotional arc. At first, black keys can look intimidating. They seem like “advanced piano territory,” as if touching one requires a permit. Then, after practicing a few scales in G major or F major, something clicks. You realize black keys are not harder; they are simply part of the pattern. Many learners describe this as a turning point because the keyboard stops feeling divided into easy keys and scary keys. It starts feeling like one complete instrument.
Finger placement has its own learning curve. In the beginning, proper fingering can feel overly picky. Why can’t you just use whichever finger gets there first? Then you try a short passage with random fingering and compare it to the same passage with a planned fingering pattern. Suddenly the “picky” approach feels brilliant. Students often experience this most clearly with scales, where thumb crossings first feel awkward and then, after enough slow practice, become strangely satisfying. One day the motion feels impossible; a week later it feels logical.
There is also the experience of reading music more intelligently. Early on, many beginners try to decode each note one at a time. That works, but it is slow and tiring. Over time, they begin to spot patterns instead: repeated notes, neighboring steps, chord shapes, and hand positions. This is one of the most exciting parts of learning because it feels like the page is finally speaking a language you recognize.
Perhaps the most valuable experience, though, is discovering that progress on piano is usually quiet before it is obvious. A practice session may feel messy, but a few days later the same notes suddenly come easier. Your hands land more accurately. Your eyes recognize patterns faster. The song that once felt impossible starts sounding like music instead of an emergency. That slow accumulation is how piano learning works. It is not magic. It is repetition, observation, and a growing sense that the keyboard is becoming familiar territory.


