
Table of Contents >> Show >> Hide
- Why Tomato Cage Christmas Gnomes Work So Well
- Materials You’ll Need
- How to Make a Tomato Cage Christmas Gnome Step by Step
- Best Style Ideas for Tomato Cage Christmas Gnomes
- Common Mistakes to Avoid
- How Much Does This DIY Cost?
- Conclusion
- Extra Holiday Craft Experience: What It’s Really Like to Make Tomato Cage Christmas Gnomes
- SEO Tags
If your holiday decorating style falls somewhere between “cozy cottage” and “I absolutely will glue faux fur to random garden supplies,” tomato cage Christmas gnomes may become your new favorite tradition. They’re cheerful, a little goofy in the best possible way, and surprisingly practical. A basic tomato cage already gives you the cone-shaped frame that makes a gnome body easy to build, so half the work is done before you even plug in the glue gun.
Better yet, this is the kind of Christmas craft that looks far fancier than it really is. You can make one for a front porch, a pair for your entryway, or a whole gnome squad if you have the energy and the storage closet space. The result feels whimsical and handmade, with the sort of old-world charm people love in Nordic-inspired holiday decor. Christmas gnomes, often linked to Scandinavian tomte or nisse traditions, have become a playful favorite in modern seasonal decorating, and it’s easy to see why: they are equal parts folklore, humor, and fluff.
In this guide, you’ll learn how to make tomato cage Christmas gnomes for the holidays using simple materials, easy steps, and plenty of room for your own style. Whether you want a budget-friendly craft, a porch statement piece, or a holiday project that makes your house look like a woodland elf got a Pinterest account, this tutorial has you covered.
Why Tomato Cage Christmas Gnomes Work So Well
A tomato cage is basically the secret sauce of this project. It creates a sturdy, tapered base without requiring woodworking, advanced sewing, or the emotional turmoil of cutting perfect circles out of cardboard. The shape naturally mimics a gnome body, especially once you flip or gather the frame and cover it with fabric, greenery, or a sweater.
That makes this holiday DIY especially appealing for people who want big visual impact without complicated construction. It also fits right in with the upcycled spirit of modern Christmas decorating. Reusing garden materials, leftover fleece, old sweaters, mittens, ribbon, and scrap fabric turns this into a clever low-cost craft instead of a holiday budget ambush.
Another perk is flexibility. You can make your tomato cage Christmas gnome look rustic, farmhouse, Scandinavian, playful, elegant, or downright ridiculous in a charming way. A plaid hat says “cozy cabin.” A red velvet hat says “I host cookie swaps.” A flannel body and giant beard say “I split wood recreationally.” It’s a very versatile little fellow.
Materials You’ll Need
You do not need every possible craft supply under the sun. You just need the basics and a willingness to improvise a little.
Core supplies
- 1 tomato cage
- Hot glue gun and glue sticks
- Wire cutters or sturdy pliers
- Floral wire, zip ties, or twine
- Fabric for the body, such as fleece, sweater knit, burlap, or felt
- Fabric for the hat, such as fleece, felt, flannel, or velvet-look material
- Beard material, such as faux fur, chunky yarn, loop yarn, mop fibers, or wool roving
- Nose material, such as a wood bead, pom-pom, stuffed felt ball, or dryer ball
Optional extras
- Mittens for hands or feet
- Pool noodle pieces for arms
- Battery-operated fairy lights
- Pinecones, bells, ribbon, faux greenery, berries, or ornaments
- Polyfill or scrap stuffing
- A weighted base if you’re displaying the gnome outdoors
If you are making outdoor Christmas gnomes for a porch, lean toward tougher materials like fleece, weather-friendlier faux greenery, sturdy ribbon, and battery lights. If your gnome will live indoors, you can be more delicate and decorative with the details.
How to Make a Tomato Cage Christmas Gnome Step by Step
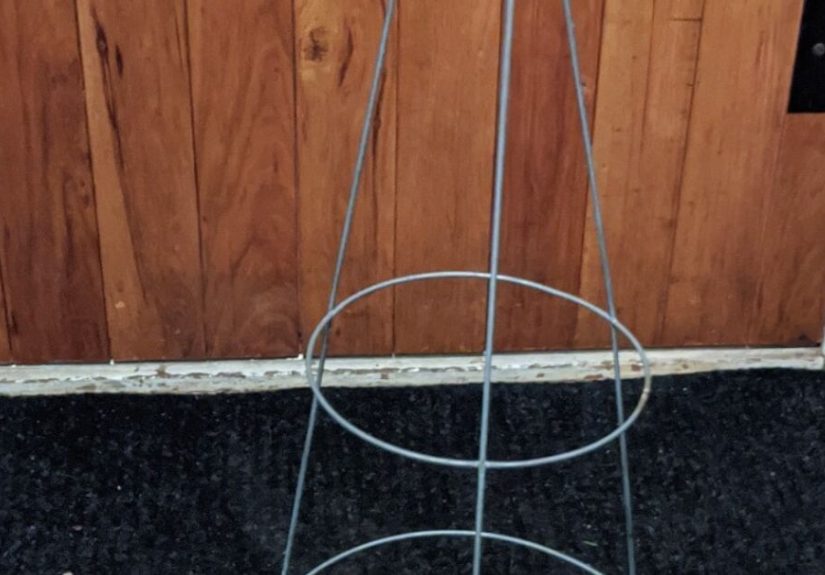
Step 1: Shape the tomato cage
Start by turning the tomato cage into a cone form. Most people either flip it upside down so the wider section becomes the base, or gather the narrower wires together at the top and secure them with floral wire. If your cage has pokey ends sticking out like it’s trying to pick a fight, bend them inward with pliers.
Set it upright and check the shape. This is your gnome’s body, so now is the time to make it stand evenly. If it wobbles, gently adjust the metal frame. A stable base now saves you from holiday rage later.
Step 2: Cover the body
Wrap the cage with your chosen body material. A sweater creates a cozy, ready-made texture and is one of the easiest options. Slip it over the frame, then bunch and secure the excess fabric at the top or bottom with wire or glue. Fleece is also great because it’s forgiving, easy to cut, and doesn’t fray much.
If the metal frame shows through, you can first wrap it with craft foam, batting, burlap, or a second layer of fabric. The goal is simple: make the body look plump, soft, and intentionally gnome-shaped instead of “vegetable support in a costume.”
Step 3: Add the beard
The beard is where your tomato cage Christmas gnome starts gaining personality. Faux fur gives the fullest, most high-end look. Yarn works well for a softer, homespun style. Wool roving looks charming and fluffy. Even loop yarn can work if you want texture without sewing.
Cut the beard into a rounded triangle or long U-shape. Place it on the upper front of the body, leaving enough room for the hat to drape down later. Glue the beard securely, especially around the top edge, because that’s where gravity likes to test your optimism.
Step 4: Make and attach the nose
A gnome nose is usually simple and round. A wood bead is classic. A pom-pom works. A stuffed felt ball works too. Glue the nose at the top center of the beard so it peeks out under the hat brim. That’s the sweet spot. Too high and it disappears. Too low and your gnome starts looking oddly human, which is not the holiday magic we’re aiming for.
Step 5: Create the hat
Cut a large triangle or half-circle from your hat fabric and form it into a cone. Hot glue or stitch the seam closed. Slide it over the top of the tomato cage and pull it down until it sits just over the nose. This draped, low-brimmed look is what gives Christmas gnomes their signature face-hidden charm.
You can keep the hat clean and simple, or decorate it with faux fur trim, a bell, a pom-pom, ribbon, greenery, or a candy-cane striped bow. Wired ribbon helps hats hold their shape a little better, especially for larger porch gnomes.
Step 6: Add arms, hands, and feet if you want
This part is optional, but it adds a lot of charm. Pool noodle pieces or rolled fabric tubes can become arms. Slip mittens onto the ends and tuck them into sweater sleeves or glue them to the sides. For feet, use small boots, stuffed socks, or mittens turned sideways. Suddenly your gnome goes from “cute decor” to “small holiday resident with opinions.”
Step 7: Decorate and stabilize
Finish your gnome with details that match your holiday style. Tuck faux greenery around the hat. Add pinecones or berries. Wrap battery fairy lights around the body for a soft evening glow. If the gnome will sit outside, add weight inside the base with rocks, sandbags, or a heavy planter insert so it doesn’t tip over the first time the wind gets festive too.
Best Style Ideas for Tomato Cage Christmas Gnomes
Classic red-and-white Christmas gnome
Use a red fleece hat, white faux fur beard, round wood nose, and greenery accents. This is the most recognizable look and works beautifully on a porch or beside a fireplace.
Farmhouse holiday gnome
Think plaid fabric, burlap, cream fleece, neutral yarn beard, and a muted color palette. This version looks great with lanterns, galvanized planters, and wooden porch signs.
Evergreen porch gnome
Instead of fabric for the whole body, cover sections of the tomato cage with artificial greenery or winter branches. Add a fleece hat and a simple nose. It feels woodsy and looks especially good by a front door.
Whimsical colorful gnome
Go all in with velvet, pom-poms, striped hats, oversized mittens, and bright ornaments. This version is cheerful, playful, and perfect if your holiday decor has more color than restraint.
Common Mistakes to Avoid
Using a hat that’s too small. If the hat doesn’t drape over the nose, the gnome loses its signature look. Make the hat bigger than you think you need.
Skipping body coverage. Exposed wire can make the finished piece look unfinished. Layer fabric or filler if the frame is too visible.
Under-gluing the beard. The beard is a focal point. Secure it well so it doesn’t peel away after two days and start looking emotionally exhausted.
Ignoring balance for outdoor display. Porch gnomes need weight. Holiday whimsy is lovely, but not when it rolls into the hydrangeas.
Overdecorating. Yes, I know that sentence is rude during Christmas. But sometimes one great hat, one fluffy beard, and one cute nose are enough.
How Much Does This DIY Cost?
If you reuse a tomato cage and some old fabric, this can be a very budget-friendly Christmas craft. A simple gnome may cost only a few dollars in glue, felt, and embellishments. A larger, more decorative porch gnome with faux fur, lights, ribbon, and accessories may cost more, but it’s still usually cheaper than buying oversized holiday character decor from a store.
That’s one reason this project is so popular. It feels custom, charming, and substantial without demanding luxury-level spending. In holiday craft terms, that’s basically a Christmas miracle.
Conclusion
Learning how to make tomato cage Christmas gnomes for the holidays is one of those rare seasonal projects that checks every box. It’s affordable, creative, beginner-friendly, customizable, and genuinely fun to display once it’s finished. You can keep the design simple with fleece and a pom-pom nose, or build a full-blown porch gnome with mittens, lights, and enough personality to deserve a mailing address.
The best part is that no two gnomes have to look the same. One can be classic and woodsy, another can be bright and playful, and another can wear an old sweater that finally got a glorious second act. So grab that tomato cage, dig through your fabric stash, and start crafting. Your front porch, entryway, or living room is about to get a lot more cheerfuland a lot more beard-forward.
Extra Holiday Craft Experience: What It’s Really Like to Make Tomato Cage Christmas Gnomes
There’s something oddly satisfying about turning a humble tomato cage into a Christmas gnome. At the start, it looks a little ridiculous. You’re standing there with garden wire in one hand, a piece of fleece in the other, and just enough confidence to say, “This is definitely going to become adorable.” That early stage always feels like a leap of faith. It does not look like a gnome yet. It looks like you lost a bet with your craft supplies.
Then the transformation starts. The minute the body gets covered, the whole thing begins to make sense. Add a beard and suddenly it has character. Add the nose and it somehow becomes charming. Pull that floppy hat down over the face and there it is: your little holiday oddball has arrived.
One of the best parts of making tomato cage Christmas gnomes is how forgiving the project is. The hat can be crooked. The beard can be extra wild. The body doesn’t need to be perfectly smooth. In fact, the more handmade it looks, the more personality it seems to have. That’s part of the fun. You’re not aiming for factory-perfect. You’re aiming for cozy, whimsical, and “Where did you buy that?” followed by your very smug reply: “I made it.”
This project also has a sneaky way of becoming a holiday tradition. You make one, then you decide it needs a friend. Then the friend needs a smaller cousin for the mantel. Next thing you know, your house has a gnome population problem and you are absolutely not sorry. Families often end up giving each gnome a different style or little backstory. One looks like a lumberjack. One looks like it drinks cocoa professionally. One looks like it might judge your wrapping-paper choices.
There’s also a cozy rhythm to the making itself. Cutting fabric, wrapping the frame, fluffing faux fur, testing where the nose should go, adjusting the hat one hundred times for dramatic effectit all feels very holiday in the best way. Put on a Christmas playlist, make something warm to drink, and suddenly the craft becomes part decor project, part seasonal memory.
And when the gnome is finished and finally set on the porch, by the front door, or near the tree, it has a kind of handmade warmth store-bought decor often misses. It feels personal. It feels festive. It feels like the holidays showed up wearing a floppy hat and refusing to reveal their eyes. That, frankly, is excellent seasonal energy.


