Table of Contents >> Show >> Hide
- Why Nail Polish Gets Messy in the First Place
- What You’ll Need Before You Start
- How to Paint Your Nails Without Making a Mess: 8 Steps
- Step 1: Set up your space like you actually want to succeed
- Step 2: Prep your nails until they’re clean, dry, and smooth
- Step 3: Apply a base coat and let it do its job
- Step 4: Load the brush correctly instead of drowning the nail
- Step 5: Use the three-stroke method for the first color coat
- Step 6: Add a second thin coat instead of one thick one
- Step 7: Clean up while the polish is still workable
- Step 8: Seal with top coat and give your nails real drying time
- Extra Tips for an Even Cleaner At-Home Manicure
- Common Mistakes That Turn a Manicure Into a Mess
- What a Mess-Free Nail Routine Really Feels Like
- Real-Life Experience: What I Learned the Hard Way About Painting Nails Neatly
- Conclusion
Painting your nails at home sounds easy in the same way making “just a quick sandwich” sounds easy. Five minutes later, the kitchen looks like a crime scene and somehow there’s mustard on your elbow. Nail polish can be like that. You sit down with hopeful energy, a fresh bottle of color, and the dream of glossy, salon-worthy nails. Then one shaky swipe later, you’re wearing half the polish on your skin, your thumb has smudged itself into modern art, and your confidence has left the chat.
The good news: neat nails are not reserved for salon pros, people with superhero-level hand control, or that one friend who somehow paints both hands perfectly while answering texts. Learning how to paint your nails without making a mess is mostly about preparation, technique, and patience. Not glamorous, perhaps, but very effective. Once you understand the order of operations and stop trying to rush like you’re diffusing a bomb, your manicure gets dramatically cleaner.
This guide breaks the process into eight practical steps you can actually follow. You’ll learn how to prep your nails, apply polish with less wobble, avoid flooding your cuticles, and clean up the small mistakes that happen to literally everyone. Whether you’re a total beginner or someone who usually ends up saying, “It’ll look better after I wash my hands,” these tips can help you get a smoother, tidier finish.
Why Nail Polish Gets Messy in the First Place
Before we jump into the steps, let’s diagnose the usual troublemakers. Messy nails usually happen for a few reasons: too much polish on the brush, thick coats that slide around, oily nail surfaces that make polish behave like it’s on a slip-and-slide, and painting too close to the skin too soon. Add poor lighting, a weird sitting position, and the classic “I have exactly seven minutes to do this” mindset, and you’ve got a recipe for chaos.
The fix is surprisingly simple. Clean nails thoroughly, use thin layers, give each coat a little breathing room, and leave a tiny margin around the cuticle instead of trying to paint every last millimeter. Perfect coverage is not the same thing as polish touching your skin. In fact, the cleanest manicures usually look polished because the edges are controlled, not overloaded.
What You’ll Need Before You Start
- Nail polish remover or acetone
- Cotton pads or lint-free wipes
- Nail file and optional gentle buffer
- Base coat
- Your nail color
- Top coat
- A small angled brush, lip brush, or cleanup brush
- Cuticle oil for the finishing touch
You do not need a beauty room, a velvet robe, or a playlist titled “Main Character Manicure.” You just need a flat surface, decent light, and enough time to avoid immediately opening a soda can with wet nails.
How to Paint Your Nails Without Making a Mess: 8 Steps
Step 1: Set up your space like you actually want to succeed
Start with a stable table or desk, not your bed, couch, or the edge of a mysterious pillow mountain. Put your tools within reach before you open the polish. Good lighting matters more than people think. If you can’t clearly see where your nail ends and your skin begins, your polish certainly can’t either.
Rest both forearms on the table to reduce shaking. This tiny adjustment makes a huge difference. When your hands are floating in midair, your polish strokes get wobbly fast. If you want bonus points, place a paper towel or old cloth underneath your hands so you’re not panicking about spills. Nail painting is smoother when your brain isn’t screaming, “Do not ruin the table!”
Step 2: Prep your nails until they’re clean, dry, and smooth
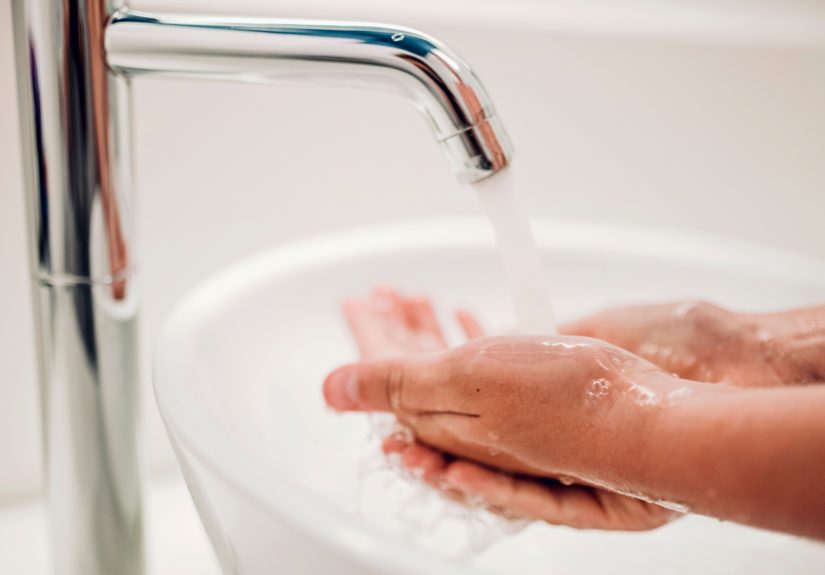
If there’s old polish, remove it completely. Then wash your hands and make sure your nails are fully dry before you begin. File your nails into your preferred shape and lightly smooth any rough edges. If your nail surface has obvious ridges, a very gentle buff can help polish go on more evenly. Keep it gentle, though. You’re smoothing, not sanding a bookshelf.
Next, remove any leftover oil or lotion from the nail plate with remover or alcohol. This step matters because polish sticks better to a clean, dry surface. If you’ve ever wondered why your manicure slides around or chips early, oils are often the sneaky culprit. Push cuticles back very gently if needed, but do not go digging, cutting, or launching an attack on them. The skin around your nails is there for a reason, and angry cuticles are not known for enhancing a manicure.
Step 3: Apply a base coat and let it do its job
Base coat is not an optional extra invented by the nail polish industry to test your patience. It helps polish adhere better, can reduce staining, and gives the color something smooth to grip. Apply one thin coat to each nail. Thin is the key word here. You want coverage, not puddles.
Brush the base coat from near the cuticle toward the tip. Some people like to lightly cap the free edge of the nail to help with wear, especially if their nails are longer. Let the base coat dry until it’s no longer tacky enough to smear around immediately. You do not need it fossilized, but you do need it settled.
Step 4: Load the brush correctly instead of drowning the nail
Most polish mess begins right here. Pull the brush out of the bottle and wipe one side against the neck of the bottle so the brush holds polish without turning into a drip machine. If there’s a giant blob hanging off the tip, that is not confidence. That is a warning sign.
The goal is enough polish to cover the nail in a thin layer, not enough to repaint a fence. A smaller amount gives you more control, especially near the cuticle and sidewalls. If you need another dip for the next nail, great. It’s better to reload than to try to push a giant lake of polish into behaving. Nail polish has many talents. Obedience is not one of them.
Step 5: Use the three-stroke method for the first color coat
Now for the fun part. Place the brush slightly above the cuticle line, then nudge it gently toward the cuticle without touching the skin. Once the brush fans out a little, pull the polish straight down the center of the nail. Then do one stroke along one side and one along the other side. That’s the basic three-stroke method, and it works because it gives you control without overworking the polish.
Try to leave a hairline gap between the polish and the skin. That tiny margin is what makes the manicure look neat. Flooding the cuticle area almost always leads to mess, slower drying, and peeling. Keep your strokes steady and resist the urge to keep brushing once the polish is laid down. The more you fuss, the streakier and messier it gets.
If your non-dominant hand paints like it’s operating under emotional distress, slow down and brace the painting hand with a finger from the other hand. You can also rotate the finger you’re painting instead of twisting the brush into odd angles. Work smarter, not shakier.
Step 6: Add a second thin coat instead of one thick one
One thick coat seems faster, but it usually creates dents, bubbles, smears, and regret. Two thin coats give better color payoff and a cleaner finish. Let the first coat set for a minute or two, then repeat the same controlled process for the second coat: center, side, side.
This is also when patience quietly earns its paycheck. If the first coat is still sliding around, the second coat can drag it and create bald patches or ridges. Thin layers dry more evenly, look smoother, and are much less likely to spill over onto the skin. If your polish formula is sheer, you may need a third very thin coat, but only after the second one has settled.
Step 7: Clean up while the polish is still workable
Even careful people make mistakes. The difference between messy nails and neat nails is often not perfection. It’s cleanup. Dip a small angled brush or cleanup brush into remover, then lightly trace around the edges of each nail to sharpen the outline. This is the manicure equivalent of using an eraser after sketching. Tiny corrections create a much more polished result.
Be gentle and precise. You don’t want a brush dripping with remover and dissolving half the nail. A slightly damp brush is enough. Clean around the sidewalls and cuticle line, especially if polish wandered where it was not invited. If you accidentally paint your skin a little, do not panic, cancel plans, or move to another country. Cleanup is part of the process.
Step 8: Seal with top coat and give your nails real drying time
Finish with one thin layer of top coat to add shine, smooth minor unevenness, and help protect the color. Apply it the same way you applied your color, with controlled strokes and no cuticle flooding. A good top coat can make even a basic manicure look more expensive and intentional.
Then comes the step people love to ignore: drying. Dry-to-the-touch is not the same as fully dry. Your nails may seem ready, then one button, zipper, bedsheet, or snack wrapper says otherwise. Give your manicure time to set. Avoid hot water, tight gloves, and anything that requires fingertip bravery for a while. If you use quick-dry drops or spray, great, but they help most when the coats underneath are already thin and even. In other words, there is no miracle cure for impatience, though the beauty industry has certainly tried.
Extra Tips for an Even Cleaner At-Home Manicure
Choose the right polish formula
Some polishes are easier to control than others. If a bottle is old, stringy, or gloopy, it will fight you every step of the way. Roll the bottle gently between your hands instead of shaking it hard, which can create bubbles. If the formula has thickened with age, a polish thinner made for nail lacquer can help restore a smoother consistency.
Paint your dominant hand first if that helps you focus
Some people prefer painting their easy hand first to build confidence. Others like getting the hard hand out of the way. There is no sacred rule here. Test both and see which method gives you fewer smudges and fewer dramatic sighs.
Use lighter shades when you’re learning
Very dark colors, neons, and quick-dry formulas can be less forgiving. Sheers, nudes, and soft pinks often make beginner mistakes less obvious. They are the training wheels of manicure life, and there is no shame in that.
Keep lotion and oil away until the end
Moisturizer before painting can leave the nail plate too slick for polish to grip well. Save your cuticle oil and hand cream for the finishing stage once everything is dry enough to handle. Your nails will look better, and your manicure will thank you by staying put longer.
Common Mistakes That Turn a Manicure Into a Mess
- Applying thick coats because you’re in a hurry
- Painting all the way into the skin around the nail
- Skipping nail prep and leaving oil on the surface
- Using old, clumpy polish that no longer applies evenly
- Shaking the bottle aggressively and creating bubbles
- Touching things too soon because the nails “seem dry”
- Trying to fix wet polish with too many extra strokes
A neat manicure is less about artistic talent and more about not committing these little acts of sabotage. That’s encouraging, because habits are easier to fix than genetics.
What a Mess-Free Nail Routine Really Feels Like
Once you get the hang of it, painting your nails at home becomes oddly satisfying. The rhythm starts to make sense. Prep, coat, breathe, repeat. You stop treating nail polish like a race and start treating it like a process. And magically, your results improve. Cleaner edges. Better shine. Fewer smudges. Far less “maybe no one will notice if I keep my hands in my pockets.”
The biggest mindset shift is this: neat nails are not created by rushing toward perfection. They’re created by giving yourself small advantages at every step. Good setup. Clean nails. Thin coats. Thoughtful cleanup. Time to dry. When you stack those simple habits together, the manicure looks more professional without demanding professional-level drama.
Real-Life Experience: What I Learned the Hard Way About Painting Nails Neatly
My early at-home manicures were a master class in how not to paint nails. I used to sit on the couch with one leg folded under me, balancing the polish bottle on a book like that was somehow a stable workstation. I would slap on color in thick, enthusiastic strokes, admire the shine for six seconds, and then immediately decide it was a great time to check my phone, open a cabinet, or put on socks. The result was always the same: dents, smears, and a weird halo of polish around every nail that made my hands look like they had survived a minor arts-and-crafts emergency.
The first big improvement came when I stopped treating preparation like a pointless delay. I used to think base coat was optional and cleanup was something only perfectionists did. Once I started cleaning the nail plate properly and keeping the polish slightly away from the cuticle, everything looked more intentional. It was such an annoyingly simple fix that I was personally offended by how well it worked.
I also learned that the brush is not supposed to be soaked like a paint roller. For the longest time, I believed more polish would mean fewer strokes and a faster manicure. In reality, it just meant more flooding, more slipping, and more muttering under my breath. Wiping one side of the brush and applying thin layers changed the whole game. Suddenly I could guide the polish instead of wrestling it. The color looked smoother, dried faster, and stopped creeping into places it had absolutely no business visiting.
The cleanup brush became my favorite secret weapon. There is something deeply satisfying about tracing around the edges of a nail and watching the whole manicure look ten times more polished in about three seconds. It’s like editing a rough draft. The content was already there, but now it looks sharp. Once I accepted that even good manicures need a little cleanup, I stopped expecting flawless application on the first try and started getting much better results.
The funniest lesson, though, was learning that “dry enough” is a lie my brain tells me when I am bored. I cannot count how many times I ruined a decent manicure because I got overconfident and tried to do one tiny task. Just one! Button jeans. Pick up keys. Peel a label. Apparently my nails heard that and said, “No, let’s become textured.” Now I build in real drying time and treat fresh polish with the caution normally reserved for carrying a full cup of coffee across a white carpet.
Over time, doing my nails stopped feeling frustrating and started feeling relaxing. Not because I became magically ambidextrous or suddenly elegant, but because I finally had a system. I knew what tools to set out, how much polish to use, when to slow down, and how to fix little mistakes before they turned into obvious ones. The process became more predictable, and that made it much easier to enjoy.
If you’re still in the messy phase, that’s normal. Truly. Most people do not get a clean at-home manicure by accident. They get it by repeating a few boring but effective habits until those habits feel automatic. So if your first attempt still leaves a bit of polish on your skin or one thumbnail looking more “abstract concept” than “salon chic,” do not give up. Keep the coats thin, keep the cleanup brush nearby, and remember that even a less-than-perfect manicure usually looks much better once it’s glossy, dry, and paired with a little confidence.
Conclusion
If you want to paint your nails without making a mess, the secret is not having impossibly steady hands. It’s having a smart method. Set up a stable space, prep your nails well, use a base coat, apply thin color layers with control, clean the edges, and let everything dry longer than your impatient soul thinks necessary. That’s the formula. No wizardry. No salon membership required. Just good technique and a little self-restraint when your brain says, “These are probably dry enough to fold laundry.” They are not.
With practice, your manicure will get cleaner, faster, and a lot less stressful. And once that happens, painting your nails at home becomes less of a mess-management exercise and more of a tiny act of self-care with a glossy finish.