Table of Contents >> Show >> Hide
- What Makes a Rock Polish Well?
- Tools and Supplies You Need
- Safety First: Keep Rock Dust Out of Your Lungs
- How to Polish Rocks by Hand
- How to Polish Rocks in a Tumbler
- The Four Main Tumbler Stages
- Burnishing: The Secret Clean-Up Step
- Hand Polishing vs. Tumbler Polishing
- Common Rock Polishing Mistakes
- Troubleshooting: Why Are My Polished Rocks Dull?
- Expert Tips for a Better Shine
- Extra Experience: Lessons From Real Rock Polishing Practice
- Conclusion
Polishing rocks is one of those hobbies that starts innocently: you pick up a pretty pebble, rinse it under the faucet, and suddenly you are comparing silicon carbide grit like a tiny geologist with a shopping cart. The good news? Learning how to polish rocks is not difficult. The slightly inconvenient news? Rocks do not care about your schedule. They shine when the surface is ready, not when your patience says, “Okay, sparkle now.”
Whether you want to polish rocks by hand for a single special stone or use a rock tumbler to turn a whole batch of rough stones into glossy treasures, the process is all about controlled abrasion. You remove scratches little by little, moving from coarse grit to finer grit until the surface reflects light instead of scattering it. Think of it as teaching a rock manners: first you smooth the rough edges, then you refine, then you polish until it is ready for the display bowl.
This expert-style guide explains how to choose good rocks, polish stones by hand, use a rotary tumbler, avoid common mistakes, and get a brighter finish without turning your kitchen sink into a geology crime scene.
What Makes a Rock Polish Well?
Not every rock is a future superstar. Some rocks polish beautifully, while others crumble, pit, shed grains, or look dull no matter how lovingly you glare at them. The best rocks for polishing are hard, dense, non-porous, and fairly uniform in texture.
For beginners, excellent choices include agate, jasper, quartz, chalcedony, chert, petrified wood, and many types of quartzite. These stones are popular because they are durable and often fall around 6.5 to 7 on the Mohs hardness scale. That range is firm enough to take a strong shine but not so hard that you need industrial-level determination and a snack break every five minutes.
Use the Mohs Hardness Scale as Your Starting Point
The Mohs hardness scale measures how resistant a mineral is to scratching. Talc is very soft at 1, while diamond sits at 10. Quartz is 7, which is why quartz-rich stones such as agate, jasper, and many forms of chalcedony are favorites for rock tumbling and hand polishing.
Try to polish rocks of similar hardness together. Mixing very soft stones with hard stones can lead to disappointment: the soft ones wear down too quickly, while the hard ones may not smooth properly. It is like putting a marshmallow and a bowling ball in the same washing machine. Technically possible? Sure. Wise? Absolutely not.
Tools and Supplies You Need
For hand polishing, you do not need a full lapidary workshop. You need patience, water, abrasives, and a workspace that can handle mud. For tumbling, you need a rock tumbler, grit, polish, and enough discipline to clean everything between stages.
Supplies for Polishing Rocks by Hand
- Wet/dry sandpaper in multiple grits, such as 80, 120, 220, 400, 600, 1000, 1500, and 2000
- A small container of water
- Safety glasses
- Dust mask or respirator if sanding could create dust
- Old towel or rubber mat
- Aluminum oxide polish or cerium oxide polish
- Soft cloth, leather pad, felt pad, or denim for final buffing
Supplies for Tumbling Rocks
- Rotary rock tumbler or vibratory tumbler
- Coarse grit, usually 60/90 silicon carbide
- Medium grit, such as 120/220 silicon carbide
- Fine grit or pre-polish, often 500 or 600 grit
- Rock polish, commonly aluminum oxide
- Ceramic media or plastic pellets for cushioning and filling space
- Plastic bucket and colander for rinsing
- Notebook or tumbling log
Safety First: Keep Rock Dust Out of Your Lungs
Many attractive rocks contain silica, especially quartz-rich stones. Cutting, grinding, or dry sanding silica-containing material can release fine dust. The safest habit is simple: work wet whenever possible. Water keeps particles from becoming airborne and also helps carry grit across the rock surface.
Wear safety glasses when rinsing tumbler barrels or scrubbing muddy stones. Do not dump slurry, grit, or rock mud down the drain. It can harden and clog plumbing with the enthusiasm of concrete. Use a bucket, let the solids settle, pour off clear water outdoors where appropriate, and dispose of the settled grit in the trash.
How to Polish Rocks by Hand
Hand polishing is best for one or two special stones, small display pieces, or rocks with shapes you want to preserve. It is slower than tumbling, but it gives you more control. It is also oddly relaxing, provided you accept that your hands may look like you lost a wrestling match with a sidewalk.
Step 1: Wash and Inspect the Rock
Start by scrubbing the stone with water and a brush. Remove dirt from cracks and pits. Look for deep fractures, crumbly patches, or porous areas. If a rock sheds grains when rubbed, it may never take a clean polish. Save those for the garden, aquarium decoration, or the “interesting but emotionally complicated” rock pile.
Step 2: Shape With Coarse Grit
Begin with coarse wet/dry sandpaper, such as 80 or 120 grit, if the rock has bumps, sharp edges, saw marks, or weathered crust. Keep both the stone and sandpaper wet. Sand in small circles or steady strokes. Your goal is not shine yet; your goal is to remove the worst surface damage.
Do not rush this step. If a scratch remains after coarse shaping, it will still be there after polishing, only shinier and more annoying. Coarse work is where most of the real transformation happens.
Step 3: Move Through Finer Grits
Once the shape looks good, move to 220 grit, then 400, 600, 1000, 1500, and 2000. Rinse the rock and your hands between each grit. A single leftover coarse grain can scratch the surface and send you backward like a villain in a board game.
At each stage, sand until the marks from the previous grit are gone. Dry the stone briefly and inspect it under a bright light. Wet stones can hide scratches because water fills tiny grooves. A dry surface tells the truth, often with unnecessary honesty.
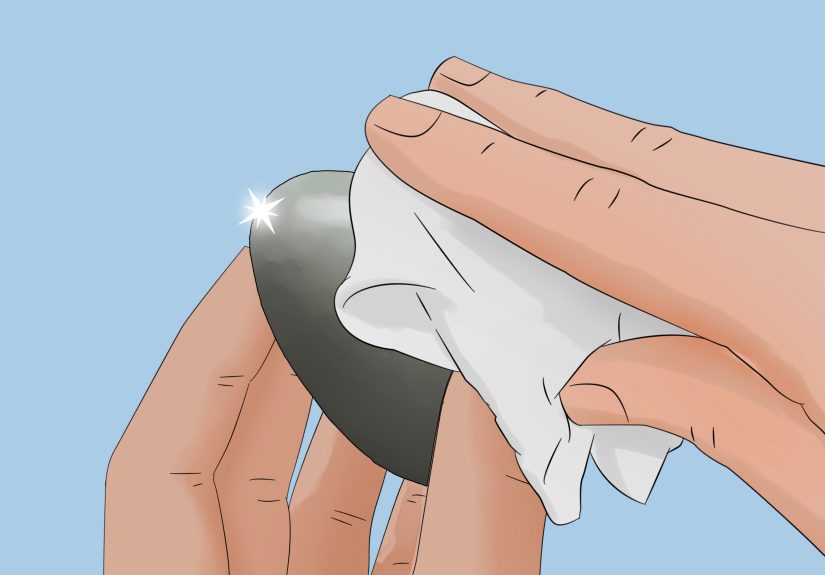
Step 4: Apply Polish
When the rock feels smooth and has a soft satin look, apply a small amount of aluminum oxide or cerium oxide polish to a damp cloth, felt pad, leather, or denim. Rub firmly in circles. Keep the polish slightly damp, not soupy. Continue buffing until the shine improves.
Some stones develop a mirror-like gloss. Others produce a warm, waxy glow. Both can be beautiful. The final result depends on the rock’s mineral makeup, hardness, texture, and how completely you removed scratches before polishing.
How to Polish Rocks in a Tumbler
A rock tumbler is ideal when you want to polish multiple stones at once. A rotary tumbler slowly rolls rocks, grit, and water inside a barrel. Over time, the stones grind against each other, becoming smoother and rounder. It is basically a tiny artificial river with better organization.
Step 1: Choose the Right Rocks
Select rocks that are similar in hardness and size. For small home tumblers, pieces between about 1/4 inch and 1 1/2 inches usually work well. Include a mix of sizes so smaller stones fill gaps between larger ones. More contact points mean better grinding.
Avoid rocks with deep cracks, crumbly texture, or open pits. Pits can trap coarse grit and contaminate later stages. Fractured rocks may break apart and scratch the whole batch. Tumbling rewards quality rough. “Garbage in, garbage out” may sound harsh, but rocks are not famous for giving second chances.
Step 2: Load the Barrel Correctly
Fill the tumbler barrel about one-half to two-thirds full with rocks. If the barrel is too empty, rocks can crash into each other and bruise or chip. If it is too full, they may not tumble properly. Add ceramic media if needed to bring the load to the right level and cushion the stones.
Add grit according to your tumbler size and manufacturer instructions. A common rule for rotary tumblers is about two level tablespoons of grit per pound of rock. Add water until it sits just below the top layer of stones. Seal the barrel tightly and start tumbling.
The Four Main Tumbler Stages
Stage 1: Coarse Grind
The coarse grind shapes the rocks and removes rough surfaces. Use 60/90 silicon carbide grit and run the tumbler for about seven days. After a week, rinse and inspect the stones. If they still have sharp edges, pits, or rough spots, repeat the coarse stage.
This is the stage where beginners often get impatient. Resist the urge to move on too soon. A poor coarse grind leads to dull final results. You cannot polish away major shaping problems in the last stage any more than you can fix a bad haircut with perfume.
Stage 2: Medium Grind
After the rocks are shaped, clean everything thoroughly: stones, barrel, lid, rim, and any media. Then add medium grit, such as 120/220 silicon carbide. Run for another week. At the end, the rocks should feel smoother and show fewer visible scratches.
Cleanliness matters. Coarse grit hiding in the lid or barrel seam can scratch the rocks during medium grind. This is one of the most common reasons polished rocks come out cloudy or scratched.
Stage 3: Fine Grind or Pre-Polish
The fine grit stage prepares the surface for polish. Use 500 or 600 grit silicon carbide, again with a clean barrel and proper water level. Run for about seven days. When finished, the stones should be very smooth and may show a slight sheen.
If you see cracks, broken pieces, or rough patches, remove those stones. One problem rock can sabotage an entire batch like a tiny gravel gremlin.
Stage 4: Polish
For the final polish, use a clean barrel, clean stones, and a true rock polish such as aluminum oxide. Do not assume that very fine sand is the same as polish. Polishing compounds are designed to create a reflective surface with extremely fine abrasive particles.
Run the polish stage for about a week. When finished, rinse the stones carefully. If they are smooth but slightly hazy, a burnishing step may help.
Burnishing: The Secret Clean-Up Step
Burnishing is not the same as polishing. It is a cleaning step that removes leftover polish, haze, and residue from tiny surface crevices. Place the polished stones back in the clean barrel with water and a mild soap, such as finely grated plain bar soap. Run the tumbler for 30 minutes to a few hours, depending on your setup.
Do not use gritty cleaners, scented soaps with additives, or mystery household products from under the sink. Your rocks asked for a spa day, not a chemistry experiment.
Hand Polishing vs. Tumbler Polishing
Hand polishing is best when you want control over shape, edges, and individual details. It is ideal for one favorite stone, a pendant piece, or a rock with a unique pattern you do not want rounded away.
Tumbler polishing is best for batches. It creates smooth, rounded stones with less hands-on labor, but it takes weeks. A rotary tumbler may need four to six weeks depending on the material and how many times you repeat the coarse stage. The tumbler does the work, but it does not work instantly.
Common Rock Polishing Mistakes
Moving Through Grits Too Quickly
The biggest mistake is advancing before scratches are removed. Each grit must erase the marks from the previous grit. If you skip this, the final polish will reveal every shortcut.
Poor Cleaning Between Stages
Contamination is the enemy of shine. Rinse rocks, media, barrel, lid, and tools thoroughly. Use separate brushes if needed. Treat coarse grit like glitter: once it spreads, it appears everywhere and ruins your afternoon.
Mixing Unsuitable Rocks
Do not tumble soft calcite with hard jasper and expect harmony. Group stones by similar hardness and texture. When testing a new material, tumble it separately until you know how it behaves.
Using the Wrong Polish
Not all fine powders create a glossy polish. Use a proven lapidary polish such as aluminum oxide, tin oxide, or cerium oxide depending on the stone. For most beginner tumbling batches of agate, jasper, and quartz, aluminum oxide is a dependable choice.
Troubleshooting: Why Are My Polished Rocks Dull?
If your rocks are dull after polishing, first check the surface. Are there visible scratches? Go back to medium or fine grit. Are the rocks smooth but hazy? Try burnishing. Are there pits? Grit may be trapped, or the rock may be too porous for a high gloss.
Also consider the material. Some rocks naturally take a glassy shine. Others produce only a soft luster. This does not mean you failed. It means the rock has boundaries, which is more emotional maturity than many people show before coffee.
Expert Tips for a Better Shine
- Start with dense, high-quality rough.
- Keep rocks wet while sanding by hand.
- Do not skip grit levels.
- Inspect stones dry between stages.
- Keep one tumbler barrel only for polish if possible.
- Use ceramic media to cushion and improve contact.
- Keep a tumbling log with dates, grit, rock type, and results.
Extra Experience: Lessons From Real Rock Polishing Practice
The first lesson of rock polishing is that enthusiasm is not a substitute for surface preparation. Many beginners want to jump straight to the polish because polish sounds glamorous. Coarse grit sounds like work. Unfortunately, rocks are brutally fair: they show exactly what you did and what you skipped. A stone that still has tiny pits after coarse grinding will not magically become smooth in polish. It will become a shiny stone with tiny pits. Congratulations, you have invented reflective disappointment.
One useful habit is to create a “decision bowl” after each grit stage. Place rocks that are ready to move forward in one bowl, rocks that need more time in another, and rocks that are cracked or suspicious in a third. This keeps one bad stone from ruining the rest. It also gives you a clearer sense of progress. Instead of treating the whole batch as one unit, you judge each rock by its own surface.
Another practical tip is to photograph your stones before tumbling and after every stage. Photos help you notice changes in shape, color, and texture. Some rocks look boring when rough but reveal bands, speckles, or hidden color after the coarse grind. Others look promising at first and then develop cracks. A photo record teaches you which materials are worth collecting again.
For hand polishing, comfort matters more than people admit. Use a rubber mat, wrap sandpaper around a small foam block, and take breaks. Hand polishing is repetitive. If your fingers ache, your technique gets sloppy. Sloppy sanding creates uneven surfaces and missed scratches. A little patience saves a lot of rework.
Water control is also important. Too little water creates dust and clogs the abrasive. Too much water can wash away polishing compound before it does its job. Aim for a damp slurry. The surface should feel smooth and slightly creamy, not dry and squeaky or flooded like a miniature swamp.
With tumblers, listen to the barrel. A healthy rotary tumble usually has a steady rolling sound. Loud clacking may mean the barrel is underfilled or lacks cushioning media. A barrel that barely moves may be overloaded. The sound tells you whether the rocks are rolling, sliding, or throwing a private demolition party.
Finally, accept that polishing rocks is part science, part craft, and part polite negotiation with nature. The same grit sequence can produce different results on different stones. That is normal. The reward is not just the shine; it is learning how each material behaves. Once you understand that, every rough rock becomes a small mystery with a possible glossy ending.
Conclusion
Learning how to polish rocks by hand or in a tumbler is really learning how to remove scratches in the right order. Choose dense stones, match hardness, work wet, clean carefully, and never ask the polish stage to fix problems that belong to the coarse stage. Hand polishing gives you control over individual pieces, while tumbler polishing turns batches of rough stones into smooth, rounded gems over several weeks.
The process may be slow, but the payoff is wonderfully satisfying. One day you are holding a dull pebble. A few stages later, it looks like something that belongs in a museum gift shop with a tiny velvet pouch and an inflated price tag. That, dear rock person, is the magic of lapidary patience.