Table of Contents >> Show >> Hide
- Sterile Gloves vs. Clean Gloves: Not the Same Thing
- When Open Gloving Is Used
- What You Need Before You Start
- How to Put On Sterile Gloves: Step-by-Step
- 1. Check the package before opening it
- 2. Perform hand hygiene and dry thoroughly
- 3. Place the glove package on a clean, dry surface
- 4. Pick up the first glove by the inside of the folded cuff
- 5. Slip the gloved fingers under the cuff of the second glove
- 6. Adjust the gloves using sterile-to-sterile contact only
- 7. Keep your gloved hands where they belong
- Common Mistakes That Break Sterility
- What If You Contaminate a Glove?
- Open Gloving vs. Closed Gloving
- Practical Tips That Make Donning Easier
- Why This Skill Matters So Much
- Real-World Experiences With Sterile Gloving
- Final Thoughts
Putting on sterile gloves looks simple right up until you try it and suddenly feel like your own thumbs have betrayed you. One wrong touch, one wandering fingertip, one casual brush against the package, and the whole “sterile” part can disappear faster than free snacks in a hospital break room. That is exactly why sterile gloving matters. It is not a theatrical ritual. It is a practical infection-prevention skill used to help protect patients during invasive procedures, wound care, line care, catheter care, and other tasks that require a sterile field.
If you are learning how to don sterile gloves, the good news is that the process is very teachable. The even better news is that once you understand the logic behind each step, it stops feeling like a magic trick and starts feeling like a repeatable routine. This guide walks through the open-gloving method step by step, explains why each move matters, points out common mistakes, and shares practical lessons that make the skill easier to perform with confidence.
Sterile Gloves vs. Clean Gloves: Not the Same Thing
Before jumping into the steps, it helps to clear up a common point of confusion. Clean gloves are used for many everyday healthcare tasks when reducing contamination is enough. Sterile gloves are different. They are manufactured, packaged, and handled to remain free of microorganisms until opened correctly. In other words, sterile gloves are for moments when “pretty clean” is nowhere near good enough.
You may need sterile gloves for dressing changes involving sterile technique, central line care, urinary catheter insertion, minor bedside procedures, or any situation in which your facility’s policy calls for surgical asepsis. If your protocol says sterile gloves, that instruction is not a suggestion. It is the whole plot.
When Open Gloving Is Used
The donning method most people learn first is called open gloving. This is commonly used when you need sterile gloves but are not already wearing a sterile gown. In the operating room, clinicians may use closed gloving after a sterile gown has been donned, but open gloving is the classic skill for nursing students, bedside clinicians, caregivers managing sterile home procedures, and anyone setting up for sterile tasks outside a full surgical gowning sequence.
What You Need Before You Start
Good sterile gloving begins long before the gloves touch your hands. Start with the basics:
- A correct-size pair of sterile gloves in unopened packaging
- A clean, dry work surface at a comfortable height
- Clean, dry hands after proper hand hygiene
- Short natural nails and no hand jewelry
- All supplies gathered before you begin
That last point matters more than people expect. Hunting for tape, gauze, or a dressing kit after you have already donned sterile gloves is a fantastic way to waste a perfectly good pair. Gather everything first. Sterile technique rewards preparation and punishes improvisation.
How to Put On Sterile Gloves: Step-by-Step
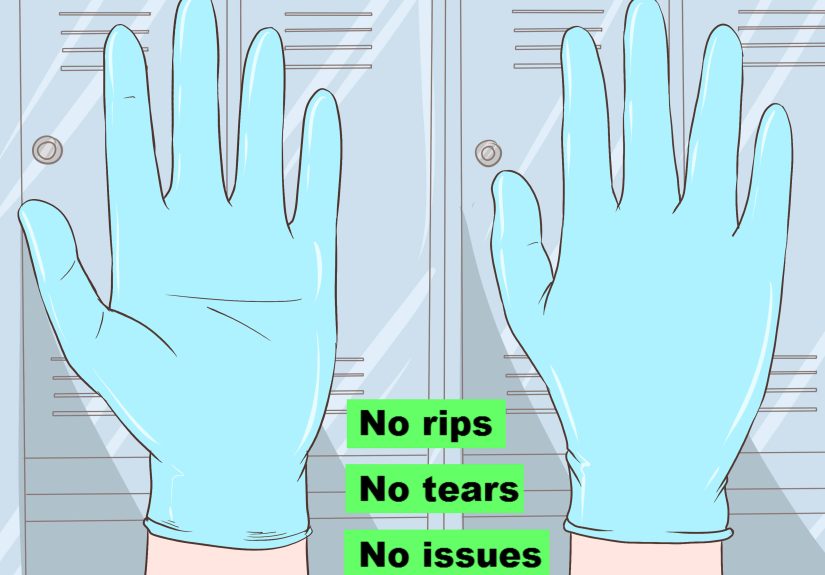
1. Check the package before opening it
Inspect the glove package for tears, moisture, damage, or an expired date if your setting requires that check. If the packaging looks wet, ripped, or questionable, do not try to talk yourself into using it anyway. Sterile items need intact packaging to remain sterile.
2. Perform hand hygiene and dry thoroughly
Wash your hands according to facility policy or the instructions provided for the procedure you are performing. Clean between the fingers, around the thumbs, under the nails, and across all hand surfaces. Then dry completely. Hands that are still damp make glove donning harder and can undermine the sterile process. If you are doing a surgical or invasive procedure in a perioperative setting, follow the required hand antisepsis protocol before glove donning.
3. Place the glove package on a clean, dry surface
Set the glove package down so the cuffs of the gloves will be closest to you when opened. Open the outer wrapper carefully. Then open the inner sterile wrapper by touching only the edges that are considered nonsterile. Lay the wrapper flat. You should be able to clearly see a right glove and a left glove.
Pause here for one second. This is where rushing starts to cause trouble. A calm setup is worth it. Fast is nice. Sterile is nicer.
4. Pick up the first glove by the inside of the folded cuff
Use your nondominant hand to pick up the glove for your dominant hand. Touch only the inside of the folded cuff, because that part will rest against your skin. Do not touch the outer glove surface.
Keep your dominant hand flat, fingers together, and thumb slightly tucked. Slide your hand into the glove smoothly. Pull it on without touching the outside surface with your bare skin. Leave the cuff folded for the moment. If the glove feels slightly crooked, resist the urge to fuss with it right away.
5. Slip the gloved fingers under the cuff of the second glove
Now the move that humbles beginners everywhere. With your gloved dominant hand, slide your fingers under the folded cuff of the second glove. This time, you are touching the outside of that second glove, which is acceptable because your gloved hand is already sterile.
Lift the second glove carefully and keep it open. Slide your bare nondominant hand into the glove, keeping the palm up and the fingers extended. Be careful that the thumb of your gloved hand does not brush your bare skin while you guide the glove on. Once the second glove is in place, pull it up gently.
6. Adjust the gloves using sterile-to-sterile contact only
After both gloves are on, you may adjust the fit. At this point, only touch sterile glove surfaces with other sterile glove surfaces. Smooth the fingers if needed. Unfold the cuffs if your procedure requires it. Do not touch your face, clothing, hair, ID badge, stethoscope, phone, keyboard, bed rail, or anything outside the sterile field. Yes, that list gets oddly personal because these are exactly the things people accidentally touch.
7. Keep your gloved hands where they belong
Once the gloves are on, keep your hands above waist level, in front of you, and within view. If your hands drop below the waist, move out of sight, or brush against a nonsterile surface, sterility is considered broken. The rule may feel strict, but it exists for a reason: if you cannot see what touched what, you cannot honestly call it sterile.
Common Mistakes That Break Sterility
Most contamination during glove donning happens for very ordinary reasons. Not dramatic reasons. Not cinematic reasons. Just regular human reasons.
Touching the wrong part of the cuff
For the first glove, your bare hand should touch only the inside cuff. For the second glove, your gloved hand should touch only the outside cuff. Mixing those up can contaminate the glove before the procedure even starts.
Using the wrong glove size
Gloves that are too small are hard to pull on and more likely to tear. Gloves that are too large make fine motor tasks awkward and floppy. Neither situation is ideal when you are trying to maintain precision.
Rushing the setup
People often contaminate gloves because they start before their supplies are arranged, the surface is ready, or their hands are fully dry. Sterile gloving is one of those skills where “just wing it” should be banned from the building.
Reaching back to adjust glasses, hair, or clothing
This is a classic. You glove up beautifully, then your glasses slide down your nose or a strand of hair falls forward, and suddenly your sterile gloves are taking part in a completely nonsterile side quest.
Letting the gloved hands drop too low
Keep your hands in front of you and above the waist. Think of your gloved hands as VIPs. They do not go wandering into questionable neighborhoods.
What If You Contaminate a Glove?
Start over. That is the answer no one loves and everyone needs. If you touch a nonsterile surface, tear a glove, notice a puncture, feel uncertain about what you touched, or simply suspect contamination, remove the gloves and don a new sterile pair. Guessing is not a sterile technique. Neither is optimism.
In many clinical settings, glove integrity should also be assessed after donning and throughout use. If there is any doubt, change them using sterile technique. A fresh pair is cheaper than an infection.
Open Gloving vs. Closed Gloving
Open gloving is the method described above and is commonly used when only gloves are needed. Closed gloving is typically performed after donning a sterile gown, with the hands staying inside the gown sleeves while the gloves are applied. The goal of both methods is the same: preserve sterility. The method depends on the procedure, the environment, and facility protocol.
In perioperative settings, you may also hear about double gloving, especially during surgeries or invasive procedures with higher exposure risk. That does not change the basic lesson here: sterile gloves only stay sterile if they are donned and handled correctly.
Practical Tips That Make Donning Easier
Practice the hand position
Keeping the hand flat and the thumb tucked slightly inward makes it much easier to slide into the first glove without snagging the cuff or brushing the outer surface.
Open the wrapper neatly
A wrapper flung open like a pizza box in a hurry tends to move, fold, or place the gloves at awkward angles. A calm, deliberate opening gives you a better field to work from.
Use a comfortable work height
If the surface is too low, you are more likely to hunch, lose visual control, or drop your hands below waist level. Waist-high or slightly above is often easier for maintaining technique.
Do a mental rehearsal
Before touching the first glove, know your sequence: first glove by the inside cuff, second glove by the outside cuff, adjust sterile-to-sterile only. That tiny mental script can prevent a lot of awkward mid-procedure improvising.
Why This Skill Matters So Much
Donning sterile gloves is not about passing a lab checkoff, impressing a preceptor, or looking extra official near a sterile field. It is about reducing opportunities for contamination during care. The patient does not care whether the motion looked graceful. The patient benefits when the technique is correct.
That is also why sterile gloving should always be paired with the bigger picture: proper hand hygiene, good nail and skin care, correct glove size, sterile supplies, a clean work surface, and close attention to any break in technique. Gloves are one part of sterile practice, not a magical force field.
Real-World Experiences With Sterile Gloving
People learning sterile gloving often expect the skill to feel intuitive on the first try. It usually does not. In real life, the first glove can feel manageable, and the second glove can feel like trying to put a fitted sheet on a cloud without touching the bed. That is normal. Many learners describe their early attempts as a weird mix of concentration, panic, and silent bargaining with their own fingers.
One common experience is discovering that confidence and speed do not always arrive together. Beginners often move very slowly, checking every motion like they are handling museum artifacts. Then, after a few repetitions, they suddenly get too confident and touch something nonsterile. That little cycle is part of the learning curve. Slow, accurate repetition usually works better than trying to look fast before the technique is solid.
Another frequent lesson is how much workspace matters. People who struggle at first often improve immediately when the field is arranged more clearly and the wrapper is opened in a neat, predictable way. In other words, sterile gloving is not just a hand skill. It is also an organization skill. If the setup is messy, the gloving often becomes messy too.
Students and new caregivers also talk about how surprisingly physical the process feels. Hands that are slightly damp can make the glove drag. Gloves that are one size too small can turn a simple step into a wrestling match. Gloves that are too big can make the fingers feel clumsy. Many people do not realize how important correct sizing is until they try a better fit and suddenly the whole process becomes much smoother.
There is also a mental shift that happens with practice. At first, people focus on memorizing the steps: touch this part, not that part; keep the thumb tucked; keep the hands up. Later, they start thinking in terms of sterile logic. They stop memorizing isolated motions and begin asking the right question: “What is sterile, what is not sterile, and what can safely touch what?” That is the point where the skill becomes more durable. If you understand the logic, you can recover from little surprises without guessing.
Many clinicians can recall a moment when they thought they had gloved perfectly, only to realize they had absentmindedly adjusted their mask, scratched an eyebrow, or reached for a nonsterile pen. It is humbling, yes, but also useful. Those moments teach the habit of staying mentally present after the gloves are on. Donning is not the finish line. Maintaining sterility afterward is the rest of the race.
Caregivers doing sterile tasks at home often describe a different challenge: distractions. In a hospital or training lab, the room is designed around the procedure. At home, the phone rings, the dog barks, someone knocks, the child asks for a snack, and suddenly the sterile field is competing with real life. That is why experienced home caregivers often become serious about setup. They clear the area, gather every supply first, and create a few uninterrupted minutes before opening anything sterile.
Perhaps the most reassuring real-world truth is this: people get better. The skill that feels awkward at first becomes familiar with repetition. The package opens more neatly. The first glove goes on without a struggle. The second glove stops feeling like a public test of character. And the person donning the gloves becomes less focused on “not messing up” and more focused on protecting the patient. That shift is the real goal. Sterile gloving is not about perfection theater. It is about safe, careful, repeatable practice.
Final Thoughts
Learning how to put on sterile gloves is one of those healthcare skills that looks tiny from the outside and turns out to carry a lot of responsibility. The basic idea is simple: prepare well, clean your hands, touch only the approved glove surfaces, keep the gloves sterile after donning, and start over if contamination occurs. But inside that simple sequence is a bigger principle: details matter.
Done correctly, sterile glove donning supports safer procedures, cleaner wound care, and better infection prevention. Done sloppily, it becomes a fake safety step that only looks correct from a distance. So take the extra moment. Set up the field. Dry your hands. Respect the cuff. Keep your hands up. And if something goes wrong, get a new pair and begin again. Sterility is not about ego. It is about doing the job right.