Table of Contents >> Show >> Hide
- Before You Start: Safety, Tools, and a Quick Reality Check
- Step-by-Step: How to Replace a Ceiling Light Fixture
- 1) Turn Off Power (The Right Way)
- 2) Remove the Old Shade/Globe and Fixture Body
- 3) Verify Power Is Off (Again) and Disconnect the Wires
- 4) Inspect the Ceiling Electrical Box (This Step Prevents Regret)
- 5) Prep the New Light Fixture
- 6) Connect the Wires (The Part Everyone Googles Twice)
- How to Make a Solid Wire-Nut Connection
- Common Wiring Situations (Because Homes Love Plot Twists)
- 7) Mount the Fixture and Tuck Wires Carefully
- 8) Install Bulbs/Shade, Restore Power, and Test
- Troubleshooting After Installation
- Smart Upgrades While You’re Up There
- FAQ: Quick Answers People Actually Ask
- of Real-World Experience (a.k.a. “Things You Learn While Balancing on a Ladder”)
- Conclusion
Replacing a ceiling light fixture is one of those home upgrades that can make your room look instantly “I have my life together”
without actually requiring you to have your life together. It’s mostly screws, a few wires, and the ability to resist the temptation
to “just test it real quick” while the power is on (don’t).
This guide walks you through a safe, step-by-step ceiling light replacement in standard American homes, with real-world scenarios
like mystery wires, crowded electrical boxes, and fixtures that seem designed by someone who hates wrists.
Before You Start: Safety, Tools, and a Quick Reality Check
Yes, you can replace many ceiling light fixtures as a DIY project. But electricity is the one roommate who never forgives. The goal
is simple: turn the power off, verify it’s off, wire it correctly, mount it securely.
When to Call a Pro (No Shame, Only Wisdom)
- No ceiling box (or the fixture is hanging from drywall/anchors). That’s a hard stop.
- Damaged, brittle, scorched, or aluminum wiring, or you see crumbly cloth insulation.
- No ground wire in a metal fixture situation and you’re not sure how the system is grounded.
- The breaker trips or you smell burning when the old light was used.
- Heavy fixtures (big chandeliers) where the box may need to be rated for the load.
If any of that describes your ceiling situation, a licensed electrician is the fastest route to “safe and done.”
Tools and Materials Checklist
- Non-contact voltage tester (a.k.a. the “please don’t electrocute me” pen)
- Phillips and flathead screwdrivers
- Wire strippers/cutters
- Needle-nose pliers
- Flashlight or headlamp
- Wire connectors (wire nuts) sized for your wire count
- Electrical tape (optional but handy)
- Step ladder
- New ceiling light fixture + included mounting bracket/hardware
- Optional: multimeter, new mounting screws (#8-32 are common for boxes), and a helper to hold the fixture
Time, Difficulty, and the “How Many Trips to the Hardware Store?” Factor
Typical time: 30–90 minutes. Difficulty: Beginner to intermediate, depending on wiring.
Hardware store trips: Ideally zero. Realistically… keep your shoes on until the light turns on.
Step-by-Step: How to Replace a Ceiling Light Fixture
The basic process is the same for most flush mounts, semi-flush fixtures, and many pendant lights: power off, remove old fixture,
inspect box, attach bracket, connect wires, mount fixture, restore power.
1) Turn Off Power (The Right Way)
- Go to your electrical panel and switch off the breaker that controls the light.
- Flip the wall switch for the light to “on” (this helps you verify the circuit is dead).
- Use a non-contact voltage tester on the fixture and then on the wires once exposed.
Don’t trust the wall switch alone. Some wiring setups still leave parts energized even with the switch off. Your tester is your
best friend heretreat it like a tiny, beeping guardian angel.
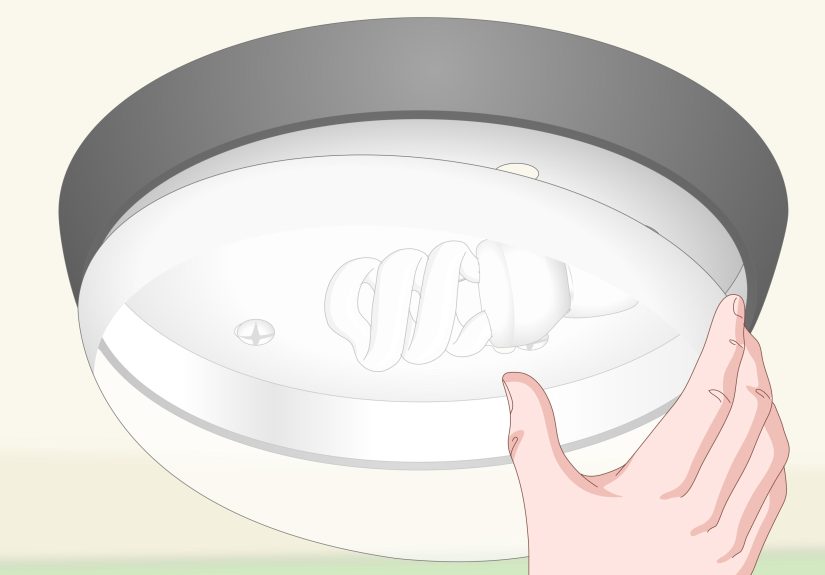
2) Remove the Old Shade/Globe and Fixture Body
- Remove bulbs and any glass globe or shade. Support glass with one hand while loosening screws with the other.
- Unscrew the fixture base from the ceiling box (usually two screws or decorative nuts).
- Gently lower the fixture to expose the wiring. If it’s hanging by wires, support it with your hand.
Pro tip: Take a quick photo before disconnecting anything. Future-you will love past-you for this.
3) Verify Power Is Off (Again) and Disconnect the Wires
- Test the wires in the ceiling box with your voltage tester.
- Unscrew wire nuts and separate the connections.
- Disconnect the ground wire (bare copper or green) if present.
- Remove the old mounting bracket/strap if the new fixture has its own (it usually does).
4) Inspect the Ceiling Electrical Box (This Step Prevents Regret)
Look for these issues before installing the new fixture:
- Loose box: If the box wiggles, tighten mounting screws or address the box support.
- Overcrowded wiring: If wires are jam-packed, you may need to carefully fold them or consider a deeper box.
- Damaged insulation: Cracks, scorch marks, or melted plastic means stop and investigate further.
- Box rating: Heavy fixtures should be supported by a properly mounted, rated box (especially for chandeliers).
A ceiling light fixture should be mounted to the electrical box or mounting strapnot dangling by wires like it’s auditioning for a
low-budget horror movie.
5) Prep the New Light Fixture
- Unbox the fixture and confirm all parts are present: bracket, screws, wire nuts (sometimes), canopy, and any decorative bits.
- Identify fixture wires: typically black (hot), white (neutral), and green/bare (ground).
- Install the mounting bracket to the ceiling box using the correct screws (commonly #8-32).
If the fixture includes a foam gasket, level plate, or keyhole slots, read the manufacturer instructions once. Yes, once. You’re
still rebellious, just safer.
6) Connect the Wires (The Part Everyone Googles Twice)
In most U.S. homes, you’ll connect like-to-like:
- Black (fixture) to black or red (ceiling) = hot/switched hot
- White (fixture) to white (ceiling) = neutral
- Green/bare (fixture) to bare/green (ceiling) = ground
How to Make a Solid Wire-Nut Connection
- Strip about 1/2 to 3/4 inch of insulation (check your wire nut packaging for guidance).
- Hold the wire ends together evenly.
- Twist the wire nut on clockwise until snug and the wires feel secure.
- Gently tug each wire to confirm it’s locked in.
Optional: wrap the wire nut with electrical tape if you want extra peace of mind (not always required, but some DIYers love it).
Common Wiring Situations (Because Homes Love Plot Twists)
Situation A: The Old Fixture Had Two Same-Color Wires
Older fixtures sometimes have two identical leads. One goes to hot, one to neutralfunctionally it works either way, but the common
practice is to connect one to the ceiling’s black (hot) and the other to the ceiling’s white (neutral). If the fixture has a marked
neutral (ridges, writing, or a tag), follow that marking.
Situation B: You See a Red Wire in the Ceiling Box
A red wire is often a switched hot (common in ceiling fan/light setups or multi-switch situations). If the old light was controlled
by the wall switch and was connected to red, connect the new fixture’s hot (black) to red. Cap off any unused wire securely with a
wire nut.
Situation C: Multiple White or Black Wires in the Box
That can indicate the circuit continues to another location (a “feed-through”). Typically, those neutrals stay bundled together,
and the fixture neutral ties into that neutral bundle. Same idea for hots: the switched hot goes to the fixture. If you’re unsure
which is which, pausethis is where photos of the original connections help a lot, and a multimeter test can clarify.
Situation D: No Ground Wire Visible
Some older homes rely on metal conduit for grounding, or they may not have a ground at all. Metal fixtures should be grounded for
safety. If you don’t know how your system is grounded, this is a smart time to call an electrician rather than “wing it” with
electricity.
7) Mount the Fixture and Tuck Wires Carefully
- Gently fold wires into the electrical box. Avoid sharp bends and avoid pinching wires under the canopy.
- Attach the fixture base/canopy to the mounting bracket per the fixture instructions.
- Make sure the fixture sits flush and level. Tighten evenlydon’t crank one side down like you’re tightening a lug nut.
8) Install Bulbs/Shade, Restore Power, and Test
- Install bulbs with the correct wattage/type (LED is a great option for most fixtures).
- Reinstall the globe or shade.
- Turn the breaker back on.
- Test at the wall switch.
If the light works, enjoy your success. If it doesn’t, don’t panicmost issues are fixable and usually involve one loose connection.
Troubleshooting After Installation
The Light Won’t Turn On
- Confirm the breaker is on and the correct circuit was used.
- Check the bulb (yes, even new bulbs can be badrude but true).
- Turn power off and recheck wire nut connections; a loose neutral is a common culprit.
- If there’s a red wire, confirm you connected hot to the correct switched conductor.
Flickering, Buzzing, or Heat
- Make sure bulbs are compatible with any dimmer switch (many LEDs require LED-rated dimmers).
- Check that wire connections are tightloose connections can cause arcing and heat.
- If the fixture gets unusually hot, turn it off and confirm correct bulb wattage and ventilation.
The Breaker Trips
Turn everything off immediately. A tripping breaker can mean a short, miswired connection, or damaged wiring. Do not keep resetting
the breaker and “trying again” like it’s a stubborn Wi-Fi router.
Smart Upgrades While You’re Up There
Switch to LED (Lower Heat, Lower Bills, Less Ladder Time)
LED bulbs and integrated LED fixtures use less energy and typically run cooler than incandescent lighting. That can be especially
helpful in low-clearance fixtures or rooms where you don’t want extra heat.
Check Dimmer Compatibility
If you’re adding a dimmer (or already have one), ensure both the bulbs and the dimmer are compatible. A mismatch can cause flicker,
buzzing, or limited dimming range.
Don’t Ignore Fixture Weight
Decorative fixtures can be heavier than they look. If your new light is much heavier than the old one, make sure the ceiling box and
mounting method are appropriate. This is especially important for chandeliers or large semi-flush lights.
FAQ: Quick Answers People Actually Ask
Do I really need to shut off the breaker?
Yes. The breaker is the safest way to de-energize the circuit. The wall switch alone isn’t reliable for every wiring configuration.
What if my ceiling wires are not black and white?
Color can vary in older work or specific setups. Red is often switched hot. If colors are unclear and you can’t match to the old
connections confidently, use a multimeter test or call a pro.
Can I replace a ceiling light fixture without a ground wire?
Some older homes may not have a visible ground wire. For metal fixtures, grounding is important for safety. If you’re not sure how
your home is grounded, consult an electrician.
Why are there so many wires in my ceiling box?
It may be feeding power onward to other lights/outlets, or it may include switch legs. Multiple conductors are commonbut they do
require careful identification.
of Real-World Experience (a.k.a. “Things You Learn While Balancing on a Ladder”)
The first time you replace a ceiling light, you’ll probably feel like you’re defusing a very small, very domestic bomb. That’s normal.
What’s also normal: discovering your “simple swap” includes one decorative screw that refuses to loosen, a canopy that’s somehow both
too tight and too loose, and a mounting bracket that appears to have been designed by a committee of raccoons.
Here’s the experience-based truth: the hardest part usually isn’t the wiringit’s the logistics. Holding a fixture overhead
while trying to twist wire nuts with the precision of a brain surgeon is a workout nobody asked for. This is why DIY veterans love
two things: a helper and a temporary hook. If your fixture has no hook, you can sometimes rest the canopy on the bracket while you
connect wires (carefully), or you can pre-assemble parts on a table to reduce ladder time. Your shoulders will send thank-you notes.
Another lesson: wire nuts are not “one-size-fits-all.” If you’re trying to cram three neutrals plus your new fixture neutral into a
tiny connector, you’re going to lose that battle. Use the right size connector, and don’t be afraid to replace old, crusty wire nuts.
Many mysterious “my light doesn’t work” moments are just a loose neutral hiding under a connector that felt tight… until it didn’t.
Also, take photos. Not one photo. Several. Get the wire bundle, the bracket position, and the way the old fixture was attached.
People think they’ll remember, and then ten minutes later the ceiling box looks like a bowl of spaghetti and confidence evaporates.
Photos turn panic into a mild inconvenience.
The funniest experience lesson is how often the fix is embarrassingly simple. If the new fixture won’t turn on, you’ll imagine
expensive nightmares: “Did I break the switch? Is the breaker haunted? Do I need to sell the house?” Then you’ll realize the bulb
isn’t seated, the dimmer hates your LEDs, or the wall switch is off. That’s not failurethat’s homeownership cardio.
Finally, respect the ceiling box. If it wiggles, if the screws won’t bite, if the drywall is crumbling, don’t “tighten harder” and
hope for the best. A secure mounting point is what keeps your new ceiling light fixture from becoming a surprise physics lesson at
2 a.m. When in doubt, upgrade the box, use the correct hardware, or bring in a pro for the structural part. The goal isn’t just a
beautiful lightit’s a beautiful light that stays on the ceiling where it belongs.