Table of Contents >> Show >> Hide
- Know What Kind of “Track Bicycle” You Have
- Tools You’ll Want Before the Teardown Starts
- Step 1: Prepare the Bike and Your Workspace
- Step 2: Remove the Wheels
- Step 3: Remove the Chain
- Step 4: Remove the Pedals
- Step 5: Remove the Seatpost and Saddle
- Step 6: Remove the Handlebars and Stem
- Step 7: Remove the Crankset
- Step 8: Remove the Bottom Bracket
- Step 9: Remove the Fork and Headset
- Step 10: Remove the Fixed Cog and Lockring
- Common Mistakes to Avoid
- When to Stop and Call a Bike Shop
- Final Thoughts
- Experience: What Taking Apart a Track Bicycle Actually Feels Like
A track bicycle looks beautifully simple. One gear. No derailleurs. No cassette stack trying to impersonate a wedding cake. No mystery shifters dangling from the bars like extra punctuation. That simplicity is exactly why many riders assume taking one apart will be laughably easy. Then the first stuck pedal laughs back, the fixed cog refuses to cooperate, and suddenly the garage sounds like a one-person drama festival.
The good news is that learning how to take apart a track bicycle is very doable if you work in the right order, use the correct tools, and respect the parts that are designed to stay put until a human with leverage and patience shows up. Whether you are packing a bike for travel, repainting a frame, replacing worn parts, or giving an old velodrome machine a new life, a methodical teardown will save time, money, and your last nerve.
This guide walks through the process step by step, from removing the wheels and chain to pulling the crankset, bottom bracket, fork, headset, and track-specific rear cog hardware. It is written for real people, not mythical mechanics born holding an 8mm hex key.
Know What Kind of “Track Bicycle” You Have
Before you grab a wrench, make sure you know what is actually in front of you. A true track bike built for velodrome use often has a fixed rear cog, a lockring, horizontal rear dropouts, and no brakes. A street fixie may look similar but can have a front brake, a flip-flop hub, different handlebars, toe straps, or pedals and cranks borrowed from another planet.
That matters because the order of disassembly stays mostly the same, but the tools can change. Some cranksets are self-extracting. Some require a crank puller. Some bottom brackets are threaded. Others are press-fit. Some rear wheels come out with axle nuts, while others use a quick-release skewer. If you identify those details first, the rest of the job gets dramatically less chaotic.
Tools You’ll Want Before the Teardown Starts
You do not need a full pro shop, but you do need more than hope. A repair stand is ideal, though flipping the bike carefully upside down can work in a pinch. Beyond that, gather the basics:
- Hex keys or a quality multi-hex set
- Pedal wrench or 6mm/8mm hex key, depending on the pedals
- Box wrench or socket for axle nuts if the bike uses bolt-on wheels
- Chain tool or master-link pliers
- Crank puller if your crankset requires one
- Bottom bracket tool matched to your specific bottom bracket
- Cassette lockring or fixed-gear lockring tools if you are removing the rear cog hardware
- Torque wrench for reassembly later
- Grease, rags, degreaser, and small containers for bolts and spacers
- Painter’s tape and a marker for labeling parts
One small habit makes a huge difference: take photos as you go. Future You is not as brilliant as Present You thinks. A phone photo of spacer order, chain direction, or headset stack arrangement can rescue the entire project later.
Step 1: Prepare the Bike and Your Workspace
Start by cleaning the bike enough to see what you are doing. It does not need spa music and cucumber slices, but wiping off grime helps prevent dirt from falling into bearings or hiding bolt heads. Remove bottles, bags, lights, computers, pumps, and anything else clipped, strapped, or zip-tied to the frame.
Then create a parts system. Use small cups, magnetic trays, or labeled bags for each area of the bike: cockpit, seatpost, crankset, rear wheel hardware, and so on. Mixing all the bolts into one heroic little pile is a great way to turn reassembly into interpretive dance.
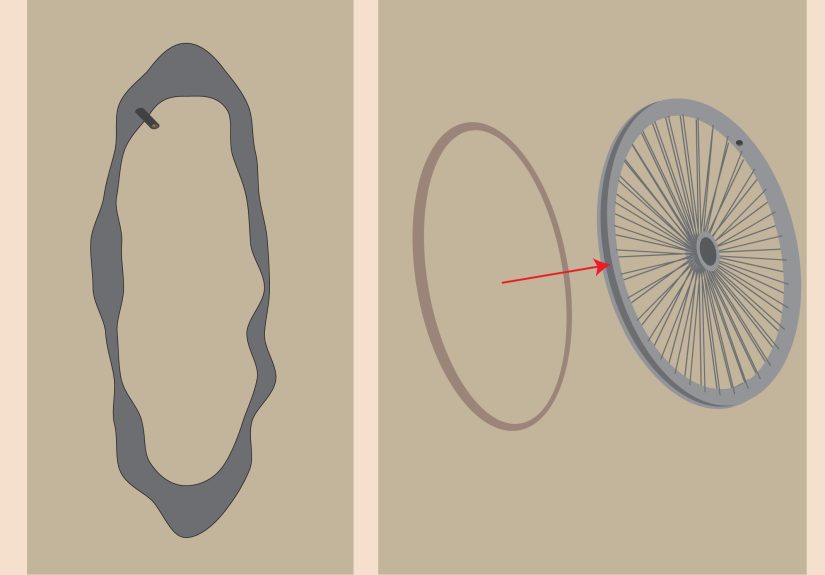
Step 2: Remove the Wheels
Most track bikes use horizontal rear dropouts so the wheel can slide back and forth to set chain tension. That means rear wheel removal is usually straightforward, but you need to release chain tension carefully.
Front wheel
If the bike has a front brake, open or remove it if necessary so the tire clears. Then loosen the axle nuts or quick release and pull the wheel out of the fork.
Rear wheel
Loosen the axle nuts on both sides. If the bike has chain tugs, back them off evenly. Push the wheel forward in the dropouts to create slack in the chain, then lift the chain off the cog and remove the wheel. Set axle washers and nuts aside together so you do not have to play “which side did this go on?” later.
If your bike uses a flip-flop hub, make a note of which side was installed. It sounds obvious now. It becomes less obvious after lunch.
Step 3: Remove the Chain
A fixed-gear drivetrain has fewer parts, but the chain can still be snug and stubborn. If the chain has a master link, use master-link pliers to disconnect it. If not, use a chain tool to push out a pin or break the chain at a serviceable link.
Once the chain is off, wipe it down and decide whether you are keeping it, replacing it, or cleaning it separately. If the chain is badly rusted, stretched, or kinked, this is an excellent moment to stop pretending it has “character” and replace it.
Step 4: Remove the Pedals
Pedals are where many first teardowns become educational in the loudest possible way. The drive-side pedal loosens the usual direction. The left pedal uses reverse threading, which means it loosens clockwise when viewed from the outside of the bike.
The simplest memory trick is this: both pedals loosen by turning the wrench toward the back of the bike when the wrench is positioned properly. Another trick is to rotate the crank arm forward, brace yourself, and push with steady pressure instead of yanking like you are starting a lawn mower in a thunderstorm.
If the pedals are seized, add penetrating oil, wait, and try again. A longer wrench gives more leverage. Just avoid chewing up the flats or rounding internal hex fittings. If the pedal threads or crank arms are already damaged, this is one of the few moments when a bike shop can save you from making the problem dramatically more expensive.
Step 5: Remove the Seatpost and Saddle
Loosen the seatpost clamp and twist the post gently as you pull upward. If it slides out, wonderful. If it refuses to move, do not immediately escalate into medieval methods. Seatposts can seize, especially in older steel or aluminum frames, and brute force can damage the frame.
Mark the saddle height before removal if you plan to reinstall it. If you are stripping the bike completely, you can remove the saddle from the post now or leave it attached to save time. Either approach works as long as the hardware stays together.
Step 6: Remove the Handlebars and Stem
For a threadless setup, remove the faceplate bolts from the stem and lift off the handlebars. If brake levers are present on a street setup, you may need to remove bar tape or loosen lever clamps first. Let the bars hang only if cables allow it safely and nothing will scratch the frame. Otherwise, remove the levers or disconnect cables as needed.
Next, loosen the stem’s steerer clamp bolts. Then remove the top cap bolt. At this point, the stem and spacers can slide off the steerer. Keep the spacers in order. Stack them exactly as they came off. That thin 5mm spacer you dismiss now becomes the villain later when the headset preload feels wrong.
If your track bike has a quill stem instead, loosen the expander bolt a few turns, tap it lightly to free the wedge, then twist and pull the stem upward.
Step 7: Remove the Crankset
This step depends entirely on crank design. Many modern two-piece cranks use pinch bolts and a preload cap. Some older or more traditional cranksets use crank bolts plus a crank puller. Self-extracting cranks remove with the correct hex key and their own built-in hardware.
Work slowly and identify the system before forcing anything. If you remove a crank bolt and the arm does not pop off, that does not mean it is “being difficult.” It may simply mean you need the correct puller. Using the wrong tool on a crank interface is the mechanical equivalent of opening a can with a flamethrower. Yes, something will happen. No, it will not be good.
Once the crank arms are off, check the spindle, chainring bolts, and chainring teeth for wear. On a fixed-gear bike, chainline matters a lot. This is a great time to note spacers, offsets, and chainring orientation so reassembly preserves that precious straight drivetrain.
Step 8: Remove the Bottom Bracket
Now we reach the part that separates “basic disassembly” from “real teardown.” Bottom brackets vary widely, so the exact tool and removal direction depend on the model. Many threaded bottom brackets have opposite thread directions on the drive and non-drive sides. Press-fit systems are a different beast entirely and usually need dedicated drifts or extraction tools.
If your goal is a frame repaint or full overhaul, remove it. If your goal is only packing the bike for travel, you usually do not need to touch it. That said, if you are removing it, verify the standard before turning anything. Forcing a threaded cup the wrong direction can damage the shell, and that is a heartbreak best avoided.
Clean the shell once the bottom bracket is out and inspect the threads or bearing seats. Any grinding, rust, or visible damage is worth addressing before the bike goes back together.
Step 9: Remove the Fork and Headset
With the stem already off, hold the fork from below before removing the last spacer or bearing cover. Then slide the fork downward out of the head tube. The headset bearings, compression ring, dust cap, and any small seals may come loose, so be ready.
Lay the parts out in order from top to bottom. This is not optional if you want reassembly to happen without dramatic sighing. Check the bearing orientation, especially if the headset uses angular-contact cartridge bearings. Flip one the wrong way and the front end will feel like a shopping cart with unresolved trauma.
Wipe the head tube, crown race area, and bearings clean. If the bearings feel rough, dry, or gritty, service or replace them before rebuilding the bike.
Step 10: Remove the Fixed Cog and Lockring
This is the most track-specific part of the whole job. On a proper track hub, the rear cog threads onto the hub, and a separate lockring prevents it from loosening under back-pressure. That lockring typically uses reverse threading. In plain English: it does not loosen the way your instincts may expect.
You usually need two tools here: one to hold or turn the cog and one for the lockring. Remove the lockring first, then unthread the cog. If the hub has been ridden hard and tightened by repeated skid pressure, the cog may be impressively stuck. Controlled leverage helps. Random fury does not.
If your bike uses a flip-flop hub and you are working on the freewheel side instead, the process and tools may differ. Always identify the hardware before starting. “Looks about right” is not a professional standard, even if it has gotten many of us through questionable home projects.
Common Mistakes to Avoid
- Ignoring thread direction: Left pedals and track lockrings love to humble overconfident mechanics.
- Using the wrong crank or bottom bracket tool: This turns a removable part into a damaged part.
- Losing spacer order: Especially in the headset and bottom bracket area.
- Skipping photos: Memory is a liar with excellent confidence.
- Forcing seized parts dry: Penetrating oil and patience beat stripped hardware.
- Mixing hardware together: Tiny washers are chaos agents.
When to Stop and Call a Bike Shop
There is no shame in drawing the line when a part is seized, cross-threaded, cracked, or attached to a carbon frame you really cannot afford to ruin. If the bottom bracket will not budge, the seatpost is frozen, or the fixed cog seems welded on by anger alone, a shop with the correct fixtures and tools may save both time and money.
The smartest home mechanics are not the ones who do everything themselves. They are the ones who know when a fifteen-minute shop visit can prevent a three-week regret spiral.
Final Thoughts
Taking apart a track bicycle is less about brute strength and more about sequence, tool fit, and patience. The bike is mechanically simple, but a few parts, especially pedals, cranks, bottom brackets, and fixed-gear rear hardware, demand the right approach. Work step by step, label everything, take photos, and resist the urge to “just see what happens” with a questionable wrench angle.
Do it carefully, and a full teardown becomes oddly satisfying. What began as a complete bicycle turns into a neat set of understandable systems: frame, fork, cockpit, drivetrain, wheels. And once you see how all those parts come apart, reassembling them feels a lot less like black magic and a lot more like a skill you actually own.
Experience: What Taking Apart a Track Bicycle Actually Feels Like
The first time you take apart a track bicycle, you expect speed. After all, there are fewer parts than on a geared road bike. No front derailleur. No rear derailleur. No shifters. No cassette tower of tiny metal opinions. You imagine a quick, elegant process in which every bolt cooperates and every part lifts away like a cooking-show ingredient prepped by invisible assistants.
Reality is a little more human and a lot more memorable. The front half of the job usually creates a dangerous sense of confidence. The front wheel comes off. The bars are manageable. The seatpost behaves. You begin to think, “I was clearly born for this.” Then the left pedal introduces itself, and suddenly you are standing in the garage questioning directions, geometry, and perhaps the general concept of handedness.
That is one of the funny things about working on a track bike: the machine is simple, but it teaches humility with unusual efficiency. Every step rewards patience. Every rushed decision sends you a bill later. The rear wheel reminds you that chain tension matters. The fixed cog reminds you that parts under pedaling load can tighten themselves like they are guarding state secrets. The headset teaches you that tiny parts rolling across the floor can create an emotional response wildly disproportionate to their size.
But once you settle into the rhythm, the experience becomes deeply satisfying. You start noticing how clean the logic of the bike really is. The drivetrain is direct. The frame feels purposeful. The parts talk to one another in a straightforward way. Even the stubborn pieces begin to make sense. The reverse-thread lockring is not being difficult just to ruin your Saturday. It is doing a very specific job. The horizontal dropouts are not old-fashioned decoration. They are central to how the bike works.
There is also a strangely calming part of the teardown that sneaks up on you. Wiping grease from a spindle. Lining up spacers in the correct order. Dropping headset parts into a tray. Labeling axle washers. It stops feeling like disassembly and starts feeling like reading the bicycle in its native language. You are no longer just taking it apart. You are learning how it thinks.
By the end, the floor is covered with organized parts, your hands are filthy, and your respect for mechanics has increased dramatically. You may also have one mystery washer left over, which is a classic rite of passage. But even with that small existential issue, the experience gives you something valuable: confidence. Not the loud kind you had at the beginning, but the useful kind. The earned kind. The kind that says, “Next time, I’ll know where to start, what tool to grab, and which direction that ridiculous pedal actually turns.”
And that is the real payoff. A track bicycle may be minimalist by design, but taking one apart teaches a surprisingly rich lesson in patience, order, and mechanical awareness. It is half maintenance project, half character-building exercise, and occasionally one-quarter comedy routine. Somehow, all of that makes the process even better.