Table of Contents >> Show >> Hide
- Why Eyebrow Pomade Works So Well
- Before You Start: What You Need
- How to Use Eyebrow Pomade to Define Eyebrows: 12 Steps
- Step 1: Choose the Right Pomade Shade
- Step 2: Brush Your Brow Hairs Up and Out
- Step 3: Start With Clean, Dry Brows
- Step 4: Map Out Your Brow Shape
- Step 5: Load the Brush With a Tiny Amount of Product
- Step 6: Define the Bottom Edge First
- Step 7: Shape and Extend the Tail
- Step 8: Lightly Define the Top of the Brow
- Step 9: Fill Sparse Areas With Hair-Like Strokes
- Step 10: Keep the Front of the Brow Soft
- Step 11: Blend Everything With a Spoolie
- Step 12: Clean Up the Edges and Set the Look
- Common Eyebrow Pomade Mistakes to Avoid
- Who Should Use Eyebrow Pomade?
- Extra Tips for Better Brow Definition
- Conclusion
- Real-Life Experiences With Eyebrow Pomade
- SEO Tags
Eyebrow pomade is the overachiever of the brow world. It fills, shapes, defines, and helps sparse brows look fuller without demanding a glam squad or a degree in architecture. If you have ever looked at your brows and thought, “You two could really use a team meeting,” pomade may be your new best friend.
Unlike powders that can fade softly into the background or pencils that create precise but sometimes obvious lines, brow pomade sits right in the sweet spot. It can be soft and natural, or bold and sculpted, depending on how much product you use and how steady your coffee-fueled hand is. The key is technique. A tiny amount, the right brush, and a little patience can turn patchy, uneven, or undefined brows into polished arches that still look like real eyebrows.
In this guide, you will learn exactly how to use eyebrow pomade in 12 simple steps, along with the mistakes to avoid, tips for choosing the right shade, and realistic advice for getting better results every time you do your makeup.
Why Eyebrow Pomade Works So Well
Eyebrow pomade is popular because it offers control. The texture is creamy enough to glide on, but firm enough to stay put once it sets. That makes it especially useful for defining the shape of your eyebrows, filling in sparse areas, and creating hair-like strokes that look more natural than one solid block of color.
It is also versatile. You can use pomade to create soft everyday brows, a lifted arch, a fluffier shape, or a more dramatic evening look. If your brows are oily, uneven, overplucked, or simply hard to see in photos, pomade can help them show up and stay put without disappearing by lunchtime.
Before You Start: What You Need
- Eyebrow pomade in a shade close to your natural brow color
- An angled brow brush
- A clean spoolie brush
- Mirror with good lighting
- Concealer or cotton swab for cleanup
- Optional clear brow gel for extra hold
Now let’s get into the part your brows have been waiting for.
How to Use Eyebrow Pomade to Define Eyebrows: 12 Steps
Step 1: Choose the Right Pomade Shade
The fastest way to make your brows look harsh is to pick a shade that is too dark or too warm. A good rule is to choose a color that closely matches your natural brow hair. If you are between two shades, the slightly lighter one usually creates a softer, more believable result.
For example, someone with medium brown brows usually looks better with a neutral or ash brown than a deep espresso shade. Jet-black pomade can be striking, but on many people it turns brows from defined to dramatic in one swipe flat.
Step 2: Brush Your Brow Hairs Up and Out
Use a clean spoolie to comb your brow hairs upward and slightly outward toward the temple. This simple step helps you see your natural shape, identify sparse spots, and decide where you actually need product. It also keeps you from applying pomade blindly and hoping for the best.
Think of this as fluffing the pillow before making the bed. Structure first, detail second.
Step 3: Start With Clean, Dry Brows
Pomade performs best on clean skin and dry brow hairs. If your brows are coated in moisturizer, foundation, sunscreen, or leftover brow gel from yesterday’s brave choices, the product may skip, smear, or refuse to stick evenly.
If needed, gently blot the brow area with a tissue or micellar water and let it dry before applying pomade. Clean brows help you get better pigment control and longer wear.
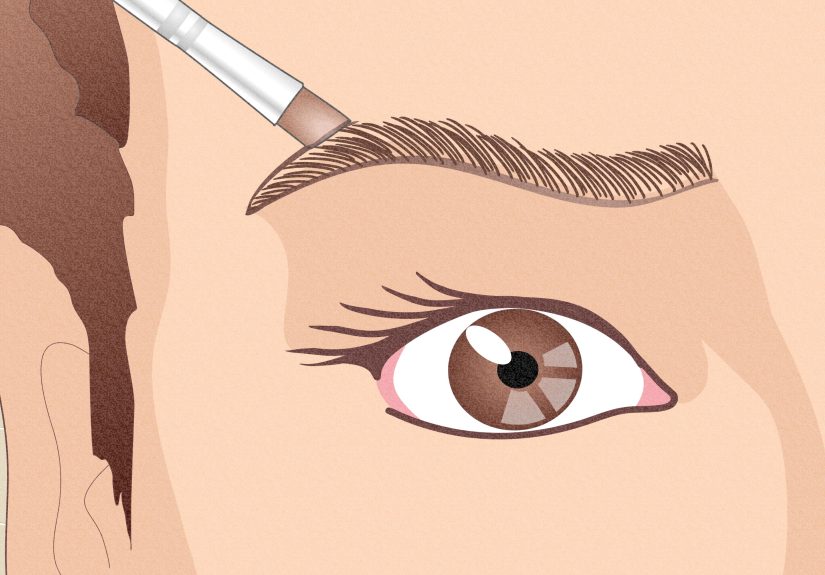
Step 4: Map Out Your Brow Shape
If you struggle with symmetry, mapping your brow shape before filling can save you from endlessly fixing one side until both brows look confused. A classic way to map the brow is to use your brush handle or pencil:
- The front of the brow should generally start in line with the side of your nose.
- The arch usually sits above the outer edge of the iris.
- The tail should angle from the side of the nose to the outer corner of the eye.
You do not need to treat this like geometry class. These points are just guidelines to help you create balance.
Step 5: Load the Brush With a Tiny Amount of Product
This is the step where many pomade beginners accidentally create villain-origin brows. Dip the angled brush lightly into the pomade, then wipe the excess on the lid or the back of your hand. The brush should have a thin, even coating, not a blob.
Pomade is richly pigmented, so a little goes a long way. You can always build up more, but removing too much product is where the regret begins.
Step 6: Define the Bottom Edge First
Using light pressure, draw a soft line along the bottom edge of your brow, starting from the arch area and moving toward the tail. This creates the clean shape that makes brows look lifted and polished.
Do not start at the very front of the brow unless you want the inner corners to look too intense. Most natural-looking brows are softer at the front and more defined from the arch to the tail.
Step 7: Shape and Extend the Tail
The tail of the brow is where pomade really shines. Use the angled brush to sharpen, fill, or slightly extend the tail if it is sparse or uneven. Short, precise strokes work best here.
A defined tail can instantly make the whole brow look more intentional. Just keep the shape aligned with your natural brow direction. If the tail points too far downward, it can drag the eye area visually. If it shoots off too high, well, that is a different emotional journey.
Step 8: Lightly Define the Top of the Brow
Once the bottom edge and tail are in place, use whatever product remains on the brush to lightly sketch along the top edge of the brow. This should be softer than the bottom line, not a hard outline.
The goal is not to box the brow in completely. The goal is to give it structure while keeping the result soft enough to pass for real hair instead of a very committed sticker.
Step 9: Fill Sparse Areas With Hair-Like Strokes
Now use the tip of the angled brush to create tiny strokes in areas where the brow looks patchy. Follow the direction your hair naturally grows. At the front of the brow, strokes usually go upward. Through the arch, they angle outward. At the tail, they sweep more horizontally.
These small strokes mimic real hair and keep the brow from looking flat. Avoid coloring the whole brow with one solid layer unless you want a bold editorial look.
Step 10: Keep the Front of the Brow Soft
The inner part of the brow should be the lightest and fluffiest area. If you still need a bit more definition there, use the leftover product on the brush and apply only a few upward flicks. Then immediately blend with a spoolie.
This is one of the biggest differences between natural-looking brows and overly heavy ones. Soft front, stronger middle, crisp tail. That is the brow balance formula.
Step 11: Blend Everything With a Spoolie
Take your spoolie and gently brush through the brow to soften edges, disperse pigment, and blend the pomade into your natural hairs. This step is non-negotiable if you want brows that look polished instead of stamped on.
Blending also helps you see whether you need more product anywhere. Often, once you spoolie through, the brow looks fuller and more natural without adding anything else.
Step 12: Clean Up the Edges and Set the Look
If you want extra definition, use a tiny amount of concealer under the brow and blend it out. This can sharpen the shape and make the arch stand out beautifully. You can also use a cotton swab to tidy any smudges if concealer feels like too much effort before 9 a.m.
Finish with clear brow gel if you want more hold, especially if your brow hairs are long or unruly. Then step back from the mirror and check both brows in natural light. Bathroom lighting has started unnecessary drama for many people.
Common Eyebrow Pomade Mistakes to Avoid
Using Too Much Product
This is the most common mistake by far. Too much pomade creates thick, heavy brows that can overwhelm your features. Always start with the smallest amount possible and build slowly.
Making Both Brows Identical
Your brows are sisters, not clones. Tiny differences are normal. Focus on balance, not perfection.
Choosing the Wrong Undertone
Even if the depth looks right, the undertone matters. A shade that is too red, too warm, or too gray can throw off your whole look. Neutral and cool-toned brow shades often look more natural than warm ones.
Ignoring the Spoolie
Skipping the spoolie is like frosting a cake and refusing to smooth it. Blend the product so it melts into the brow hairs.
Overdrawing the Front of the Brow
A harsh square front can make the brow look stiff and overly done. Keep the front airy and feathered.
Who Should Use Eyebrow Pomade?
Eyebrow pomade is a great choice for people with sparse brows, uneven tails, oily skin, or anyone who wants longer-lasting brow makeup. It is also excellent if you like stronger definition than a powder or tinted gel can usually give.
That said, if you love an ultra-soft brow and prefer a no-makeup makeup look, pomade may feel too intense unless you use a very light hand. In that case, use just a trace of product and spend extra time blending.
Extra Tips for Better Brow Definition
- Use an angled brush with firm bristles for more control.
- Keep the jar tightly closed so the pomade does not dry out.
- Wipe excess off the brush before every pass.
- Check your brows from a normal distance, not only two inches from the mirror.
- Replace old eye-area makeup regularly and avoid using products that irritate your skin.
- If your skin is sensitive, test new products carefully before wearing them all day.
Conclusion
Learning how to use eyebrow pomade to define eyebrows is less about having a magic product and more about having a smart method. When you choose the right shade, use a tiny amount, start shaping from the middle to the tail, and blend with a spoolie, pomade can create brows that look fuller, cleaner, and more balanced without looking overdone.
The best part is that you do not need perfect brows to get good results. You just need a few minutes, a little patience, and the willingness to accept that the first attempt may be “learning experience brows.” After that, things get easier fast. Once you understand where to place the product and where to hold back, pomade becomes one of the most useful tools in your makeup routine.
So go ahead and define those brows. Soft front, crisp tail, light hand, no panic.
Real-Life Experiences With Eyebrow Pomade
The first time many people use eyebrow pomade, they expect instant beauty-editor perfection. What they often get is one excellent brow and one brow that seems to have developed its own goals. That is normal. Pomade has a learning curve because it is more pigmented than most brow products, and it responds fast. The upside is that once you get the feel for it, it can become the most reliable brow product in your makeup bag.
A common beginner experience is using too much product on the brush. The result is usually a dark front section, an overly sharp line, and a moment of silence while staring into the mirror. Most people improve almost immediately when they start wiping excess product off before touching the brow. That single habit makes the application smoother, softer, and easier to control.
Another real-world lesson is that pomade looks very different depending on lighting. Brows that seem soft and polished in dim bathroom lighting can suddenly look much stronger near a sunny window or in the car mirror. Checking the finished shape in natural light helps prevent that surprise. It also helps you notice whether the two brows are balanced or whether one tail somehow wandered into a different zip code.
People with sparse brows often report the biggest payoff from pomade because it can create the illusion of fullness without requiring a lot of product. Instead of coloring in the whole brow, placing a few small strokes exactly where hair is missing can make the brow look naturally thicker. That targeted approach usually looks better than trying to force every brow into the same bold shape.
There is also the emotional side of brow makeup, which sounds dramatic until you have had a really good brow day. Defined brows can make the face look more awake, polished, and expressive even when the rest of the makeup is minimal. Many people find that on rushed mornings, brows and mascara alone make them feel more put together. Pomade is especially useful in that kind of routine because it lasts well and keeps the shape visible throughout the day.
Over time, most users develop their own shortcut method. Some prefer a crisp, sculpted brow with concealer cleanup. Others use pomade only on the tail and stick to a spoolie for the front. That flexibility is part of why brow pomade stays popular. It can be soft, strong, natural, or dramatic depending on how you use it. The best experience usually comes when you stop chasing perfect social-media brows and start shaping the brows you actually have. That is when pomade becomes less intimidating and much more fun.