Table of Contents >> Show >> Hide
- What a 3-Way Switch Is (and Why It’s Called “3-Way”)
- Safety First (Because Electricity Doesn’t Accept Apologies)
- Tools and Materials You’ll Need
- Know Your Wires: Common, Travelers, Ground, and Neutral
- The Most Common Setup: Power at Switch Box #1 (Step-by-Step)
- What the cables look like (conceptually)
- Step 1: Shut off power and verify it’s off
- Step 2: Remove the old switches and label everything
- Step 3: Wire Switch #1 (the “line” side)
- Step 4: Wire Switch #2 (the “load” side)
- Step 5: Neatly fold wires back, mount switches, install plates
- Step 6: Restore power and test operation
- Quick Wiring “Map” (Text-Only Cheat Sheet)
- Other Common 3-Way Switch Wiring Configurations
- Troubleshooting 3-Way Switch Wiring (Most Problems Are One Wire)
- Best Practices That Make Electricians Nod Approvingly
- FAQ: 3-Way Light Switch Wiring Questions People Google at 11:47 PM
- Hands-On Experience: The Stuff the Diagrams Don’t Warn You About (500+ Words)
- 1) The “common” wire is the main charactertreat it like one
- 2) Take photos like you’re documenting a rare species
- 3) Old homes love creative wire colors
- 4) Crowded boxes will test your patience (and your knuckles)
- 5) Backstabs are temptinguntil they’re not
- 6) Testing isn’t just flipping switches and hoping
- Wrap-Up
Wiring a 3-way switch is one of those DIY rites of passage: you either come out feeling like a home-improvement wizard, or you come out muttering, “Why does electricity hate me?” (Spoiler: it doesn’t. It’s just extremely indifferent.)
In this guide, you’ll learn how to wire a 3-way switch the right waysafely, cleanly, and without turning your hallway into a haunted house where the light only works when both switches are in a secret handshake position. We’ll cover the most common wiring setup step-by-step, plus quick guidance for the other configurations you’ll run into in real homes.
What a 3-Way Switch Is (and Why It’s Called “3-Way”)
In the U.S., a “3-way switch” setup means two switches control one light (like at the top and bottom of stairs). Each switch has three terminals for current-carrying conductors: one common and two travelers. Flip either switch and you change which traveler path is connectedso the light turns on or off depending on the combined switch positions.
Fun fact: 3-way switches usually don’t say ON/OFF on the toggle. That’s not a manufacturing mistakeit’s because either position could be ON, depending on the other switch.
Safety First (Because Electricity Doesn’t Accept Apologies)
Warning: Electrical work can cause shock, fire, injury, or worse if done incorrectly. If you feel unsure at any pointold wiring, crowded boxes, aluminum conductors, mystery splices, or “what even is this wire?” moments stop and call a licensed electrician.
Safety checklist
- Turn off the breaker that feeds the circuit (don’t rely on the wall switch).
- Test before you touch using a non-contact voltage tester and/or multimeter.
- Use safety glasses, insulated tools if you have them, and keep your work area dry.
- Take a photo before disconnecting anything. Your future self will be grateful.
Tools and Materials You’ll Need
- Two 3-way switches (or one 3-way switch + one 3-way dimmer rated for 3-way use)
- Flathead and Phillips screwdrivers
- Wire stripper/cutter
- Needle-nose pliers (for making nice, tight wire hooks)
- Non-contact voltage tester (and ideally a multimeter)
- Wire connectors (wire nuts) and electrical tape
- Short lengths of matching-gauge wire for pigtails (often helpful)
- New wall plate (optional, but why not make it pretty?)
Know Your Wires: Common, Travelers, Ground, and Neutral
Before you wire anything, you need to understand what you’re looking at. Wire colors can varyespecially in older homesso think in function, not just color.
The terminals on a 3-way switch
- Common terminal: usually a black or dark-colored screw. This connects to either the incoming hot (line) or the outgoing hot to the light (load), depending on which box you’re in.
- Traveler terminals (2): usually brass-colored screws. These connect to the two traveler wires between switches.
- Ground: green screw connected to bare/green ground wire.
The conductors you’ll typically see
- Line (hot feed): power coming from the breaker panel.
- Load (switched hot): power going to the light fixture.
- Travelers (2): the pair of wires running between the two switches.
- Neutral: usually white, typically bypasses the switch and continues to the light. (Many smart switches need a neutral in the box.)
- Ground: bare copper or green.
Key idea: In most standard 3-way light switch wiring, the neutral is not connected to the mechanical 3-way switch. It’s tied through in the box and goes on to the fixture. Don’t force a neutral onto a switch terminal that isn’t designed for it.
The Most Common Setup: Power at Switch Box #1 (Step-by-Step)
This is a very typical arrangement in U.S. homes: power enters the first switch box, then a 3-wire cable (often 14/3 or 12/3) runs between the switches, and the load exits from the second switch box to the light fixture.
What the cables look like (conceptually)
- Panel → Switch #1: 2-wire cable (hot + neutral + ground)
- Switch #1 → Switch #2: 3-wire cable (two travelers + one common conductor + ground)
- Switch #2 → Light: 2-wire cable (switched hot + neutral + ground)
Step 1: Shut off power and verify it’s off
- Turn the light on (so you can tell when it goes off).
- Flip the breaker OFF.
- Confirm the light goes off.
- Remove the wall plates and use a voltage tester on the wires in both boxes.
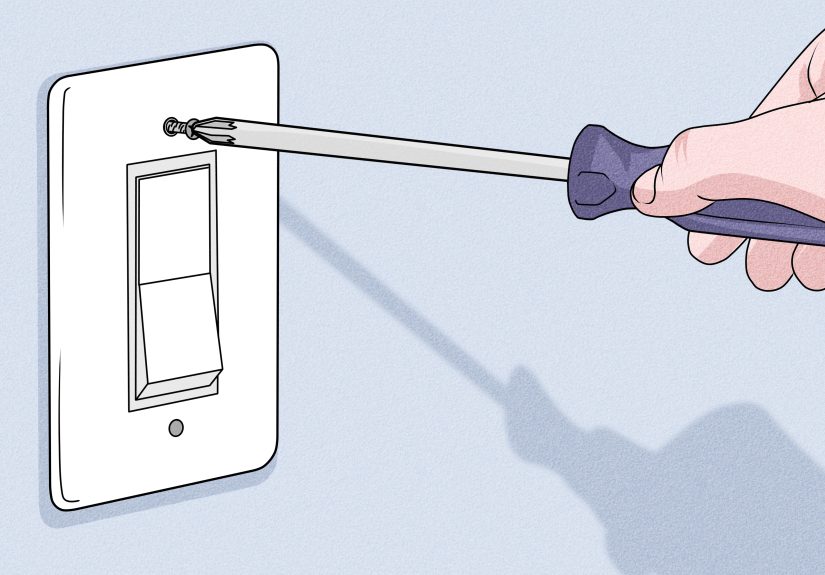
Step 2: Remove the old switches and label everything
Pull the switches out gently (don’t yankwires don’t like surprise workouts). On each old 3-way switch:
- Find the wire on the odd-colored screw (often black). That wire is the common for that box.
- Label it with tape: COMMON.
- Label the other two as TRAVELER 1 and TRAVELER 2 (their order usually doesn’t matter for a standard mechanical 3-way).
- Label ground and neutral bundles (if present) so you don’t disturb them accidentally.
If you skipped labeling and are reading this with regret: it’s okay. You’re not the first. You won’t be the last. But you will now have to identify line/load/travelers with a testerdoable, but slower.
Step 3: Wire Switch #1 (the “line” side)
In Switch Box #1 (where power comes in), you’ll connect the incoming hot feed to the common screw on the 3-way switch.
- Connect ground (bare/green) to the green screw on the switch, and ensure the metal box is bonded if required.
- Connect the incoming hot (line) to the common (black) screw.
- Connect the two traveler wires to the two brass traveler screws (either traveler can go to either traveler screw).
- Keep neutrals tied together with a wire connector (they usually do not land on the switch).
Step 4: Wire Switch #2 (the “load” side)
In Switch Box #2 (where the cable goes out to the light), the common terminal typically becomes the load (switched hot).
- Connect ground to the green screw.
- Connect the wire that goes to the light’s hot (the switched hot / load) to the common (black) screw.
- Connect the two traveler wires to the brass traveler screws (match your travelers from Switch #1 to Switch #2 if you labeled them).
- Make sure the neutral from the panel and the neutral to the light are tied together.
Step 5: Neatly fold wires back, mount switches, install plates
- Fold wires in an accordion shape. Don’t smash them like you’re cramming a sleeping bag into a lunchbox.
- Mount the switches, install wall plates, and keep screws snugnot “Hulk tight.”
Step 6: Restore power and test operation
- Turn the breaker back ON.
- Test the light from both switch locations.
- Verify that flipping either switch changes the light state (on ↔ off) regardless of the other switch position.
Quick Wiring “Map” (Text-Only Cheat Sheet)
Remember: travelers go traveler-to-traveler; commons are the “special” ones.
- Switch #1 common = incoming hot (line)
- Switch #2 common = outgoing hot to fixture (load)
- Traveler pair = the two wires running between the switches
- Neutral = spliced through to the light (usually not on the switch)
- Ground = bonded everywhere it should be
Other Common 3-Way Switch Wiring Configurations
Not every home follows the “power at switch #1” plan. Here are the other setups you might encounter. The big goal stays the same: travelers connect the switches, and the common terminals land on line and load.
1) Power at the light fixture (feed in the ceiling box)
In this case, power comes to the light first, then a switch loop sends power down to the switches. Depending on how it’s wired, a white conductor may be re-identified as hot. This setup can confuse DIYers because neutrals and hots are mixed differently in boxes.
If you open a switch box and there’s no neutral bundle, this is often why (especially in older homes). If you’re installing a smart 3-way switch that requires neutral, you may need a different device strategy or professional help.
2) Power at switch #2
Same concept as the common setup, just flipped: the line hot lands on the common in the box where power enters, and the load to the light lands on the common in the other box.
3) “Dead-end” 3-way (older style switch loop)
Some older wiring methods bring power into one switch box and run a cable between switches and up to the light in a way that makes wire colors especially misleading. You might see whites used as travelers or hots (properly re-identified with tapeat least in theory). If your wire colors don’t match expectations, trust your tester, not the paint job.
Troubleshooting 3-Way Switch Wiring (Most Problems Are One Wire)
Symptom: The light works only when one switch is “up”
Classic sign that a traveler and common got swapped on one switch. Double-check which wire is on the common (black screw).
Symptom: Nothing works at all
- Breaker still off (yes, it happens).
- Loose connection under a screw or wire connector.
- Common wire not actually common (misidentified).
- A neutral splice came loose in the box or ceiling fixture.
Symptom: Breaker trips immediately
Stop. Turn it off. This can indicate a short (hot-to-ground or hot-to-neutral) caused by a miswire, damaged insulation, or pinched conductor. Recheck all splices and ensure no bare copper is touching where it shouldn’t.
Symptom: Switch feels warm or makes crackling noises
Turn off power and investigate. Warmth can happen with certain loads, but crackling is a giant red flag for a loose connection. Loose connections are heat factoriesand not the cozy kind.
Best Practices That Make Electricians Nod Approvingly
- Use screw terminals instead of backstabs when possible for a more secure connection.
- Pigtail grounds neatly so every device and metal box stays bonded as needed.
- Match wire gauge to the circuit (commonly 14 AWG on 15A circuits, 12 AWG on 20A circuits).
- Don’t overfill boxes; box fill rules exist for a reason (heat and space).
- Use a torque screwdriver if you want to be extra-correctmanufacturers specify terminal torque for a reason.
FAQ: 3-Way Light Switch Wiring Questions People Google at 11:47 PM
Do traveler wires have to be red and black?
No. Red and black are common in 14/3 or 12/3 cable, but colors can vary in older wiring or rework. Identify by function and continuity/testing, not assumptions.
Does it matter which traveler goes on which traveler screw?
For a standard mechanical 3-way switch, usually noeither traveler can go to either traveler terminal. The common is the one you must get right.
Can I install a dimmer in a 3-way circuit?
Yes, but it must be a dimmer rated for 3-way applications. Many dimmer systems require one “master” dimmer and a compatible companion switch, not two identical dimmers.
Why is there no neutral on my old switch?
Many older switch loops didn’t bring neutral into the switch box. The neutral stayed at the light fixture. That’s normal for older installations, but it can complicate smart switch installs that require a neutral.
Hands-On Experience: The Stuff the Diagrams Don’t Warn You About (500+ Words)
Wiring diagrams are wonderful. They’re clean, polite, and optimisticlike a cooking show where the kitchen is spotless and nobody mentions the mountain of dishes off-camera. Real switch boxes, on the other hand, often look like a tiny metal closet where wires have been doing yoga for 30 years.
Here are some real-world lessons that make 3-way switch installation easier, faster, and less likely to trigger a dramatic monologue in your hallway.
1) The “common” wire is the main charactertreat it like one
The single biggest DIY mistake is mixing up the common and a traveler. Travelers are interchangeable; the common is not. If you get the common wrong on one end, the system may do weird things like “only turns on when both switches point north” or “works once, then never again.”
2) Take photos like you’re documenting a rare species
Before you disconnect anything, take clear photos from multiple angles. Then take one more photo. Why? Because once the wires are free, they tend to flop around and instantly look identicallike identical twins who swapped shirts the second you looked away.
3) Old homes love creative wire colors
In theory, white is neutral. In practice, white sometimes gets repurposed as a hot or traveler in switch loops, and it may or may not be marked with tape to warn you. If your setup doesn’t match the “red/black travelers” story, slow down and test. Your voltage tester is the adult in the room.
4) Crowded boxes will test your patience (and your knuckles)
Many switch boxes are packed tight. When you add a new switchespecially a bulkier smart switchsuddenly it’s like trying to park a pickup truck in a compact spot. If your wires are short, consider adding pigtails properly (same gauge, solid-to-solid where appropriate) and use quality connectors. Neat splices fold back into the box better and reduce stress on terminals.
5) Backstabs are temptinguntil they’re not
Some devices allow “push-in” back wiring. It’s fast, but screw terminals (or clamp-style back wiring on higher-quality devices) tend to be more reliable long-term. A loose connection can cause flickering, heat, and eventual failure. If you’re already doing the work, give future-you the gift of a solid connection.
6) Testing isn’t just flipping switches and hoping
After you wire everything, test thoughtfully. Flip one switch repeatedly while the other stays put, then reverse. Make sure both switches can change the light state every time. If something is off, don’t keep cycling the breaker like a video game reset buttonturn power off and recheck the common/travelers.
The best feeling is when it works on the first try. The second-best feeling is when you fix it safely on the second try and learn enough to help a friend laterwithout starting the sentence with, “So… funny story.”
Wrap-Up
Wiring a 3-way switch isn’t magicit’s a predictable system built around one key idea: the common terminals handle line and load, and the travelers connect the two switches. Label wires, test before touching, keep splices tight, and you’ll end up with a clean, reliable 3-way light switch circuit that makes staircases and hallways feel instantly more convenient.