Table of Contents >> Show >> Hide
- Why Build an LED Panel Lamp on Protoboard?
- Understanding the Basic LED Panel Circuit
- Why Protoboard Makes the Layout Easier
- Choosing Components for a DIY LED Panel Lamp
- Designing the LED Panel Before Soldering
- Building the Lamp Step by Step
- Making the Lamp More Useful
- Common Mistakes to Avoid
- Why This Project Is Great for Learning Electronics
- of Practical Experience: What Building a Protoboard LED Panel Feels Like
- Conclusion
There are two kinds of electronics projects: the ones that look beautiful in a CAD render, and the ones that actually get built on a desk covered with wire clippings, coffee, and one mysteriously missing resistor. A DIY LED panel lamp made with protoboard belongs proudly to the second groupbut with a little planning, it can end up looking surprisingly clean, practical, and professional.
The idea is simple: arrange many small LEDs on a protoboard, wire them in neat rows or groups, power them safely, and place the finished light behind a diffuser. The result can be a compact workbench lamp, portable video light, camping light, photography fill light, or emergency desk light. It is not the only way to build an LED lamp, of course. You could buy a ready-made LED panel, use a chip-on-board LED module, or order a custom PCB. But protoboard has a special charm: it is cheap, flexible, beginner-friendly, and wonderfully honest. Every solder joint tells a tiny story.
For makers, students, repair hobbyists, and anyone learning electronics, an LED panel lamp is one of the best protoboard projects because it combines real-world usefulness with core circuit lessons. You learn about polarity, current limiting, series and parallel wiring, power distribution, heat, battery safety, soldering technique, enclosure design, and light diffusionall without needing a full engineering lab. In other words, it is a small lamp with a big curriculum.
Why Build an LED Panel Lamp on Protoboard?
Protoboard, sometimes called perfboard, is a board filled with holes and copper pads that let you solder components into a permanent or semi-permanent layout. Unlike a solderless breadboard, which is great for testing but not ideal for a finished project, protoboard gives your circuit mechanical strength. Once the LEDs, resistors, wires, and connectors are soldered in place, the project can survive being moved around, mounted in a case, or used repeatedly.
An LED panel lamp works especially well on protoboard because LEDs naturally like organized layouts. You can place them in rows, columns, grids, strips, or clusters. The board becomes both the physical structure and the wiring platform. With careful spacing, the finished panel looks intentional rather than improvised. Add a diffuser, and suddenly your collection of tiny bright dots becomes a smooth, usable light source.
It Turns a Practice Board Into a Practical Tool
Many beginners make a blinking LED as their first electronics project. That is useful, but after the tenth blink, the excitement starts to fade. A protoboard LED panel takes the same basic idea and gives it a purpose. Instead of one LED saying, “Look, I work,” you get a whole panel saying, “I can light your desk while you look for the resistor you dropped.”
This makes the project rewarding. The result is not just educational; it is something you can actually use. That matters because useful projects motivate better craftsmanship. You are more likely to trim leads neatly, plan wiring paths, check polarity, and test current draw when the finished device is going to sit on your workbench instead of disappearing into a drawer labeled “almost done.”
Understanding the Basic LED Panel Circuit
At its simplest, an LED circuit needs a power source, an LED, and a way to control current. LEDs are not like ordinary light bulbs. They are diodes, which means they allow current to flow in one direction. They also need current control. If too much current flows through an LED, it can overheat, dim permanently, or fail. That is why LED circuits commonly use a resistor, a constant-current driver, or another current-limiting method.
For a small protoboard panel, many hobbyists use low-voltage DC power such as 5V USB, a protected battery pack, or a regulated supply. Staying with low voltage is safer and easier than working with household AC power. A project like this does not need mains wiring, and beginners should avoid mains-powered builds unless trained and supervised. A bright desk lamp is nice; a dramatic electrical incident is not a feature.
Series, Parallel, and the “Why Is One LED Brighter?” Problem
LEDs can be wired in series, parallel, or series-parallel groups. In a series string, current flows through one LED and then the next. The forward voltages add together, so three white LEDs that each need roughly 3V may require around 9V before current control is considered. In a parallel layout, each branch receives the same supply voltage, but current may not divide evenly unless each branch has its own resistor or matched driver path.
This is where beginners often run into trouble. If several LEDs are placed directly in parallel with no balancing, one LED or one group may hog more current than the others. That branch gets hotter, brighter, and possibly shorter-lived. The better approach is to give each LED or each LED string its own resistor, or to use a suitable constant-current driver designed for LED loads. It may add a few extra parts, but it saves you from the classic electronics mystery: “Why did half my panel become a tiny sun while the other half looks emotionally unavailable?”
Why Protoboard Makes the Layout Easier
A protoboard is basically graph paper for electronics. The regular hole spacing helps you align components, repeat patterns, and keep wiring under control. When building an LED panel, that structure is incredibly helpful. You can place LEDs in a grid, reserve outer rails for power, and route groups in a predictable way.
Some protoboards have individual copper pads around each hole. Others have connected strips or breadboard-style traces. Breadboard-style prototyping boards are especially convenient because their layout resembles the solderless breadboard you may have used for testing. That makes it easier to transfer a working circuit from temporary test form to a soldered version.
Clean Rows Mean Cleaner Soldering
When LEDs are arranged in rows, the build becomes easier to inspect. You can quickly see if one LED is flipped, one resistor is missing, or one solder bridge has connected places that should not be connected. A tidy layout also improves troubleshooting. If row three is not lighting, you can focus on that section instead of trying to decode a spaghetti map of wires that looks like a robot sneezed.
For a practical panel, spacing matters. LEDs placed too close together may create hot spots, while LEDs placed too far apart can create a dotted pattern even behind a diffuser. A good starting point is to space LEDs evenly and test the panel behind the diffuser material before final assembly. Sometimes moving the diffuser a little farther from the LEDs improves the blend dramatically.
Choosing Components for a DIY LED Panel Lamp
The best LED panel lamp is not necessarily the brightest one. It is the one that matches your power source, enclosure, runtime, cooling, and intended use. A small reading light, a video fill light, and a workbench inspection lamp all have different requirements.
LEDs
White LEDs are the most common choice for a lamp. Warm white is comfortable for reading and room lighting, while cool white can feel brighter and is useful for task lighting. Neutral white is often a good compromise. If the lamp is meant for photography or video, color rendering becomes important. Higher-quality LEDs with better color rendering make skin tones, product colors, and small details look more natural.
Through-hole LEDs are easier for beginners because their leads fit through protoboard holes and clearly show polarity. Surface-mount LEDs can create a flatter, more modern panel, but they require steadier soldering hands and better planning. Both can work. The right choice depends on your comfort level and how compact you want the final lamp to be.
Resistors and Drivers
For simple builds, current-limiting resistors are affordable and reliable. The resistor value depends on supply voltage, LED forward voltage, and desired current. A common beginner mistake is to choose a resistor only by copying another project. Copying can work when the parts and voltage are identical, but small changes matter. A 5V USB lamp and a 12V battery lamp are not the same circuit wearing different shoes.
For more efficient or higher-power builds, a constant-current LED driver may be a better choice. A driver can regulate current more effectively than resistors, especially when battery voltage changes during discharge. However, drivers introduce their own requirements, including input voltage range, output current, heat management, and sometimes electromagnetic noise considerations. For a first protoboard lamp, simple and safe usually wins.
Power Source
USB power is convenient for a desk lamp because adapters and power banks are widely available. A 5V USB input also keeps the project low-voltage and approachable. Battery-powered versions are great for portability, but rechargeable lithium-ion cells must be handled carefully. Use protected cells or reputable battery packs, include proper charging circuitry, avoid short circuits, and never charge damaged or unknown cells. Batteries are useful servants but terrible roommates when mistreated.
Diffuser
A diffuser turns individual LED points into a smoother sheet of light. Frosted acrylic, translucent plastic, thin white polypropylene, or purpose-made diffusion film can work. The diffuser should sit far enough from the LEDs to blend the light but close enough to keep the lamp compact. Testing several materials is worthwhile. Some plastics reduce brightness too much, while others create a pleasant soft glow.
Designing the LED Panel Before Soldering
The secret to a clean protoboard lamp is planning before soldering. Once solder flows, changing the layout becomes possible but annoying. A pencil sketch or simple grid diagram can prevent a lot of frustration. Mark LED polarity, resistor positions, power rails, switch placement, connector location, and mounting holes.
Start With the Power Budget
Before placing parts, estimate total current draw. If one LED branch draws 10mA and you have 20 branches, the panel may draw around 200mA, not counting driver losses. If the lamp runs from USB, check whether the power source can supply the required current comfortably. If it runs from batteries, estimate runtime based on battery capacity and realistic efficiency. A lamp that shines like a stadium for six minutes may be exciting, but not necessarily useful.
Plan for Heat
LEDs are efficient, but they still produce heat. Resistors also dissipate power. On small, low-current panels, heat may be modest. On brighter panels, it becomes important. Protoboard is not a great heatsink, so high-power LEDs should not be treated like magic cold light dots. Keep currents reasonable, leave some spacing, provide ventilation, and avoid sealing everything in a tiny unventilated plastic box.
If the panel feels hot during testing, reduce current, improve airflow, use a better driver, or move to a metal-core LED board or proper PCB design. Warm is acceptable; “I can toast a marshmallow on this” is a design review from the universe.
Building the Lamp Step by Step
A reliable build usually follows a calm sequence: test, place, solder, inspect, power gradually, and then assemble. Rushing is how LEDs get installed backward in perfect rows. They will look beautiful, and they will do absolutely nothing.
1. Test LEDs Before Installation
Before soldering, test each LED with a safe tester or a resistor-limited circuit. This confirms that the LED works and helps identify polarity. For through-hole LEDs, the longer leg is usually positive, and the flat side often marks the negative side. Still, do not rely on memory alone if the part is unusual. Check the datasheet when available.
2. Place Components in Repeating Groups
Arrange the panel into repeated sections. For example, each small group might include one resistor and one LED string. Repetition makes the circuit easier to inspect and easier to repair. It also makes the finished board look organized, which is excellent for your confidence and your photos.
3. Solder Carefully
Good solder joints are shiny, secure, and not overly bulky. Use enough heat to flow solder properly, but avoid cooking the components. Trim leads after soldering, and watch for tiny solder bridges between pads. A magnifier can help. So can patience, which is basically a tool, except nobody sells it in a little plastic drawer.
4. Test in Sections
Do not wait until the entire board is complete to test it. Power one section at a time through current-limited testing when possible. This helps catch mistakes early. If one group does not light, check polarity, resistor value, solder joints, and power routing. A multimeter is your best friend here. It does not judge. It only tells the truth.
5. Add the Switch, Connector, and Enclosure
Once the panel works, add the switch and input connector. Mounting the board in an enclosure protects the wiring and makes the lamp easier to use. A 3D-printed case, small project box, wood frame, or repurposed plastic housing can work. Include strain relief for wires so the solder joints are not carrying mechanical stress.
Making the Lamp More Useful
The basic LED panel is already handy, but a few upgrades can make it much better. A brightness control is one of the most useful additions. Pulse-width modulation, or PWM, can dim LEDs efficiently when implemented correctly. A simple low-voltage dimmer module can also work if it matches the voltage and current of the lamp.
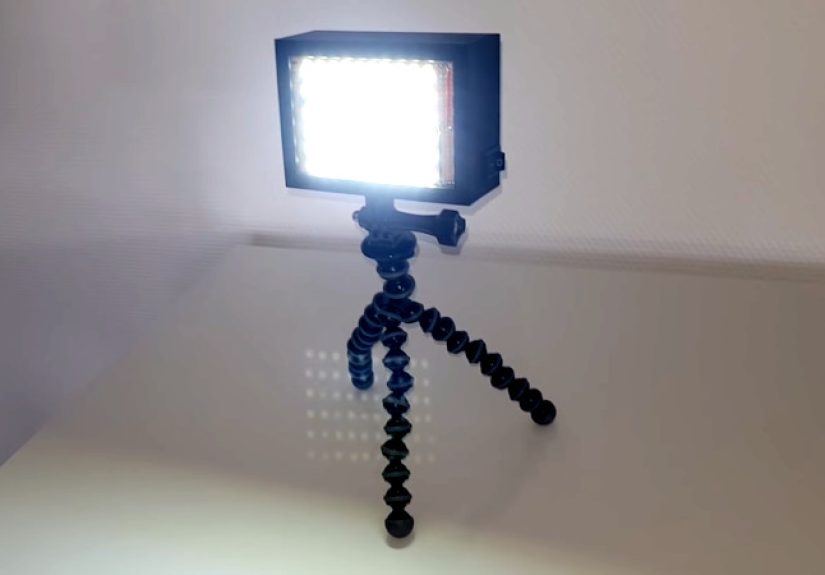
A mounting system is another excellent upgrade. A small tripod mount, magnetic base, clamp, flexible gooseneck, or GoPro-style mount can turn the lamp into a serious tool. For workbench use, angle adjustment is more important than raw brightness. Light that points exactly where you need it often beats light that blasts the entire room like an interrogation scene.
You can also add a diffuser frame, removable front cover, battery indicator, USB-C charging module, or color-temperature mixing if you use warm and cool LED groups. Just remember that each feature adds complexity. The best project is the one that still works after the fun ideas arrive.
Common Mistakes to Avoid
The first common mistake is skipping current limiting. LEDs need controlled current. A resistor or driver is not decoration; it is the difference between a lamp and a brief flash of regret.
The second mistake is ignoring resistor power ratings. A resistor may have the correct resistance value but still overheat if it dissipates too much power. Choose parts with comfortable margins, especially in enclosed builds.
The third mistake is making the wiring too thin for the total current. Individual LED branches may draw little current, but the main power rails carry the combined load. Use appropriately sized wire for the input and main distribution paths.
The fourth mistake is sealing batteries in a case without thought. Rechargeable cells need proper charging, protection, and physical security. Do not use loose lithium cells in a project unless you understand safe handling. For beginners, a commercial USB power bank is often the easiest portable power solution.
The fifth mistake is expecting the diffuser to fix everything. Diffusion helps, but it cannot fully rescue uneven LED spacing, wildly mismatched brightness, or hot spots caused by poor layout. Test the light quality during the build, not after everything is glued together with heroic confidence.
Why This Project Is Great for Learning Electronics
An LED panel lamp teaches electronics in a way that feels real. You are not only reading formulas; you are watching decisions affect brightness, heat, runtime, and reliability. Change the resistor value, and the light changes. Rearrange the LEDs, and the diffuser behaves differently. Improve the wiring, and voltage drop becomes less noticeable. This feedback loop is exactly how practical skill grows.
The project also teaches respect for constraints. Every design has trade-offs. More brightness means more current. More current means more heat. More heat means more cooling or shorter life. More battery capacity means more size and weight. Electronics is not just connecting parts; it is balancing competing needs without letting the magic smoke escape.
of Practical Experience: What Building a Protoboard LED Panel Feels Like
The first time you build an LED panel lamp on protoboard, the project feels almost too simple. You line up the LEDs, place the resistors, connect power, and imagine a clean rectangle of light appearing on the first try. Then reality politely taps you on the shoulder. One LED is backward. One row is dimmer than the others. A solder bridge has created a shortcut that was absolutely not approved by management. This is not failure; this is the project teaching you how to see.
One of the most valuable experiences is learning to test in small sections. When you power the whole board at once and something goes wrong, the problem can hide anywhere. But when you test row by row, the circuit becomes less mysterious. You begin to recognize patterns. If an entire row is dark, check the supply path. If one LED is dark, check polarity or soldering. If a row is brighter than expected, check the resistor value. Troubleshooting stops feeling like guessing and starts feeling like detective work, except the suspect is usually your own solder joint.
Another lesson is that neatness is not just cosmetic. On protoboard, clean wiring makes the lamp easier to repair and safer to use. Short trimmed leads reduce accidental shorts. Consistent resistor placement makes inspection faster. Marked positive and negative rails prevent confusion when the board is flipped over. It is amazing how often a project works better simply because it is easier to understand.
You also learn that brightness is not everything. A harsh LED panel with no diffuser can be unpleasant even if it is technically powerful. Add a simple frosted cover, and the same circuit becomes much more usable. Move the diffuser a little farther away, and the light softens. Angle the lamp toward a wall or work surface, and glare drops. Good lighting is about comfort and control, not just maximum output.
Heat is another hands-on teacher. A panel that seems fine for thirty seconds may become too warm after ten minutes. That experience quickly changes how you think about current, spacing, and enclosure design. You start leaving air gaps. You stop pushing LEDs to their limits. You choose reliability over bragging rights. A lamp that runs comfortably for hours is more impressive than one that wins a brightness contest and then slowly cooks itself.
Finally, building this project gives you confidence. Protoboard can look intimidating at first because there are so many holes and no printed instructions. But once you complete a useful lamp, you realize protoboard is not chaos. It is freedom with a grid. You can use the same skills to build sensor boards, small amplifiers, indicator panels, battery monitors, Arduino accessories, repair adapters, and dozens of practical gadgets. The LED panel lamp is not just a light source; it is a gateway project. It proves that simple parts, arranged carefully, can become something genuinely useful.
Conclusion
An LED panel lamp is a great way to use protoboard because it sits at the perfect intersection of beginner-friendly, affordable, educational, and useful. It teaches the fundamentals of LED circuits while producing a tool you can actually keep on your desk, mount near a camera, bring to a repair job, or use during small projects. With thoughtful current limiting, careful soldering, safe power choices, proper diffusion, and a realistic approach to heat, a protoboard lamp can be far more than a quick weekend build.
The beauty of this project is that it scales with your skill. A beginner can build a simple USB-powered panel with through-hole LEDs and resistors. A more advanced maker can design a rechargeable version with dimming, better thermal planning, a custom enclosure, and a polished diffuser. Either way, the result is the same kind of satisfaction: you made light from a board full of holes, a handful of parts, and a little patience. That is electronics at its bestpractical, visible, and just slightly magical.
Note: This article is written for educational web publishing and focuses on low-voltage DIY electronics. For battery-powered projects, use protected cells or certified battery packs, proper charging modules, and safe assembly practices.