Table of Contents >> Show >> Hide
- Why Repurpose a Queen Headboard?
- Before You Start: Inspect the Headboard Like a Pro
- Best Ideas for a Repurposed Queen Headboard
- How to Prep and Finish a Repurposed Queen Headboard
- Design Styles That Work Beautifully
- Common Mistakes to Avoid
- Conclusion: An Old Headboard Can Become the Best Piece in the Room
- Extra Experience: What It Feels Like to Repurpose a Queen Headboard in Real Life
- SEO Tags
A queen headboard is one of those furniture pieces that refuses to retire quietly. It may lose its bed frame, its matching footboard, or its spot in the guest room, but it still has size, structure, and personality. In other words, it is not junk. It is a project wearing pajamas.
Repurposing a queen headboard is a smart way to create custom furniture without starting from a blank sheet of plywood. Because a queen mattress is 60 inches wide, many queen headboards are large enough to become a bench back, entryway organizer, wall-mounted shelf, garden accent, or dramatic decorative panel. The trick is knowing what your headboard wants to be when it grows up.
This guide explores practical, stylish, and realistic ways to give an old queen headboard a second life. Whether your style is farmhouse, cottage, modern vintage, rustic, coastal, or “I found this on the curb and now I’m emotionally attached,” there is a repurposed headboard idea here with your name on it.
Why Repurpose a Queen Headboard?
A queen headboard has three things DIYers love: width, height, and built-in design detail. Unlike plain lumber, a headboard usually already has curves, panels, posts, carvings, rails, or trim. That means half the decorating work is done before you even pick up a sander.
Repurposing also saves money. A new entry bench, coat rack, storage shelf, or garden feature can cost far more than a secondhand headboard from a thrift store, estate sale, garage sale, or Habitat ReStore-style donation center. Even if you buy paint, hooks, screws, wood filler, and a protective topcoat, the finished piece can still be budget-friendly.
There is also the sustainability bonus. Upcycling keeps bulky furniture out of the landfill and reduces the demand for new materials. That does not mean every project has to look like it came from a rustic barn wedding. A repurposed queen headboard can look polished, modern, elegant, or wonderfully weird. The headboard sets the bones; your finish sets the mood.
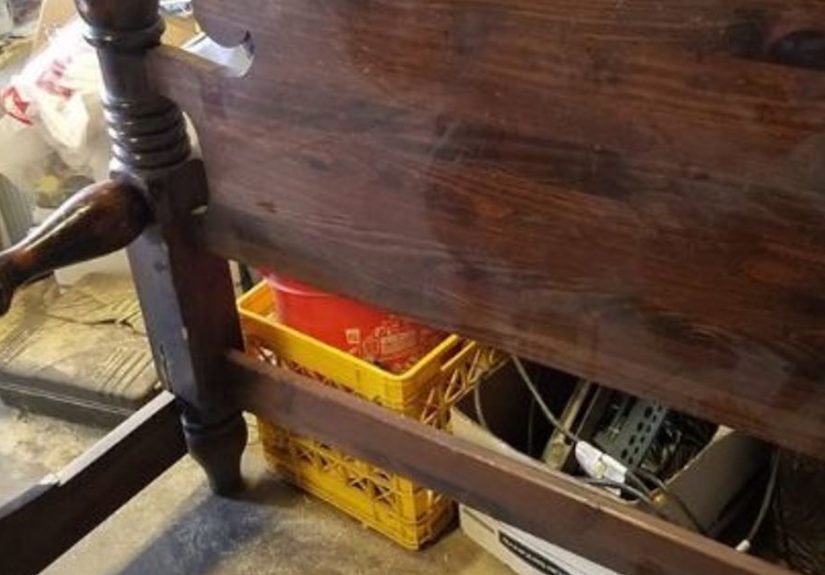
Before You Start: Inspect the Headboard Like a Pro
Before falling in love with a project idea, give the headboard a practical once-over. Look for cracks, loose joints, water damage, missing trim, peeling veneer, soft spots, wobbly posts, and old hardware. A solid wood headboard is often easier to repair and customize, but laminate, veneer, and metal headboards can also work if you choose the right project and prep method.
Check the Structure
If the headboard will become a bench, hall tree, shelf, or wall-mounted organizer, strength matters. Push gently on the posts and rails. If the piece wiggles like a baby tooth, reinforce it before building around it. Wood glue, clamps, pocket screws, corner braces, and replacement boards can fix many common problems.
Think About Scale
A queen headboard can be too large for a narrow hallway but perfect for a mudroom, porch, dining nook, or garden wall. Measure the future location before cutting anything. A project that looks charming in your garage can become a traffic jam in your entryway if you forget about door swings, backpacks, shoes, and humans trying to walk.
Respect Old Paint
If the headboard is vintage or you are unsure of its age, test painted surfaces before sanding. Older painted furniture can contain lead-based paint, and sanding can create hazardous dust. When in doubt, use a lead test kit, wear proper protection, avoid dry sanding questionable finishes, and consider professional help for unsafe surfaces.
Best Ideas for a Repurposed Queen Headboard
The best repurposed queen headboard project depends on your space, tools, and patience level. Some ideas take an afternoon. Others require cutting, framing, anchoring, and a few moments of staring dramatically into the distance. Here are the most useful transformations.
1. Turn It Into an Entryway Bench
The classic queen headboard bench is popular for a reason: it works. The headboard becomes the back of the bench, while the seat is built from boards, plywood, or reclaimed lumber. If you also have the footboard, it can be cut down and used as the arms. If not, you can add simple front legs and leave the bench armless for a cleaner look.
This project is ideal for a foyer, mudroom, covered porch, bedroom, or dining nook. A queen-size headboard gives enough width for two adults or several children wrestling with sneakers. Add a cushion for comfort, baskets underneath for storage, and hooks above if you want a full drop-zone setup.
For best results, build the seat frame with sturdy lumber, attach it securely to the headboard posts, and reinforce corners with screws or brackets. A bench is not the place for wishful thinking. If people are going to sit on it, it needs to be strong enough to handle real life, not just a pretty Instagram angle.
2. Make a Wall-Mounted Coat Rack
A queen headboard can become a striking coat rack for an entryway, laundry room, guest room, or mudroom. The wide back provides space for multiple hooks, while decorative trim adds character. You can keep the full height for drama or cut the headboard down to a more manageable size.
Paint it in a durable satin or semi-gloss finish, then add hooks in a finish that matches your hardware: matte black, oil-rubbed bronze, brushed nickel, antique brass, or even colorful ceramic knobs. For a family entryway, assign each person a hook. For guests, add a small shelf on top for keys, sunglasses, or the mysterious mail you keep meaning to open.
Because coats, bags, and backpacks can get heavy, mount the piece into wall studs or use proper heavy-duty anchors. A coat rack should hold coats, not perform a surprise trust fall.
3. Create a Garden Bench or Porch Seat
If the headboard has a cottage, spindle, iron, or farmhouse look, consider using it outdoors. A queen headboard can become the back of a garden bench, a porch seat, or a decorative seating area near flower beds. Weathered wood and old metal often look especially charming outside.
Outdoor projects need extra protection. Use exterior-rated primer and paint or an outdoor sealant. Lift the feet slightly off soil or wet concrete when possible, and avoid using delicate veneer pieces in exposed weather. A covered porch is kinder than a full rainstorm.
For a whimsical garden look, paint the bench soft green, white, navy, black, or cheerful red. Add outdoor cushions and a small side table. Suddenly your old bedroom furniture has become the star of the patio. Not bad for something that used to hold pillows.
4. Build a Shelf or Display Ledge
A queen headboard with a flat top rail or panel detail can become a wall shelf. Add a board across the top, secure it with brackets or cleats, and mount the piece as a display ledge for framed art, plants, candles, or seasonal decor.
This idea works especially well with paneled headboards because the design gives the wall texture. In a dining room, it can display plates or serving pieces. In a bedroom, it can act as a decorative focal point. In a hallway, it can hold small baskets, photos, and keys.
Keep shelf depth reasonable. A narrow ledge is elegant; an oversized shelf attached to an old headboard can look like the wall is trying to wear a backpack. For safety, anchor the piece properly and avoid loading it with heavy items unless the structure is designed for weight.
5. Transform It Into a Hall Tree
A hall tree is basically an entryway bench plus a coat rack, and a queen headboard is a strong candidate for the job. Use the headboard as the tall back, build a bench seat at the base, add hooks to the upper section, and include baskets or cubbies below.
This is one of the most practical ways to repurpose a queen headboard because it solves a real household problem: stuff. Shoes, coats, dog leashes, reusable bags, sports gear, and umbrellas all need a landing zone. A repurposed headboard hall tree gives them one while looking far better than a pile by the door.
Paint the hall tree in a color that can handle traffic. Deep green, charcoal, navy, creamy white, or warm gray are all strong choices. Use a washable finish, because entryway furniture meets muddy hands, wet coats, and the occasional snack crumb.
6. Use It as a Room Divider or Decorative Wall Panel
Not every repurposed queen headboard needs to become furniture. Some are beautiful enough to hang or stand as architectural decor. A carved wood headboard can become a wall panel behind a sofa, console table, or dining bench. A metal headboard can serve as a light room divider in a studio apartment or open-plan space.
For a more finished look, add trim around the edges, paint everything one color, and mount it securely. If the headboard has open spindles or scrollwork, weave in string lights, greenery, or fabric panels. Just keep it tasteful unless your design goal is “enchanted attic,” in which case, carry on bravely.
7. Make a Towel Rack for a Bathroom or Pool House
A smaller or cut-down queen headboard can become a towel rack. Add hooks or horizontal bars, seal the surface against moisture, and mount it to the wall. This works beautifully in a farmhouse bathroom, beach house, pool room, or laundry area.
Use moisture-resistant paint and avoid placing untreated wood directly where it will be soaked daily. If your bathroom has poor ventilation, choose a sealed finish and inspect the piece occasionally for swelling or mildew. Pretty is wonderful; soggy is not.
8. Create a Pet Bed Frame
For a playful project, cut down a queen headboard and turn it into a pet bed frame. The headboard becomes the back, side rails create the frame, and a washable cushion or small mattress sits inside. This is especially cute for medium or large dogs who believe they are royalty, which is most of them.
Use pet-safe paint after it fully cures, round sharp edges, and avoid decorative pieces that can be chewed off. Add the pet’s name with stencils or vinyl lettering for a custom touch. Your dog may not appreciate the craftsmanship, but your guests will.
How to Prep and Finish a Repurposed Queen Headboard
Finishing is where a repurposed project goes from “garage experiment” to “yes, I absolutely meant to do that.” Good prep matters more than expensive paint.
Clean First
Old furniture collects dust, oils, wax, and mystery grime. Clean the headboard with a mild degreasing cleaner before sanding or painting. Remove hardware, stickers, loose nails, and old felt pads. Let the piece dry completely.
Sand Smart
Light sanding helps paint and primer stick. You do not always need to strip a piece to bare wood. In many cases, scuff-sanding the glossy surface is enough. If the headboard has carvings or spindles, use sanding sponges or flexible sandpaper to reach details.
Prime for Success
Primer is especially helpful when covering dark wood, glossy finishes, stains, or old varnish. Use a bonding primer for slick surfaces and a stain-blocking primer for wood that might bleed through paint. Skipping primer can lead to peeling, blotchy coverage, or the classic DIY tragedy known as “why is the stain coming through my white paint?”
Choose the Right Paint or Stain
For indoor projects, furniture paint, enamel, chalk-style paint with a protective topcoat, or quality latex paint can work well. For outdoor pieces, choose exterior-rated products. If you love the wood grain, stain and polyurethane can highlight the original material while protecting it.
Apply several thin coats instead of one thick coat. Thick coats run, sag, and take longer to cure. Thin coats are the quiet professionals of furniture finishing.
Design Styles That Work Beautifully
A repurposed queen headboard can adapt to many home styles. The secret is pairing the headboard shape with the right finish and hardware.
Farmhouse
Use white, black, sage, or weathered gray paint. Add simple metal hooks, a stained wood seat, woven baskets, and maybe a ticking-stripe cushion. Farmhouse style loves a headboard bench like a porch loves sweet tea.
Modern Vintage
Choose a bold color such as deep blue, forest green, or matte black. Keep hardware minimal and clean. A carved headboard painted in one dramatic color can look surprisingly modern.
Coastal
Try soft white, pale blue, driftwood gray, or sandy beige. Add rope details, light wood accents, and relaxed fabrics. A repurposed headboard towel rack fits perfectly in this style.
Cottage
Lean into charm with soft paint colors, floral cushions, glass knobs, and gently distressed edges. Cottage style forgives imperfections, which is excellent news for anyone whose cutting skills are more enthusiastic than precise.
Common Mistakes to Avoid
The first mistake is choosing the wrong project for the headboard. A flimsy decorative headboard should not become a heavy-duty bench without serious reinforcement. A massive headboard might overwhelm a tiny hallway. Let the piece guide the plan.
The second mistake is ignoring safety. Wall-mounted projects need proper anchoring. Benches need sturdy frames. Old painted surfaces may need lead-safe handling. Outdoor pieces need weather protection. DIY should be creative, not chaotic.
The third mistake is rushing the finish. Paint needs dry time and cure time. A piece may feel dry in an hour but still be soft underneath. Give it time before loading it with coats, bags, cushions, or impatient pets.
Conclusion: An Old Headboard Can Become the Best Piece in the Room
A queen headboard repurposed with imagination can become far more useful than it was in its first life. It can welcome guests as an entryway bench, organize coats in a mudroom, hold towels in a bathroom, brighten a garden, frame a pet bed, or turn a blank wall into a custom focal point.
The best part is that every project carries a little history. New furniture can be beautiful, but repurposed furniture has a story. It says someone looked at an outdated headboard and saw a second chance instead of a trash pile. That is the heart of good DIY: not perfection, but possibility.
Extra Experience: What It Feels Like to Repurpose a Queen Headboard in Real Life
Repurposing a queen headboard sounds neat and tidy when described in steps, but the actual experience is more like a friendly wrestling match with furniture. The headboard is always heavier than it looks. The screws are always hiding under dust. The “quick sanding” stage somehow turns into a full upper-body workout. Still, once the first coat of paint goes on, the whole project starts to feel addictive.
One of the most satisfying parts is discovering that the old details still matter. A curved top rail that looked dated in a bedroom can look elegant as the back of a bench. Turned posts that felt too traditional beside a mattress can become charming supports in an entryway. Even scratches and dents can become part of the story if you choose a distressed, rustic, or layered finish.
The biggest lesson is to plan for function before beauty. A bench should be comfortable and stable. A coat rack should be mounted where coats will not block a door. A shelf should be deep enough to hold decor but not so deep that it becomes a forehead hazard. It helps to tape the outline on the wall or floor before building. This one step can prevent the classic DIY regret of realizing the finished piece is gorgeous but inconvenient.
Another useful experience is learning to embrace adjustments. Maybe the headboard is too tall, so you cut off the legs. Maybe the finish is too shiny, so you switch to a satin topcoat. Maybe the original plan was a garden bench, but the wood is too delicate for weather, so it becomes an indoor reading nook seat instead. Repurposing works best when you stay flexible.
Paint color can also change everything. A dark, outdated cherry headboard may look heavy and formal, but paint it warm white and add black hooks, and suddenly it belongs in a modern farmhouse entry. Paint it navy with brass hardware, and it feels boutique-hotel chic. Paint it soft green, add a floral cushion, and it becomes cottagecore without needing to own a single chicken.
The final reward comes when someone asks, “Where did you buy that?” That is the magic moment. You get to smile casually and say, “Oh, I made it from an old queen headboard,” as if you did not spend twenty minutes looking for the drill bit that was in your pocket. A repurposed queen headboard is more than a furniture makeover. It is proof that creativity can turn awkward leftovers into something useful, personal, and genuinely beautiful.