
Table of Contents >> Show >> Hide
- Quick diagnosis: what’s most likely causing it?
- Before you start: two things that save headaches
- Fix #1: Confirm Apple’s servers + make your internet “boringly reliable”
- Fix #2: Use the right macOS Recovery mode (this matters more than people think)
- Fix #3: Correct the date and time in macOS Recovery (yes, your Mac can time-travel)
- Fix #4: Change DNS and remove network blockers
- Fix #5: Reset NVRAM/PRAM (Intel) and try again
- Fix #6: Install macOS another way (bootable installer = the “get it done” method)
- FAQ: Common questions people ask while staring at this error
- Conclusion
- Real-World Fix Stories: What Usually Works (and Why) (Experience Section)
You’re in macOS Recovery, you click Reinstall macOS, and your Mac hits you with the most unhelpful message
since “Something went wrong”: “The recovery server could not be contacted.”
Translation: your Mac tried to reach Apple’s recovery/installation servers and failedbecause of network issues, time/certificate problems,
outdated recovery installers, or (occasionally) Apple’s side having a bad day.
The good news: this error is usually fixable without turning your Mac into an expensive paperweight.
The better news: you don’t need to be an IT wizardjust a patient human with a keyboard and, ideally, a snack.
Quick diagnosis: what’s most likely causing it?
This error usually falls into one of four buckets:
- Network problem: Wi-Fi is connected but not actually usable (captive portal, strict firewall, DNS issues, flaky router).
- Date/time problem: your Mac’s clock is wrong in Recovery, which breaks secure connections (certificates).
- Recovery mode mismatch: you’re booted into a recovery that’s trying to install an older macOS version that’s harder to download/validate today.
- Temporary server issue: Apple’s services hiccuping (rare, but it happens).
Fast Fix Decision Table
| What you notice | Try this first |
|---|---|
| Wi-Fi shows connected, but install fails instantly | Fix #1 (Network sanity checks) + Fix #4 (DNS) |
| The Mac was erased and now won’t reinstall anything | Fix #2 (Use Internet Recovery / different combo) + Fix #6 (Bootable installer) |
| The date in Recovery looks wrong (or you’re not sure) | Fix #3 (Correct date/time in Terminal) |
| Older Mac trying to reinstall High Sierra/Sierra/El Capitan | Fix #2 (Right recovery type) + Fix #6 (Bootable installer) |
| It worked yesterday, now it doesn’t | Fix #1 (Check Apple server status) and try again later |
Before you start: two things that save headaches
1) Know what kind of Mac you’re working with
Intel Macs and Apple silicon Macs (M1/M2/M3) enter Recovery differently, and some “classic” resets only apply to Intel.
If you’re unsure, think: does your Mac say Intel in older About This Mac screens, or is it an M-chip model?
2) Don’t erase anything “just to try stuff”
Some fixes involve Disk Utility or reinstall choices. If you still have access to your normal macOS desktop,
back up first (Time Machine or an external backup). If you already erased the drive, focus on reinstall methods
that don’t require existing databecause it’s already gone.
Fix #1: Confirm Apple’s servers + make your internet “boringly reliable”
macOS Recovery can be picky. “Connected” doesn’t always mean “can reach Apple servers.”
Aim for the most stable, least fancy network possible.
Step A: Check whether Apple is having a moment
On another device (phone/tablet), check Apple’s System Status page and look for macOS-related services.
If there’s an outage or degradation, you may simply need to try again later.
Step B: Switch networks like you mean it
- Try a different Wi-Fi (phone hotspot is a great test).
- Use Ethernet if you can (USB-C to Ethernet adapter for many Macs).
- Avoid captive portals (hotel/coffee shop Wi-Fi that requires a browser login).
- Temporarily disable VPNs, proxies, “security” DNS apps on your router/network if applicable.
Step C: Retry the install once after reconnecting
After you connect to a new network, go back to Reinstall macOS and try again.
If it fails immediately, move ondon’t keep clicking like it’s going to feel guilty and change its mind.
Fix #2: Use the right macOS Recovery mode (this matters more than people think)
“Recovery” isn’t just one thing. Different startup methods can offer different macOS installers
(current system, latest compatible, or original OS). If your Mac is trying to fetch an older installer,
you can run into download/verification issues that look like “can’t contact server.”
Intel Mac key combos to try
- Command (⌘) + R: reinstall the macOS currently installed (or closest available).
- Option + Command (⌥⌘) + R: Internet Recovery for the latest compatible macOS.
- Shift + Option + Command (⇧⌥⌘) + R: Internet Recovery for the original macOS that came with the Mac (or closest available).
Apple silicon (M-series) Recovery approach
Shut down the Mac. Press and hold the power button until you see Startup Options.
Select Options > Continue to enter Recovery.
Why this works
If one Recovery path is pointing at an older installer that fails to download or validate, switching to
Internet Recovery (latest compatible) often pulls a newer installer workflow that behaves better.
Fix #3: Correct the date and time in macOS Recovery (yes, your Mac can time-travel)
This is the “secret handshake” fix. If the system clock is wrong, secure HTTPS connections can fail because certificates look “expired”
or “not yet valid.” Then your Mac reports the recovery server can’t be contactedbecause from its perspective,
the internet is lying about who it is.
Step-by-step
- In macOS Recovery, open Utilities > Terminal.
- Type
dateand press Enter to see the current date/time. - Try to sync time automatically (one of these may work depending on the Recovery environment):
Or:
If automatic sync isn’t available, set the date manually. The classic format is:
date mmddHHMM[[cc]yy]
(month, day, hour, minute, then year).
Example: Set Jan 8, 2026 at 10:30 AM:
After setting time, quit Terminal and try Reinstall macOS again.
Why this works (in plain English)
Apple’s download and install flow relies on secure connections and signed packages. If your Mac thinks it’s 2001 or 2049,
it may reject the security handshake and pretend the server “can’t be contacted.”
Fix #4: Change DNS and remove network blockers
DNS is the internet’s address book. If it’s slow, filtered, misconfigured, or doing “helpful” security rewriting,
your Mac can fail to resolve or reach the recovery endpoints it needs.
What to do
- Try a different network first (phone hotspot often bypasses DNS problems instantly).
- If you control the router, set DNS to a reliable provider temporarily (for example, Google DNS 8.8.8.8 / 8.8.4.4 or Cloudflare 1.1.1.1).
- Avoid filtered networks (schools/workplaces) that block unknown Apple endpoints.
- If you’re on a managed device/network, try installing from a home connection.
Real-world example
A Mac can join office Wi-Fi but still be unable to access Apple’s recovery resources because the firewall blocks certain ports,
DNS rewrites requests, or a proxy requires interactive login. A phone hotspot is the quickest “is it my network?” test.
Fix #5: Reset NVRAM/PRAM (Intel) and try again
Sometimes Recovery failures come from low-level settings that survive normal restartslike startup configuration,
network quirks, or cached values. Resetting NVRAM/PRAM can clear out some of that weirdness.
Intel Mac: reset NVRAM/PRAM
- Shut down the Mac.
- Turn it on and immediately press and hold: Option + Command + P + R.
- Keep holding for about 20 seconds (some Macs restart during this).
- Release the keys and boot back into Recovery to retry.
What about Apple silicon (M-series)?
Apple silicon Macs handle this differently; you generally don’t perform a classic PRAM reset the same way.
If you’re on Apple silicon, focus on Fix #2 (Recovery options), Fix #3 (date/time), Fix #4 (network/DNS),
and Fix #6 (bootable installer/alternate install).
Bonus: if you suspect hardware/network weirdness
If your Mac has been acting haunted (random fan blasts, sleep issues, power weirdness), resetting the SMC can help on some Intel models,
but the steps vary by hardware. If you’re not sure, skip it and move to Fix #6.
Fix #6: Install macOS another way (bootable installer = the “get it done” method)
When Recovery can’t reach the server, the most reliable workaround is to stop asking Recovery to be your delivery service and instead
bring the installer to the Mac yourself.
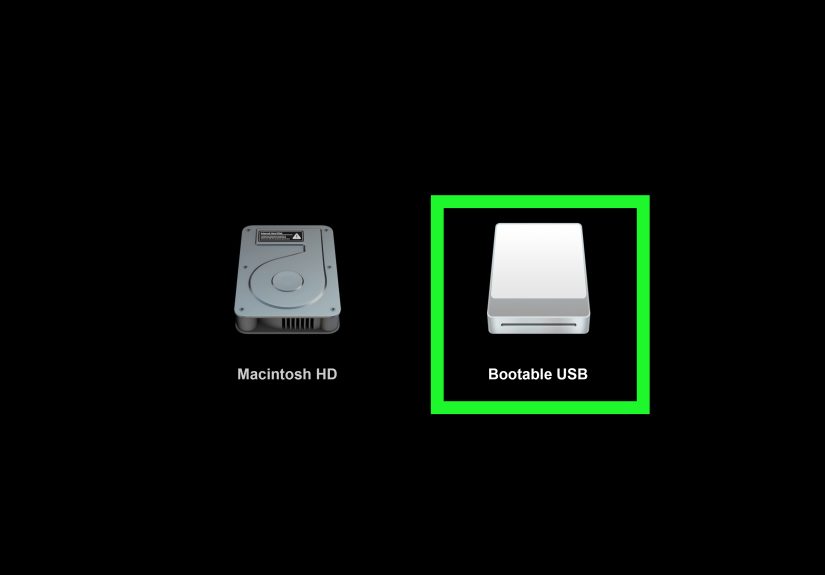
Option A: Create a bootable USB installer (best all-around fix)
You’ll need another working Mac and a USB drive (typically 16GB+). Download the macOS installer from Apple,
then use the createinstallmedia command to make a bootable installer.
Once created:
- Intel Mac: Start up while holding the Option (⌥) key and select the USB installer.
- Apple silicon: Hold the power button for Startup Options, then select the USB installer.
Option B: Use Internet Recovery for the latest compatible macOS, then upgrade later
If your goal is “any working macOS,” use Option + Command + R (Intel) or Startup Options (Apple silicon),
install what it offers, then upgrade from System Settings once you’re back in a normal desktop environment.
Option C: If it’s an older macOS installer issue
Older macOS versions can be extra fussy due to installer certificate validation and changing delivery infrastructure.
That’s why the bootable installer route often saves the day: it avoids repeated server handshakes during Recovery.
When to contact Apple (or a repair shop)
If you’ve tried multiple networks, corrected date/time, used the correct Recovery mode, and even a bootable installer still fails,
you may be looking at hardware issues (SSD problems, network card issues) or firmware/security configuration problems.
At that point, professional diagnostics are worth it.
FAQ: Common questions people ask while staring at this error
“But my Wi-Fi works!”
Totally believable. Recovery needs more than “Wi-Fi connected.” It needs DNS resolution, access to Apple endpoints, and no captive portal.
That’s why a phone hotspot is such a powerful test.
“Does erasing the disk cause this?”
Erasing doesn’t cause the server error directly, but it removes your fallback options. Once erased, you’re dependent on Recovery
or external installers. That’s why Fix #6 is so valuable after a wipe.
“Why does fixing the date help an internet problem?”
Because modern downloads are secured with certificates. If your Mac’s clock is wrong, it may refuse secure connections
and interpret that refusal as “can’t contact server.”
“What’s the safest order to try fixes?”
Try this flow: Fix #1 → Fix #2 → Fix #3 → Fix #4 → Fix #5 → Fix #6. It moves from easiest/least invasive to most decisive.
Conclusion
“The recovery server could not be contacted” sounds like a dramatic breakup text from your Mac, but it’s usually just a practical problem:
network reliability, date/time validation, or Recovery trying to fetch an installer that doesn’t play nicely anymore.
Start with the simple checks (network and Apple status), make sure you’re using the right Recovery mode, correct the clock,
andwhen you want to end the sagause a bootable installer. The goal isn’t to win an argument with Recovery.
The goal is to get macOS installed and move on with your life.
Real-World Fix Stories: What Usually Works (and Why) (Experience Section)
In the real world, this error tends to show up at the worst possible time: right after someone erased a Mac to sell it,
right before a deadline, or five minutes after you proudly announced, “Don’t worry, I can reinstall macOS. It’s easy.”
(The Mac, of course, heard that and immediately decided to build character.)
The most common “experience pattern” looks like this: someone connects to Wi-Fi in Recovery, sees the Wi-Fi icon,
assumes the internet is fine, and hits install. Then the error pops up. What’s actually happening is usually a captive portal
(hotel Wi-Fi), a DNS filter (office/school network), or a router doing something “smart” like security rewriting.
The fastest real-world test is a phone hotspot. When hotspot works instantly, you’ve proven the Mac isn’t cursed
it just hates that network.
The second most common story is time travel. A Mac that’s been wiped, stored, or had a dead battery can boot into Recovery
with a wildly wrong date. People don’t check because… why would they? It’s a computer. It should know what year it is.
But in Recovery, time sync isn’t always automatic, and if the Mac thinks it’s 2001, secure downloads fail.
Once you run date and see nonsense, the fix becomes almost funny: set the date correctly, retry, and suddenly
the “server” is reachable again. Nothing changed on the networkonly the Mac stopped living in the past.
Older Macs add an extra layer of drama. If Recovery is trying to reinstall an older macOS version (like High Sierra-era installers),
you can hit issues that feel like server trouble but are really installer workflow troubleespecially if you’re stuck with the OS
the Mac originally shipped with. In these cases, switching to Internet Recovery for the latest compatible macOS
often works because it points you at a newer, more compatible installer path. When that fails, a bootable USB installer is the
“adult in the room.” It’s not as quick, but it’s predictable: you’re not relying on Recovery to negotiate downloads perfectly.
Another real-world twist: people repeat the same attempt 20 times on the same flaky Wi-Fi, hoping attempt #21 is the magical one.
If you’re seeing the error repeatedly, changing one variable at a time is what winsswitch networks, change Recovery mode,
fix time, change DNS. The moment you get a different outcome (even a different error), you’re learning something useful.
The goal isn’t to spam the install button; it’s to narrow the cause.
Finally, there’s the “I erased everything and now I’m stuck” experience. It’s stressful, but it’s also the moment
where the bootable installer shines. People resist it because it feels like extra work, but it’s usually the shortest path
to a working Mac once Recovery won’t cooperate. If this article had a motivational poster, it would say:
When Recovery gets moody, bring your own installer.


