Table of Contents >> Show >> Hide
- How We Got Here: From Cramped Doorways to Big Plans
- Planning the Doorway Widening Before Demo Day
- What Actually Happens on Day 1
- Why Wider Doorways Feel So Good (Beyond the Measurements)
- Practical Tips If You’re Starting Your Own “Day 1”
- Real-Life Experiences: What We Learned from Widening Doorways
- Lesson 1: The Emotional Mess Is RealAnd Temporary
- Lesson 2: Communication with the Crew Matters as Much as the Measurements
- Lesson 3: Pets and Renovation Do Not Mix
- Lesson 4: Budget More for “Invisible” Work
- Lesson 5: The Payoff Is Bigger Than the Opening
- Lesson 6: Start with One Day, Think Long-Term
- Conclusion: Day 1 Is Where the House Starts to Breathe
Every home has that one doorway you side-eye every time you walk through it. You turn sideways with a laundry basket, do a weird shoulder shuffle with the vacuum, and silently vow that one day this opening is going to grow up. For the Young House Love crew, “Day 1” of widening their doorways was exactly that moment: the leap from “this is annoying” to “let’s get the sledgehammer.”
Whether you’re following along with their original project or planning your own doorway makeover, Day 1 is where big ideas meet actual dust, real structural work, and a surprising number of phone calls to electricians, contractors, and occasionally the vet. This guide walks through what really happens on that first day, how to plan for a wider doorway safely, and why those few extra inches can change how you live in your home.
How We Got Here: From Cramped Doorways to Big Plans
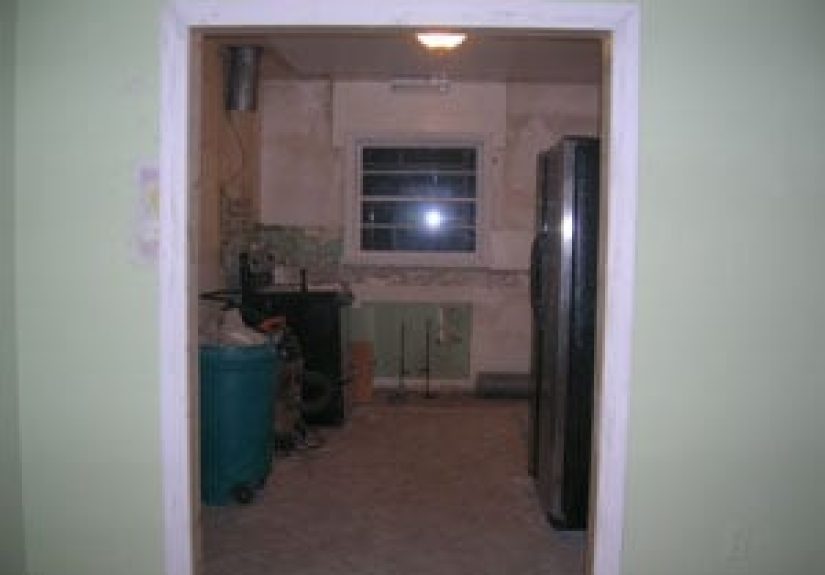
In Young House Love’s first house, the layout was classic older-home: small rooms, narrow openings, and a kitchen that felt more like a tunnel than the heart of the house. The doorway between the kitchen and the adjoining spaces did its job, technicallybut it also blocked sightlines, restricted natural light, and made the home feel chopped into little boxes instead of one connected living area.
That’s the moment a lot of homeowners reach: the house is fine, but it doesn’t flow. Widening doorways is one of the fastest ways to:
- Open views between rooms without committing to a full “no-walls-anywhere” open concept
- Share light from windows in one room with darker adjacent spaces
- Improve accessibility, especially for wheelchairs, walkers, and strollers
- Make moving furniture and appliances much less of a puzzle
For the Young House Love project, Day 1 meant a pro crew showing up at the crack of dawn to tackle the kitchen demo and begin widening the first doorway. It was messy, occasionally chaotic, and exactly the kind of progress you can actually see by dinnertime.
Planning the Doorway Widening Before Demo Day
The most successful Day 1 actually starts weeks earlier with good planning. Before anyone swings a hammer, you’ll want to answer a few key questions.
1. How wide should your new doorway be?
A typical interior doorway in many older houses lands around 28–32 inches. That might feel “standard,” but it’s not always practical. Accessibility guidelines and aging-in-place remodelers often suggest:
- At least 32 inches of clear opening as a minimum for wheelchair passage (door open at 90 degrees).
- 36 inches as a much more comfortable and future-proof width for wheelchairs, walkers, and general traffic.
Many homeowners doing lifestyle-driven renovations (like the Young House Love projects) aim even bigger in high-traffic areas, opting for wide cased openings between 36 and 42 inchesor more in special spotsto visually connect rooms and create that airy, “one big space” feel.
The sweet spot for most interior door-widening projects is:
- Bedrooms/bathrooms: 32–36 inches
- Main traffic routes (hall to living room, kitchen to dining): 36–42 inches
- Big statement openings: 48 inches or more, often framed without a door at all
2. Is this wall load-bearing?
This is the “do not guess” part. On Day 1 of Young House Love’s project, they had a professional crew in part because the openings they were modifying were in structural walls. Widening an opening in a load-bearing wall means you’re literally changing what holds your house up, so you’ll want:
- A structural engineer or qualified contractor to confirm whether the wall is load-bearing
- Proper sizing of the new header (beam) based on span and load
- Permits where required by your local building department
Pros typically support the existing load with temporary walls, remove the old header, and then install a beefier one before widening the opening. That’s the kind of step you want done by someone who knows their way around code tables and gravity.
3. What’s hiding in the wall?
Day 1 is notorious for surprises: electrical wires through studs where you want open air, plumbing you didn’t expect, or mystery junction boxes just out of sight. In the original Young House Love “Day 1,” they had to call in an electrician after discovering a light switch location that just didn’t work with the new opening.
That’s why pre-demo planning should include:
- Turning off power to circuits in the work area
- Checking both sides of the wall for switches, outlets, and vents
- Budgeting time and money for at least one electrical or plumbing surprise
4. How will you control dust and chaos?
Renovation dust is an overachieverit will happily travel from the kitchen to your bedroom closet in under 24 hours if you let it. The Young House Love team has long been a fan of simple dust barriers made with plastic sheeting and painter’s tape to create a “dust door” you can walk through while the worst of the demo happens on the other side.
On Day 1, have ready:
- Plastic tarps or zip-wall style barriers to seal off nearby rooms
- Drop cloths for floors and furniture
- A plan for pets and kids (ideally, not walking through the jobsite eating random debris)
What Actually Happens on Day 1
Once the crew pulls up, Day 1 follows a familiar rhythm: prep, demo, structure, clean-up. It’s noisy, it’s dusty, and it’s also incredibly satisfying.
Step 1: Protecting the House
Before any walls come down, a good crew will:
- Cover floors in the path from the front door to the work area
- Set up tarps or plastic to contain dust
- Remove trim carefully if it’s going to be reused
If you’re DIYing, take your time here. Spending 45 minutes on prep can save you hours of deep-cleaning drywall dust out of your closet later.
Step 2: Opening the Wall
For non-load-bearing walls, widening an opening can be as simple as:
- Scoring the drywall along your new opening lines
- Removing drywall, then carefully cutting studs
- Adding new king studs and jack studs to frame the wider opening
- Installing a properly sized header, even if the wall isn’t structural (it resists sagging and keeps things tidy)
In a load-bearing wall, the steps are similar but more serious. Temporary walls or supports go up first, then the old header is removed, the opening is widened, and a new, stronger header is installed to carry the load.
Step 3: Surprises, Phone Calls, and Problem-Solving
This is where your project starts to feel like an episode of a home-improvement show. You might:
- Discover a wire running through the stud you planned to cut
- Realize an HVAC return is exactly where your dream cased opening wants to be
- Need to call in an electrician to reroute switches and outlets
In the Young House Love project, emergency calls included an electrician to rescue a tricky switch situationand even a panicked vet call when their dog managed to swallow a stray piece of plastic. (Renovation pro tip: pets have no judgment. Keep them far away from demo zones.)
Step 4: Ending the Day with Visible Progress
By the end of Day 1, you’re usually not ready for paint, but you are ready for a happy dance. In many projects, the new width is already framed, the header is in place, and you can stand in the opening and feel how different the space is going to be.
This is also when you’ll confirm final details like:
- Exact trim style and casing width
- Whether the opening will have a door, pocket door, or be cased only
- How flooring transitions will be handled between rooms
Why Wider Doorways Feel So Good (Beyond the Measurements)
On paper, widening a doorway is about inches and headers and code. In real life, it’s about how your home feels.
- More natural light: Light floods through wide openings, making interior rooms feel brighter without adding a single window.
- Better flow: People aren’t stacking up in bottlenecks at parties or family gatherings.
- Future-proofing: If you ever need wheelchair or walker access, those extra inches become a big deal for safety and independence.
- Resale value: Open sightlines and flexible layouts are consistently attractive to buyers in modern real-estate listings.
Young House Love’s later projects even show how widening a brick doorway to a full five-foot opening completely changed the feel between their kitchen and densuddenly it looked like one big space instead of two awkwardly connected rooms.
Practical Tips If You’re Starting Your Own “Day 1”
Thinking of widening your own doorways? Here are some hard-earned lessons wrapped into quick tips:
- Start with one opening. Use it as a test run for cost, dust, and how much it changes your layout before committing to every doorway in the house.
- Oversize a little when in doubt. It’s very rare to wish you’d made a big transition smaller, especially along main traffic paths.
- Respect load-bearing walls. Bring in pros for structural changes, even if you’re comfortable with demo and drywall.
- Protect your stuff. Dust barriers, covered vents, and sealed doorways will protect your sanity later.
- Plan for finish work. Wider openings may require new casing profiles, patched floors, or updated baseboards to look intentional.
Real-Life Experiences: What We Learned from Widening Doorways
Doorway widening looks simple in before-and-after photos: narrow opening, demolition glamour shot, wide and beautiful after. Living through it, especially on Day 1, is a bit more nuanced. Here are some experience-based takeaways that echo what many homeowners (including the Young House Love crew) learn along the way.
Lesson 1: The Emotional Mess Is RealAnd Temporary
The first hours of Day 1 can feel like you’ve voluntarily destroyed your house. You see bare studs, dangling wires, and a pile of drywall crumbs where a familiar doorway used to be. It’s normal to feel a pang of “What have we done?” around lunchtime.
The turning point usually comes the moment the new opening is framed. Even without drywall or trim, you can stand back and literally see the future flow of your house. That “a-ha” moment tends to erase a lot of the panic. Remind yourself: the mess is short-term, but the wider opening is going to serve you for decades.
Lesson 2: Communication with the Crew Matters as Much as the Measurements
On projects like Young House Love’s, the best days happen when the homeowners and contractors are aligned on expectations:
- Exactly how wide the finished opening should be (including trim)
- How high the opening sits relative to adjacent doors and windows
- Where switches and outlets should land after the dust settles
On Day 1, little decisionslike whether casing should match original 1950s trim or be updatedcan snowball into extra time and cost if they’re not clear. A quick walkthrough with the crew in the morning and again before they leave can save a lot of “Oh, I thought you meant…” later.
Lesson 3: Pets and Renovation Do Not Mix
One of the most memorable parts of the original “Widening Our Doorways – Day 1” story is the emergency call to the vet when the family dog swallowed a sharp piece of debris. It makes for a funny anecdote later; in the moment, it’s stressful, expensive, and scary.
If you share your home with animals, treat the work area like a no-go zone. Use baby gates, closed doors, or even temporary boarding if your pet is particularly curious or anxious. The fewer living things wandering around while the crew is knocking out walls, the better.
Lesson 4: Budget More for “Invisible” Work
Most of us mentally budget for visible changes: new trim, patching drywall, repainting. Doorway projects sneak up on you with less glamorous line items:
- Electrical relocation (moving switches, outlets, or lights)
- Possible HVAC adjustments if there’s a vent nearby
- Flooring repair or patching at the widened opening
- Engineer consultations or permit fees for structural changes
A smart Day 1 mindset is to treat those invisible tasks as part of the core project, not annoying add-ons. They’re exactly what makes a wider doorway feel like it’s always belonged there instead of looking like a hastily hacked opening.
Lesson 5: The Payoff Is Bigger Than the Opening
After living with wider doorways, most homeowners say the same thing: “I can’t believe we waited so long.” You notice it when:
- Two people can pass each other in the hall without doing an awkward dance
- You can see from the front room into the kitchen and keep an eye on kids or guests
- Wheelchairs, walkers, and strollers glide through without scraped knuckles and door jambs
In the Young House Love universe, widening doorways became one of those “foundational” upgrades they repeated in multiple homesproof that once you live with wider openings, it’s hard to go back. The Day 1 chaos feels tiny compared to the daily comfort and usability you gain.
Lesson 6: Start with One Day, Think Long-Term
The magic of a “Day 1” mentality is that it keeps the project bite-sized. You’re not rebuilding your whole house; you’re committing to improving one opening, one connection between two rooms. But that single doorway often becomes the blueprint for future changesanother widened opening off the hall, a bigger transition to the dining room, or even a dramatic brick arch between indoor and outdoor spaces.
So take Day 1 seriously, but don’t let it intimidate you. The combination of good planning, the right help for structural and electrical work, and realistic expectations about dust and surprises turns a scary-sounding project into one of the highest-impact changes you can make to your home.
Conclusion: Day 1 Is Where the House Starts to Breathe
“Widening Our Doorways – Day 1” isn’t just about a few studs and a new header. It’s about rethinking how rooms talk to each other, how light moves through your home, and how you move through it, too. With thoughtful planning, respect for structural realities, and a willingness to embrace a bit of short-term chaos, widening your doorways can make your home feel larger, brighter, and more welcomingwithout adding a single square foot.
So if you’re standing in a cramped doorway right now thinking “This could be better,” consider this your sign. Day 1 might be dusty, loud, and a little nerve-rackingbut it’s also the day your home starts to breathe easier.