Table of Contents >> Show >> Hide
- Quick checklist before you connect
- Way #1: Use Finder “Connect to Server” (best for shared folders)
- Way #2: Use Terminal with SSH (best for admins, developers, and troubleshooting)
- Way #3: Use Screen Sharing (Mac-to-Mac) or Remote Desktop (Mac-to-Windows)
- Way #4: Use a dedicated file transfer app (best for SFTP/FTP/WebDAV power users)
- Which connection method should you use?
- Security and sanity tips (please don’t skip these)
- Conclusion
- Real-world experiences (the part you only learn after doing this a lot)
- SEO Tags
“Connect to a server” sounds like something you do in a sci-fi movie while dramatic music plays and someone yells, “I’m in.” In real life, it’s usually: you’re on a Mac, you need a file or a desktop somewhere else, and your coffee is getting cold.
The good news: macOS gives you multiple built-in ways to reach serverswhether that “server” is a Windows file share, a Linux box in a data center, or your coworker’s Mac that has the one folder you need right now. This guide covers four reliable options, how to choose between them, and how to avoid the classic mistakes (like typing an address that looks correct… but isn’t).
Quick checklist before you connect
Before we jump into the four methods, take 30 seconds to collect the basics. It’ll save you 30 minutes of “Why is this not working?!”
- Server address: a hostname (like files.company.local) or IP address (like 10.0.0.12).
- Connection type: file sharing (SMB/NFS/WebDAV), command-line access (SSH), or full remote desktop (VNC/RDP).
- Credentials: username/password, or an SSH key, or a corporate login.
- Network access: are you on the same network, or do you need a VPN first?
- Permissions: you might reach the server but still get “access denied” to a specific folder.
Way #1: Use Finder “Connect to Server” (best for shared folders)
If your goal is “I want that shared folder to show up like a drive on my Mac,” Finder is your easiest on-ramp. This method is perfect for office file servers, NAS devices, and shared team directories.
How it works
Finder can mount network shares so they appear in the Finder sidebar, on your Desktop (depending on settings), and in Open/Save dialogsbasically anywhere you browse files.
Step-by-step
- Open Finder.
- In the menu bar, choose Go > Connect to Server… (or press Command + K).
- Enter the server address (examples below), then click Connect.
- Choose how to authenticate (Guest or Registered User), enter your credentials, and select the share if prompted.
- The share mounts like a drive. To disconnect later, eject it in Finder.
Server address examples (copy these formats)
- SMB (Windows shares / most NAS devices):
smb://server-name/share-nameorsmb://10.0.0.12/share-name - NFS (common in Linux/Unix environments):
nfs://server-name/path - WebDAV (often used for web-based file storage):
http://server-name/pathorhttps://server-name/path
Pro moves for Finder connections
- Save it for later: In the Connect to Server window, add frequently used servers to your favorites so you’re not retyping the same thing forever.
- Make it automatic: If you need the share every day, add it to your Login Items after you mount it. (Mount it once, then look for options to reopen at login depending on your macOS version.)
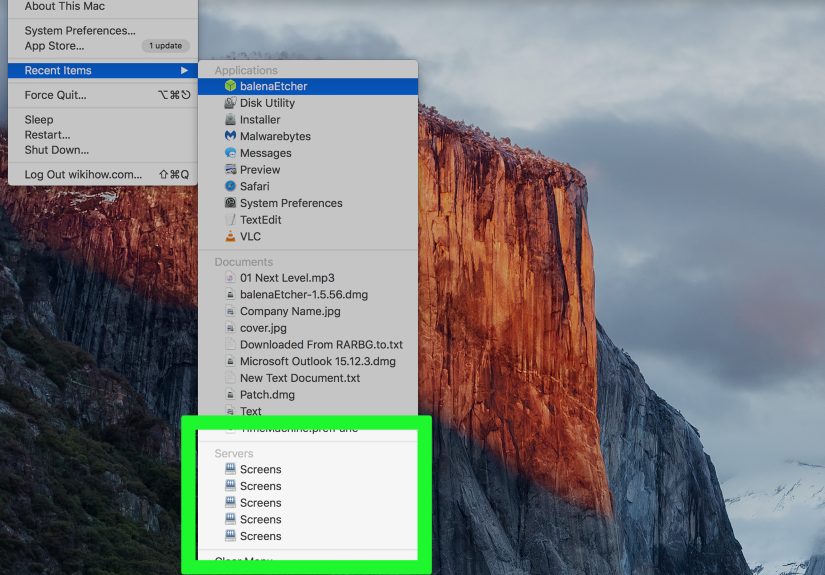
- Browse instead of typing: In Finder, click Network in the sidebar to discover shared computers/servers on your local network.
Troubleshooting (the usual suspects)
- You forgot the prefix:
smb://matters. A plain hostname may not resolve correctly. - VPN required: Some corporate shares only work after you connect to VPN.
- Authentication format: Some Windows domains want usernames like
DOMAINusername. - It connects, but folders are missing: That’s usually permissions, not your Mac being “dramatic.”
Way #2: Use Terminal with SSH (best for admins, developers, and troubleshooting)
If Finder is the friendly front desk, SSH is the employee entrance with the keycard reader. SSH (Secure Shell) gives you command-line access to a servergreat for Linux servers, cloud instances, routers, and basically anything you’d normally manage with a terminal.
The basic SSH command
Open Terminal and use:
The first time you connect, you may see a prompt about the host fingerprint. That’s normal: it’s your Mac asking, “Are we sure this is the server we think it is?” If you’re confident you typed the right address, you accept and continue.
Common SSH upgrades you’ll actually use
- Specify a port:
ssh -p 2222 [email protected] - Use an SSH key:
ssh -i ~/.ssh/id_ed25519 [email protected] - Exit cleanly: type
exit(or pressControl + D).
File transfers without leaving the Terminal
Once you can SSH, you can usually transfer files securely using SFTP or SCP. These are lifesavers when you need to move logs, configs, or “the file that absolutely must be on the server five minutes ago.”
- SFTP interactive session:
sftp [email protected] - Copy a file up (SCP):
scp ./report.csv [email protected]:/home/username/ - Copy a file down (SCP):
scp [email protected]:/var/log/system.log ./
When SSH is the right choice
- You need to run commands, restart services, check logs, or manage a remote machine.
- You want the most secure “default” option for remote access over the internet.
- You’re automating tasks (scripts, cron jobs, deploys) and need something that plays well with tools.
Way #3: Use Screen Sharing (Mac-to-Mac) or Remote Desktop (Mac-to-Windows)
Sometimes you don’t need “files.” You need the whole computerthe exact desktop, apps, settings, and that one program that only exists on the remote machine. That’s where remote desktop tools come in.
Option A: Screen Sharing (built-in Mac-to-Mac)
macOS includes a Screen Sharing app that can connect to another Mac (or many VNC-compatible machines). It’s ideal for helping a family member, supporting a teammate, or accessing your own second Mac across the network.
- Open Screen Sharing (it’s in
/Applications/Utilities). - Enter the Mac’s address (hostname or IP), then connect.
- Authenticate with an allowed account on the remote Mac.
On the remote Mac, Screen Sharing must be enabled in system sharing settings. One important gotcha: Screen Sharing and “Remote Management” can conflict depending on configurationso if a connection fails, check what’s enabled.
Option B: Windows Remote Desktop from a Mac (RDP)
To connect from a Mac to a Windows PC (or a Windows virtual desktop), you typically use Microsoft’s client. In recent years, Microsoft has been transitioning from the older “Remote Desktop” app to the newer Windows App for accessing Windows resources.
The workflow is usually: install the Windows App, add a PC by name/IP, then connect and sign in. Once connected, you get the Windows desktop in a window (or full screen) on your Mac.
When remote desktop is the right choice
- You need to use apps that only exist on the remote machine (Windows-only tools, internal systems, etc.).
- You’re doing support or troubleshooting and need to see what the other user sees.
- You want a “sit down at that computer” experience without leaving your chair.
Way #4: Use a dedicated file transfer app (best for SFTP/FTP/WebDAV power users)
Finder is great for mounted shares, and Terminal is great for command-line control. But if your day-to-day work involves moving files to and from serversespecially over SFTP, FTP, or WebDAV a dedicated file transfer client can feel like switching from a pocketknife to a full toolbox.
Why use an app instead of Finder or Terminal?
- Bookmarks and profiles: save servers with names like “Production” (and stop guessing which IP is which).
- Drag-and-drop transfers: with progress indicators, retry options, and queueing.
- Safer workflows: less “oops, I SCP’d the file into the wrong directory.”
- More protocols and integrations: many apps support classic servers plus cloud storage targets.
Popular choices (examples)
- Transmit: a polished macOS-native option for managing many server types and cloud services.
- Cyberduck: a widely used option that supports SFTP and other services with a friendly UI.
- Fetch: a long-running, simplicity-first file transfer client for FTP/SFTP workflows.
Bonus: If you code, “connect” can mean editing remote files directly
Developers often connect to a server by opening a remote folder in an editorso you can browse, edit, run, and debug against the server without constantly downloading and uploading files. Tools like VS Code’s Remote SSH feature do exactly that: your code editor becomes the “client,” and the server becomes your working environment.
Which connection method should you use?
If you’re choosing based on vibes alone, you’ll eventually end up using the wrong tool at the worst time. Here’s a more rational approach (with a tiny bit of attitude).
- You need shared folders that feel like a drive: use Finder (SMB/NFS/WebDAV).
- You need command-line control (Linux servers, cloud instances): use SSH in Terminal.
- You need the full desktop experience: use Screen Sharing (Mac) or Windows App (Windows).
- You move files constantly and want a smoother workflow: use a dedicated transfer app.
Security and sanity tips (please don’t skip these)
- Prefer secure protocols: SSH/SFTP over plain FTP whenever possible.
- Use a VPN for private networks: especially when connecting to internal servers from home or public Wi-Fi.
- Don’t ignore warnings: SSH “host key changed” messages can indicate a real problem (or a rebuilt server).
- Separate environments: name bookmarks clearly (Dev/Staging/Production) so you don’t upload the wrong build to the wrong place.
- Use least privilege: connect with accounts that have only the permissions you actually need.
Conclusion
Connecting to a server on a Mac isn’t one featureit’s a small toolkit. Finder is the easiest way to mount shared drives, Terminal gives you powerful SSH access, remote desktop tools let you control another computer as if you’re sitting in front of it, and dedicated clients make frequent file transfers smoother and less error-prone.
Once you know which “server” problem you’re solvingfiles, commands, or a full desktopthe correct method becomes obvious. And suddenly “I can’t access the server” turns into “Okay, which of the four ways are we using today?”
Real-world experiences (the part you only learn after doing this a lot)
After you’ve connected to servers on a Mac a few dozen timesat the office, at home, at an airport, on a hotspot that absolutely hates youyou start collecting small lessons. They’re not dramatic enough to be in a movie montage, but they are dramatic enough to save your afternoon.
The first lesson: “Server” is not one thing. The word gets used for everything from “a shared folder in the accounting department” to “a Linux machine running an API” to “a Windows desktop in the cloud.” Early on, I treated them the same way: I’d open Finder, hit Command + K, and try whatever address I was given like I was casting spells. Sometimes it worked. Sometimes Finder stared back politely, like, “That’s adorable. I don’t speak that protocol.”
The second lesson: prefixes matter more than they should. Typing smb:// feels like a tiny detail, but it’s the difference between “connected in five seconds” and “why can’t it find the server?” Same with WebDAV paths: missing a folder segment can land you at a dead end that looks like a permissions issue. The fix is boringdouble-check the exact formatbut boring fixes are the best fixes because they end quickly.
The third lesson: VPN first, then everything else. If you’re offsite and a share won’t mount, you can spend an hour troubleshooting authentication, DNS, and Finder quirks… or you can connect to the VPN and immediately watch the server appear like it was there the whole time. Many organizations purposely block internal services unless you’re on their network. That’s not your Mac being difficult; it’s security doing its job.
The fourth lesson: SSH is the most honest tool. Finder and GUI apps can fail with vague messages. SSH tends to tell you what’s happeningwrong username, wrong key, port blocked, host unreachable. The first time you see a scary-looking fingerprint prompt, it feels like you’re about to launch a missile. But once you understand it’s a verification step, you start appreciating how direct SSH is. When it works, you’re in. When it doesn’t, it usually gives a clue why.
The fifth lesson: remote desktop is a superpower… and a trap. It’s amazing for using Windows-only software or fixing something on a remote Mac. It’s also easy to overuse. If what you really need is one file, remote desktop is like driving to the store in a tank. When I’m disciplined, I mount the share in Finder or use SFTP and I’m done in minutes. When I’m not, I remote into a machine, get distracted by its desktop, and somehow end up reorganizing someone else’s icons.
Final lesson: name your connections like you’ll forget tomorrowbecause you will. “prod,” “prod2,” “newprod,” and “prod-final-really” are not a strategy. Whether you’re saving favorites in Finder, profiles in a transfer client, or entries in an SSH config, clear names prevent the kind of mistake you only make once (and then remember forever).