Table of Contents >> Show >> Hide
- Macro vs. Close-Up: What Counts as “Macro,” Anyway?
- Gear That Helps You See the World on “Tiny Mode”
- Settings That Keep Tiny Details Sharp (Without Making You Cry)
- Focus Stacking: When One Photo Isn’t Enough
- 50 Stunning Macro Photo Ideas
- Quick Editing Workflow for Clean, Crisp Macro Photos
- Common Macro Mistakes (And the Fixes)
- Ethics and Safety: Tiny Subjects, Big Respect
- Experiences With Macro Photography: What It Feels Like to Chase Tiny Wonder
- SEO Tags
Macro photography is basically a permission slip to be nosy. It lets you lean in so close that a ladybug’s shell looks like a glossy sports car, a flower’s pollen resembles sci-fi coral, and a pencil tip becomes a craggy mountain range. The best part? You don’t need an exotic destination. Your backyard, kitchen counter, or a nearby park can turn into a tiny-detail theme parkno height requirement, just patience.
This guide pulls together time-tested macro techniques (lighting, focus, stability, and focus stacking) and then hands you a list of 50 macro photo ideas designed to make your portfolio look like you own a microscope with excellent taste.
Macro vs. Close-Up: What Counts as “Macro,” Anyway?
In photography terms, “true macro” usually means 1:1 magnificationyour subject projects onto the camera sensor at life size. In real life, that means tiny things look huge in your frame: insect eyes, fabric weave, the ridges on a coin. “Close-up photography” is the bigger umbrella: you’re close, but not necessarily at 1:1. Either way, the creative goal is the same: reveal detail your brain normally edits out for storage space.
Gear That Helps You See the World on “Tiny Mode”
1) A macro lens (or a clever substitute)
A dedicated macro lens is the cleanest path to sharp details and comfortable working distance. Many macro lenses are designed to hit 1:1 and stay sharp edge-to-edge. If you’re not ready to commit, you can still get surprisingly close with extension tubes, close-up filters, or even a phone with a clip-on macro lensjust expect more trial-and-error (and more “why is this blurry?” moments).
2) Extension tubes: the “budget teleport” to closer focus
Extension tubes move your lens farther from the sensor so it can focus closer. They’re great for experimenting because they don’t add glassjust distance. The tradeoff is you lose infinity focus and some light, so you’ll lean more on good lighting or higher ISO.
3) Stability tools: tripod, monopod, or “human tripod” technique
At macro distances, tiny movement becomes big movement. A tripod helps, but so does bracing your elbows, using a remote/timer, and gently rocking your body forward and back to nail focus. If you go deeper into macro, a focusing rail can help you make precise micro-adjustments.
4) Lighting: soft light is the secret sauce
Macro subjects love diffused light. Direct flash can create harsh reflections (especially on shiny bug eyes and petals). A diffuserstore-bought or DIYspreads and softens light so details pop without looking like they’re under interrogation. Speedlights, ring lights, and small LEDs can all work; the key is controlling softness and direction.
Settings That Keep Tiny Details Sharp (Without Making You Cry)
Aperture: depth of field vs. diffraction
Macro depth of field is famously thin. Stopping down (like f/8–f/16) can help keep more in focus, but going too small can soften detail due to diffraction. Many photographers aim for a “sweet spot” and then use focus stacking when they need more depth.
Shutter speed and ISO: freeze what needs freezing
If your subject moves (windy flower, energetic ant), prioritize shutter speed. If you’re adding flash, you can often freeze motion with flash duration while keeping ambient exposure under control. For natural light, raise ISO before you accept a shutter speed that turns your masterpiece into impressionism.
Focus: manual, live view, and micro-adjustment
Autofocus can hunt at close distances. Many macro shooters switch to manual focus, use live view/zoom, and “move the focus” by gently shifting the camera. If your camera supports focus peaking or magnified live view, use it like it’s your favorite cheat code.
Focus Stacking: When One Photo Isn’t Enough
Focus stacking combines multiple images taken at slightly different focus points into one photo with more of the subject sharp. It’s popular for insects, products, textures, and anything where you want front-to-back detail without stopping down into mushy diffraction. You can do it with in-camera focus bracketing (if available) or by manually stepping focus (or camera position) and blending later in software.
50 Stunning Macro Photo Ideas
Below are fifty shootable macro subjectssome found outdoors, some in your home, and some hiding in plain sight. For each idea, the goal is the same: hunt for texture, pattern, and tiny drama.
Nature’s Micro-Textures (1–10)
- Dew beads on a spiderweb backlight for sparkle; keep light soft.
- Butterfly or moth wing scales shoot parallel to the wing for pattern.
- Bee pollen “pants” fast shutter or flash; respect the bee’s space.
- Mushroom gills side light to emphasize ridges and layers.
- Fern unfurling (fiddlehead) focus on the spiral; watch for breeze.
- Leaf veins try backlighting to reveal the “map” inside.
- Pinecone geometry shoot from above for repeating patterns.
- Frost crystals early morning; avoid breathing on your subject.
- Raindrops on petals diffuse light to prevent blown highlights.
- Tree bark micro-landscapes look for cracks, lichens, tiny worlds.
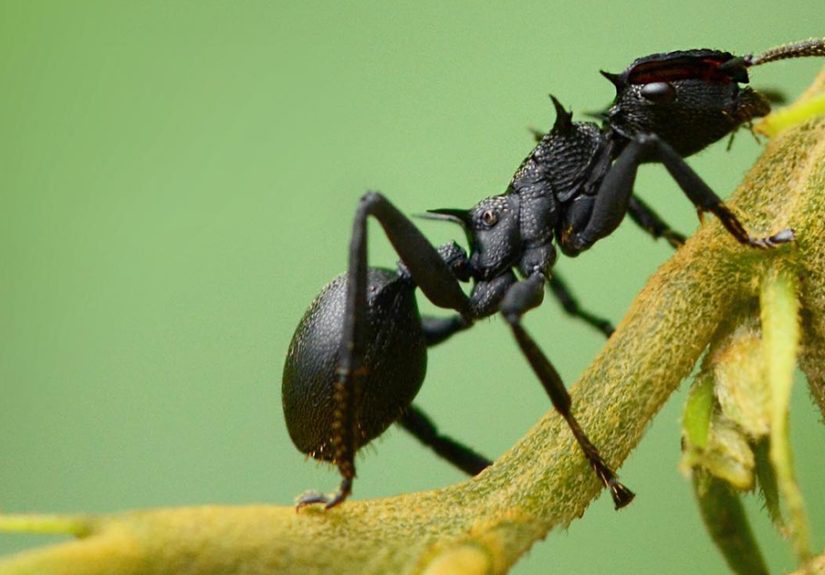
Insects and Tiny Wildlife (11–20)
- Dragonfly eyes angle for iridescence; focus on the nearest eye.
- Ladybug shell texture control reflections with a diffuser.
- Ant trail storytelling frame a “path”; shoot bursts for timing.
- Jumping spider portrait low angle; focus on the front eyes.
- Snail shell spirals soft side light makes curves pop.
- Caterpillar hairs keep distance; some species can irritate skin.
- Praying mantis “hands” look for gesture; keep background clean.
- Butterfly proboscis patience; focus where it meets the flower.
- Beetle armor polarizer can help tame glare on shiny shells.
- Frog skin texture (from a safe distance) don’t touch; use longer macro.
Flowers, Plants, and Garden Details (21–30)
- Flower stamen and pollen grains center the “fireworks” of detail.
- Succulent rosette symmetry shoot straight-on for satisfying geometry.
- Rose petal edges side light reveals delicate ruffles.
- Sunflower center spirals fill the frame; let pattern lead.
- Milkweed seeds and silk use calm air; focus on silky strands.
- Cactus spines (carefully) strong direction light for shadow texture.
- Herb leaf fuzz (sage, mint) backlight to make fuzz glow.
- Seed pods cracking open tell a “before/after” with two angles.
- Water droplets as mini-lenses try to reflect a colorful background.
- Leaf edges with bite marks zoom in on nature’s “editing notes.”
Everyday Objects That Become Abstract Art (31–40)
- Pencil graphite shoot the tip; it looks like volcanic rock.
- Salt and sugar crystals rake light across for tiny “city skylines.”
- Fabric weave denim, linen, wool; patterns hide in plain sight.
- Vinyl record grooves angle light for repeating lines and shine.
- Coin ridges and wear side light reveals years of pocket travel.
- Soap bubbles capture rainbow film; shoot fast before they pop.
- Feather barbs backlight for delicate structure (ethical sourcing only).
- Paper fibers tear an edge and photograph the “forest” of pulp.
- Rust and peeling paint macro abstracts turn decay into design.
- Ice cube fractures light from behind for crystal drama.
Food, Tools, and “Whoa, That’s What That Looks Like?” (41–50)
- Strawberry seeds and surface texture soft light avoids harsh shine.
- Citrus pulp cut slice; shoot the translucent “cells” with backlight.
- Chocolate bloom patterns macro makes swirls look like marble.
- Coffee grounds side light for texture; aim for “mini boulders.”
- Popcorn craters it’s basically edible cloud geography.
- Knife edge reflections (carefully) angle for highlights; keep fingers safe.
- Watch gears or jewelry detail stable setup; consider focus stacking.
- Keyboard key texture capture tiny scratches that tell a story.
- Paintbrush bristles shoot from the tip; it becomes a fiber forest.
- Printed ink dots (newspaper/magazine) macro reveals the secret pixel world.
Quick Editing Workflow for Clean, Crisp Macro Photos
Start simple: crop to emphasize pattern, correct exposure, and tame highlights (macro reflections can get spicy). Add sharpening carefullymacro images can look crunchy fast. If you shot a stack, align and blend with software, then inspect edges for “halo” artifacts. Finally, clean backgrounds: a subtle vignette or gentle background smoothing can keep attention on the tiny hero of your frame.
Common Macro Mistakes (And the Fixes)
- Blurry “almost” focus: use live view magnification and take small bursts.
- Harsh glare: diffuse the light, change angle, or use a reflector.
- Messy backgrounds: shift your position by inches; it changes everything.
- Too much stopping down: consider stacking instead of f/22 softness.
- Wind sabotage: block breeze with your body or a small screen.
Ethics and Safety: Tiny Subjects, Big Respect
Macro photography works best when it’s gentle. Avoid handling insects or wildlife, don’t damage plants for a shot, and be mindful of protected habitats. If you’re photographing stinging/biting critters or unfamiliar plants, prioritize safety over bravery. (Your portfolio doesn’t need an ER cameo.)
Experiences With Macro Photography: What It Feels Like to Chase Tiny Wonder
Macro photography has a funny way of changing how you move through the world. After a few sessions, you stop “walking to the car” and start “walking through an endless exhibit of textures.” Sidewalk cracks become canyon systems. A single leaf becomes a layered sculpture. You’ll catch yourself pausing mid-step because a glint of light on a spiderweb looks like jewelry someone accidentally hung between two branches. It’s not that the world got more interestingyou just finally zoomed in.
Most people’s first macro experience is also their first experience with micro-frustration. The breeze that felt pleasant five minutes ago suddenly becomes an evil genius, nudging your flower just enough to ruin focus. Your depth of field feels like a razor blade. You discover that “steady hands” is a myth invented by people who don’t shoot at 1:1 magnification. But then you learn the small tricks: brace elbows, exhale slowly, take short bursts, and let the camera do the heavy lifting when you can.
Lighting is another “aha” moment. At first, you might chase bright sunlight, thinking more light equals better photos. Then you see those harsh reflections and blown highlights and realize macro prefers soft lightlike an overcast day or a flash that’s been politely diffused. The day you try a simple DIY diffuser and watch a shiny beetle’s shell turn from glaring mirror to velvety detail is the day you start treating light like a sculpting tool instead of a flashlight.
There’s also a quiet joy in the patience macro requires. You wait for an insect to settle. You watch how it moves, where it pauses, how it tilts toward light. You start noticing behavior and rhythmtiny decisions happening in tiny time. Even with still subjects, you begin to “see” composition differently: backgrounds matter more, angles matter more, and a shift of one inch can transform chaos into clean color.
And then there’s focus stackingequal parts magic and discipline. The experience usually goes like this: you shoot a stack, you blend it, and you stare at the result like it just performed a card trick. Suddenly the entire subject is crisp: the ridges, the hairs, the texture you couldn’t even see while shooting. It teaches you that macro isn’t only about the moment you press the shutterit’s also about planning, consistency, and the satisfaction of building clarity from a series of near-misses.
Over time, macro photography becomes less about “finding rare subjects” and more about “finding rare ways to look.” The best experiences come from ordinary places: a kitchen table, a garden, a local park. You don’t need more stuff or farther traveljust the willingness to slow down and treat tiny details like they’re worth your attention. Because they are. And honestly? Once you’ve seen the world this way, it’s hard to go back to normal zoom.