Table of Contents >> Show >> Hide
- What You Need to Cure Gel Polish Successfully
- Quick Reality Check: Are You Using True Gel Polish?
- Step-by-Step: How to Dry (Cure) Gel Nail Polish Properly
- Step 1: Prep Like a Pro (This Is Where Long Wear Is Born)
- Step 2: Apply Base Coat (Thin Means “Cures Correctly”)
- Step 3: Color Coat #1 (Thin, Even, Boringin a Good Way)
- Step 4: Color Coat #2 (And Maybe #3 for Dark or Neon Shades)
- Step 5: Apply Top Coat (Shiny Armor)
- Step 6: Wipe the Sticky Layer (Only If Needed)
- Step 7: Finish with Oil (Yes, Even If You’re “Not an Oil Person”)
- How Long Does Gel Nail Polish Take to Dry?
- How to Tell If Gel Polish Is Fully Cured
- Troubleshooting: Why Your Gel Nail Polish Isn’t Drying
- Lamp Mistakes That Quietly Ruin Gel Manicures
- Safety Notes (Because Pretty Nails Shouldn’t Come With Regrets)
- FAQ: Gel Polish Drying Questions People Google at 2:00 AM
- Conclusion: Your “Perfect Cure” Checklist
- Real-Life Experiences and Tips (500+ Words)
Let’s clear up the #1 gel manicure misunderstanding right away: gel polish doesn’t really “dry.”
It cures. Translation: it hardens through a chemical reaction triggered by a UV/LED lamp,
not by air, patience, or pleading with the nail gods.
If your gel manicure is coming out sticky, wrinkled, or mysteriously soft (like a brownie that’s “almost done”),
it’s usually not because you’re cursed. It’s because something in the curing setuplamp, layers, timing, prep,
or product compatibilityis off.
This guide walks you through the exact steps to cure gel nail polish properly, plus fixes for the most common
“why are my gel nails not drying?” disasters. Expect practical tips, a little humor, and fewer ruined thumbs.
What You Need to Cure Gel Polish Successfully
Before we begin, grab these basics. You don’t need a salon… but you do need the right tools.
Essentials
- UV/LED nail lamp (reputable brand; ideally 36W+ or manufacturer-recommended)
- Gel base coat
- Gel color (your shade)
- Gel top coat (either “wipe” or “no-wipe”)
- Isopropyl alcohol (commonly 91% or a gel cleanser)
- Lint-free wipes (cotton can leave fuzzaka tiny villains)
Nice-to-Haves (That Save Your Manicure)
- Nail file (180/240 grit) + buffer
- Cuticle pusher + cuticle remover (optional)
- Nail brush or soft dust brush
- Cuticle oil (your “we did it” finishing move)
- Fingerless UV gloves or SPF (for lamp exposure protection)
Quick Reality Check: Are You Using True Gel Polish?
Some products say “gel-like,” “gel finish,” or “long-wear gel” but are actually regular polish.
Those air-dry and don’t require a lamp. True gel polish says things like:
- “Cure under LED/UV lamp”
- “Soak-off gel”
- Specific cure times per coat
If your bottle doesn’t mention curing, your lamp is basically just giving your nails a tiny tanning session for no reason.
Step-by-Step: How to Dry (Cure) Gel Nail Polish Properly
Step 1: Prep Like a Pro (This Is Where Long Wear Is Born)
Prep is unglamorous. Prep is also the difference between a 14-day manicure and a 48-hour tragedy.
- Wash hands and dry thoroughly.
- Remove old polish and clean under nails.
- Shape nails with a file. (Pick a shape and commit. Your nails deserve consistency.)
-
Push back cuticles gently. Remove dead skin from the nail platedon’t paint over it.
Gel doesn’t stick well to cuticle residue, lotion, or yesterday’s life choices. -
Lightly buff the nail surface to remove shine. Don’t over-buff; you’re not sanding a deck.
You just want a smooth, slightly matte surface. - Brush off dust, then wipe nails with alcohol or cleanser to remove oils.
Step 2: Apply Base Coat (Thin Means “Cures Correctly”)
Apply a thin layer of base coat. Think “whisper,” not “frosting.”
Too thick = under-cured gel hiding underneath a cured shell.
- Keep product off the skin and cuticle area.
- Cap the free edge (a swipe along the tip) to help prevent chipping.
- Cure under your lamp for the time listed by the brand.
Step 3: Color Coat #1 (Thin, Even, Boringin a Good Way)
Apply the first color coat in a thin, even layer. If it looks a little sheer, that’s fine.
Gel color is usually built in 2–3 thin coats, not one chunky coat.
- Avoid flooding the cuticles.
- If you do touch skin, wipe it off before curing.
- Cure for the brand’s recommended time.
Step 4: Color Coat #2 (And Maybe #3 for Dark or Neon Shades)
Repeat: thin layer, clean edges, cure. Dark shades (black, navy, deep red) and heavily pigmented neons often need
a little extra attention because light has to travel through more pigment.
Pro move: if you’re using very dark polish, do two ultra-thin coats instead of two “normal” coats.
Your lamp can only cure what light can reach.
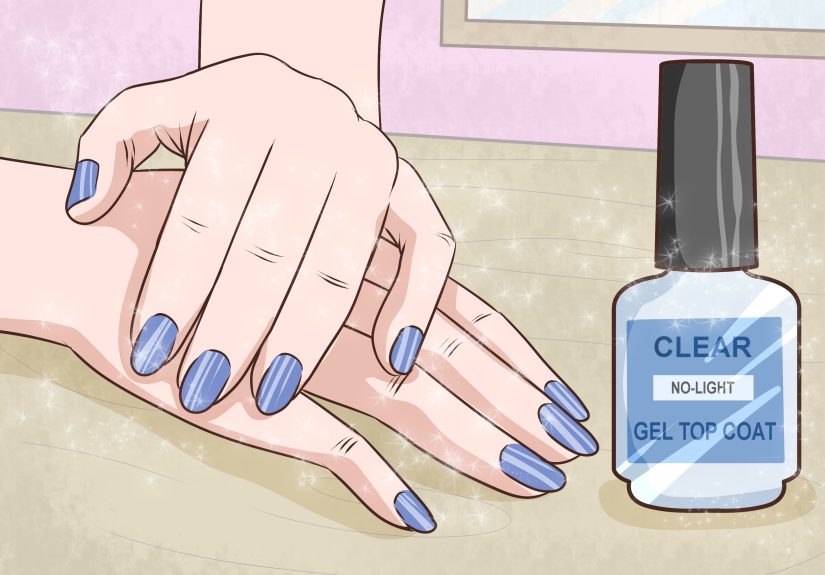
Step 5: Apply Top Coat (Shiny Armor)
Top coat locks everything in and gives you that “I have my life together” shine.
- Apply a thin layer, cap the free edge again, and cure.
-
If you’re using a no-wipe top coat, you’re done after curing.
If it’s a wipe top coat, you’ll have a tacky layer to remove (that’s normal).
Step 6: Wipe the Sticky Layer (Only If Needed)
Many gel systems leave a tacky “inhibition layer” after curing. This does not automatically mean your gel didn’t cure.
It’s a normal byproduct of how many gels polymerize in contact with oxygen.
How to remove it:
- Use a lint-free wipe.
- Dampen with isopropyl alcohol (or gel cleanser).
- Wipe each nail thoroughlyuse a fresh area of the wipe as you go.
Step 7: Finish with Oil (Yes, Even If You’re “Not an Oil Person”)
Massage cuticle oil around nails. It rehydrates skin after alcohol cleansing and makes the manicure look professionally finished.
Also it’s the moment where you admire your work and whisper, “I am unstoppable.”
How Long Does Gel Nail Polish Take to Dry?
With true gel polish, the “dry time” is basically the curing time per layer. Typical ranges:
- LED lamps: often around 30–60 seconds per coat
- UV lamps: often around 120 seconds per coat
That said, cure time depends on the brand, lamp type, lamp power, polish pigmentation, and how thick you apply it.
The most correct answer is: follow your product’s instructions, then troubleshoot if results still feel off.
How to Tell If Gel Polish Is Fully Cured
Gel can feel “hard” on top while still being under-cured underneath. Here are more reliable signs:
- After wiping: the surface should feel smooth and firm, not rubbery or dentable.
- Free edge check: the tip shouldn’t feel soft or peelable.
- No weird wrinkling: wrinkling often means the top cured but the layer beneath didn’t.
- No strong chemical smell lingering on nails: a persistent smell can be a sign of under-curing (not always, but pay attention).
Troubleshooting: Why Your Gel Nail Polish Isn’t Drying
If your gel nails are sticky, smudging, peeling, or wrinkling, don’t panic. Diagnose like a nail detective.
Here’s the cheat sheet.
| Problem | Most Likely Cause | Fix |
|---|---|---|
| Sticky after curing (even after wiping) | Under-cured layers, wrong lamp, too-thick coats, old/weak lamp | Apply thinner coats; increase cure time per brand guidance; ensure lamp matches gel; replace lamp/bulbs if needed |
| Sticky only on top (and you used a wipe top coat) | Normal inhibition layer | Wipe with alcohol/cleanser; or switch to a no-wipe top coat |
| Wrinkling or “ripples” | Top cured, underneath didn’t (often thick/dark polish) | Remove the wrinkled layer; reapply thinner coats; cure longer for dark shades |
| Peeling or lifting within days | Poor prep (oils/dust), flooding cuticles, not capping edges | Improve prep; avoid skin contact; cap edges; ensure nails are clean and dry before base coat |
| Dull or cloudy top coat | Wrong cleanser, too much wiping, residue, or over-buffing earlier | Use proper gel cleanser/alcohol sparingly; wipe gently; avoid cotton; apply a fresh top coat if needed |
| Burning sensation in lamp | Heat spike (common with some gels), thick product, sensitive nails | Use thin coats; try low-heat mode; cure in shorter bursts; stop if pain is intense |
Lamp Mistakes That Quietly Ruin Gel Manicures
1) Using the Wrong Lamp for the Product
Not all gels cure under all lamps. Some gels are formulated for specific wavelengths and lamp types.
If your polish brand recommends a lamp, that’s not marketing fluffit’s chemistry and light spectrum.
2) The Lamp Is Too Weak (or Just Tired)
Lamps lose effectiveness over time. If your gel suddenly starts acting weird after months of being fine,
your lamp may be agingespecially if it’s low wattage, off-brand, or has seen some things.
3) Hand Positioning Is Off (AKA “The Thumb Betrayal”)
Thumbs often cure poorly because the angle is different and the tip sits farther from the bulbs.
Cure thumbs separately if needed, and make sure the nail surface faces the light directly.
Safety Notes (Because Pretty Nails Shouldn’t Come With Regrets)
Avoid Skin Contact with Gel
Gel products contain acrylates and other ingredients that can cause skin sensitization and allergic reactionsespecially
if gel touches skin repeatedly or remains under-cured. Keep product on the nail plate only, and clean up before curing.
Protect Your Hands from UV Exposure
UV exposure from nail lamps is generally considered low for occasional use, but it’s still UV.
If you get gel manicures regularly, consider fingerless UV gloves or applying broad-spectrum sunscreen to the backs of your hands
(avoid getting sunscreen on the nail plate right before application).
Don’t Peel Off Gel Polish
Peeling gel off can strip layers of your natural nail, leaving nails thin, bendy, and prone to breakage.
Remove properly with soaking (if it’s soak-off gel) and patience, not rage and corner-picking.
FAQ: Gel Polish Drying Questions People Google at 2:00 AM
Can gel nail polish dry without a UV/LED lamp?
True gel polish needs a curing lamp. If it “dries” without one, it’s probably not true geljust a regular polish with a gel-like finish.
Why are my gel nails still tacky after curing?
If you used a wipe top coat, tacky can be normal (wipe it). If it stays tacky after wiping, it’s likely under-cured:
thin your coats, check lamp strength, confirm lamp compatibility, and follow brand cure times.
Should I wipe the sticky layer between coats?
Usually no. The sticky layer often helps the next coat adhere. Most people wipe only after the final top coatunless the brand says otherwise.
What’s the fastest way to cure gel polish?
Use the correct lamp, apply thin layers, and follow the brand’s cure times. Speed comes from proper technique, not from blasting extra-thick polish
and hoping the lamp performs miracles.
Conclusion: Your “Perfect Cure” Checklist
- Prep nails: clean, matte, oil-free
- Thin coats: base, color, color, top
- Correct lamp + correct timing
- Wipe inhibition layer only when appropriate
- Cuticle oil to finish (and to flex on your past self who used to skip it)
Once you get the curing process right, gel polish becomes almost unfairly convenient: glossy, durable,
and ready the second the timer dings. No sheet marks. No smudges. No standing around like a museum statue protecting wet nails.
Real-Life Experiences and Tips (500+ Words)
The first time I did gel nails at home, I was confident in the way only beginners can be.
I had a lamp, a color, and the belief that “thin coat” was more of a suggestion than a lifestyle.
I applied that polish like I was icing a cupcake. It looked amazing… until it didn’t.
The top felt dry, but when I bumped a nail against a drawer (because of course I did), I got a dent.
Then I got a wrinkle. Then I got that gummy feeling that makes you question reality:
“Is this cured… or is it just pretending?”
That was my introduction to the #1 gel lesson: gel cures with light penetration.
If you paint too thick, the light can’t fully reach through the layer, and you end up with a hardened shell on top
and soft product underneath. It’s like crème brûlée, except less delicious and more emotionally damaging.
The second lesson was the “thumb problem.” Every hand has that one nail that refuses to behave, and it’s usually the thumb.
I’d cure four fingers, feel proud, then realize my thumbs were still tacky or lifting at the edges days later.
The fix was embarrassingly simple: I started curing my thumbs separately, making sure the nail surface faced the bulbs directly.
Once I did that, my wear time improved immediately. Apparently, geometry matters. Who knew?
Then came my dark-color era. Black gel polish looks chic, dramatic, and expensive.
It also behaves like a tiny black hole that eats light. My first black manicure wrinkled on the second coat,
and I stared at it like it had personally offended me. The better approach ended up being:
two ultra-thin coats (almost sheer on the first pass), plus a slightly longer cure time
if my brand recommended it. That combo cured cleaner and actually looked smootherbecause thick polish doesn’t self-level well anyway.
I also learned that “sticky” isn’t always failure. There’s a moment in gel where you cure a layer,
touch it lightly, and think, “Oh no. It’s not dry.”
But if it’s a normal tacky inhibition layer, it’s doing its job: helping the next layer stick.
Once I stopped panic-wiping between coats, my adhesion improved and my manicures lasted longer.
(Wiping between every coat is like mopping a floor while you’re still painting the room.)
The most valuable habit I adopted was treating gel like a “clean-room hobby.”
I stopped applying lotion right before doing nails. I wiped each nail carefully. I kept polish off skin.
And yes, I started using lint-free wipes instead of whatever cotton thing was nearby.
Those tiny changes reduced lifting and made the finish look more professional.
Finally, I got serious about lamp safety and consistency. If I’m doing gels frequently,
I’ll use fingerless gloves or apply sunscreen to the backs of my hands earlierthen wash my fingertips
so the nail plate stays oil-free. I also set timers instead of guessing.
Because “I think it’s been 30 seconds” is how you end up with under-cured polish and regrets.
The biggest takeaway from all these experiments: gel nails aren’t hard, but they’re specific.
Once you respect the systemprep, thin coats, correct cureyou get that instant, glassy finish that feels like magic.
And if you mess up? Congrats. You’re officially part of the club. Wipe, reapply, cure again, and pretend it never happened.