Table of Contents >> Show >> Hide
If you’re looking to give back to your community, share your love of books, or simply create a fun and charming outdoor project, building your own Little Free Library is an ideal solution. These mini libraries are an excellent way to promote reading, foster connections with neighbors, and make your outdoor space more inviting. In this step-by-step guide, we’ll walk you through how to build a Little Free Library that’s both functional and attractive, ensuring it stands out in your neighborhood while providing a place for the exchange of books.
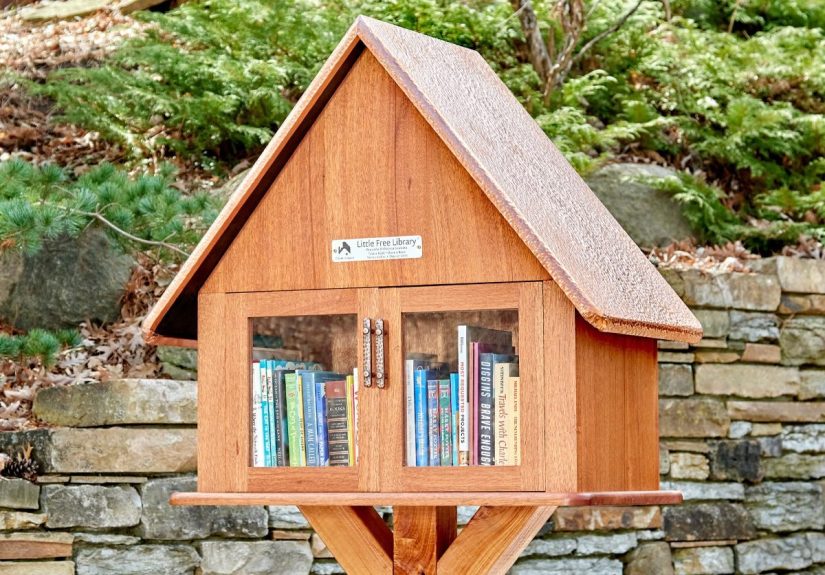
What is a Little Free Library?
A Little Free Library (LFL) is a small, community-based book exchange. These miniature libraries are often housed in decorative boxes or cabinets placed in public or semi-public spaces, such as front yards, parks, or community centers. The idea is simple: “Take a book, leave a book.” By creating a Little Free Library, you encourage the love of reading and share books with neighbors, fostering a sense of community.
Materials You’ll Need
Before you dive into the project, gather all the necessary materials. Here’s a list of what you’ll need to get started:
- Wooden planks (weather-resistant wood such as cedar or pine is recommended)
- Wood screws or nails
- Hinges (for the door)
- Shingles (optional, for the roof)
- Wood glue
- Paint and brushes (for decoration)
- Tools (saw, drill, hammer, level)
- Post or stand (for mounting the library)
- Glass or plexiglass (for the door, to protect books from weather)
Step-by-Step Instructions
Step 1: Design Your Library
Start by deciding on the design of your Little Free Library. There are numerous styles to choose from, from classic house-shaped boxes to more modern, minimalist designs. It’s essential to choose a design that matches the look of your yard or neighborhood while also considering functionality. You want the library to be weatherproof and spacious enough to hold a decent number of books. Measure your space and sketch your idea on paper before starting construction.
Step 2: Build the Frame
Once you have your design, it’s time to build the frame. Begin by cutting the wooden planks for the sides, back, and front of the library. Use a saw to ensure that each piece is the correct size. You’ll want the base to be sturdy, so make sure the frame is square and level as you assemble the pieces using wood screws or nails. Attach the front and back panels, and then secure the sides. This will form the main structure of the Little Free Library.
Step 3: Install the Roof
Next, add the roof. The roof can be a simple flat panel or a peaked roof, depending on your design. If you choose a peaked roof, you’ll need to cut the planks at an angle to create the desired slope. Secure the roof to the top of the structure using screws or nails. You can also add shingles for a more durable and weather-resistant finish. This will help protect the books inside from rain and sun damage.
Step 4: Add the Door
The door is a critical component of the Little Free Library, as it will protect the books inside from the elements. To build the door, cut a piece of wood to the size of the front opening. You can use glass or plexiglass for the window, which will let people see the available books without opening the door. Attach the door using hinges, and secure it in place with a latch or hook to keep it closed. Be sure the door is functional and easy to open but secure enough to withstand the weather.
Step 5: Mount the Library
Once the library structure is complete, it’s time to mount it. You can place it on a post or mount it directly to a wall, depending on your preference and space. If using a post, ensure that it’s tall enough for easy access but not so high that people can’t reach the books. Dig a hole in the ground, place the post in the hole, and fill it with cement to secure it in place. If you’re attaching it to a wall, use appropriate wall anchors and screws to ensure stability.
Step 6: Paint and Decorate
Once your Little Free Library is assembled and mounted, it’s time for the fun partpainting and decorating! Choose colors that will stand out and catch the eye. You can go with bright, cheerful hues or a more classic, rustic look. Add some fun designs, like flowers, animals, or inspirational quotes, to make the library even more inviting. Remember to use outdoor-grade paint to ensure it holds up against the weather.
How to Stock Your Library
Now that your Little Free Library is built, it’s time to fill it with books. Start by donating books you no longer need, and invite your neighbors to do the same. You can even create a sign to encourage people to take or leave books. Over time, your library will grow as more people contribute, and it will become a popular spot for book lovers of all ages.
Tips for Maintaining Your Little Free Library
Building your Little Free Library is just the first stepmaintenance is key to ensuring its longevity. Here are a few tips to help keep your library in good condition:
- Regularly check for damage: Make sure the structure is weatherproof and that the door is still functioning properly.
- Keep it organized: Arrange the books neatly and ensure they’re in good condition. Rotate books periodically to keep the selection fresh.
- Use weather-resistant materials: Choose durable wood and outdoor-grade paint to help your library stand up to the elements.
- Engage your community: Encourage neighbors to donate books and check in regularly to see how the library is doing.
Experiences with Building a Little Free Library
Building a Little Free Library can be an incredibly rewarding project. From the moment you see your library standing proudly in your yard, you’ll feel a sense of accomplishment and community pride. A friend of mine who built one in her neighborhood shared her experience with me. She mentioned how excited the kids in the neighborhood were when they first discovered the library. It became a gathering spot, with children and adults alike trading books and chatting about their favorite stories. The sense of connection it created was something she hadn’t anticipated but loved. Additionally, the library became a point of pride for her family, as they frequently added new books and decorated it for different holidays, which made the library an even more welcoming place.
Another builder of a Little Free Library I spoke with shared how easy it was to get neighbors involved. She placed a simple sign nearby asking people to donate books if they could, and within weeks, the library was fully stocked. She even found that people from outside the neighborhood were leaving books, expanding the reach of the community. One of the best things about building a Little Free Library is how it brings people together through the shared love of reading, and that’s something that will continue to grow for years to come.
Conclusion
Building your own Little Free Library is a fun and rewarding DIY project that not only enhances your yard but also brings your community together. It’s a simple way to promote reading, encourage neighborly interactions, and give back to your area. With the right tools, materials, and a little creativity, you’ll have a charming, functional Little Free Library that serves as a focal point for both book lovers and the general public. Happy building!