Table of Contents >> Show >> Hide
- What Makes Quartz Countertops Difficult to Cut?
- Can You Cut Quartz Countertops Yourself?
- Tools and Materials Professionals Use to Cut Quartz
- Before Cutting: Measure Twice, Then Measure Like Your Budget Depends on It
- Step-by-Step: How Quartz Countertop Cutting Is Properly Planned and Performed
- How to Cut a Sink Hole in Quartz
- How to Cut Quartz for a Cooktop
- Common Mistakes to Avoid When Cutting Quartz
- Should You Cut Quartz After It Is Installed?
- When to Hire a Professional Immediately
- of Practical Experience: What Real Quartz Cutting Projects Teach You
- Conclusion
Quartz countertops are gorgeous, durable, and just fancy enough to make your kitchen feel like it has its life togethereven when the junk drawer says otherwise. But cutting quartz is not the same as trimming laminate or shaving down a piece of wood. Quartz is heavy, dense, brittle at weak points, and capable of releasing hazardous silica dust when cut, drilled, ground, or polished.
That means this guide is not a “grab a random saw and hope for the best” tutorial. Cutting a quartz countertop should be done by a qualified adult fabricator or experienced installer using wet diamond tools, dust-control systems, proper personal protective equipment, and a stable work setup. For most homeowners, the smartest step-by-step guide is: measure carefully, understand the process, know what good workmanship looks like, and hire the right professional before an expensive slab turns into a very stylish mistake.
Still, whether you are planning a sink cutout, adjusting a cooktop opening, trimming an edge, or simply trying to understand what your installer is doing, this guide explains how quartz countertop cutting works, what tools are typically used, what safety precautions matter, and how to avoid the most common errors.
What Makes Quartz Countertops Difficult to Cut?
Quartz countertops are engineered stone surfaces made from crushed quartz mineral, resins, pigments, and binders. The result is a hard, nonporous slab that resists stains and everyday wear beautifully. The downside? That same hardness makes quartz unforgiving when cut incorrectly.
Unlike wood, quartz does not flex much. It can chip along the edge, crack near a corner, or break around unsupported cutouts. A sink opening, cooktop opening, faucet hole, or L-shaped inside corner creates stress points. That is why professional fabricators round inside corners, support the slab properly, and use the right diamond tools with water cooling.
Can You Cut Quartz Countertops Yourself?
Technically, quartz can be cut with specialized diamond tools. Practically, most homeowners should not cut quartz themselves. The risks are real: silica dust exposure, blade kickback, broken slabs, inaccurate measurements, voided warranties, and edges that look like they lost a fight with a sidewalk.
Professional fabricators typically use bridge saws, CNC machines, water-fed saws, waterjet equipment, diamond core bits, polishing pads, seam adhesives, and slab-handling tools. They also know how to support the stone, control heat, prevent vibration, and manage the slurry created by wet cutting.
If your project involves a major cut, new sink opening, undermount sink, cooktop cutout, seam adjustment, or installed countertop modification, hire a qualified countertop fabricator. If the job is minor, such as slightly enlarging a faucet hole or smoothing an edge, it still requires proper tools and dust control.
Tools and Materials Professionals Use to Cut Quartz
The exact setup depends on the job, the slab thickness, the manufacturer’s requirements, and whether the work is performed in a fabrication shop or on site. A typical professional setup may include:
- Water-fed diamond saw or bridge saw
- Diamond blade rated for engineered stone or quartz
- Diamond core bits for faucet, pipe, or accessory holes
- Wet polishing pads or diamond hand pads
- Clamps, padded supports, or an A-frame slab rack
- Measuring tape, straightedge, square, and templates
- Painter’s tape or layout tape for marking
- HEPA vacuum and wet cleanup tools
- Respirator, eye protection, hearing protection, gloves, and work clothing
The key words here are “water-fed” and “diamond.” Quartz should be cut with wet diamond tools to control dust and heat. Dry cutting can create dangerous airborne dust and can overheat the blade or stone.
Before Cutting: Measure Twice, Then Measure Like Your Budget Depends on It
Quartz is not cheap, so measurement is where the project is won or lost. Before any cut is made, the countertop layout should be confirmed against the cabinet dimensions, sink template, appliance specifications, faucet placement, wall conditions, overhang requirements, and seam locations.
Check the Cabinet and Wall Layout
Cabinets should be level, secured, and able to support the countertop. Walls are rarely perfectly straight, because apparently houses enjoy having a sense of mystery. A professional may scribe the slab or adjust the backsplash plan to account for small wall variations.
Use the Actual Sink or Appliance Template
Sink and cooktop manufacturers often provide paper templates, but a smart installer verifies the template against the actual product. A tiny layout error can create a gap, weak corner, or opening that is too large to fix cleanly.
Plan for Clearance
Quartz cutouts usually need a little extra clearance around sinks and cooktops for fit, movement, and installation. Many installation guidelines recommend allowing a small expansion gap rather than cutting the opening so tight that the appliance or sink stresses the stone.
Step-by-Step: How Quartz Countertop Cutting Is Properly Planned and Performed
The following steps describe the professional process at a high level. They are useful for homeowners who want to understand the work, inspect quality, or communicate clearly with an installer.
Step 1: Confirm the Cut Location
The fabricator confirms the exact cut line using field measurements, templates, cabinet dimensions, sink specifications, and appliance requirements. For a sink cutout, the centerline of the sink base cabinet is usually checked first. For a cooktop, the installer verifies the manufacturer’s required opening size and required distance from front, back, and side edges.
This step also includes checking whether the cut is too close to a seam, edge, corner, or unsupported span. A beautiful cut in the wrong location is still a problemjust a very accurate problem.
Step 2: Mark the Quartz Surface
Fabricators often apply painter’s tape or layout tape to the quartz surface before marking. This helps improve visibility and can reduce surface scratching during layout. The cut line should be clear, square, and double-checked from multiple reference points.
For sink and cooktop openings, inside corners should not be sharp. Rounded corners help reduce stress concentration and lower the chance of cracking. A common professional approach is to create rounded corners with a diamond core bit before connecting the cuts.
Step 3: Support the Slab
Quartz must be fully supported before cutting. Unsupported stone can vibrate, flex, or crack. A slab should never be balanced awkwardly on a couple of random buckets in the driveway. That may sound obvious, but home improvement disasters are often built on the phrase, “This should be fine.”
Professionals use padded work tables, rigid supports, clamps, suction systems, or fabrication equipment designed for stone. The goal is to keep the slab stable without putting pressure on fragile sections.
Step 4: Control Dust Before Cutting Starts
Dust control is not cleanup. It is prevention. Quartz cutting should be done with wet methods, proper ventilation, and dust collection where needed. A HEPA vacuum may be used for cleanup, but ordinary shop vacs are not enough for hazardous fine silica dust unless they are properly rated and filtered.
Professional crews should also avoid dry sweeping or using compressed air to blow dust around. That simply turns settled dust into airborne dust, which is the exact opposite of progress.
Step 5: Use Wet Diamond Cutting Tools
Quartz is typically cut with a diamond blade designed for engineered stone. Water helps cool the blade, reduce heat buildup, and suppress dust. The cut should be steady and controlled. Forcing the tool can chip the quartz, overheat the blade, or create an uneven edge.
For long straight cuts, fabrication shops often use larger machines for accuracy and stability. For holes, professionals use diamond core bits rather than trying to carve out circles with the wrong tool. For sink and cooktop openings, the corners are usually drilled or rounded first, then the straight sections are cut.
Step 6: Smooth and Polish the Edge
After the cut, the edge may need light polishing, easing, or smoothing. Exposed edges require more finishing than hidden cutouts. A sink opening for an undermount sink, for example, must look clean because the edge remains visible. A drop-in sink cutout is more forgiving because the sink rim covers the edge.
Polishing should also be performed with dust control in mind. Grinding and polishing can create silica dust too, so wet polishing and ventilation are important.
Step 7: Test Fit Before Final Installation
The installer checks the fit before adhesive, silicone, mounting brackets, or final seam work is completed. The sink, faucet, cooktop, or appliance should fit without forcing. If something needs adjustment, it is better to discover it before the slab is locked into place.
A proper test fit also checks overhangs, wall gaps, cabinet support, seam alignment, and whether the countertop sits flat. Quartz should not be forced into position.
Step 8: Clean the Work Area Safely
After cutting, the work area should be cleaned using wet methods or HEPA-filtered equipment. Dusty clothing, tools, and surfaces should be handled carefully so dust is not spread through the home. A professional crew should leave the space clean, safe, and ready for the next stage of installation.
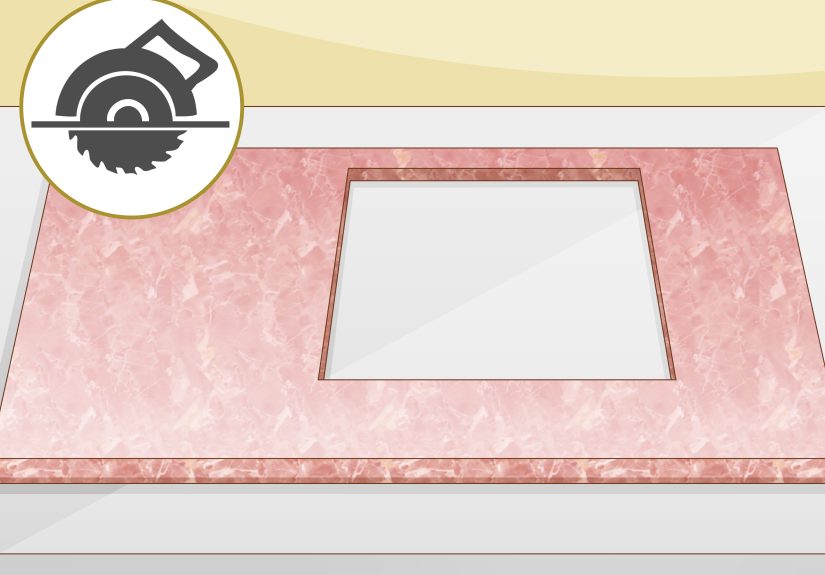
How to Cut a Sink Hole in Quartz
A sink cutout is one of the most common quartz modifications, and it is also one of the easiest places to make an expensive mistake. The process depends on whether the sink is undermount, drop-in, farmhouse, or integrated into a special cabinet design.
With undermount sinks, the edge of the cutout is visible from above, so the cut must be clean and polished. The reveal stylepositive, negative, or flushshould be decided before fabrication. With drop-in sinks, the rim covers the cut edge, but the opening still needs to be accurate and properly supported.
Inside corners should be rounded, not sharp. Sharp interior corners create stress points where cracks can begin. The slab should also have enough stone left between the sink opening and the front rail, back rail, seams, and side edges.
How to Cut Quartz for a Cooktop
Cooktop cutouts require careful attention to the appliance manufacturer’s specifications. The opening must allow the cooktop to sit properly while leaving enough quartz around the perimeter for strength. The installer also needs to consider heat clearances, cabinet structure, and access for electrical or gas connections.
Just like sink cutouts, cooktop openings should have rounded inside corners. If the cooktop opening is too tight, heat expansion or pressure from the appliance can stress the stone. If it is too large, the cooktop may not sit securely.
Common Mistakes to Avoid When Cutting Quartz
Dry Cutting
Dry cutting is one of the biggest mistakes. It creates hazardous dust and can overheat the blade and stone. Wet cutting and dust control are essential.
Using the Wrong Blade
A general-purpose blade is not the same as a diamond blade rated for quartz or engineered stone. The wrong blade can chip the slab, wander off line, or wear out quickly.
Creating Sharp Inside Corners
Sharp corners in sink or cooktop cutouts can become stress points. Rounded corners are a standard best practice because they reduce the chance of cracking.
Cutting Without Support
Quartz needs stable, even support. Cutting across an unsupported section can cause vibration, cracking, or breakage.
Ignoring the Manufacturer’s Instructions
Different quartz brands may have specific rules for cutouts, seams, overhangs, supports, adhesives, and acceptable tools. Ignoring those requirements can affect performance and warranty coverage.
Should You Cut Quartz After It Is Installed?
Cutting quartz after installation is possible in some cases, but it is more complicated and riskier than shop fabrication. The installed countertop may be close to finished cabinets, walls, flooring, appliances, and plumbing. Dust control is harder indoors, and vibration can affect seams or weak areas.
If an installed quartz countertop needs modification, such as enlarging a sink opening or trimming for a new appliance, contact a stone fabricator. The crew should protect the surrounding area, use wet methods where feasible, control dust, support the slab, and clean safely afterward.
When to Hire a Professional Immediately
Hire a professional if the project involves an undermount sink, cooktop, waterfall edge, seam relocation, large slab trimming, finished edge polishing, indoor cutting, or any work near a crack. Also hire a pro if the countertop is still under warranty. A DIY mistake can turn a repairable issue into a replacement.
Professional help is also the right choice if you do not have water-fed cutting tools, a HEPA dust-control plan, slab supports, respirator fit knowledge, or experience working with engineered stone. Quartz is not a good material for learning by trial and error. It is more of a “learn on someone else’s scrap piece in a controlled shop” material.
of Practical Experience: What Real Quartz Cutting Projects Teach You
The first thing experienced installers learn is that quartz rewards patience. The slab may look calm and elegant sitting on the cabinets, but during fabrication it behaves like a high-maintenance celebrity: heavy, expensive, beautiful, and not interested in being rushed. A clean quartz cut starts long before the blade touches the stone. It starts with a tape measure, a template, a level, and a person willing to check everything one more time.
One common real-world lesson is that walls are rarely straight. A homeowner may assume the countertop is a perfect rectangle, but the back wall might bow slightly, the corner may be out of square, or the cabinets may sit a fraction higher on one side. A good fabricator notices these issues before cutting. That is why templating matters. Digital templating can be excellent, but even a traditional template works when the installer understands what to look for.
Another experience-based tip is to respect the sink area. Many quartz failures happen around cutouts because the stone is narrower there. The front rail in front of a sink can be especially vulnerable if it is too thin or poorly supported. This is why fabricators think about more than the opening size. They also think about cabinet rails, sink clips, dishwasher placement, seams, and how someone might lean on the countertop later while washing a giant pan.
A third lesson is that dust control cannot be improvised at the end. Once silica dust is airborne, the problem has already started. Professionals plan wet cutting, ventilation, cleanup, and protective gear before the work begins. Indoors, this is even more important because dust can travel farther than expected. It can settle on floors, cabinets, tools, clothes, and HVAC returns. The best crews do not treat cleanup like a final sweep; they treat dust control as part of the cutting method.
Edge finishing is another area where experience shows. A hidden edge under a drop-in sink may not need to be beautiful, but an undermount sink edge absolutely does. The difference between a professional polish and a rough cut is easy to see every time light hits the countertop. Good polishing also softens sharp edges, making the surface more comfortable and less prone to tiny chips.
Finally, experienced installers know when not to cut. Sometimes the correct answer is to reorder, redesign, move a seam, change the sink style, or adjust the cabinet plan. That may sound frustrating, but it is better than forcing a risky cut and cracking a slab. Quartz is durable once installed, but during cutting and handling, it deserves respect. The best results come from careful planning, proper equipment, safe methods, and the humility to call a specialist when the job is bigger than expected.
Conclusion
Cutting a quartz countertop is a precision job that combines layout skill, stone-handling experience, diamond tooling, wet cutting, dust control, and patience. The basic idea sounds simplemark the slab and cut the openingbut the details matter. Rounded inside corners help prevent cracks. Proper support protects the slab. Wet diamond tools reduce heat and dust. HEPA cleanup and respiratory protection help manage silica hazards.
For most homeowners, the best way to cut quartz is to hire a qualified fabricator and use this guide to understand the process, ask smarter questions, and inspect the finished work. Quartz countertops can last for years and make a kitchen look fantastic, but only when they are fabricated correctly. Measure carefully, prioritize safety, respect the material, and remember: the countertop should be the thing that sparklesnot the cloud of dust in the room.