Table of Contents >> Show >> Hide
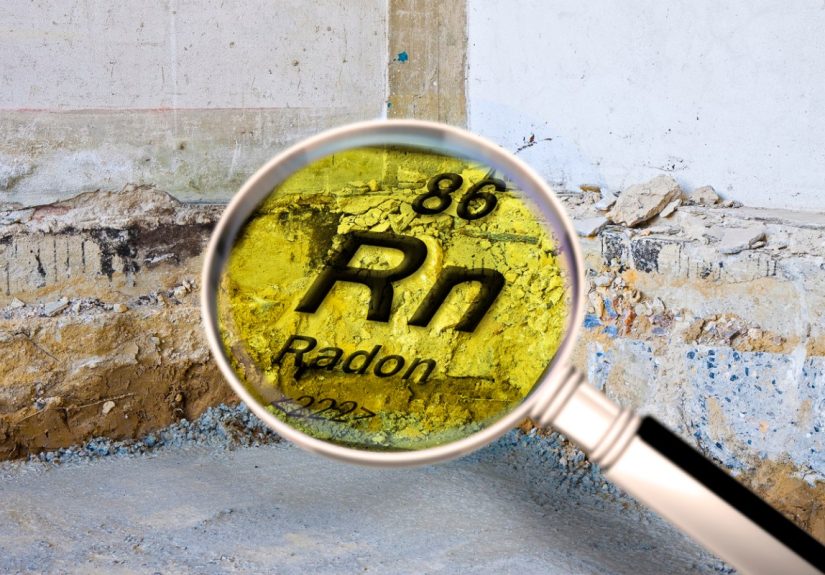
- What Is Radon, and Why Should You Test for It?
- When Should You Test for Radon?
- Types of Radon Tests
- How to Test for Radon in Your Home: Step-by-Step
- How to Read Radon Test Results
- What Happens If Radon Levels Are High?
- DIY Radon Testing vs. Hiring a Professional
- Common Radon Testing Mistakes to Avoid
- Special Situations: Basements, Apartments, and Home Sales
- Practical Experiences From Testing Radon at Home
- Conclusion
Radon is the kind of household problem that does not knock, ring the doorbell, or leave muddy footprints in the hallway. It is invisible, odorless, tasteless, and completely uninterested in your weekend plans. Yet this naturally occurring radioactive gas can build up inside homes and raise the risk of lung cancer over time. The good news? Testing for radon in your home is simple, affordable, and one of the smartest indoor air quality checks you can do.
If you can place a small device in a room, write down a start time, and mail a test kit to a lab, congratulationsyou already have most of the skills required. This guide explains how radon enters your home, what kind of radon test kit to use, where to place it, how to understand your results, and what to do if your numbers are higher than recommended.
What Is Radon, and Why Should You Test for It?
Radon is a radioactive gas that forms naturally when uranium breaks down in soil, rock, and groundwater. Outdoors, it usually disperses into the air and stays at low levels. Indoors, however, radon can sneak through cracks in foundations, gaps around pipes, crawl spaces, sump pits, construction joints, and other openings. Once inside, it can become trapped, especially in lower areas of the home.
The tricky part is that radon gives you no sensory warning. You cannot smell it like smoke, see it like mold, or hear it like a mystery drip behind the wall. Testing is the only reliable way to know whether your home has a radon problem.
Radon matters because long-term exposure can damage lung tissue. In the United States, radon is widely recognized as the second leading cause of lung cancer after smoking and a leading cause among people who have never smoked. The risk is even higher for smokers because tobacco smoke and radon together are a particularly unfriendly duolike two villains who unfortunately read the same playbook.
When Should You Test for Radon?
The best time to test for radon is before you are worried about it. That sounds annoyingly practical, but it is true. Every home should be tested, whether it is old, new, drafty, sealed tight, built on a slab, sitting over a basement, or perched next to a neighbor whose test came back low. Radon levels can vary dramatically from one house to the next, even on the same street.
Test your home if:
- You have never tested before.
- You are buying or selling a home.
- You spend time in a basement or lower-level living area.
- You finished a basement or changed your home’s ventilation.
- You installed new windows, insulation, or major air-sealing improvements.
- You had foundation repairs, flooding, or structural changes.
- You already have a radon mitigation system and need to confirm it is working.
Many experts recommend retesting every few years, and more often after major renovations or changes to heating, cooling, insulation, or foundation conditions. Radon is not a “test once and forget forever” situation. Homes change, soil conditions change, airflow changes, and your basement may eventually become a home gym, office, guest room, or storage cave for holiday decorations.
Types of Radon Tests
There are two main ways to test for radon in your home: short-term radon tests and long-term radon tests. Both can be useful, but they answer slightly different questions.
Short-Term Radon Test
A short-term radon test usually measures radon levels for 2 to 7 days, depending on the kit. This is the most common option for homeowners who want fast results. You can buy short-term radon test kits online, at hardware stores, through some state radon programs, or from National Radon Program Services.
Short-term kits are useful when you need a quick screening. They are also commonly used during real estate transactions because nobody wants a closing timeline held hostage by a tiny charcoal canister.
The downside is that radon levels fluctuate from day to day and season to season. Weather, barometric pressure, ventilation, heating systems, and open windows can all influence results. A short-term test gives you a snapshot, not a full family album.
Long-Term Radon Test
A long-term radon test usually remains in place for more than 90 days. Because it measures over a longer period, it provides a better estimate of your home’s average radon level throughout normal living conditions.
Long-term tests are especially helpful if your first short-term result is near the action level and you want a clearer picture before making decisions. They are not always practical during a home sale, but for homeowners who are staying put, they can offer more confidence.
Continuous Radon Monitors
Digital continuous radon monitors are also available. Some are used by certified professionals, while others are consumer devices designed for homeowners. These monitors can track radon patterns over time and show how levels rise or fall with weather, ventilation, or home use.
They can be convenient, but they should be used according to manufacturer instructions. If you need official results for a real estate transaction, legal requirement, or formal mitigation decision, a certified radon measurement professional may be the better choice.
How to Test for Radon in Your Home: Step-by-Step
Testing for radon is not complicated, but accuracy depends on following instructions carefully. Radon test kits are small, but they are not decorative coasters. Placement and timing matter.
Step 1: Choose the Right Radon Test Kit
Start by choosing either a short-term or long-term radon test kit. For most first-time testers, a short-term kit is a practical starting point. Look for a kit that includes laboratory analysis in the price, clear instructions, and return mailing details.
You may find low-cost kits through state radon programs, county health departments, university extension programs, or reputable national radon resources. Hardware stores and home improvement retailers also commonly sell them. Before buying, check whether lab fees and postage are included, because nobody likes surprise costs hiding in the fine print.
Step 2: Pick the Best Testing Location
Place the radon test in the lowest level of your home that is regularly used or could be used as living space. This may be a basement, family room, bedroom, office, playroom, or lower-level apartment. If your basement is unfinished but you spend time there doing laundry, hobbies, workouts, or storage missions, it may still be worth testing.
Do not place the test in a kitchen, bathroom, laundry room, crawl space, closet, or drafty area. Humidity, fans, vents, and frequent air movement can interfere with results. Instead, choose a room where the device can sit undisturbed.
Step 3: Position the Device Correctly
Follow the specific instructions that come with your kit, but in general, the device should be placed several feet above the floor, away from exterior walls, windows, doors, vents, fireplaces, direct sunlight, and high humidity. A table, shelf, or stand in the middle area of the room often works well.
Keep it out of reach of children, pets, and curious adults who see a small object and immediately ask, “What happens if I move this?” The answer is: please do not.
Step 4: Maintain Closed-House Conditions for Short-Term Tests
For short-term radon testing, closed-house conditions are usually required. This means keeping windows and exterior doors closed, except for normal entry and exit, before and during the test. Heating and air conditioning systems that recirculate indoor air can usually run normally, but fans that bring in outdoor air or exhaust large amounts of air may affect results.
Avoid testing during severe storms, unusually high winds, or unusual weather events if your kit instructions warn against it. The goal is to measure typical indoor conditions, not the atmospheric drama of the century.
Step 5: Record the Start and Stop Times
Radon test kits require accurate timing. Write down the start date and time when you open or activate the device. When the testing period ends, record the stop date and time. Many lab forms also ask for the room location, floor level, and basic home information.
Do not guess. “Sometime after lunch” may work for casual storytelling, but it is not ideal for lab analysis.
Step 6: Seal and Send the Kit Promptly
Once the test is complete, seal the device exactly as instructed and mail it to the lab right away. Delays can affect accuracy, especially with certain short-term kits. If your kit includes prepaid mailing, use it promptly. If not, follow the lab’s shipping instructions.
Results may arrive by email, mail, or an online portal, depending on the provider. Keep a copy for your records, especially if you plan to sell your home or compare future test results.
How to Read Radon Test Results
Radon is commonly measured in picocuries per liter of air, written as pCi/L. The EPA recommends fixing a home when the radon level is 4 pCi/L or higher. Because there is no known completely safe level of radon exposure, homeowners may also consider reducing levels between 2 pCi/L and 4 pCi/L when practical.
If Your Result Is Below 2 pCi/L
This is generally considered a low result. Keep the report and test again in the future, especially after renovations or major changes to the home.
If Your Result Is Between 2 and 4 pCi/L
This range is below the EPA action level but not risk-free. Consider a long-term test for a better average, especially if the room is used often. You may also talk with a radon professional about whether mitigation makes sense.
If Your Result Is 4 pCi/L or Higher
Take action. If you used a short-term test, a follow-up test is usually recommended to confirm the result. If the average of two short-term tests is 4 pCi/L or higher, or a long-term test is 4 pCi/L or higher, contact a qualified radon mitigation professional.
What Happens If Radon Levels Are High?
High radon levels can usually be reduced with a radon mitigation system. The most common type is active soil depressurization. In plain English, that means a pipe and fan system pulls radon from beneath the foundation and vents it safely above the roofline before it enters your living space.
A professional may also seal foundation cracks and openings, but sealing alone is usually not considered a complete fix. Think of sealing as helping the system work better, not as the entire superhero squad.
After mitigation, retest your home to confirm that radon levels dropped. A good contractor should explain how the system works, show you the warning device or manometer, and provide maintenance instructions. The fan should run continuously unless a qualified professional tells you otherwise.
DIY Radon Testing vs. Hiring a Professional
DIY radon testing is perfectly reasonable for many homeowners. The kits are inexpensive, easy to use, and widely available. If you follow directions carefully, you can get useful results without hiring anyone.
However, a certified radon measurement professional may be a better choice if you are buying or selling a home, dealing with a rental property, testing a multi-unit building, or need legally defensible results. Professionals may use continuous monitors that detect tampering, record hourly changes, and produce detailed reports.
To find a qualified provider, check with your state radon program or look for professionals certified through recognized organizations such as the National Radon Proficiency Program or the National Radon Safety Board. Some states have their own licensing requirements, so local rules matter.
Common Radon Testing Mistakes to Avoid
Opening Windows During the Test
Fresh air is lovely, but it can lower short-term readings and give you a misleading result. Keep windows closed when the instructions require closed-house conditions.
Testing in the Wrong Room
A bathroom, laundry room, or drafty hallway is not ideal. Test in the lowest regularly used living area.
Moving the Kit Mid-Test
Once the test begins, leave the device alone. Moving it from room to room does not create a “whole house average.” It creates confusion wearing a lab coat.
Ignoring a Borderline Result
A result between 2 and 4 pCi/L deserves attention, especially if the space is used often. Consider long-term testing to understand your average exposure.
Forgetting to Retest After Mitigation
A mitigation system should reduce radon, but testing is how you confirm it. Retest after installation and continue periodic checks.
Special Situations: Basements, Apartments, and Home Sales
Testing a Basement
Basements often have higher radon levels because they are closer to the soil. If your basement is used as living space, office space, a workout room, or a guest area, test there first. If results are high, mitigation may protect the entire home.
Testing an Apartment or Condo
If you live in a multi-unit building, test the lowest level within your unit. Ground-floor and basement-level units may have higher risk, but upper units are not automatically exempt. If your result is elevated, notify the property owner, building manager, or homeowners association.
Testing During a Home Sale
Radon testing is common during real estate inspections. Because timelines are short, professional short-term testing is often used. Buyers should ask whether the test followed proper closed-house conditions and whether the tester was certified or licensed where required.
Practical Experiences From Testing Radon at Home
Testing for radon sounds technical until you actually do it. Then it feels more like setting up a very quiet science project in the corner of the basement. The hardest part is not the test itself; it is remembering not to disturb it while life continues around it.
One common experience is realizing that the “best” place for a radon test is not always the most convenient place. A family may want to test the basement because that is where the kids play video games, but the perfect spot cannot be next to the window, under the supply vent, or on top of the washing machine. So the kit ends up on a small table in the middle of the room, looking strangely important for something so small.
Another practical lesson is that pets believe every new object belongs to them. Cats may inspect the kit like it is a tiny alien. Dogs may wag dangerously close to the table. If you have pets, place the device somewhere stable and out of reach while still following the height and location instructions. The goal is accurate testing, not an episode of “My Labrador Ate the Radon Kit.”
Homeowners also learn quickly that closed-house conditions require a little planning. If you are doing a short-term test, do not start it on the same weekend you plan to air out the house, host a party, paint a room, or have contractors marching in and out. Choose a normal stretch of days when windows can stay closed and the home will be used in a typical way.
Many people feel nervous when the results arrive, especially if the number is close to or above 4 pCi/L. That reaction is understandable, but radon is a fixable problem. An elevated result is not a reason to panic; it is a reason to confirm, call qualified professionals, and make a plan. In many homes, mitigation systems can reduce radon levels significantly and quietly operate in the background.
A useful habit is to keep radon paperwork with other home records. Save the test result, date, location, kit type, and any mitigation documents. If you sell the home later, this information may help answer buyer questions. If you retest in a few years, old results give you something to compare against.
The biggest takeaway from real-life radon testing is this: the process is easier than the worry. People often delay because they imagine expensive inspections, complicated equipment, or bad news lurking in the basement. In reality, a basic test kit can be ordered, placed, mailed, and reviewed with minimal effort. It is one of those home safety tasks that feels much bigger before you do it than after.
Conclusion
Learning how to test for radon in your home is a simple step that can have a serious impact on your family’s long-term health. Radon is invisible and odorless, but it is not mysterious once you know how testing works. Choose a reliable short-term or long-term radon test kit, place it in the right location, follow the instructions carefully, and take action if results are elevated.
If your radon level is 4 pCi/L or higher, confirm the result when needed and contact a qualified radon mitigation professional. If your level falls between 2 and 4 pCi/L, consider additional testing or reduction options, especially in rooms where people spend a lot of time.
Your home does not have to be perfect to be safer. Sometimes the smartest improvement starts with a small test kit sitting quietly in the basement, doing its job while everyone else gets on with life.