Table of Contents >> Show >> Hide
- Why Rolling Is Trickier Than It Looks
- Gear Up Like a Pro (Your Roller Is Not “One Size Fits All”)
- Prep That Makes Rolling Easy (And Makes the Finish Look Expensive)
- Loading the Roller: The Goldilocks Zone (Not Dripping, Not Dry)
- Technique: Lay It On, Then Lay It Off
- Ceilings, Texture, and Other “Why Did I Start This?” Scenarios
- Troubleshooting: Fix Common Rolling Problems (Without Repainting the Whole House)
- Cleanup and “Between-Coat” Survival Tips
- Real-World Rolling Experiences (An Extra of “Been There, Painted That”)
- Conclusion
Rolling paint looks like the easiest job in the roomright up until your “freshly painted” wall dries and starts
auditioning for a zebra documentary. If you’ve ever stared at lap marks, roller lines, splatter freckles, or a
finish that feels like 80-grit sandpaper, you’re not alone. The good news: pro-level rolling isn’t magic. It’s
mostly the right roller cover, the right amount of paint, and a simple rhythm that keeps everything wet and even.
In this guide, we’ll break down the rolling techniques pros rely on (including This Old House-style tips), plus
practical, real-world fixes for the stuff that goes wrong when the paintand your patiencestarts drying too fast.
Why Rolling Is Trickier Than It Looks
A roller is basically a tiny paint delivery system with one job: put a consistent film of paint on the surface.
When the film thickness varies, you get problemsthin spots, flashing, lap marks, and texture differences that
show up the moment sunlight hits the wall at the worst possible angle.
Most rolling issues come from one of four things:
- Wrong roller cover (nap too long or too short for the surface)
- Roller not loaded correctly (too dry = skipping; too wet = drips and splatter)
- Paint drying between passes (hello, lap marks)
- Inconsistent pressure/finishing strokes (roller lines and “edges”)
Gear Up Like a Pro (Your Roller Is Not “One Size Fits All”)
Pick the Right Nap Size (The Most Important Choice You’ll Make Today)
“Nap” is the fiber length on the roller cover. Short nap = smoother finish. Long nap = more paint capacity for
texture. Match nap to surface, and you’re halfway to a clean result before you even crack the lid.
| Surface | Common Nap Range | What to Expect |
|---|---|---|
| Ultra-smooth (metal doors, plaster) | 3/16″–1/4″ | Sleek finish, lower texture, less stipple |
| Smooth drywall / most interior walls | 3/8″ | Great balance of coverage + smooth look |
| Light texture / orange peel / some ceilings | 1/2″ | Better coverage into tiny valleys |
| Heavier texture, masonry, stucco | 3/4″–1 1/4″+ | High paint load, reaches deep texture (more stipple) |
A very common pro move for interiors: a microfiber roller cover with a 3/8-inch nap for walls.
Microfiber tends to be low-lint and can leave a smooth, even finish when used correctly.
Choose a Roller Cover Material That Matches Your Goal
- Microfiber: High pickup and smooth resultsgreat for many interior paints.
- Woven covers: Often shed less lint; solid choice for smoother surfaces.
- Knit covers: Can hold more paint; helpful for production and some textures.
- Foam rollers: Best for ultra-smooth finishes on certain surfaces, but can be fussy on walls.
Don’t Forget the “Boring” Stuff: Frame, Pole, Tray (or Bucket + Grid)
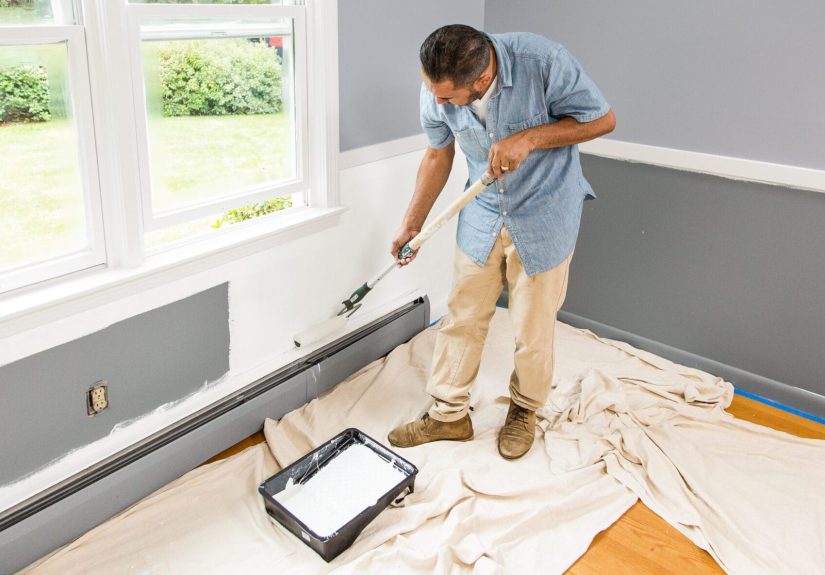
A sturdy roller frame keeps the cover spinning truewobble equals uneven pressure, and uneven pressure equals
roller marks. Add an extension pole for walls and ceilings so your strokes stay long and consistent (and your
back doesn’t write you an angry email tomorrow).
For bigger jobs, many pros prefer a bucket and roller grid over a shallow tray. It loads the
roller evenly, reduces splatter, and holds more paintso you’re painting walls, not doing cardio between wall and tray.
Prep That Makes Rolling Easy (And Makes the Finish Look Expensive)
Clean, Patch, SandThen Dust Again
Paint loves clean surfaces. Grease, dust, and mystery wall fingerprints (we won’t ask) can cause poor adhesion and
weird texture. Wash grimy areas, fill nail holes, sand patches smooth, and remove dust. Skipping dust removal is a
classic way to roll grit into your finishbasically “textured paint,” but not in the fun, intentional way.
Prime When You Should (Not When You Feel Like It)
Primer isn’t just for new drywall. Use it when:
- You repaired or patched a lot (fresh compound can “flash” through topcoat).
- You’re changing from dark to light (tinted primer can save coats).
- The wall has stains, odors, or questionable history.
- You’re painting glossy surfaces (often needs deglossing + bonding primer).
Cut In Smart: Don’t Create a “Picture Frame”
Cutting in (brushing edges around trim and corners) is necessary, but timing matters. If you cut the entire room
and then roll later, those brushed edges may dry before the roller paint blends in. That’s how you get a subtle
“frame” around the wall. Pros often work in sectionscut in an area, then roll it while the edge is still wet.
Loading the Roller: The Goldilocks Zone (Not Dripping, Not Dry)
The fastest way to a smooth wall is a roller that’s evenly loaded. Underload it and you’ll press harder, creating
lines and thin spots. Overload it and you’ll splatter like you’re celebrating paint’s birthday.
How to Load Correctly
- Pour paint into a tray or bucket.
- Dip the roller cover into paint (don’t submerge it like you’re baptizing it).
- Roll it on the tray slope or grid until the cover is evenly saturated.
- If it’s dripping, roll off the excess. If it looks patchy and dry, load more.
A simple “pro check”: the roller should look fully coated with paint, but not be actively dripping. If it’s
dripping, you have too much paint. If it’s barely coated, you don’t have enough.
Technique: Lay It On, Then Lay It Off
Work in Manageable Sections and Keep a Wet Edge
Lap marks happen when wet paint overlaps paint that has already started drying. The cure is simple but strict:
work in sections you can keep wet, and always roll back into paint that’s still wet.
- Pick a section about 3–4 feet wide (adjust smaller if the room is warm/dry).
- Plan breaks at natural stopping points: corners, doors, windows.
- Keep movingyour goal is a continuous wet edge, not “paint, scroll, paint.”
The “W” (or “M”) Is for DistributionFinishing Strokes Are for Beauty
Use a “W” pattern to spread paint quickly, then fill in the gaps. But don’t stop there. Pros typically follow with
light, consistent finishing passesoften straight up-and-downto even out texture and remove heavy edges.
Pressure and Speed: Let the Paint Do the Work
If you feel like you’re doing an arm workout, the roller is probably too dry. Reload before you start pushing hard.
Excess pressure can squeeze paint out at the roller edges, leaving lines. Aim for steady, moderate pressure and
keep your speed consistent.
Roll Close to Edges (But Don’t Smear Trim)
The closer you roll to the cut-in line, the less visible the transition between brushed paint and rolled paint.
That reduces “framing” and makes the wall look uniform. Use a smaller roller (mini-roller) for tight areas instead
of trying to force a 9-inch roller into a corner like it owes you money.
Ceilings, Texture, and Other “Why Did I Start This?” Scenarios
Ceilings: Control Splatter and Keep Your Pattern Consistent
Use an extension pole and keep your roller loaded evenly. Move in parallel passes and maintain a wet edge, just
like walls. Ceiling paint is often flatter and more forgiving, but it’s also overheadso splatter control matters.
A cover that sheds less and a loading grid can help keep paint on the surface instead of on your eyebrows.
Textured Walls: Longer Nap, More Patience
Texture needs paint pushed into recesses, so longer nap covers usually perform better. Work slower, load the roller
more fully, and consider a gentle “back roll” (a light pass) to even out the surface without leaving heavy ridges.
Bathrooms, Narrow Hallways, and Tight Spots
Use mini-rollers behind toilets, beside vanities, and in narrow spaces. They reduce bumping into everything and
allow cleaner, more controlled coverageespecially with semi-gloss or satin paints that love highlighting flaws.
Troubleshooting: Fix Common Rolling Problems (Without Repainting the Whole House)
Lap Marks (Striping / Banding)
Cause: Paint dried before you overlapped into it.
Prevention: Keep a wet edge, work in smaller sections, and reload the roller fully.
Fix: Once dry, lightly sand high ridges if needed, remove dust, and apply another coatthis time
maintaining that wet edge from start to finish.
Roller Marks / Lines
Cause: Too much pressure, roller too dry, or finishing strokes done inconsistently.
Prevention: Reload earlier, use light finishing passes, and keep your pole angle consistent.
Fix: If minor, another coat with better technique often levels it out, especially with quality paint.
Splatter
Cause: Overloading, rolling too fast, or using a cover prone to spatter.
Prevention: Load evenly, roll at a controlled speed, and avoid “flinging” the roller at the wall.
Bubbles
Cause: Over-rolling, very porous surfaces, or shaking paint (introducing air).
Prevention: Don’t overwork the paint; use primer on porous patches; stir instead of shaking.
Fix: Most bubbles pop and level as paint driesif they don’t, sand lightly and recoat.
Cleanup and “Between-Coat” Survival Tips
If you’re taking a short break between coats, keep the roller from drying out. Many painters wrap the roller cover
tightly in plastic (or slide it into a plastic bag) to slow drying. For longer pauses, clean it properly.
- Latex paint: Warm water + mild soap, rinse until clear.
- Oil-based paint: Use the appropriate solvent per the paint label, then wash and dry.
- Pro move: Use a roller spinner to remove water and speed drying.
Real-World Rolling Experiences (An Extra of “Been There, Painted That”)
Let’s talk about the stuff instructions rarely mentionthe moments that happen in actual houses with actual
lighting, actual humidity, and actual people who keep walking through the room asking, “Is it supposed to look like that?”
1) The “Looks Fine Wet” Trap
One of the most common surprises is how forgiving paint looks while wet. Thin spots hide. Overlaps blend. Roller
texture seems to disappear. Then it dries and suddenly you notice a faint patchworkespecially with eggshell or
satin paint in raking light (light hitting the wall at an angle). The practical lesson: don’t judge coverage mid-roll.
Instead, keep your roller loaded and your section size consistent. If you can see the wall “going dry” before you’re
done blending, that’s your cue to work smaller or move fasterbecause the wall is about to tell on you.
2) Painting a Dark Wall Light (a.k.a. “Why Is This Still Blue?”)
Rolling over a deep color with a light neutral is where patience gets tested. Even with good technique, the first
coat often looks streaky or uneven because the old color shows through and the paint film is still building. Pros
avoid panic by planning for it: they’ll prime (often with a tinted primer) and accept that two finish coats aren’t
a “maybe,” they’re the plan. Rolling becomes easier when you’re not trying to force full coverage in one pass.
Trying to “fix” dark show-through by pressing harder almost always creates roller marks. Reloading the roller and
trusting the second coat is the calmerand better-lookingchoice.
3) The Bathroom Speed-Run (Humidity Is the Boss Level)
Bathrooms add two fun challenges: tight spaces and moisture. In a small room, you’re constantly turning, stopping,
and dodging fixturesexactly what causes edges to dry before you overlap them. Mini-rollers become the hero here.
Another real-world win: keep the tray or bucket close, so you’re not taking ten steps between loads. The less time
you spend walking, the more time you spend maintaining a wet edge. Also, ventilation matters: too much airflow can
flash-dry paint faster, but no airflow can keep humidity high and slow curing. The sweet spot is gentle, steady air
exchangenot a hurricane from a box fan aimed directly at your wet wall.
4) Ceilings: Gravity’s Relentless Comedy Routine
Ceilings teach you instantly whether your roller is overloaded. Drips don’t just happenthey happen dramatically,
in slow motion, and usually while you’re underneath. A practical trick is to load evenly on a grid, then roll a test
pass near an edge where you can watch for drips. Keep strokes consistent and don’t “snap” the roller at direction
changes. Smooth, controlled turns reduce splatter, and your hair will thank you later.
5) The Most Valuable “Pro” Habit: Finishing Pass Discipline
Many DIY paint jobs look good from far away but busy up close because the final strokes are random: a little up,
a little sideways, a patch re-rolled after it started drying. Pros tend to finish each section with a consistent
set of light passes. That habit alonefinishing strokes done the same way, at the same pressuremakes walls look
calmer, smoother, and more “professional.” It’s not glamorous, but it’s the difference between “freshly painted”
and “freshly painted… by someone who’s done this before.”
Conclusion
Getting the most out of rolling isn’t about fancy tricksit’s about stacking small advantages: choose the right nap,
load the roller evenly, work in sections, keep a wet edge, and finish each section with consistent, light passes.
When you do that, you reduce splatter, avoid lap marks, and end up with walls that look smooth in real-life lighting
not just in the five minutes before the paint dries.