Table of Contents >> Show >> Hide
- Why Turn a Tabletop Into an Oversized Garden Clock?
- Choosing the Right Tabletop for the Project
- Tools and Materials You Will Need
- Step-by-Step: How to Make a Repurposed Tabletop Garden Clock
- Step 1: Clean the Tabletop Thoroughly
- Step 2: Sand the Surface
- Step 3: Mark the Center
- Step 4: Decide on the Clock Face Design
- Step 5: Lay Out the Numbers
- Step 6: Paint, Stain, or Distress the Clock Face
- Step 7: Seal the Entire Piece
- Step 8: Install the Clock Movement
- Step 9: Protect the Movement From Weather
- Step 10: Hang It Securely
- Design Ideas for Different Garden Styles
- Common Mistakes to Avoid
- Maintenance Tips for a Long-Lasting Garden Clock
- Budget-Friendly Ways to Customize the Clock
- Where to Display an Oversized Garden Clock
- Experience Notes: What This Project Feels Like in Real Life
- Final Thoughts
- SEO Tags
Turning an old tabletop into an oversized garden clock is one of those rare DIY projects that feels fancy, costs less than a designer garden accent, and gives forgotten furniture a second act worthy of applause. Instead of hauling a worn table to the curb, you can transform it into a bold outdoor timepiece for a patio, fence, porch, pergola, shed wall, or garden seating area. It is practical, decorative, sustainable, and just dramatic enough to make neighbors say, “Wait… was that once a table?”
Why Turn a Tabletop Into an Oversized Garden Clock?
A tabletop already has the most important feature a clock face needs: a wide, flat surface. Round tables are especially perfect because they practically whisper, “I was born to tell time.” Square, oval, and rectangular tabletops can work too, especially if you enjoy a more modern farmhouse or eclectic garden look.
This project also fits beautifully into the world of repurposed garden decor. Outdoor spaces are no longer just where we put a chair, a grill, and one sad citronella candle. Patios and gardens have become extensions of the home, with wall art, lighting, planters, textiles, and personality. An oversized garden clock adds instant structure to that space. It can anchor a blank fence, dress up a shed, or become the focal point above an outdoor buffet table.
The best part? You are not starting from scratch. The tabletop gives you size, shape, and character. Scratches, dents, worn edges, and old stain marks become part of the story. In other words, your “imperfections” are now “rustic charm.” DIY has excellent public relations.
Choosing the Right Tabletop for the Project
Not every tabletop is ready for life outdoors, but many can be prepared with the right care. Solid wood is usually the easiest material to sand, paint, stain, and seal. Plywood can work if it is thick, sturdy, and well protected around the edges. Metal tabletops can become striking industrial-style clocks, although they require metal-friendly paint and rust protection. Glass is not ideal for this project because drilling, mounting, and outdoor exposure can make it risky and less forgiving.
Best Tabletop Shapes
A round tabletop creates the classic clock silhouette and makes number placement simple. An oval tabletop feels elegant and garden-party ready. A square tabletop creates a bold contemporary clock, especially if you use oversized Roman numerals or minimalist tick marks. A rectangular tabletop can work as an artistic clock panel, though the design should be planned carefully so the hands have room to rotate.
Ideal Size for an Oversized Garden Clock
For a true oversized garden clock, look for a tabletop between 24 and 48 inches wide. Smaller than that, and it may look more like a standard wall clock. Larger than that, and you may need a high-torque clock movement, longer hands, stronger hanging hardware, and possibly a second cup of coffee before installation.
The key is proportion. A 30-inch clock looks fantastic on a fence panel or porch wall. A 42-inch clock can command attention on a shed, barn door, or large outdoor dining wall. Before committing, hold the tabletop in place or trace its size with painter’s tape on the wall. This prevents the classic DIY surprise known as “Oops, I made a clock the size of a wagon wheel.”
Tools and Materials You Will Need
This project is beginner-friendly, but it still needs the right supplies. A little preparation makes the difference between a garden clock that lasts and one that gives up after the first thunderstorm like a dramatic Victorian poet.
Basic Materials
- Old tabletop or round wooden board
- High-torque quartz clock movement for large hands
- Clock hands sized for the tabletop
- Outdoor paint, stain, or exterior wood finish
- Exterior-rated sealer or spar urethane
- Outdoor primer if painting bare wood
- House numbers, stencils, vinyl numerals, or painted markers
- Heavy-duty hanging hardware
- Exterior screws or wall anchors
- Painter’s tape and measuring tape
Helpful Tools
- Drill and drill bits
- Sander or sanding block
- Jigsaw if reshaping the tabletop
- Paintbrushes or foam brushes
- Ruler, yardstick, or straightedge
- Pencil or chalk marker
- Level
- Compass or string method for marking circles
If the tabletop is heavy, ask another person to help with hanging. Oversized clocks are charming; oversized clocks falling off a wall are less charming and much louder.
Step-by-Step: How to Make a Repurposed Tabletop Garden Clock
Step 1: Clean the Tabletop Thoroughly
Start by removing dirt, grease, wax, mildew, and mystery grime. Old furniture often collects layers of history, and not all of them are romantic. Use mild soap and water, then let the tabletop dry completely. If the surface has old polish or oily residue, use a suitable cleaner before sanding.
Do not rush the drying stage. Moisture trapped under paint or sealer can cause peeling, bubbling, or cloudy finishes later. Outdoor projects reward patience. They also punish shortcuts with flakes.
Step 2: Sand the Surface
Sand the tabletop to remove rough patches, glossy finish, peeling paint, and splinters. Start with medium-grit sandpaper, then move to a finer grit for a smoother surface. Pay special attention to the edges because outdoor moisture loves sneaking into exposed end grain.
If you want a distressed farmhouse look, you do not need to sand every mark away. Keep some age and texture. The goal is not to erase the table’s past; it is to make sure paint, stain, and sealer can properly grip the surface.
Step 3: Mark the Center
Finding the exact center is crucial because that is where the clock movement shaft will go. On a round tabletop, measure across the widest point in several directions and mark the midpoint. On a square or rectangular top, draw diagonal lines from corner to corner; the intersection is the center.
Once marked, drill a hole sized to fit the clock movement shaft. Check the instructions that come with your movement. The shaft must pass through the tabletop far enough for the hands and mounting nut to attach securely. If the tabletop is too thick, you may need to recess the movement into the back with a router or chisel.
Step 4: Decide on the Clock Face Design
This is where the project becomes personal. You can use classic Roman numerals, modern metal house numbers, painted dots, ceramic tile markers, wooden numbers, or simple tick marks. For a garden clock, visibility matters. Tiny numbers may look cute up close, but from across the yard they become decorative confetti.
Large black numerals on a light background are easiest to read. White or cream numerals on a dark stained surface create a rich vintage look. Metallic numbers bring a little outdoor glam, which is basically jewelry for your fence.
Step 5: Lay Out the Numbers
The easiest method is to mark 12, 3, 6, and 9 first. These anchor points keep the design balanced. Use a measuring tape or string from the center to make sure each number sits the same distance from the middle. After that, place the remaining numbers evenly around the face.
Before attaching anything permanently, step back and look at the tabletop from several feet away. Better yet, take a quick photo. Photos reveal crooked spacing with the honesty of a brutally direct friend.
Step 6: Paint, Stain, or Distress the Clock Face
Choose a finish that suits your garden style. For a cottage garden, try soft white, sage green, faded blue, or warm cream. For farmhouse style, use a weathered wood stain with black Roman numerals. For a modern patio, choose matte charcoal, clean white lines, and minimal markers.
If painting, use an exterior-rated primer and paint. If staining, choose an exterior stain designed for outdoor wood. If preserving the natural wood look, use a clear outdoor finish with UV and moisture protection. Outdoor wood faces sun, rain, humidity, temperature swings, and the occasional bird with poor manners, so protection matters.
Step 7: Seal the Entire Piece
Sealing is one of the most important steps in making a tabletop garden clock last. Coat the front, back, edges, drilled hole, and any exposed wood. The back is easy to forget because nobody sees it, but rain and humidity absolutely know where it is.
Use an exterior-rated clear sealer, spar urethane, or stain-and-sealer product appropriate for your chosen finish. Apply thin, even coats according to the product directions. Let each coat dry fully before adding the next. Sand lightly between coats if recommended. A well-sealed clock face will resist moisture better and maintain its look longer.
Step 8: Install the Clock Movement
For an oversized clock, choose a high-torque quartz movement. Standard clock movements are often designed for small, lightweight hands. Large garden clock hands need more power to move smoothly and accurately. Make sure the movement shaft length matches the thickness of the tabletop.
Insert the movement from the back, secure it from the front, and attach the hour hand, minute hand, and second hand if using one. Many outdoor clocks skip the second hand because wind can catch long, lightweight hands. If you do use one, make sure it clears the other hands and does not scrape the face.
Step 9: Protect the Movement From Weather
Even if the clock face is weather-resistant, the movement needs extra protection. A covered porch, pergola wall, or sheltered fence is ideal. If the clock will be exposed to rain, consider creating a small protective box or cover on the back around the movement. Leave enough room to change the battery.
No outdoor DIY clock is completely invincible. Think of it as weather-resistant, not superhero-resistant. Keeping it out of direct downpours will extend its life and reduce maintenance.
Step 10: Hang It Securely
An oversized tabletop clock can be heavy. Use hardware rated for more than the clock’s actual weight. Outdoor-rated D-rings, French cleats, or heavy-duty picture-hanging hardware can work depending on the surface. For fences and sheds, screw into solid framing whenever possible. For masonry, use proper anchors.
Hang the clock level, then step back and admire your work. This is the official DIY victory moment. You may nod proudly. You may also casually mention that you “rescued” the tabletop, because that sounds more heroic than “I found it in the garage.”
Design Ideas for Different Garden Styles
Rustic Farmhouse Garden Clock
Use a stained wood tabletop, black Roman numerals, and slightly distressed edges. Add matte black clock hands and a clear exterior sealer. This style pairs well with galvanized planters, raised beds, white flowers, and string lights.
Cottage Garden Clock
Paint the tabletop soft cream, pale blue, or muted green. Use vintage-style numerals and gently sand the edges after painting for an aged look. Surround it with climbing roses, lavender, hydrangeas, or herbs for that “I live inside a charming gardening magazine” feeling.
Modern Patio Clock
Choose a simple color palette such as black and white, charcoal and brass, or natural wood with minimal tick marks. Skip decorative flourishes and let scale do the talking. A large, clean-lined clock can look stunning against horizontal fencing or a smooth stucco wall.
Whimsical Garden Clock
Use mismatched numbers, painted flowers, mosaic tile pieces, or garden-themed markers like small metal leaves. This approach works beautifully in family gardens, creative backyards, and spaces that already embrace color. The only rule is balance: whimsical should look intentional, not like the craft drawer exploded.
Common Mistakes to Avoid
Using the Wrong Clock Movement
A large clock needs a movement strong enough for long hands. If the hands are too heavy or too long for the movement, the clock may run slowly, stop, or give you the wrong time with impressive confidence.
Skipping Edge Sealing
The edges of a tabletop are vulnerable to moisture. Seal them carefully. If water gets inside the wood, it can cause swelling, peeling, cracking, or warping.
Making the Numbers Too Small
Outdoor clocks are usually viewed from a distance. Choose bold numbers or markers that can be read across the patio or garden. A clock that looks beautiful but cannot be read is basically wall art with anxiety.
Hanging It in Harsh Exposure
Direct sun, heavy rain, and strong wind will age any outdoor decor faster. A sheltered location helps preserve the finish and protect the clock movement.
Forgetting Maintenance
Check the clock once or twice a season. Replace the battery, wipe away dirt, inspect the finish, and reseal when needed. Outdoor DIY pieces last longer when they receive a little attention before problems become dramatic.
Maintenance Tips for a Long-Lasting Garden Clock
Once your repurposed tabletop clock is hanging proudly, treat it like outdoor furniture. Clean it gently with a soft cloth. Avoid harsh chemicals that may damage the finish. After storms, check that water has not collected behind the clock or around the movement housing.
If the finish begins to dull or water stops beading on the surface, it may be time to add another protective coat. In climates with intense sun or frequent rain, maintenance may be needed more often. In a covered patio area, the clock may stay beautiful for years with only light care.
Also inspect the hands occasionally. Wind, dust, insects, and seasonal temperature changes can shift delicate parts. Make sure the hands do not touch each other or rub against the clock face. A tiny adjustment can save the movement from unnecessary strain.
Budget-Friendly Ways to Customize the Clock
A repurposed tabletop garden clock does not need expensive supplies to look impressive. Old house numbers can become clock numerals. Leftover exterior paint can create a custom background. Scrap wood can be cut into markers. Metal washers, ceramic tiles, drawer pulls, bottle caps, or stencil-painted dots can add personality.
For a more polished look, use matching metal numerals and sleek clock hands. For a charming vintage look, mix finishes intentionally: aged brass numbers, black hands, and distressed paint. For a family garden, let each person paint one number. The final result may not be perfectly symmetrical, but it will have more heart than anything from a big-box decor aisle.
Where to Display an Oversized Garden Clock
The best location depends on visibility, shelter, and style. A patio wall is ideal because the clock becomes part of the outdoor living area. A fence panel can turn an empty stretch of wood into a focal point. A shed wall gives the garden a cozy, lived-in look. A pergola post or covered porch wall provides protection while keeping the clock easy to see.
Try placing the clock where people naturally gather: near an outdoor dining table, seating area, grill station, potting bench, or poolside lounge. It is both decorative and useful. After all, someone needs to know when the burgers are done, when the tea has steeped, or when “five more minutes in the garden” has quietly become two hours.
Experience Notes: What This Project Feels Like in Real Life
Making a repurposed tabletop into an oversized garden clock is one of those projects that looks simple on paper and becomes surprisingly satisfying once you begin. The first experience most DIYers have is emotional attachment. That old tabletop may have scratches from family dinners, paint splatters from forgotten projects, or water rings from people who apparently believed coasters were decorative myths. Instead of hiding those marks, the clock gives them a new role. They become texture, memory, and character.
The sanding stage teaches patience. At first, it may feel like nothing is changing. Then the old finish starts to soften, the surface becomes smoother, and the wood begins to look alive again. This is the point where many people start talking to the project. That is normal. Furniture restoration has a way of turning everyone into a motivational speaker for wood.
The number layout is usually the most entertaining challenge. Measuring twelve points evenly around a large circle sounds easy until you realize your “eyeballed” number five is drifting into another time zone. Painter’s tape, a pencil, and a measuring string help a lot. The best tip is to place all numbers temporarily before attaching them. Walk away, come back, and look again. Fresh eyes catch crooked spacing faster than tired eyes.
Choosing the finish is another memorable part of the process. A dark stain can make the piece feel rich and vintage. White paint can make it look fresh and cottage-inspired. A faded blue or green can blend beautifully with plants. The finish sets the personality of the clock, so it is worth testing colors on the back or on scrap wood first. Outdoor light can make colors look brighter than they appear indoors.
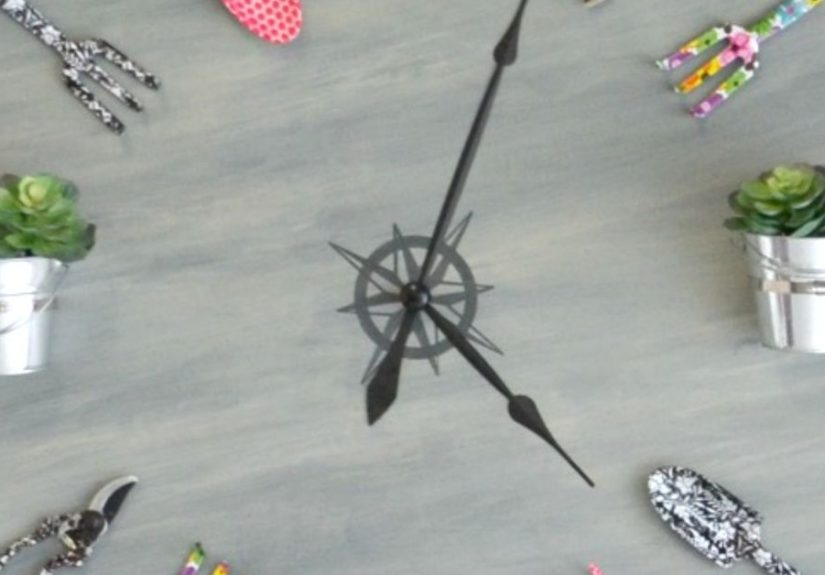
Installing the clock movement feels like the moment the project becomes real. Before that, it is a decorated tabletop. Once the hands are attached and begin moving, it becomes a working garden feature. There is something delightful about seeing a rescued furniture piece quietly ticking away outside. It feels practical and poetic at the same time, which is not something one usually says about a table that almost went to the dump.
Hanging the clock is the final test. Oversized pieces need secure support, and this is not the moment for flimsy hardware. Once mounted, the clock immediately changes the space. A plain fence looks styled. A porch looks finished. A garden corner looks intentional. Visitors notice it quickly because scale catches the eye. More than one person will ask where it came from, and you will get to say, with appropriate modesty and possibly a dramatic pause, “I made it from an old tabletop.”
The biggest lesson from this project is that repurposing does not mean settling for something second-rate. It means seeing potential. An old tabletop can become a statement piece. A scratched surface can become a clock face. A forgotten object can become the detail that makes a garden feel personal. That is the magic of DIY: it turns “junk” into “custom,” and somehow makes the backyard feel a little more like home.
Final Thoughts
A repurposed tabletop to oversized garden clock project is creative, affordable, and wonderfully useful. It brings together upcycling, outdoor decorating, woodworking, painting, and a touch of engineering without requiring expert-level skills. With the right tabletop, a strong clock movement, weather-friendly finishes, and secure hanging hardware, you can create a backyard focal point that looks custom and tells time while doing it.
This project proves that outdoor decor does not have to be expensive or predictable. Sometimes the best garden feature is already sitting in the garage, leaning against a wall, waiting for someone to give it numbers, hands, and a second chance.
Note: For best results, display the clock in a covered or semi-protected outdoor area, use exterior-rated products, and follow all manufacturer instructions for sealers, paints, clock movements, and hanging hardware.