
Table of Contents >> Show >> Hide
- Why Mini-Split Heat Pumps Are Everywhere (And Why That’s Not Just Marketing)
- First, a Reality Check: What Parts of Installation Are DIY-Friendly?
- Step 0: Plan Like a Pro (Because Fixing Bad Placement Is Expensive)
- Tools & Materials Checklist (What You’ll Likely Need)
- Step-by-Step: Installing a Mini-Split AC Heat Pump
- Step 1: Choose the Indoor Unit Location
- Step 2: Choose the Outdoor Unit Location
- Step 3: Map the Route (Lineset, Drain, Cable)
- Step 4: Mount the Indoor Bracket
- Step 5: Drill the Wall Penetration
- Step 6: Prep and Connect the Indoor Unit (Mechanical Side)
- Step 7: Set the Outdoor Unit
- Step 8: Electrical Setup (Typically Licensed Work)
- Step 9: Route and Protect the Lineset Bundle
- Step 10: Refrigerant Connections & System Evacuation (Often Pro Work)
- Step 11: Commissioning and Test Run
- Step 12: Finish Details (Weatherproofing, Line-Hide, and Documentation)
- Top Mistakes That Wreck Mini-Split Installs (And How to Avoid Them)
- What Installation Typically Costs (And Why “It Depends” Is Actually True)
- Efficiency, Rebates, and Why Ratings Matter
- Mini-Split Maintenance Basics (So It Keeps Running Like It’s Supposed To)
- Field Notes: of Real-World Installation Experiences (What People Learn the Hard Way)
- Wrap-Up
A mini-split AC heat pump is basically the “why is my house finally comfortable?” button for rooms that never behave:
bonus room, converted garage, upstairs bedroom that turns into a sauna by 3 p.m.you know the one.
But installing a ductless mini-split isn’t like hanging a picture frame. It blends three worlds that don’t play nicely together:
carpentry (holes in walls), electrical (high voltage), and refrigeration (a sealed system that really, really prefers staying sealed).
Done right, a mini-split installation is clean, efficient, and whisper-quiet. Done wrong, it’s a slow-motion water leak with a side of
“why is it icing up?”
This guide walks you through the process step-by-stepwhat you can DIY, what’s best left to licensed pros, and how to avoid the classic
mistakes that turn a weekend project into a month-long saga.
Why Mini-Split Heat Pumps Are Everywhere (And Why That’s Not Just Marketing)
Mini-split heat pumps heat and cool without ducts. That’s a big deal because ducts can lose a surprising amount of energyespecially if
they run through unconditioned attics or crawlspaces. With a ductless system, you’re delivering heating and cooling directly to the room,
so you’re not paying to condition your attic like it’s a VIP lounge.
They also shine at zoning. Each indoor head can run independently, so you’re not forced to cool the entire house just to make one bedroom
livable. Translation: fewer thermostat wars and less “I’m freezing!” / “I’m sweating!” marital diplomacy.
Efficiency matters, too. Modern ductless mini-splits can reach very high efficiency ratings (SEER2 for cooling and HSPF2 for heating), and
high-performance models can go far beyond minimum standards. In plain English: you can often get better comfort with less electricity.
First, a Reality Check: What Parts of Installation Are DIY-Friendly?
A lot of homeowners can handle the “mechanical” side: mounting the indoor bracket, drilling the wall penetration, setting the outdoor unit
on a pad, routing line-hide, and running a condensate drain line. If you’re careful, patient, and not allergic to reading manuals, those
steps are doable.
The two areas where people get into trouble are electrical and refrigerant handling.
Electrical work can be hazardous and is commonly regulated by local code. Refrigerant work is regulated, and in many cases requires EPA
certification and specialized tools. Even if you’re brave, the law is unimpressed by bravery.
Common “Split the Work” Approach (Smart and Popular)
- Homeowner: mounting, drilling, unit placement, line routing, drain routing, line-hide, cleanup.
- Licensed electrician: dedicated circuit, breaker sizing, disconnect installation, final connection.
- EPA-certified HVAC tech: refrigerant line connections (if needed), pressure test, evacuation, commissioning checks.
If you’re using a true DIY kit with pre-charged, self-sealing lines, the refrigeration step may be simplified. But you still need to follow
the manufacturer’s instructions exactlyno “freestyle HVAC,” please.
Step 0: Plan Like a Pro (Because Fixing Bad Placement Is Expensive)
Size It Correctly (This Is Where Comfort Begins)
Mini-split sizing should be based on a load calculation, not a guess, not a neighbor’s opinion, and definitely not “it’s about the same size
as my living room so… 12,000 BTU?” The right way is a room-by-room or zone-by-zone load calculation (often referred to as a Manual J method).
Why it matters: oversized systems can short-cycle (turn on/off too often), struggle with humidity control, and waste energy.
Undersized systems run constantly and still can’t keep up on the hottest or coldest days.
Pick Your System Type
- Single-zone: one outdoor unit + one indoor head (great for a garage conversion, bedroom, office).
- Multi-zone: one outdoor unit + multiple indoor heads (more complex design, more piping, more planning).
Know Your Local Rules (Permits Aren’t Just BureaucracyThey’re Liability Insurance)
Many areas require permits for HVAC work and inspections for electrical connections. Some jurisdictions also require load calculations at the
time of permit application. Even if you’re not thrilled about paperwork, future-you (and future home buyers) will be.
Tools & Materials Checklist (What You’ll Likely Need)
Basic Installation Tools
- Stud finder, tape measure, level
- Drill/driver, masonry bits if needed
- Hole saw (often around 2–3 inches depending on the wall sleeve)
- Anchors/lag bolts (appropriate for your wall type)
- Utility knife, sealant/foam for weatherproofing
- Lineset cover (line-hide) kit (optional but makes installs look professional)
Installation Components
- Indoor unit + mounting plate
- Outdoor condenser/heat pump unit
- Refrigerant lineset (and insulation)
- Control cable/communication wire (per manufacturer specs)
- Condensate drain hose (and possibly a condensate pump if gravity drain isn’t possible)
- Outdoor pad or wall bracket
Pro-Only (or Strongly Pro-Recommended)
- Electrical disconnect and dedicated circuit work
- Refrigerant pressure testing and evacuation (if the system requires field charging or opening service valves after evacuation)
- Specialized gauges, vacuum pump, leak detection tools
Step-by-Step: Installing a Mini-Split AC Heat Pump
Step 1: Choose the Indoor Unit Location
Aim for a spot that distributes air across the room, not directly into someone’s face like an arctic leaf blower. Consider:
- Clearances: follow the manufacturer’s minimum spacing above/sides.
- Air path: avoid tight corners that block airflow.
- Condensate drainage: plan a downhill path to drain outside, to a plumbing drain, or to a condensate pump.
- Service access: you (or a tech) will need to clean filters and service the unit.
Pro tip: “Looks good on the wall” is not the same as “works well on the wall.” You’re designing airflow, not wall art.
Step 2: Choose the Outdoor Unit Location
Outdoor placement affects performance, noise, and how miserable maintenance will be later. Prioritize:
- Airflow: keep it away from fences, dense shrubs, or tight alcoves.
- Stable base: pad on the ground or wall bracket properly anchored.
- Noise awareness: don’t place it right outside a bedroom window if you can avoid it.
- Drainage: in heating mode, defrost cycles can create waterplan for where that goes.
Step 3: Map the Route (Lineset, Drain, Cable)
Your lineset route is the spine of the installation. Keep it as short and clean as possible while following manufacturer limits on
length and elevation change. Plan how the bundle exits the wall, turns, and runs to the outdoor unit.
- Pick a wall penetration location that avoids studs, plumbing, and electrical lines.
- Plan where the line-hide will go (straight lines look best and protect the insulation).
- Confirm the drain line can slope downward (or decide where a condensate pump will sit).
Step 4: Mount the Indoor Bracket
Use a level. Then use it again, because walls love lying. Anchor the bracket into studs whenever possible. If you must use anchors, choose
anchors rated for the wall type and load.
Double-check the bracket height and that the unit will have proper clearance from the ceiling and side walls.
Step 5: Drill the Wall Penetration
Mini-splits usually require a wall penetration for the lineset bundle (refrigerant lines, cable, drain).
Drill with a slight downward pitch to the exterior so any incidental moisture drains outward, not into your wall.
Insert the wall sleeve (if provided) and seal around the penetration on both sides to prevent air leaks, pests, and water intrusion.
This is one of those “five minutes now or five hours later” steps.
Step 6: Prep and Connect the Indoor Unit (Mechanical Side)
Route the lines and drain according to the unit’s design. Avoid kinks in copper lines and keep insulation intact.
Make sure the drain hose is secured and routed to prevent sagging, dips, or uphill sections that can cause backups.
Then hang the indoor unit onto the bracket and confirm it’s seated properly. It should feel locked in, not “mostly hanging there.”
Step 7: Set the Outdoor Unit
Place the condenser on a level pad or a properly rated wall bracket. Level matters for drainage and vibration. If you’re in a snow-prone
region, elevating the unit can help keep it above snow accumulation.
Maintain required clearances for airflow and service access. This is not the time for “it fits, so it’s fine.”
Step 8: Electrical Setup (Typically Licensed Work)
Mini-splits generally need a dedicated branch circuit sized per the equipment nameplate and local electrical code.
A disconnecting means is typically required within sight and readily accessible from the equipment connection point.
Some mini-split configurations are treated as a single machine with one point of connection, which can mean one disconnect
serves the systemunless the manufacturer or listing requires otherwise.
If you’re not a licensed electrician, treat this step like you’d treat dental surgery: it’s not a hobby.
Step 9: Route and Protect the Lineset Bundle
Run the lineset, control cable, and drain line from the indoor unit to the outdoor unit. Use line-hide where possible for protection and a
clean look. Avoid sharp bends and abrasion points. Secure the bundle neatlyfuture-you will appreciate not tripping over “copper spaghetti.”
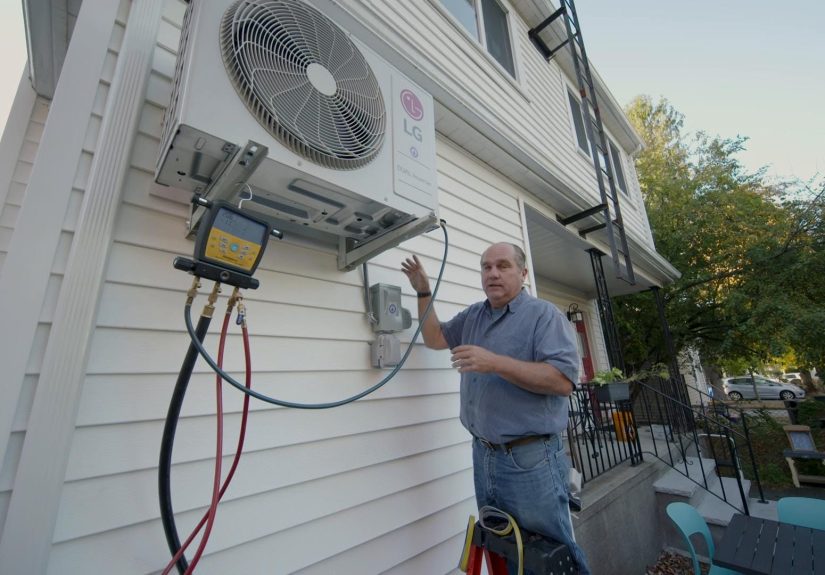
Step 10: Refrigerant Connections & System Evacuation (Often Pro Work)
Many systems require field-made refrigerant connections (often flares). Proper technique and correct torque are criticaltiny leaks can lead
to poor performance, oil loss, and compressor damage over time.
If the system requires evacuation, the line set and indoor coil are typically evacuated with a vacuum pump to remove air and moisture before
opening service valves. This is one of the most important steps for long-term reliabilityand one of the easiest to do incorrectly without
training and tools.
Some DIY-oriented systems use pre-charged, sealed connections that reduce or eliminate the need for evacuation. If you’re using one of those,
follow the manufacturer’s step order precisely and don’t improvise. Refrigeration systems punish improvisation.
Step 11: Commissioning and Test Run
Once the system is powered and ready, run it in cooling and heating modes (if outdoor conditions allow). Confirm:
- Indoor airflow is steady and unobstructed
- No unusual vibration or rattling from indoor/outdoor units
- Condensate drains properly (test with a small amount of water if appropriate)
- Outdoor unit fans and compressor operate normally
- Remote control and settings work as expected
If anything seems offshort cycling, icing, gurgling that doesn’t settle, water leakspause and troubleshoot. Running a system with a leak or
drainage issue is like driving with the check-engine light blinking: possible, but deeply unwise.
Step 12: Finish Details (Weatherproofing, Line-Hide, and Documentation)
- Seal all exterior penetrations cleanly.
- Confirm line insulation is intact and protected from UV exposure.
- Register the product for warranty if required.
- Save the installation manual and model/serial numbers for future service.
Top Mistakes That Wreck Mini-Split Installs (And How to Avoid Them)
1) Skipping the Load Calculation
“It’s probably fine” is not a sizing method. If you want comfort and efficiency, size each zone correctly.
2) Bad Indoor Placement
If the air can’t circulate, the unit works harder and comfort suffers. Avoid stuffing heads into dead corners or behind doors that stay open.
3) Poor Drain Planning
Condensate management is not optional. If gravity drain isn’t possible, plan a condensate pump and service access from day one.
4) Sloppy Refrigerant Work
A slow refrigerant leak can take weeks to show up, then months to destroy performance. Correct tools, correct technique, correct testing.
5) Electrical Shortcuts
Wrong breaker sizing, missing disconnect, improper conductor sizingthese are safety and compliance issues. Get it done correctly.
What Installation Typically Costs (And Why “It Depends” Is Actually True)
Mini-split installation costs vary widely by system size, zone count, labor rates, and site complexity (long runs, difficult access, panel
upgrades, wall type, and so on). As a general range, many sources cite totals from a few thousand dollars up into five figures for larger
multi-zone systems.
If you’re comparing bids, ask what’s included: electrical work, line-hide, condensate pump, wall penetration finishing, permit fees, and
warranty labor coverage. The “cheap” bid can get expensive fast when add-ons appear later like surprise guests who don’t bring snacks.
Efficiency, Rebates, and Why Ratings Matter
When shopping, you’ll see SEER2 (cooling efficiency) and HSPF2 (heating efficiency). Higher numbers generally mean better efficiency.
Many homeowners also look for verified performance ratings and matched system certificationsespecially when rebates or tax credits require
documentation.
Practical shopping tip: pick equipment that’s efficient and appropriately sized for your space. An ultra-efficient unit that’s
oversized for a small room can still deliver mediocre comfort.
Mini-Split Maintenance Basics (So It Keeps Running Like It’s Supposed To)
- Clean filters regularly: clogged filters reduce airflow and efficiency.
- Keep outdoor coil clear: leaves and lint reduce performance.
- Check the drain seasonally: especially before heavy cooling season.
- Don’t ignore odd behavior: icing, error codes, or persistent odors deserve attention.
Think of maintenance as brushing your teeth: the goal is to avoid the expensive appointment later.
Field Notes: of Real-World Installation Experiences (What People Learn the Hard Way)
If you talk to homeowners and installers who’ve done a few mini-split installs, you’ll notice a pattern: the actual “mount the unit” steps
aren’t what trips people up. It’s the planning detailsthe stuff that feels boring until it becomes a problem with a drip pan.
One common experience is underestimating how much the indoor head’s location affects comfort. People often choose the most convenient wall,
only to find the airflow blasts the couch (great if you like living in a wind tunnel) while the far side of the room stays warm. The fix is
rarely simple: moving the head means redoing the wall penetration, rerouting the line set, and patching drywall. Installers often say the
best “upgrade” isn’t a fancier unitit’s spending an extra hour choosing placement and confirming the throw of the airflow.
Another frequent lesson: condensate drainage needs a real plan. In mild weather, you might not notice a marginal drain route. Then peak
summer hits, humidity rises, and suddenly you’ve got a slow drip that stains the wallor worse, water that pools because the drain line has a
sag. Homeowners who had the smoothest installs tend to be the ones who tested the drain early (and made sure it stayed sloped the entire way)
or chose a condensate pump where gravity couldn’t cooperate.
The outdoor unit location also generates a lot of “wish I’d known” moments. A condenser tucked into a tight side yard can look tidy, but if
airflow is restricted, performance suffers. And when it’s time to clean the coil or service the unit, a cramped space turns a simple job into
a yoga class you didn’t sign up for. People who place the condenser with service access in mindclearance on multiple sides, a solid base, and
a sensible path for electrical and line routingtend to have fewer headaches down the road.
Then there’s the DIY-versus-pro boundary. Many homeowners report that the smartest money they spent wasn’t on premium line-hide or an upgraded
remoteit was paying an electrician to handle the circuit and disconnect cleanly, and (when needed) paying an HVAC tech to verify the
refrigeration side. That split approach often keeps the project affordable while reducing the risk of the two most expensive mistakes:
electrical issues and refrigerant leaks.
Finally, almost everyone agrees on one thing: read the manual before you drill the first hole. Mini-splits are engineered systems
with specific requirements for clearances, line lengths, and setup procedures. The smoothest installs happen when the installer treats the
manual like a recipe, not a suggestion. Because in HVAC, “close enough” is usually the beginning of a long, sweaty story.


