Table of Contents >> Show >> Hide
- Why Scrap Wood Wall Hangings Are a Seriously Good Idea
- Choosing a Scrap-Wood Wall Hanging Style
- Materials and Tools You’ll Actually Use
- Step-by-Step: A Classic Scrap Wood Mosaic Wall Hanging
- Step 1: Sort your scraps like you’re casting a movie
- Step 2: Choose a size and build around it
- Step 3: Cut pieces into a consistent “language”
- Step 4: Dry fit the design (this is where the magic happens)
- Step 5: Glue in sections, not all at once
- Step 6: Flatten (or embrace the texture)
- Step 7: Sand smart, not forever
- Step 8: Finish for the vibe you want
- Hanging Methods That Won’t Betray You
- Safety Notes (Because Scrap Wood Has a Past)
- Design Tricks That Make It Look “Store-Bought”
- Troubleshooting Common Problems
- Make It Your Own: Creative Variations
- How to Price (or Gift) a Scrap Wood Wall Hanging
- Conclusion
- Experience-Based Tips and Real-World Lessons (Extra Section)
- You’ll start seeing scraps differently
- Dry-fitting is where confidence is born
- The finish changes everything (sometimes surprisingly)
- Texture can be a feature, not a flaw
- Hardware choice affects how “professional” it feels
- Scrap wood projects are oddly personal
- Your second one will be faster (and better)
- SEO Tags
Scrap wood is basically the confetti of woodworking: it shows up everywhere, refuses to leave, and somehow ends up in your shoes. The good news? Those “too small to matter” offcuts can become a wall hanging made from scrap wood that looks intentionally artisticlike you planned it that way all along (even if the truth involves a last-minute glue-up and mild panic).
In this guide, you’ll learn how to turn leftover boards, trim pieces, and random rectangles into a polished piece of scrap wood wall artwith design ideas, smart finishing tips, and hanging methods that won’t end in a 2 a.m. “why is my art on the floor?” moment.
Why Scrap Wood Wall Hangings Are a Seriously Good Idea
They’re budget-friendly (aka “free-ish”)
If you already have scrap wood, the main “cost” is usually glue, sandpaper, and a finish. Translation: you can make something custom without paying gallery-wall prices.
They’re sustainable without being preachy
Using leftovers reduces waste and keeps usable material out of the trash. Plus, reclaimed and mixed-species wood naturally creates visual depthsomething you’d pay extra for in a store.
They’re forgiving for beginners
Small pieces mean small mistakes. If a cut is off by a hair, it’s not a disasterit’s “texture.” And if a board is ugly, it’s now “contrast.”
Choosing a Scrap-Wood Wall Hanging Style
Before you cut anything, decide what vibe you want. Your scrap pile already has an opinionyour job is to direct it.
1) Wood Mosaic Panel
A grid of small blocks or rectangles arranged like a pattern (or a very classy game of Tetris). This is the most flexible option because scraps of different sizes can still work.
2) Geometric “Sunburst” or Angular Art
Triangles and angled pieces form a bold design. Even simple angles can look high-end when finished well.
3) Wood Quilt Look
Inspired by quilt blocksthink repeating shapes and color sections. You can fake “color” with stains, paint washes, or contrasting wood types.
4) Rustic Slat Hanging
Long skinny strips lined up as a panel. Great if your scraps are mostly trim or ripped boards. Add a frame to make it look intentional.
5) Minimalist Hanging With a Strap
A smaller panel hung with a leather strap or rope. Simple, modern, and surprisingly forgiving if your “panel” isn’t museum-square.
Materials and Tools You’ll Actually Use
Materials
- Scrap wood (hardwood, softwood, plywood offcutsmixing is fine)
- Backing board (1/4″ to 1/2″ plywood is common for panels)
- Wood glue (and optionally CA glue for quick tacking)
- Sandpaper (typical progression: medium to fine grits)
- Finish (wipe-on poly, water-based poly, oil finish, wax, paint, or stain)
- Hanging hardware (D-rings, sawtooth hanger, or French cleat)
- Optional: wood filler, stain conditioner for blotch-prone woods, painter’s tape
Tools
- Miter saw, table saw, or a handsaw (whatever you have)
- Measuring tape, square, pencil
- Clamps (the more you have, the more you’ll pretend this was “easy”)
- Sander or sanding block
- Brad nailer (optional) for frames/backing support
- Drill/driver for hardware
Step-by-Step: A Classic Scrap Wood Mosaic Wall Hanging
This method is popular because it works with uneven scraps, creates depth, and can be scaled up or down.
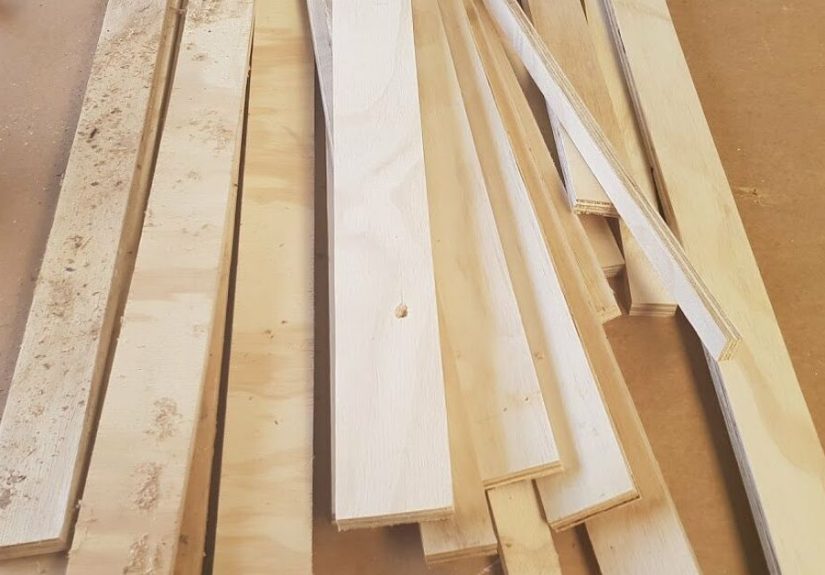
Step 1: Sort your scraps like you’re casting a movie
Lay pieces out by thickness and species. Don’t worry if they’re not identicalvariation adds interest. If some boards are much thicker, decide whether you want a 3D textured look or a flatter panel.
Step 2: Choose a size and build around it
Pick a final size based on your wall space. Common sizes for wall art include 12″x18″, 16″x24″, or 24″x36″. Cut your backing board to size (or plan a floating panel without backing if your pieces are thick enough to self-support).
Step 3: Cut pieces into a consistent “language”
Your scraps can be different sizes, but they should look related. A few easy rules:
- Pick 1–2 widths (like 1″, 2″) and cut most pieces to those widths.
- Vary lengths for pattern interest.
- If doing angled pieces, keep the same angle (like 30° or 45°) for visual unity.
Step 4: Dry fit the design (this is where the magic happens)
Arrange pieces on the backing board without glue. Take a photo once you like it. This saves you from the classic mistake of “I swear it looked better five minutes ago.”
Design tip: Distribute dark and light wood tones evenly. If all your dark pieces cluster in one corner, the artwork can look unbalancedlike it’s sliding off the wall emotionally.
Step 5: Glue in sections, not all at once
Work from one corner and glue in small areas. Apply glue to the back of each piece and press firmly. Use painter’s tape to hold small pieces in place if clamps don’t reach.
Pro move: If you want a cleaner edge, add a frame later. That way you’re not obsessing over perfect perimeter cuts during the glue stage.
Step 6: Flatten (or embrace the texture)
If you want a smooth face, sand the surface carefully. If you want texture, sand only sharp edges and splinters. Either choice can look professionaljust commit to the look.
Step 7: Sand smart, not forever
For most raw wood prep, a practical sanding approach is to start around medium grit and work up to finer grits (often finishing around the 180–220 range depending on your finish). Wipe dust off thoroughly before finishing, and lightly sand between finish coats if needed for a smoother result.
Step 8: Finish for the vibe you want
Pick a finish based on your style and your patience level:
- Clear coat only: Shows natural wood contrast; easiest to keep timeless.
- Stain blend: Use 2–3 stain tones to create a planned pattern (test first).
- Paint + wood mix: A little paint can modernize “builder beige” scraps fast.
- Whitewash or diluted paint: Adds a soft, farmhouse-meets-modern feel.
Example: For a dramatic modern look, keep most wood natural, then stain only a few pieces in a deep walnut tone to create a subtle geometric path through the design.
Hanging Methods That Won’t Betray You
Choose hardware based on size, weight, and how flat your piece sits against the wall.
Sawtooth hanger
Best for small, lightweight pieces. Fast and simple. Not ideal for heavy art or anything you want perfectly level for the rest of its life.
D-rings with wire
Great for medium-sized panels. More secure than a sawtooth. Use two D-rings so the piece hangs more evenly.
French cleat
Excellent for larger or heavier scrap wood wall hangings. A French cleat is a pair of angled strips that lock togetherstrong, stable, and easy to lift off the wall if you ever want to reposition. This is the “sleep peacefully” option.
Safety Notes (Because Scrap Wood Has a Past)
- Check for nails/staples: Scraps love hiding metal like it’s their hobby.
- Avoid mystery-treated wood indoors: If you don’t know what it is, don’t sand it into dust.
- Pallet wood caution: Only use pallets you trust and that look clean and safe; avoid anything with unknown stains or odors.
- Use a dust mask/respirator when sanding: Especially with mixed woods and old finishes.
Design Tricks That Make It Look “Store-Bought”
Use negative space on purpose
Leave small gaps between pieces (even 1/16″) to create crisp lines. It reads as modern and intentional.
Repeat a shape three times
If you introduce triangles, do them at least three times. Same with stain tones. Repetition is what makes “random” turn into “designed.”
Frame it (even a simple frame)
A thin border instantly makes a scrap project look finished. Use a contrasting wood strip or paint the frame matte black for modern edge.
Control sheen
Gloss highlights every texture and tool mark. Satin or matte tends to look more upscale for wall art (and is more forgiving).
Troubleshooting Common Problems
“My pieces shifted while clamping.”
Glue in sections and use painter’s tape as temporary clamps. Also, reduce glue squeeze-outtoo much glue can make pieces skate around.
“The stain looks blotchy.”
Some woods (like pine) blotch easily. Consider a pre-stain conditioner, or use a gel stain for more even color. Always test on offcuts first.
“My panel warped.”
Thin backing plus uneven glue moisture can cause movement. A slightly thicker backing, sealing both sides, or adding a simple frame can help keep it stable.
“It doesn’t look cohesive.”
Pick a limited palette: either 2–3 wood tones or 1–2 stain colors plus natural wood. Too many colors can make it look like a lumberyard clearance aisle (no offense to the clearance aisleit’s done a lot for all of us).
Make It Your Own: Creative Variations
Add a subtle pattern with tape
Tape off a diagonal stripe across the panel and stain that area darker. When you remove the tape, you get a clean geometric statement without complicated cutting.
Try a “mountain range” silhouette
Use angled scraps to form peaks. Keep the bottom flatter pieces lighter and stain the “peaks” darker for depth.
Include a tiny shelf ledge
Add a thin scrap strip near the bottom as a mini ledge for a small plant, postcard, or framed photo. Suddenly it’s functional artvery fancy.
How to Price (or Gift) a Scrap Wood Wall Hanging
If you’re making these for craft fairs or gifts, pricing is often less about material cost and more about time and finish quality. A clean design, smooth edges, and durable hanging hardware can justify a higher price point. If gifting, include a small note that explains what wood types you used or where the scraps came frompeople love the story.
Conclusion
A wall hanging made from scrap wood is the perfect mix of practical and creative: it clears your shop, upgrades your walls, and gives random offcuts a second life as something worth staring at. Whether you go rustic, geometric, minimalist, or full wood-quilt energy, the key is simple: choose a cohesive plan, prep the surface well, finish with intention, and hang it like you mean it. Your scrap pile will shrink, your wall will glow up, and you’ll get to say, “Oh this? I made it.” (Casually. Like it was no big deal.)
Experience-Based Tips and Real-World Lessons (Extra Section)
People who make scrap wood wall hangings tend to have a few very consistent “learning moments.” Not dramatic, not life-alteringjust the kind of hands-on lessons that show up after your second glue-up, when you realize art is fun but physics is still in charge.
You’ll start seeing scraps differently
One of the biggest shifts is mental: scraps stop being leftovers and start looking like ingredients. A thin strip becomes a border. A weird trapezoid becomes a triangle once you trim it. A slightly dented piece becomes “character.” After you make one successful panel, you’ll catch yourself saving pieces you used to tossthen you’ll realize you’ve basically adopted a second scrap pile. This is normal. This is the craft life.
Dry-fitting is where confidence is born
Most makers discover that the “I have no idea if this will look good” feeling disappears during the dry-fit stage. Laying pieces out without glue is like trying outfits on a bed: you can experiment with patterns, swap tones, rotate grain direction, and take quick photos to compare options. A lot of people find it helps to step back across the room and squintif the design still looks balanced while you’re half-blind, it’s probably a winner.
The finish changes everything (sometimes surprisingly)
Many DIYers have the same experience: the piece looks “fine” raw, but once a clear coat goes on, the grain pops and suddenly it looks expensive. On the flip side, stain can also surprise you. Two different scrap boards that looked similar raw may darken very differently. That’s why experienced makers almost always test finishes on offcuts from the same batch. It’s not overthinkingit’s avoiding the “why is this board purple?” moment.
Texture can be a feature, not a flaw
First-timers often assume they need everything perfectly flush. Then they see a textured mosaic hanging on a wall, catching light differently across its surface, and realize: depth is dramatic. Slight height changes can create shadow lines that make the piece feel like sculpture. Makers who embrace texture usually sand edges for comfort and safety, then leave some variation so the wall hanging feels alive. If you’re aiming for a modern look, keep the height differences subtle. If you want rustic drama, let the texture speak.
Hardware choice affects how “professional” it feels
A surprisingly common lesson is that hanging hardware is part of the final design. People who start with a sawtooth hanger sometimes end up upgrading later because the piece doesn’t sit as securely or level as they want. Once someone tries D-rings or a French cleat for a larger panel, they often stick with it. The experience tends to go like this: “I thought hardware didn’t matter,” then “Wow, this feels solid,” then “Okay I’m never going back.”
Scrap wood projects are oddly personal
There’s also a sentimental side that catches people off guard. Scraps often come from other projectsmaybe a shelf you built, a trim job, a repair, or even wood saved from a meaningful place. When those scraps become wall art, the piece becomes a quiet record of work you’ve done. Lots of makers end up labeling the back with a date and a note about where the wood came from. It’s not required, of coursebut it’s a nice touch, especially if you’re gifting the piece.
Your second one will be faster (and better)
Another common experience: the first wall hanging teaches you your workflow. The second one is when you start making intentional choiceslike limiting stain tones, planning negative space, or adding a frame for a clean edge. Most people find that after one successful build, they’re more willing to try bolder patterns, larger sizes, or mixed finishes. In other words, scrap wood wall hangings don’t just decorate your wallsthey quietly level up your DIY confidence.